Print
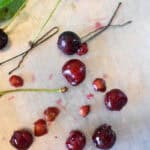
How to Pit Cherries Without a Cherry Pitter
An easy way to pit cherries at home - with nothing but a bobby pin!
Prep Time 1 minute
Ingredients
- 1 new bobby pin
Instructions
Stretch open a new bobby pin
-
Open your bobby pin until it makes a wide “V” (to widen the tip a little bit).
Fold the pin backwards
-
Fold the bobby pin backwards so that you get sort of a ribbon shape, with a loop on one end and two tails on the other.
Insert the pin into the stem opening
-
Hold your homemade cherry pitter on the tails of the bobby pin (they should provide you a little extra grip), and insert the looped end of the pin into the part of the cherry where the stem used to be.
Hook the pitter around the cherry stone
-
Use the looped end of the bobby pin to hook around the cherry pit.
Pull the cherry pit out of the cherry
-
Use the bobby pin to pull the pit out of the cherry.
Preserve the cherries as you like
-
Repeat until all of the cherries have their pits removed. You can store your cherries by freezing them individually to bake things like scones or muffins, or you can can them with this simple method. If you intend to cook them into cherry pie filling or jam later, you can also freeze them in bags or containers in pre-measured amounts so that you can add them to your pot later in the correct amount.*
Recipe Notes
*It’s important to measure the cherries ahead of time for this, since cherries are very juicy and will stick together in one large mass if they have not been frozen individually first.