
Baby Crib Bumper Pads [Sewing Project]
Here’s one thing I (accidentally) left till the last second in this pregnancy: Making baby crib bumper pads! I knew I wanted them for this baby since I bought some for my older daughter Faith, and well… She moves and bumps her head into the wall all the time. So, protecting her soft little head from the hard slats of the crib is something I’m really glad we did. It’s been a really great thing to keep her from getting those extra little bumps and bruises.
How This Project Came About
I started looking to order some bumper pads online months ago; yet, I quickly realized that since buying the ones I got for Faith, the trend seems have changed to be lining your crib with a mesh lining. I’m guessing this is mostly for safety purposes, to keep it breathable; which is great! You can check out this type of liner Here.
When I bought the bumper pads I got for Faith, the ones I found were still the old fashioned kind. Since that’s what I knew, that is what I ended up wanting for my second baby. So, I bought This Set (in a slightly different pattern) from Walmart… and that’s where my “Accidentally left this till the last second” comes in. I bought the set, set it aside, and then just pulled it out a couple of weeks ago to realize… This set only has enough pads for 1/2 of the crib walls!! Also, they didn’t seem to have my pattern anymore, so I couldn’t complete the set with matching pads.
So, I decided to roll of my sleeves, unroll my measuring tape, measure what I needed, and head to the fabric store.
Here’s what I used to make my own crib bumper pads:
- White Cotton Fabric
- Light/Bright Blue Cotton Fabric
- 1/2″ Thick Foam (or Quilting Batting for a cheaper option)
- Ribbon (I used a combination of different colours I had on hand, such as White or Ivory, Teal, and Grey)
- Measuring Tape
- Pins
- Needle
- Scissors
- White Thread
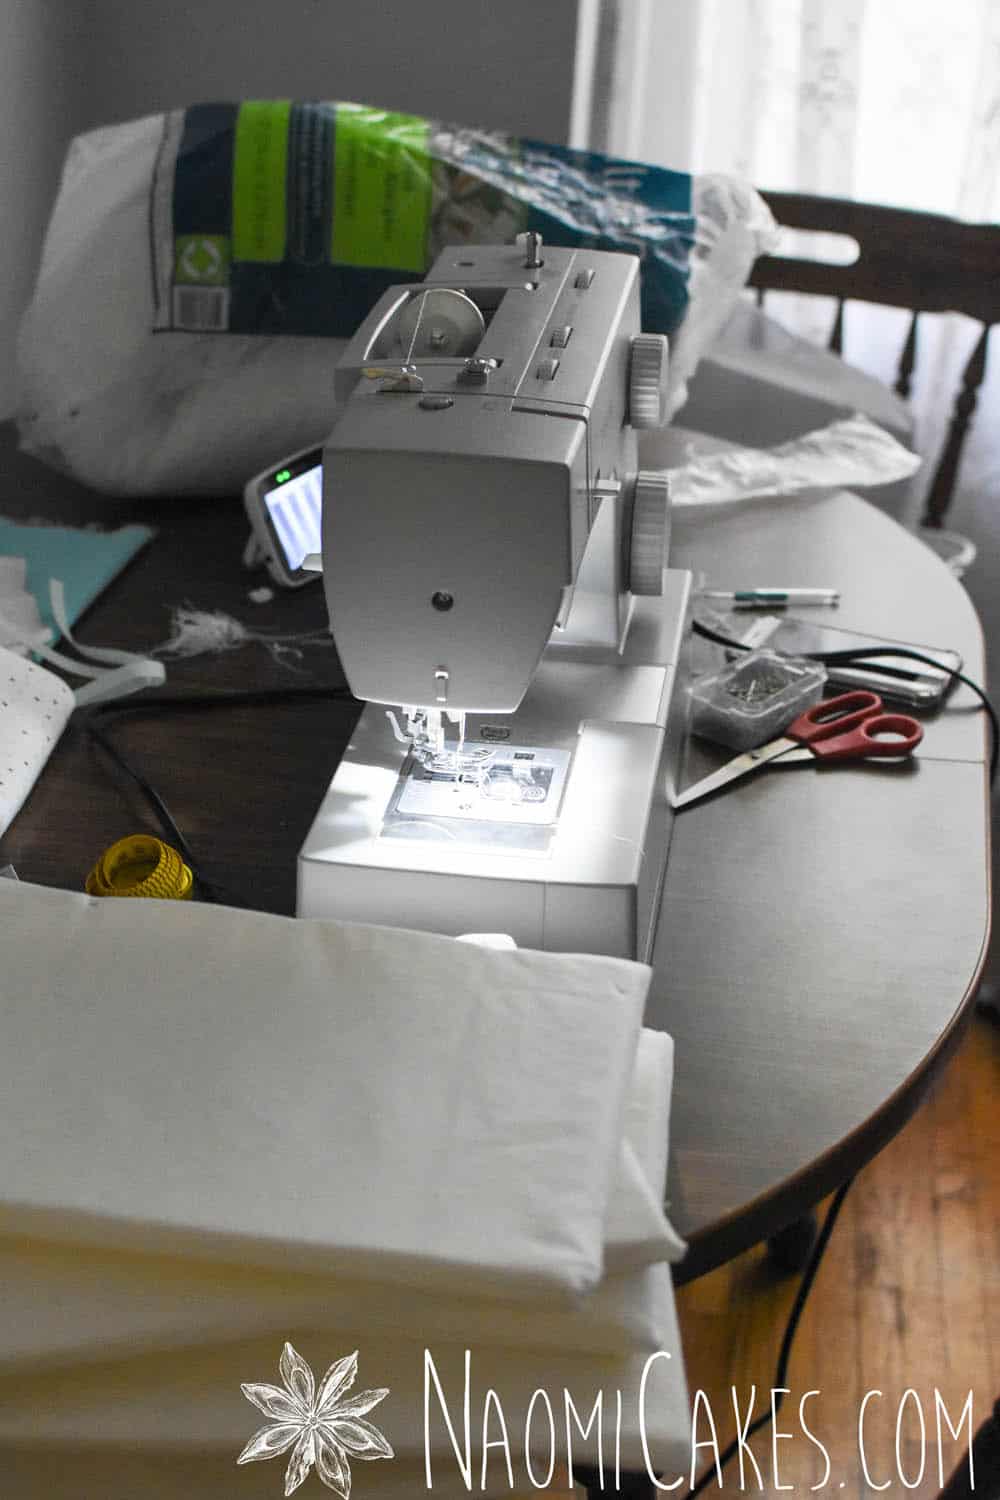
- My trusty Sewing Machine (Or you could just sew them by hand if you don’t have one! I love mine though, so if you’re looking for a machine, check out that link! It’s very user friendly and works very well!)
Honestly, the “How To” was pretty basic. I am not a super skilled seamstress, I just do basic projects to get by– and thankfully, this one was pretty basic!
Here’s a breakdown of what I did:
- First, I measured the baby crib bumper pads I already owned to see how big I wanted these to be/what height they should all be.
- Next I measured the crib to make sure that what I bought would be enough.
- Then I wrote down the measurements for my fabric shopping.
- I purchased my needed supplies. Already on hand, I had basic sewing supplies, ribbon, and quilting batting.
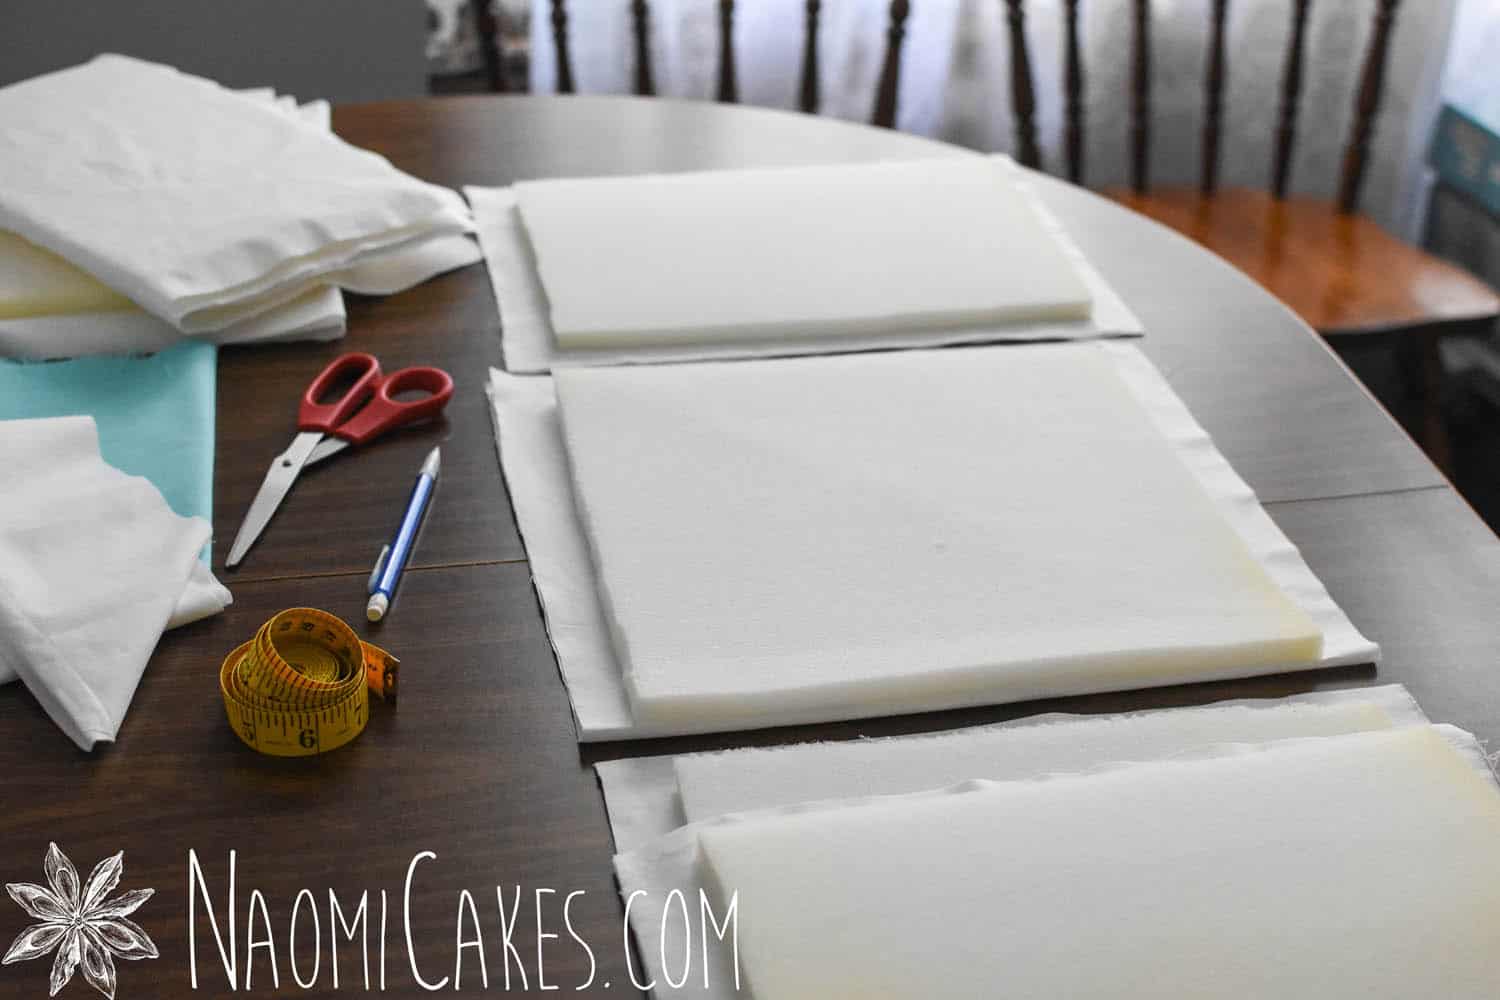
- After I bought what I needed, I cut the foam into the correct sized pieces to finish filling out the sides of my crib (the set I had previously purchased were about 11.75″ squares, so that’s how big I made them).
- Then I traced the foam pieces onto my cotton fabric with a pencil, and cut out the cotton squares with about a 3/4″ seam allowance around each traced square. I needed two pieces of fabric for each piece of foam, to cover them front and back.
- Next I lined up each double layer of cotton together and sewed 3 of the 4 edges about 1/4″ on the outside of the traced line closed (to allow the thickness of the foam to fit inside the pockets). Then I turned the pockets inside out, fit the foam into the corners, and then tucked the open edges of the pocket outside-in to make a final, enclosed seam around the foam interior.
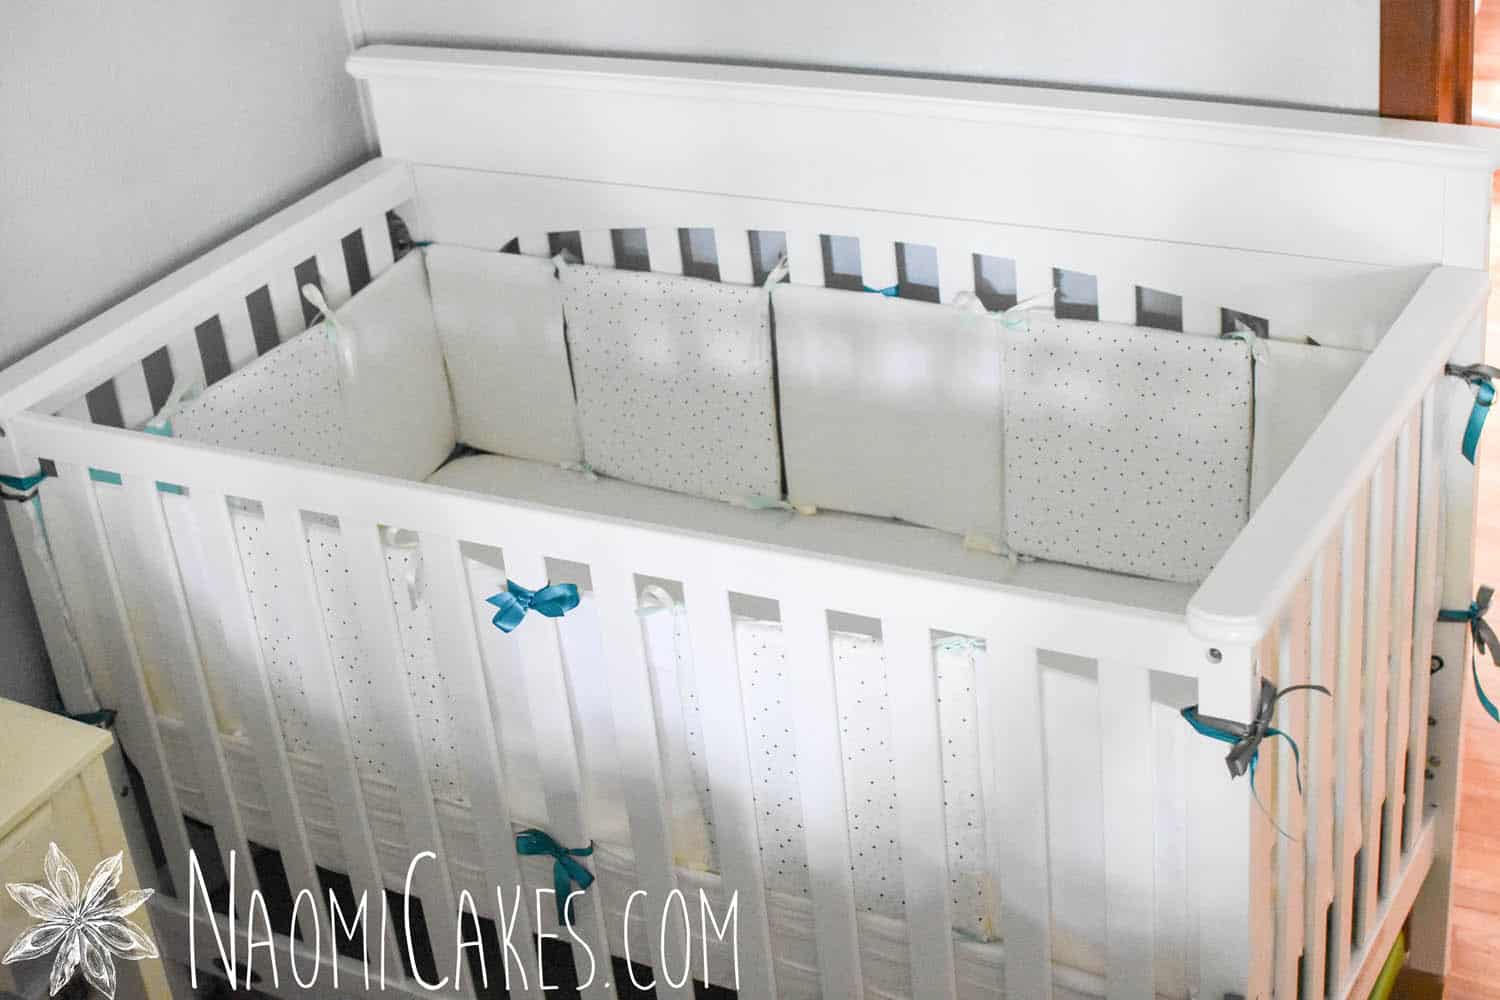
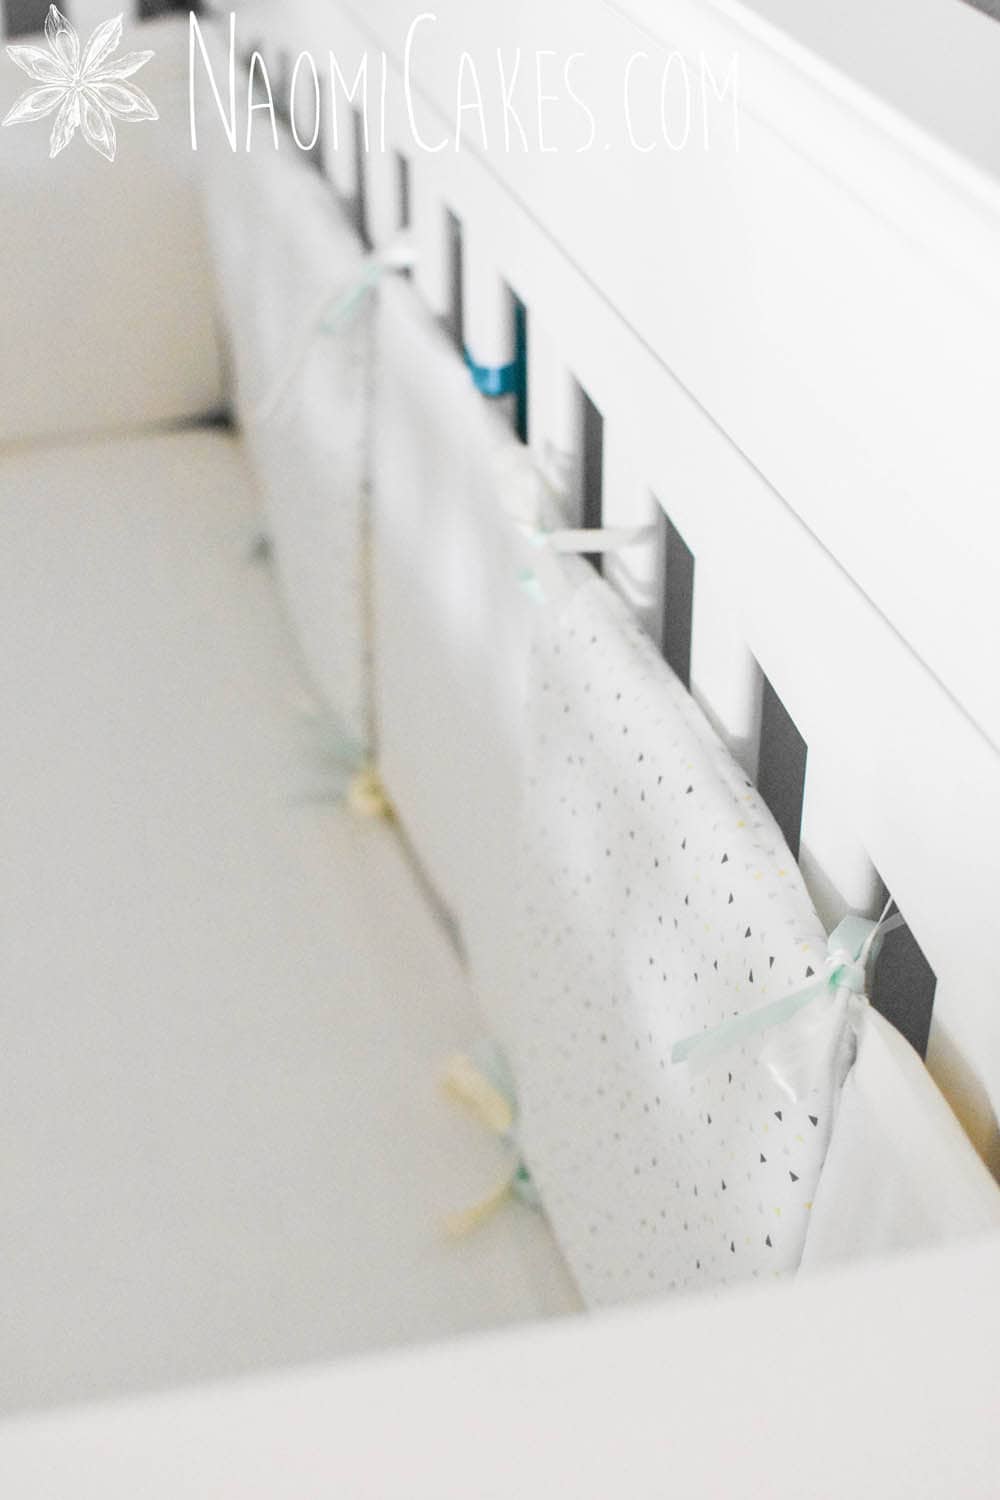
- Once all of the pieces were finished, I hand-sewed ribbons onto the corners of each square. These were to be tied onto the crib or to each other. I did each length of ribbon 16″ long, with the centre of the ribbon piece sewed to the corners of the squares. This was so that it would leave two 8″ loose strings on each corner, which could be tied around the slats of the crib to secure them. I used white or ivory ribbon for the connecting corners, and teal or grey ribbon for the outside corners. (The coloured ribbon was on the ends of the pieces that would be tied to the crib corners only.)
- Finally, I tied the pieces together the way they would fit into the crib snugly. Then I tied the whole thing onto the crib itself. I also added two extra teal ribbons (top and bottom) to the middle pieces. This was to add a little more secure of a fasten to the centre of the crib’s length.
And that was it! I took a few photos of the process, just for a small visual, and so that you can see the finished work! My very own, homemade baby crib bumper pads!
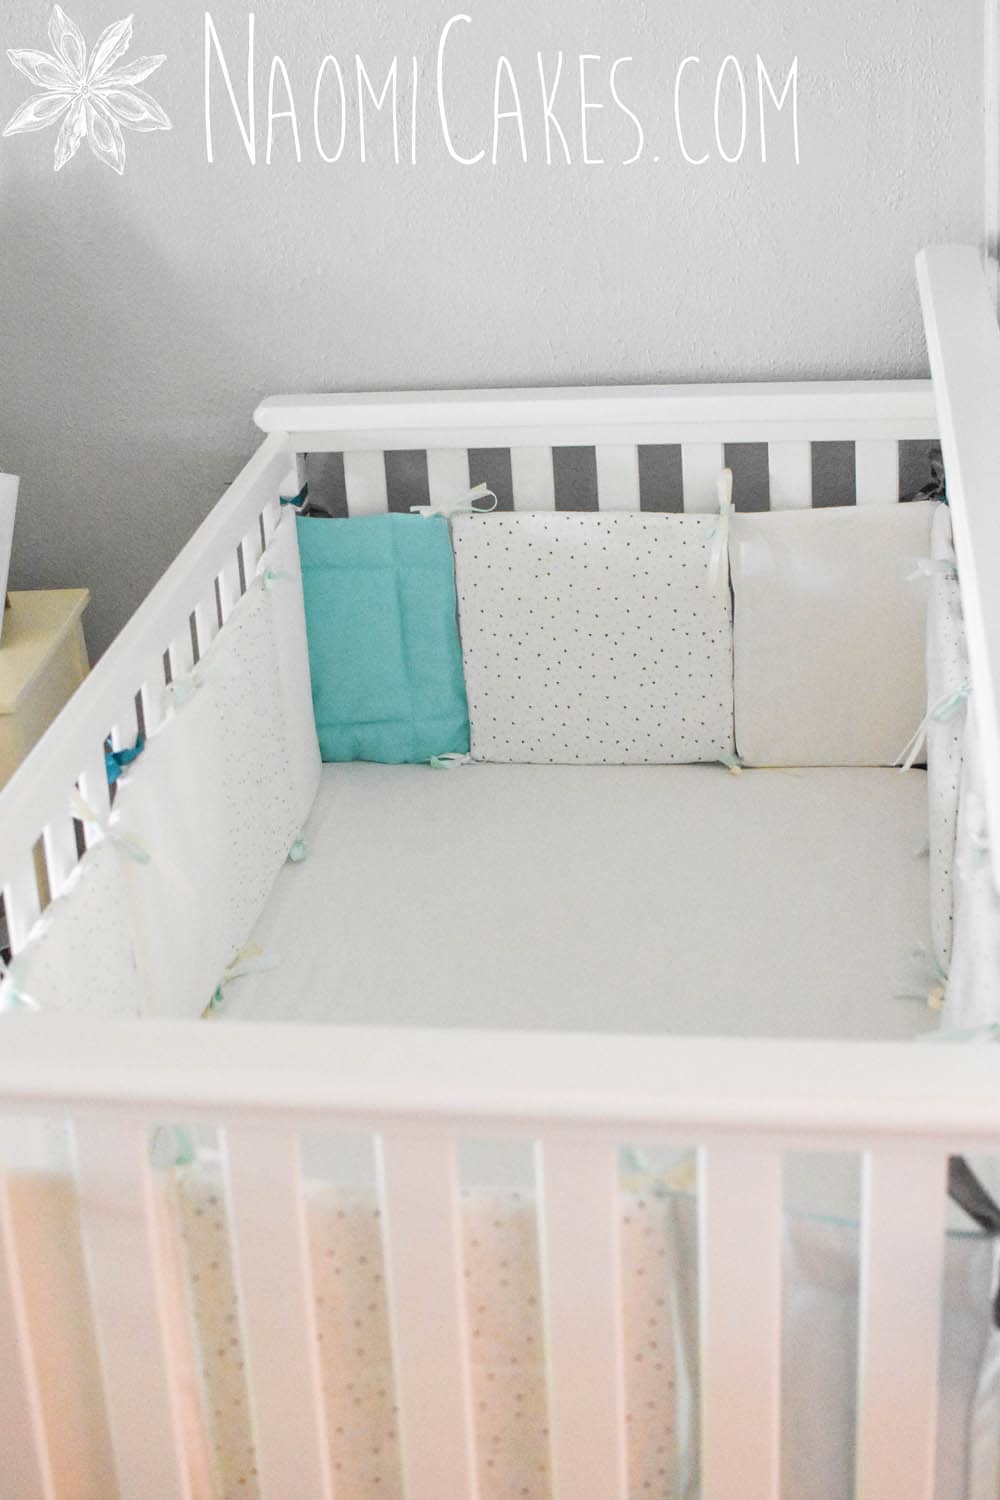

Note: The blue pieces were made with quilting batting, which was definitely a workable solution to my foam shortage! (Haha, yes, I ran out.) The foam pieces obviously have more structure, but you don’t really need more than the batting provides. So, for those on a budget, consider just getting batting and doing it that way! I did 3 layers of batting to create each cushion.
That’s it! I hope you found a little inspiration or enjoyment from this post!
Back soon, probably with food!
Bye for now,
–Naomi