
Baby Onesie Cookies [Tutorial]


2. Brush the top of your cookie with a bit of clear piping gel, or pipe over the shape with a bit of royal icing, as I have done here. Lay the fondant shape on top, and smooth with the fondant smoothers until the fondant lays smoothly and snugly on top.


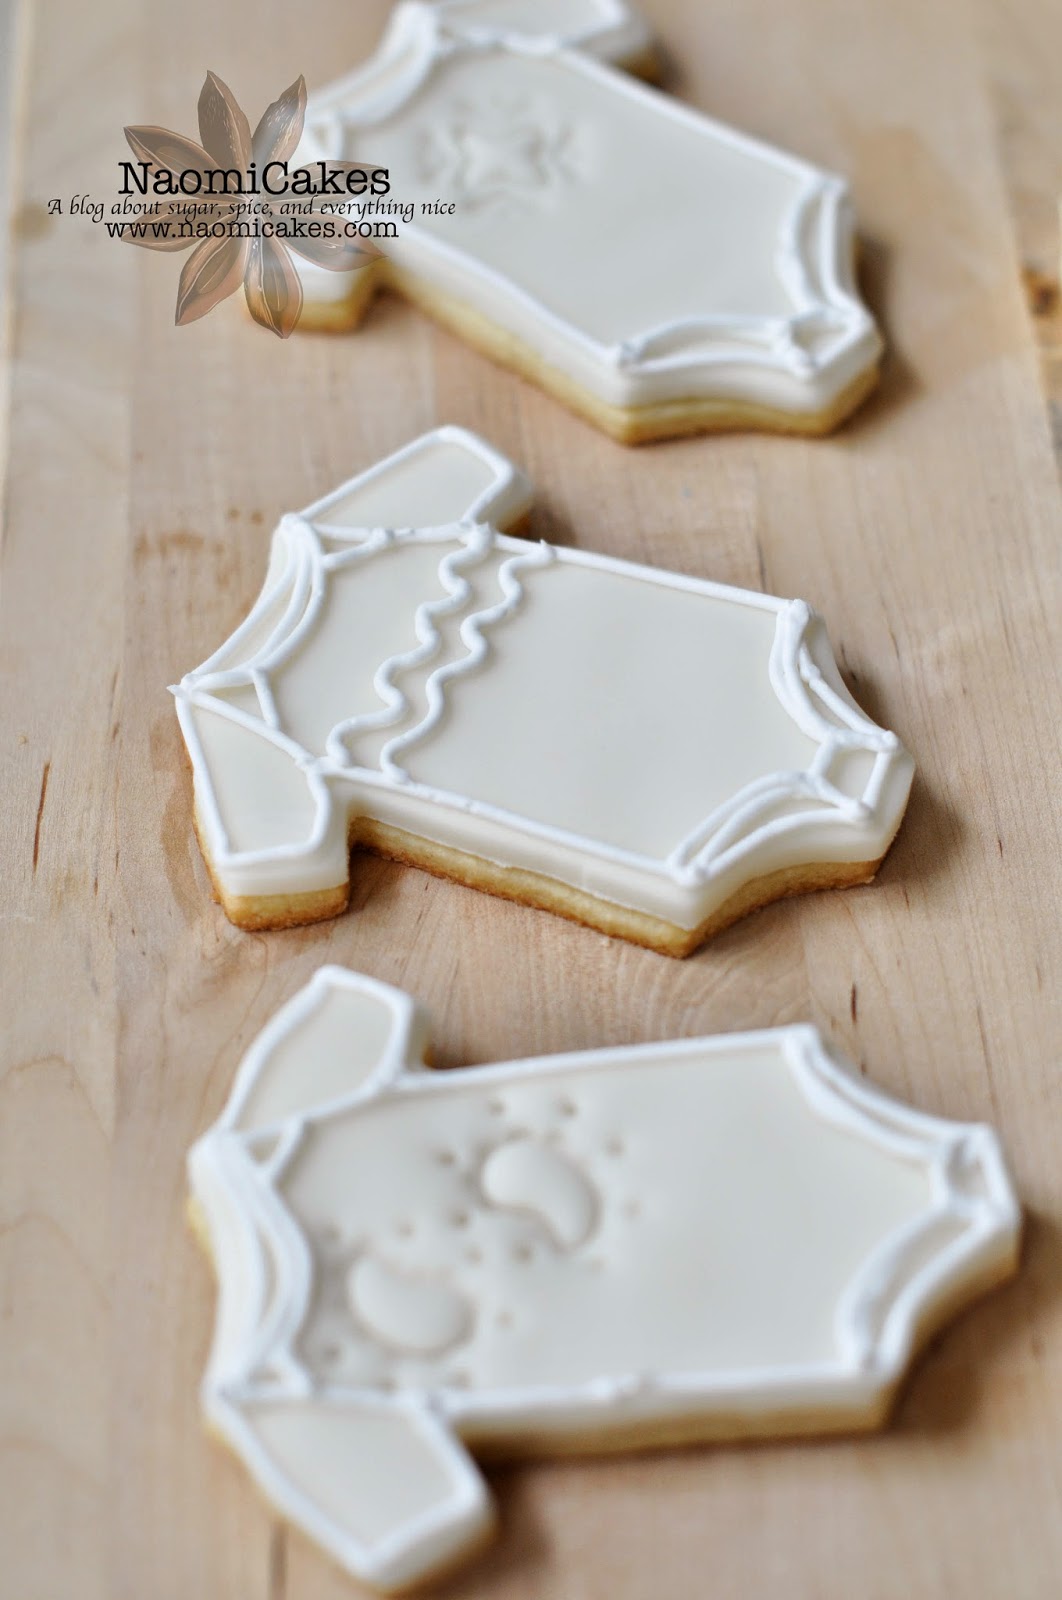
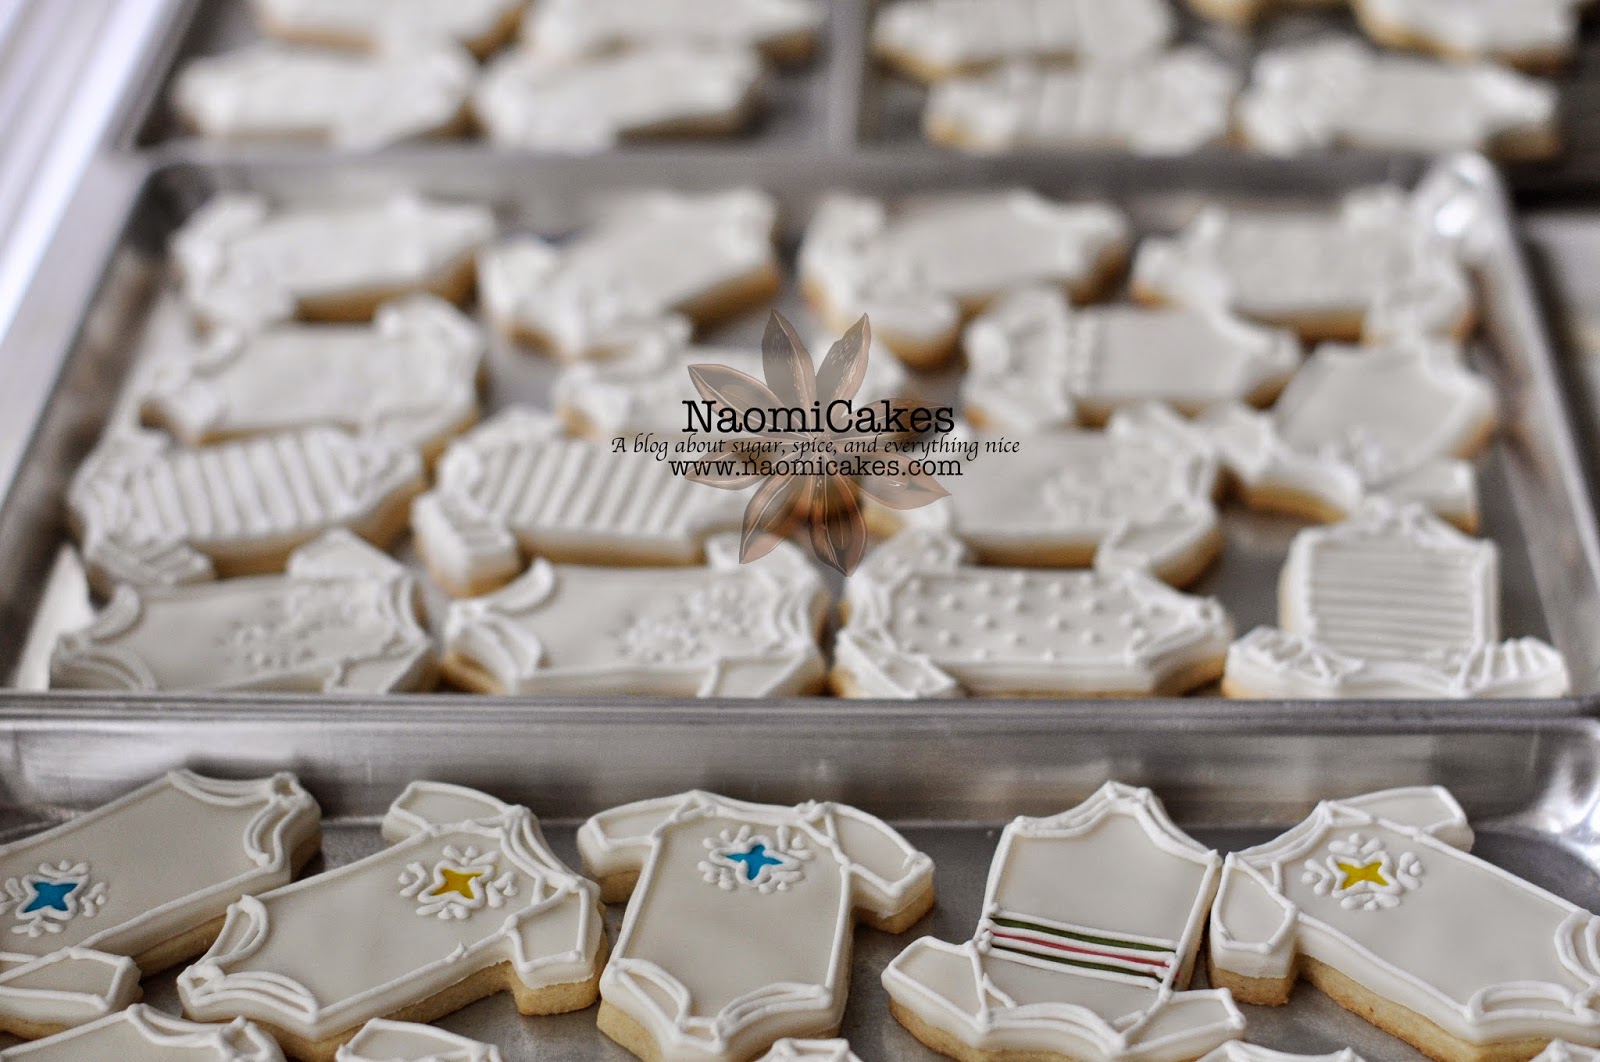
4. Once your embossing is done, if you like, you can paint the shapes or patterns in your cookies with liquid food colouring or a bit of gel colour mixed with water.
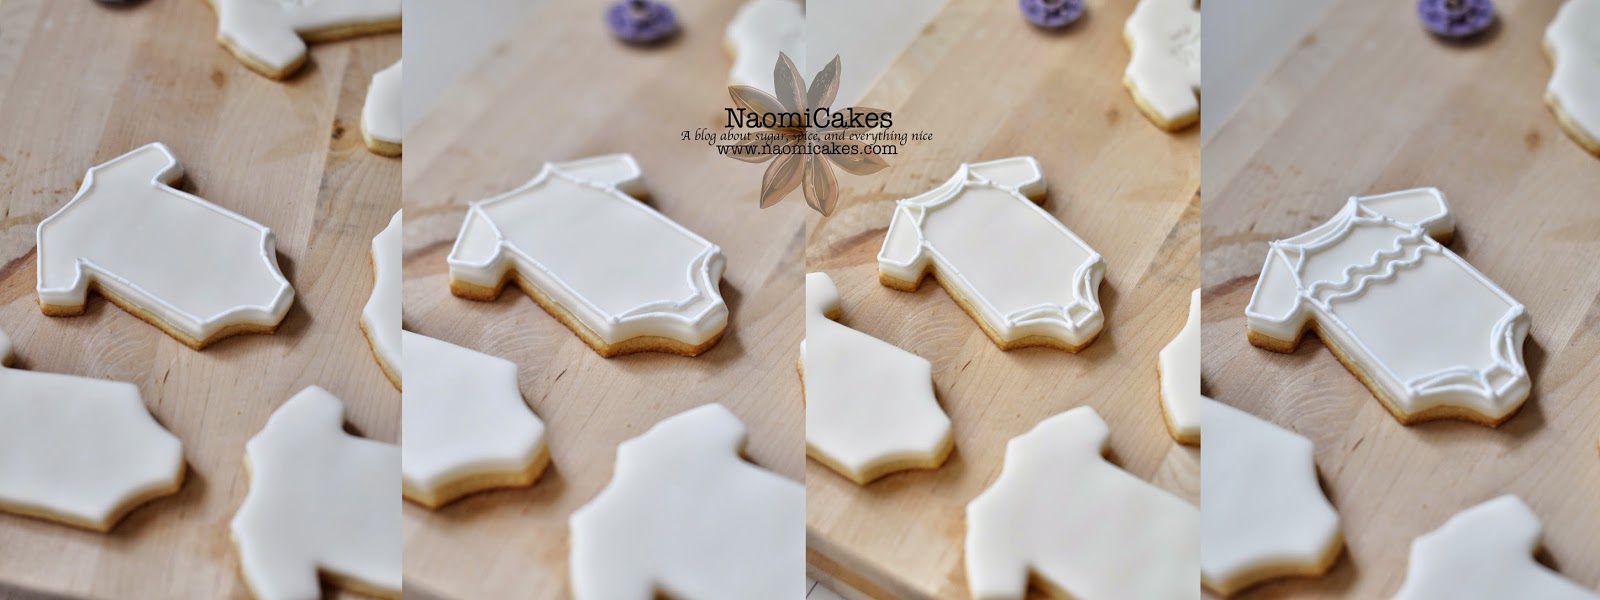
5. Pipe royal icing around the outside of the cookies, and pipe in the rest of the onesie pattern as shown here.
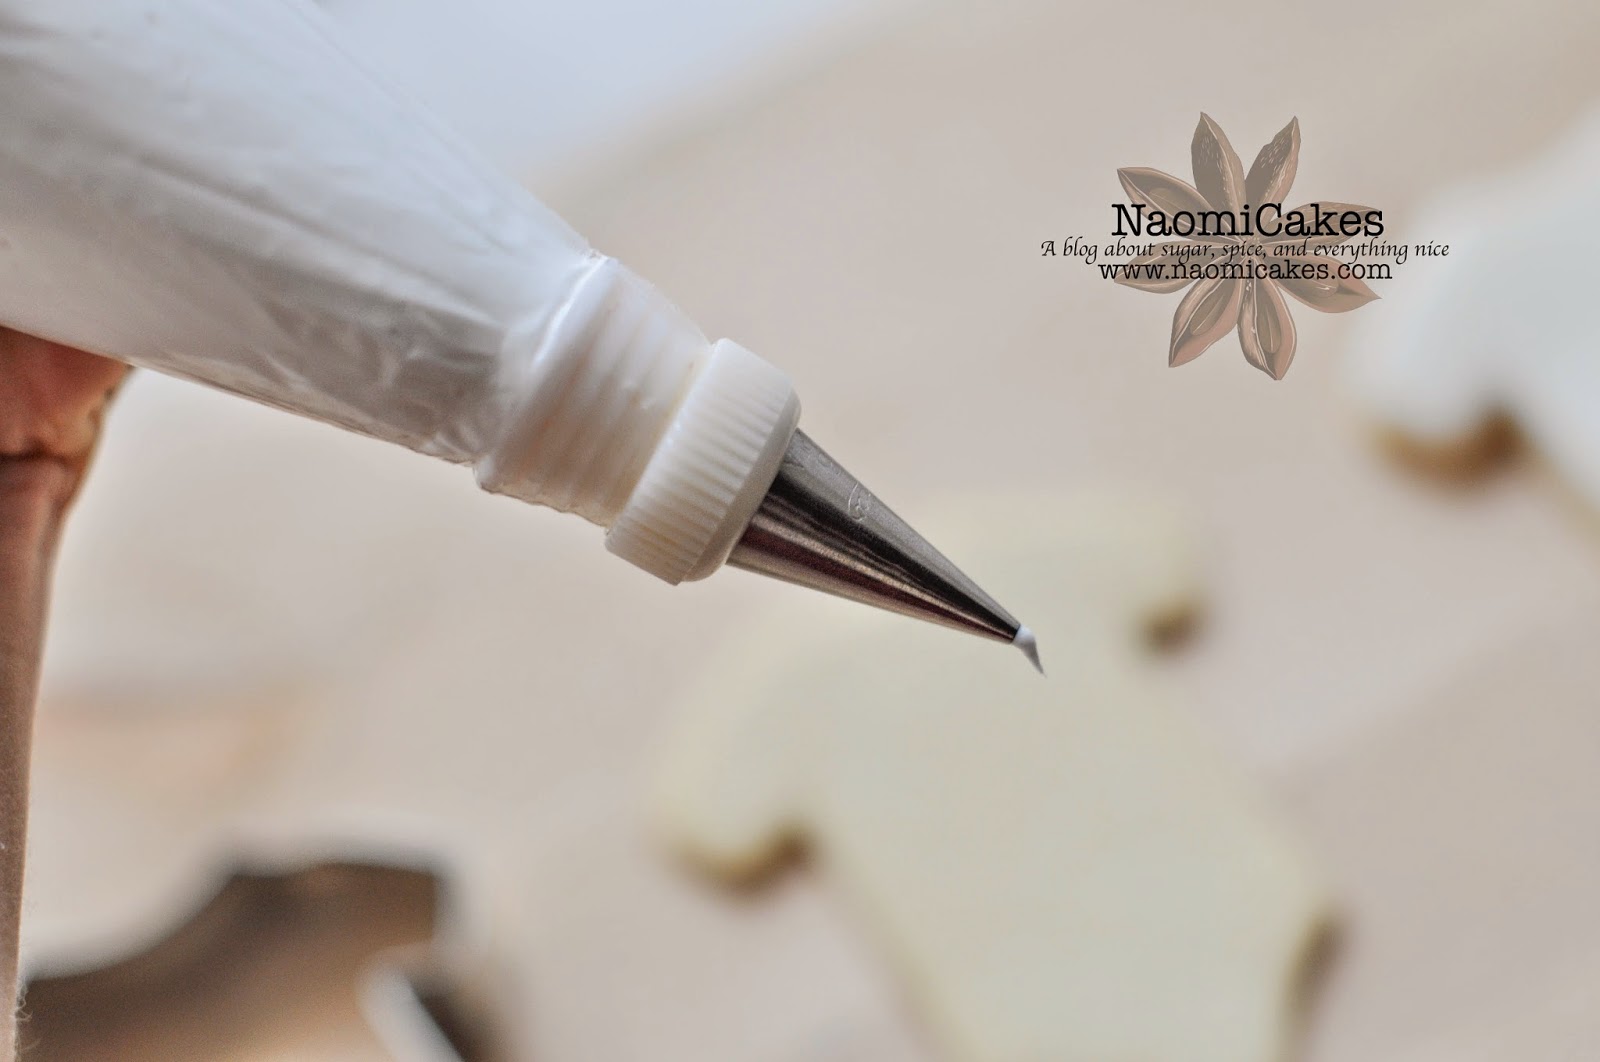
Tip: When you are using royal icing, remember to always keep a bit of the icing hanging off the tip of your bag when you aren’t using it. This way, when the icing dries (royal icing dries very quickly), you can break the dry part off the tip and begin piping again with the soft icing underneath. If you don’t leave a bit of icing hanging off the end, it will dry inside of your tip and you will have to replace it with a clean one before you can start again.


6. Allow the cookies to dry for at least 1.5 to 2 hours before you put them away or package them. I made these cookies as favours for a baby shower, so I packaged them in clear cellophane bags.
7. Be creative! I would recommend making these cookies your own in some way; unless you think mine are perfect for your event, experiment a little and try some new colours or packaging ideas… I think you will enjoy it, and find the results rewarding.


One Comment