
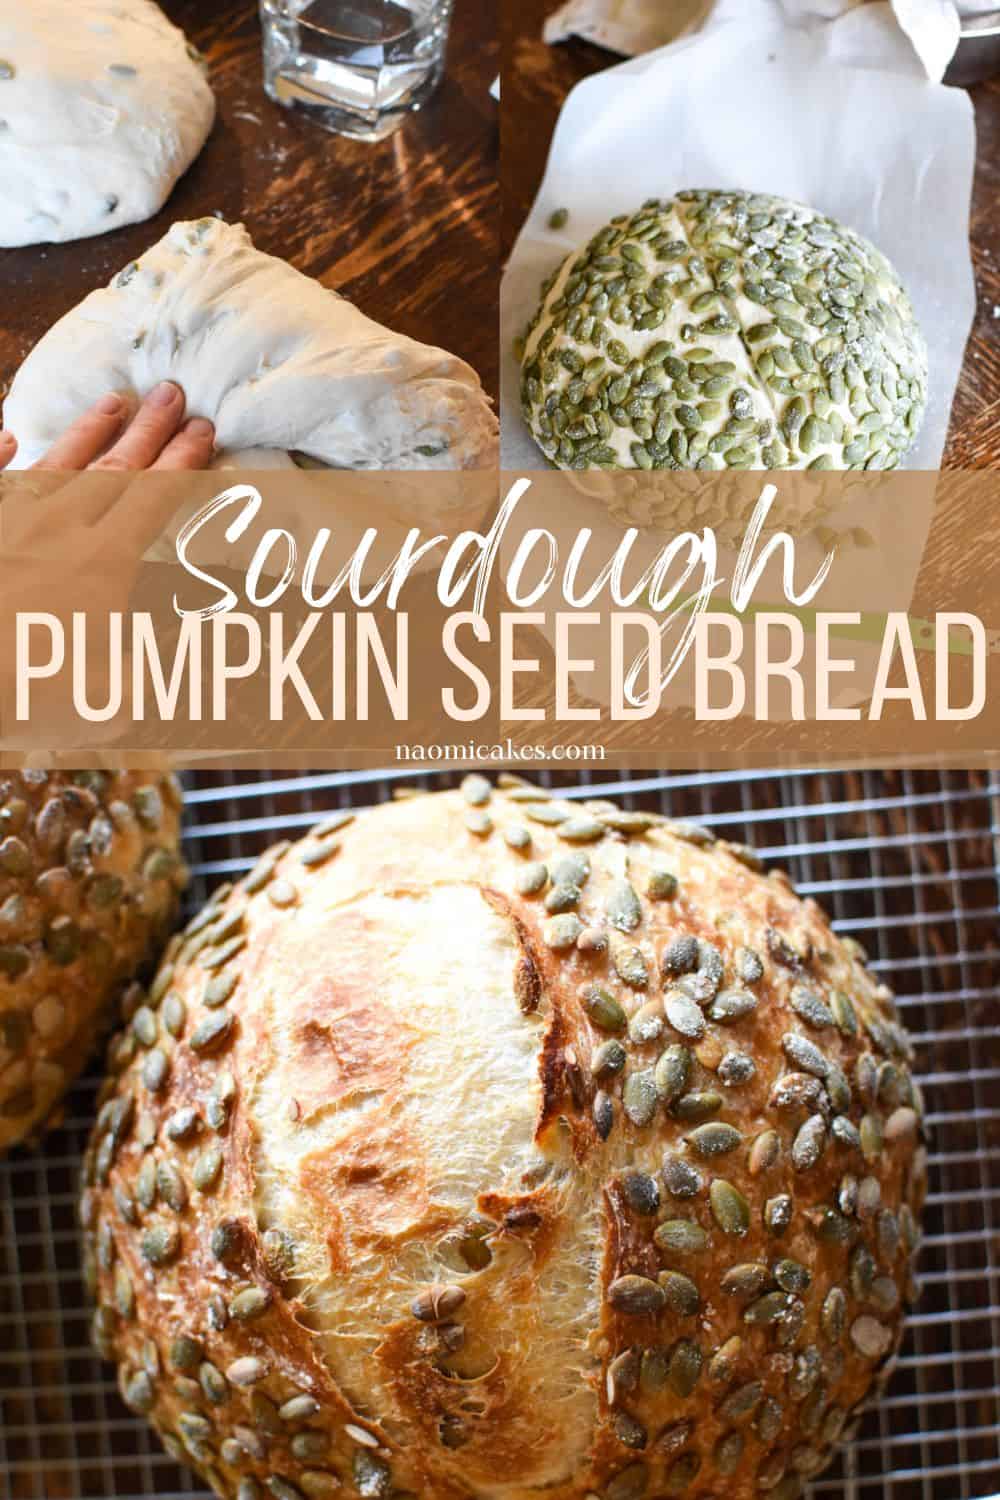
Easy Seeded Sourdough Pumpkin Seed Bread [Recipe]
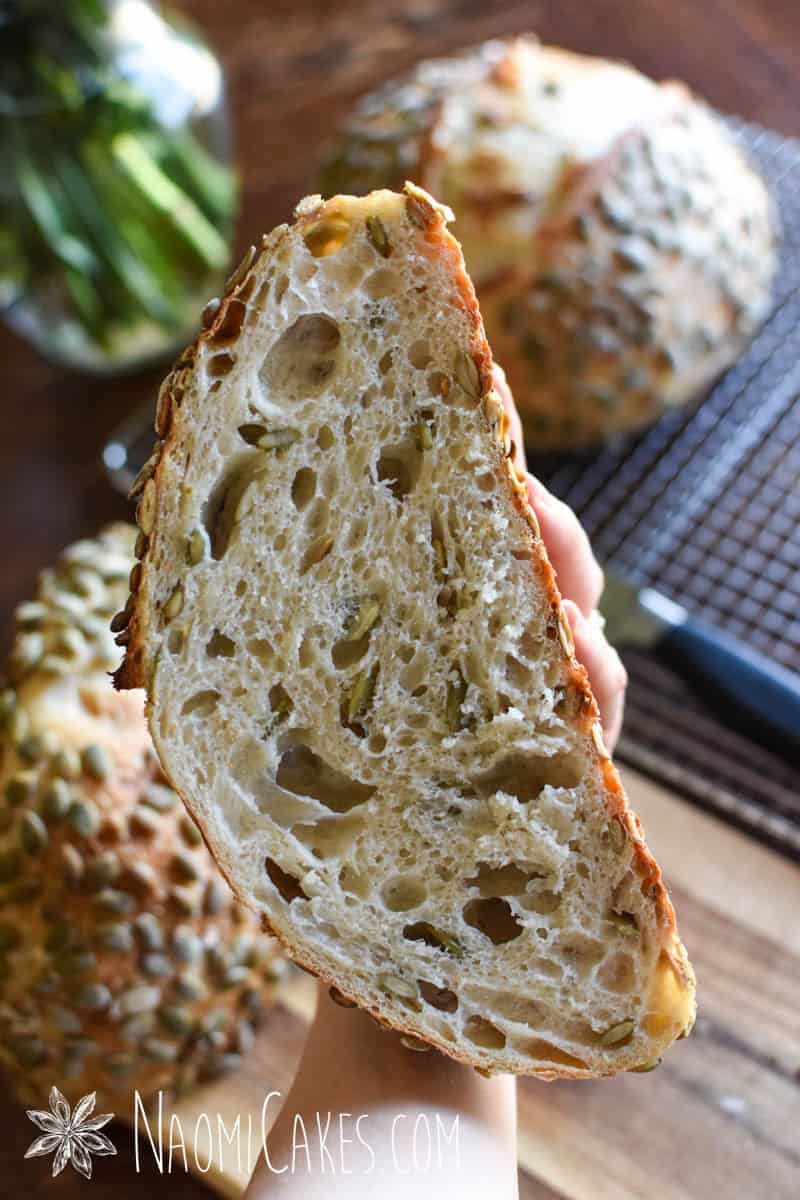
This sourdough pumpkin seed bread is one of my absolute favourite recipes. It has the incredible well-developed flavour of fermented bread, the buttery rich taste of pumpkin seeds, a silky soft interior and a golden brown, crunchy crust. Need I say more?
If you have never made sourdough bread before, this recipe is an great one, and I think you will find that it’s quite simple to make once you get the hang of it. I will say, however: if this is your first try, don’t give up if it doesn’t come out right the first time. Ask questions, and try again! I know from experience, even if you make every mistake in the book, learning to make a sourdough loaf from scratch is one of the most rewarding and well-worth it experiences you can have. Also, feel free to ask questions in the comments; I try to respond as quickly as I can, and if I can help you, I’d love to do it!
What is sourdough bread?
If you aren’t familiar with the difference between sourdough bread and traditional yeast bread, let me explain. Sourdough bread is an old-world style of making bread that has a fermented culture (made with equal parts of flour and water) called “sourdough starter” as the leaven of the dough (rather than dried yeast). Since the dough relies on fermentation to rise, it takes much longer to make, and it takes on a slightly tangy flavour (hence, the name “Sourdough”).
Is this recipe sour tasting?
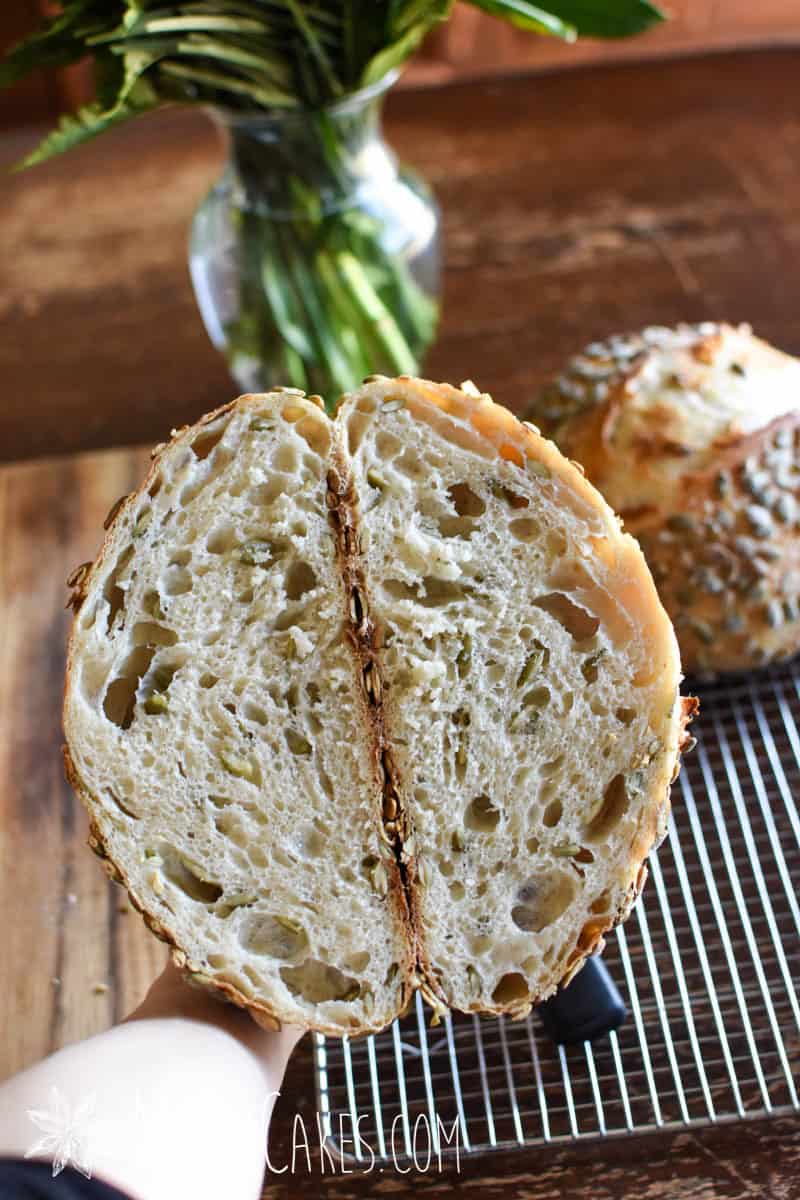
Actually, no! Sourdough breads that have a very sour taste are usually either long-fermented (for 24+ hours) or they are made in a very warm environment, which allows the dough to ferment at a faster pace (for still, a long period of time). While this sourdough pumpkin seed bread does have a hint of that tangy flavor, its overall flavour is quite mild (but well-developed and delicious). The bulk fermentation of this bread is usually finished between 3-6 hours, with a cold ferment in the fridge overnight for about 12 hours.
Ingredients
While sourdough bread can be forgiving once you know what you’re doing, I would say that it’s wise to choose your ingredients carefully for your first few times making bread. Set yourself up for success, and then learn to bend the rules once you have a feel for the process. Here are the basics of making this recipe, and what I recommend you get to make sure your bread turns out well.
Sourdough starter
To make good bread, you must first have a healthy active starter. (I have a tutorial here if you want to learn how to make your own.) You can, however, also get some from a local bakery (many people will be very willing to sell (or give!) you a small amount, which is all you need to get started making sourdough bread. Or better yet, if you have a friend who makes sourdough, you can always ask them!
If you don’t want to make your own from scratch, and the bakery or friend route is not an option, you can also order a sourdough starter culture online, which will help you get your bread going quickly and easily.
Flour
For this recipe, I like to use white flour; however, I would recommend, especially as you begin, to start with unbleached white flour or bread flour (rather than all purpose). The reason for this would be that fermented foods are mostly likely to succeed if they are able to keep an environment for good bacteria to thrive (so it is wise to avoid products treated with chemicals which could kill or impede the health of the bacteria). That said, since sourdough bread relies on fermentation, I would avoid treated flours for making your bread, or at least for making and feeding the starter, in the beginning.
Note: I have made many successful sourdough bread loaves with all purpose flour, so this is not to say that it will not work; I just offer this as a caution in order to give you a higher chance of success.
Water
As I just mentioned, sometimes water that is treated with chlorine will kill the good bacteria that is essential to allowing the fermentation process to take place. That said, opt for filtered water if you can (not treated tap water) so that the cultures in the starter have the best chance of thriving. I just use my Brita filter pitcher for this, nothing fancy.
Note: Again, this is not a hard-and-fast rule. I use filtered water for my bread, but I know others who use tap water with great success.
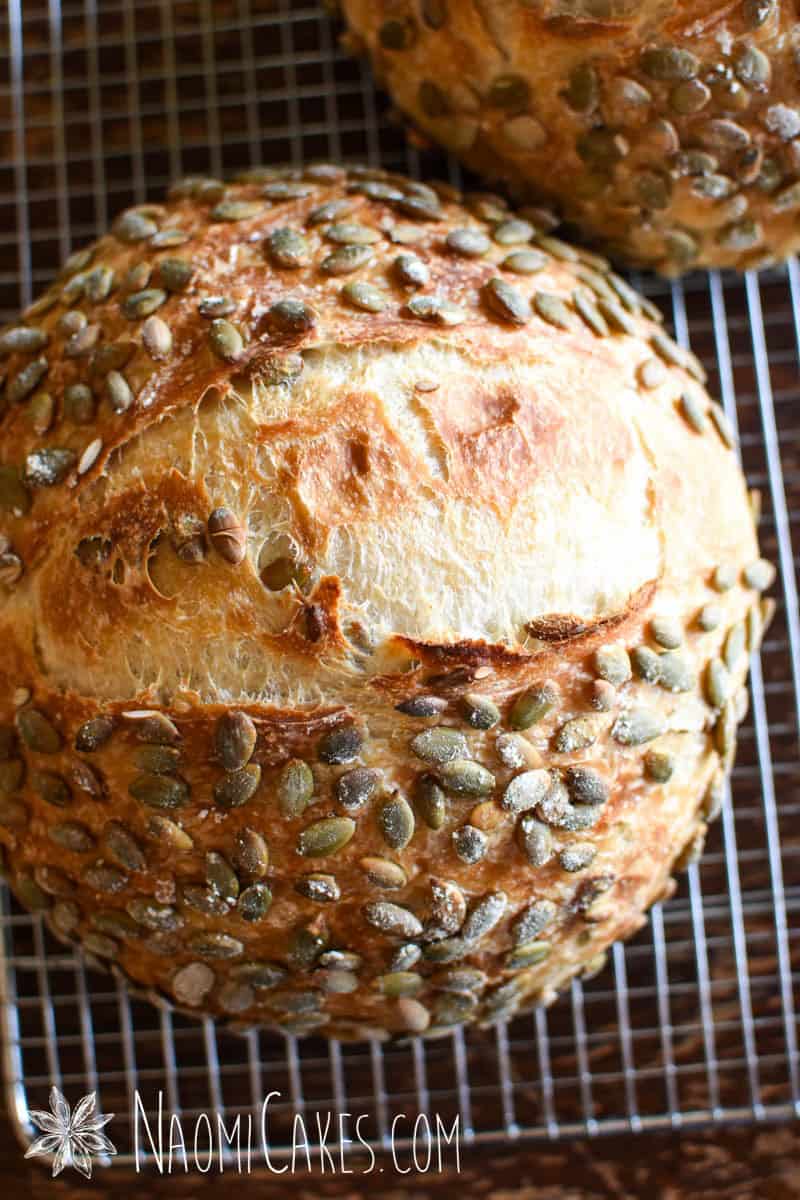
Pumpkin Seeds
For this recipe, I am using raw hulled pumpkinseeds.
Salt
Once again, non-iodized salt is best. Try using sea salt or pink salt (with no iodine) for the best results; but again, this is not a hard-and-fast rule. In fact (confession) – I most often make my bread with regular iodized table salt, and it comes out great.
Ingredient substitutes/additions
For this recipe, you can easily add some whole wheat flour or rye flour (about 1/2 cup to 1 cup/70g-140g) for 2 loaves, or substitute the pumpkin seeds for sunflower seeds or another type of seed (sunflower seeds yield the most similar flavor for this recipe). Sesame seeds are a delicious seed to roll your loaves in as well.
What is sourdough starter?
Sourdough starter is the active culture that allows your bread to rise instead of commercial yeast. It is made by mixing equal weights of water and flour together over the course of 7-10 days, until the mixture begins to ferment and bubble up. Once you have a bubbly starter, you are ready to make bread!
If you are interested in making your own sourdough starter, you can check out this tutorial for all of my best tips and tricks, as well as an easy-to-follow tutorial!
Can you bake sourdough bread without a Dutch oven?
Absolutely! The reason for using a Dutch oven is to expose the bread to steam while it bakes, preventing the bread from developing a crust too fast (which would stop the bread from expanding fully while it bakes). You can achieve the same thing by baking your bread on a cookie sheet, with a pan of boiling water on the bottom rack of your oven to create steam while the bread expands.
How to make sourdough pumpkin seed bread
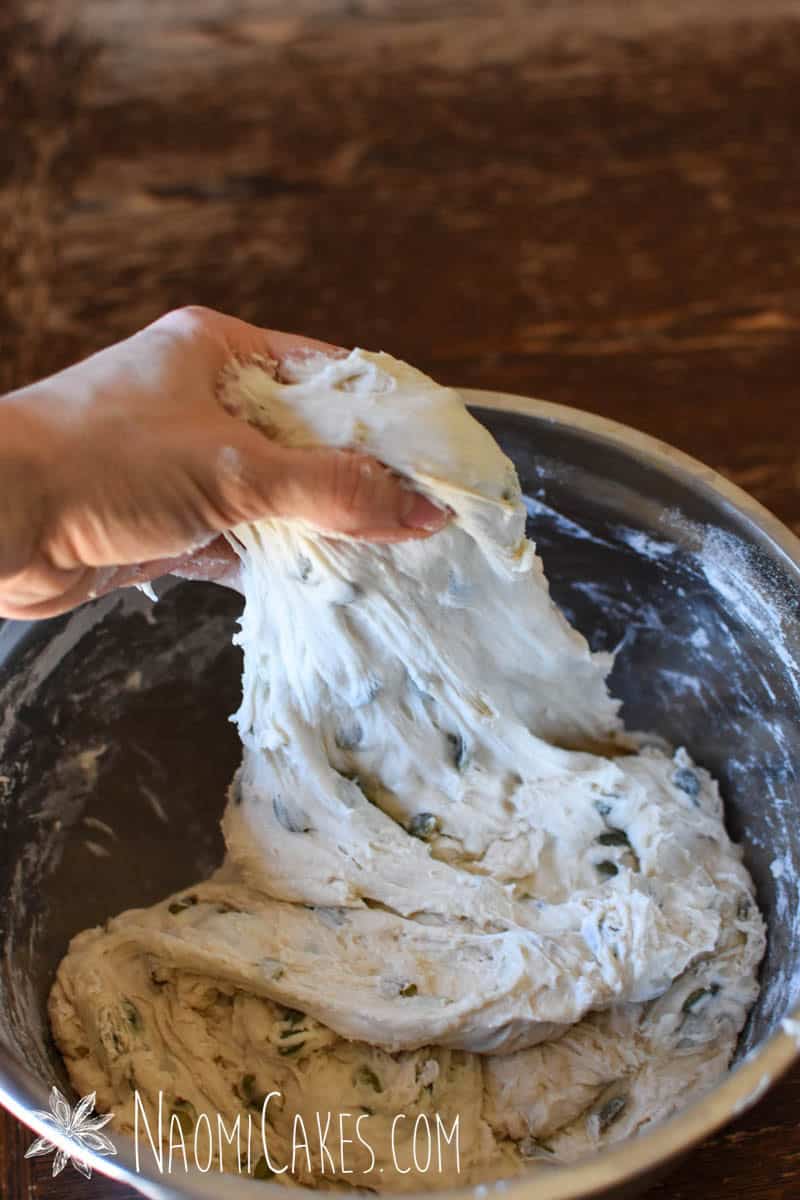
This process is fully outlined in the recipe itself, and then it is shown visually by photos underneath the recipe card (below). However, to give you an “At a glance” overview, I want to outline the steps here so that you can get an idea of how to make this recipe in advance. This dough could be called high hydration (more so than commercial yeast dough), but as sourdough recipes go, it’s not a very wet one. That said, although it should be sticky at first, it should be easy to handle once the dough develops its structure through the stretch and fold process. Here’s how it’s done:
1 – Make the dough
- In a large mixing bowl, mix together the flour, water, salt, pumpkin seeds and active sourdough starter just until the dry ingredients are have absorbed all the water. You can do this with a stand mixer with a dough hook, a wooden spoon in a large bowl, or with your hands in a large bowl. Allow this mixture to rest for 20-30 minutes.
- Stretch and fold the dough (step-by-step pictures below), and then let the dough rest for another 30 minutes.
- Repeat this process with 2 more sets of stretch and folds, until the dough is smooth and holds its shape well.
2 – Proof the dough
- Let the dough rise, covered with a damp tea towel, in a warm place for the bulk fermentation phase (the first rise). This should take about 3 hours, depending on the dough temperature and environment.
- Turn out onto a work surface, divide the bread dough into 2 portions, and roughly shape each portion into a loaf shape. Cover again, and allow to rest 20-30 minutes more.
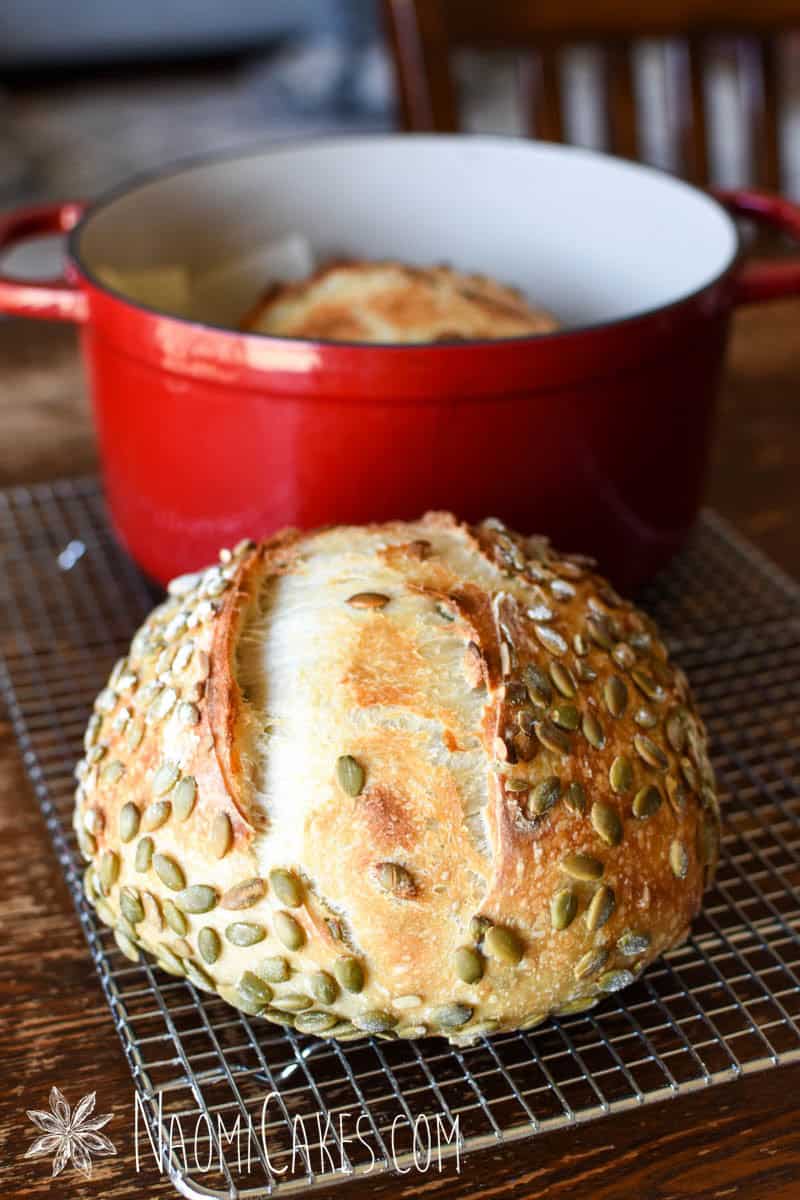
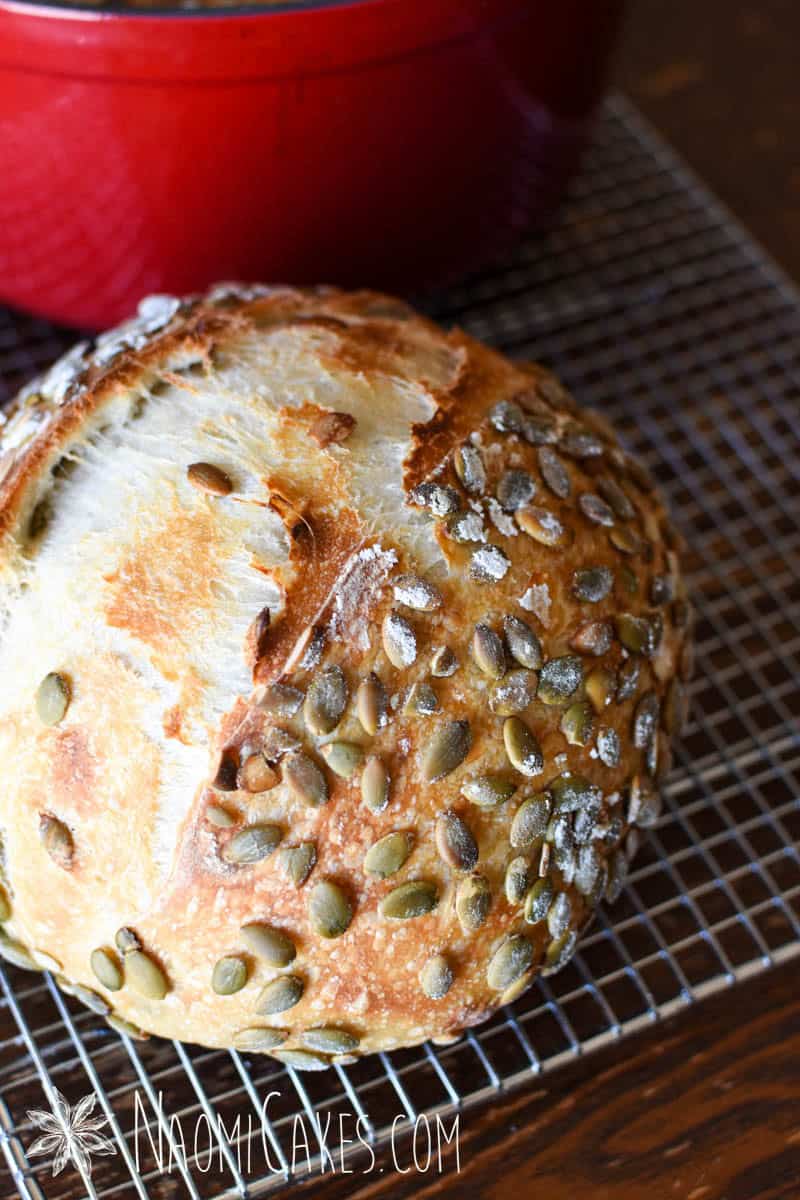
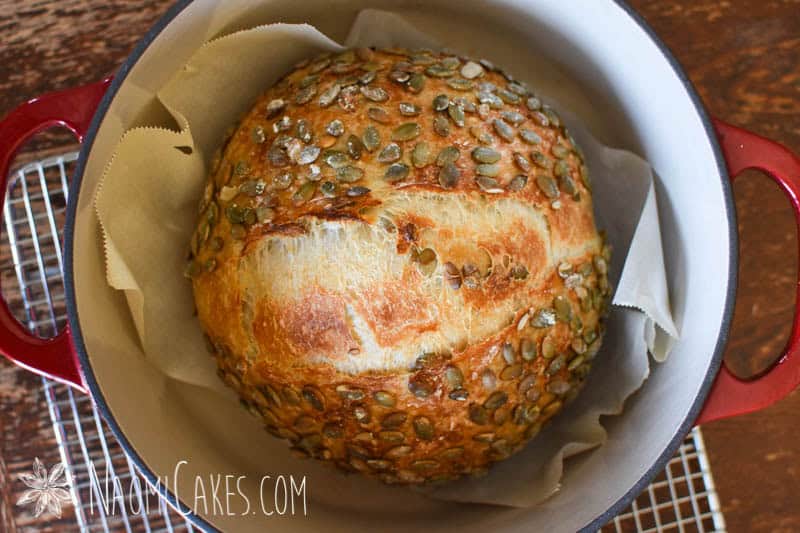
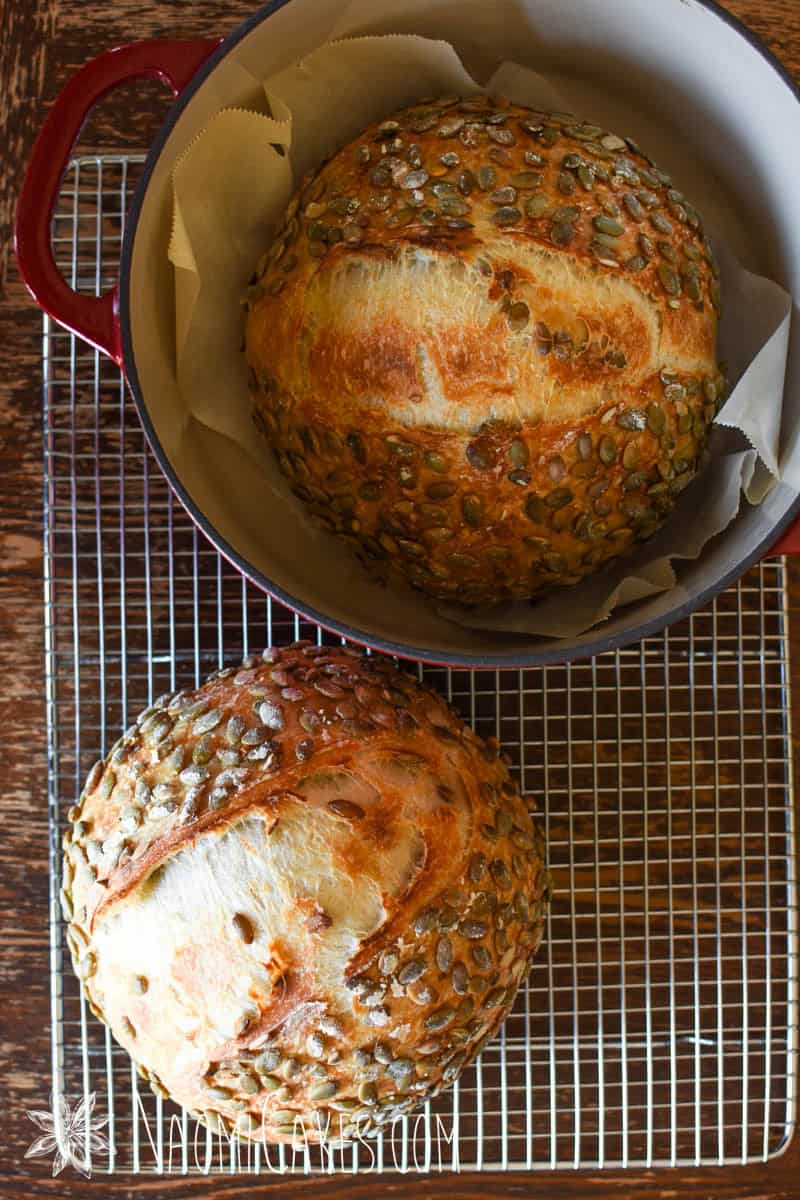
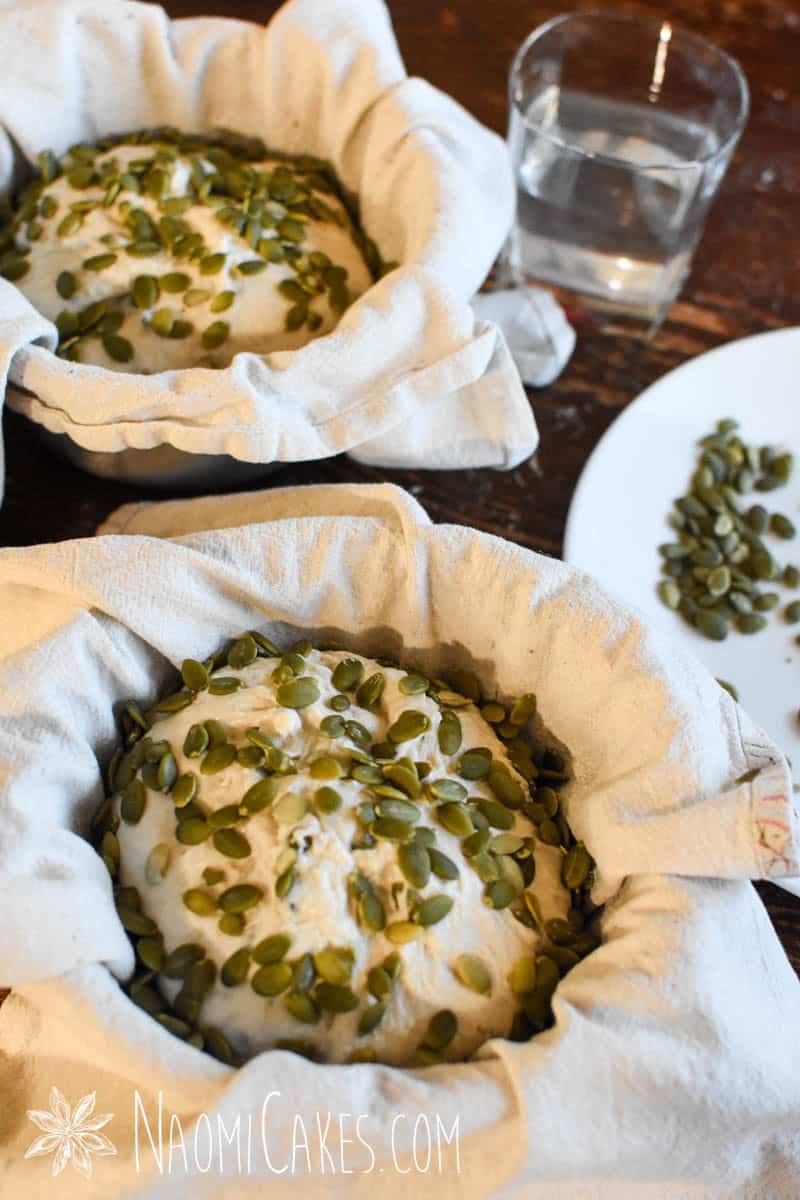
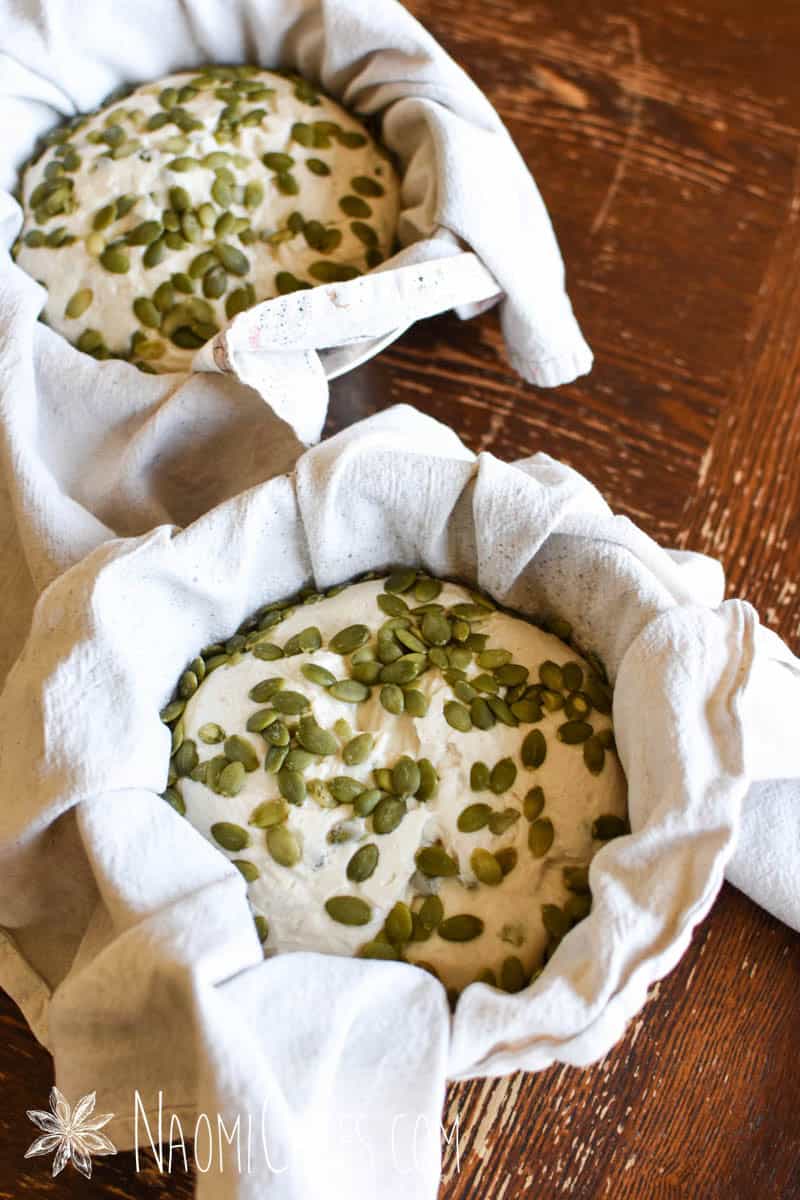
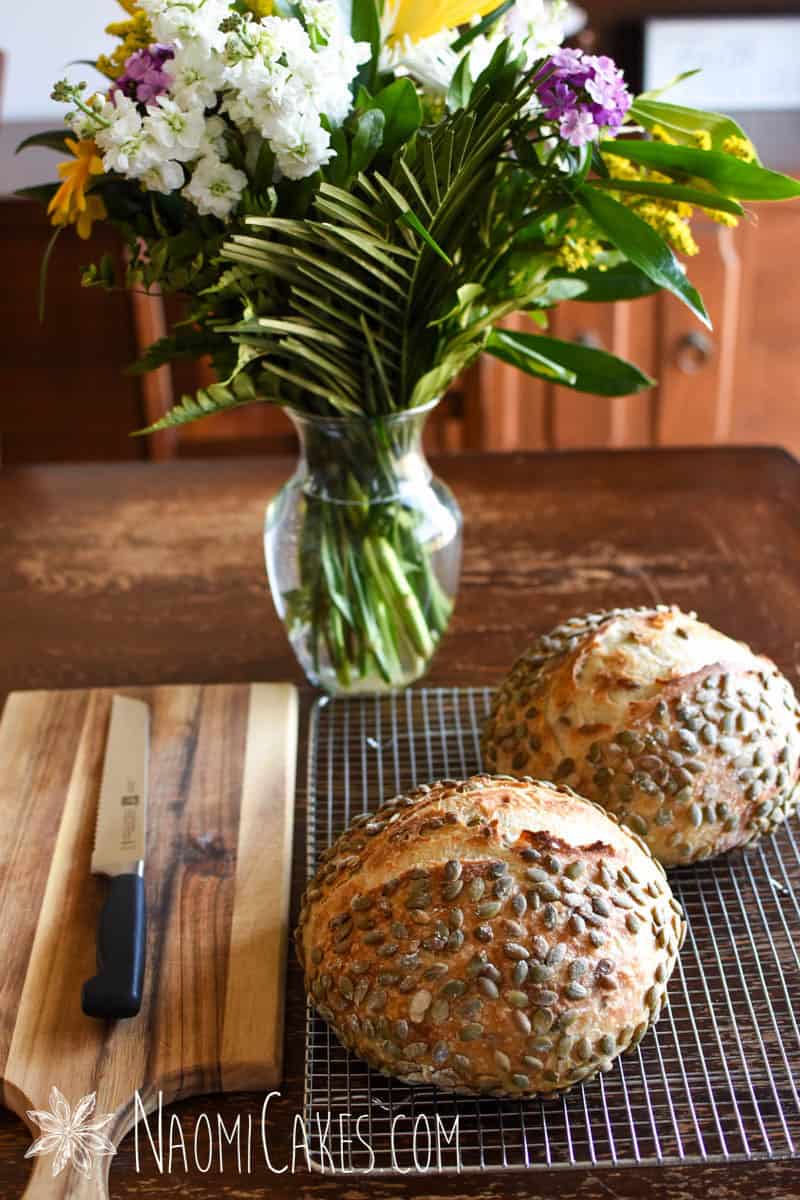
- For the final shape, form each loaf by stretching the edges into the centre and rolling into a smooth loaf. Pat the outside of each loaf with a paper towel dipped in water to make the surface of the dough sticky, and then roll the loaves in pumpkin seeds. Turn into a floured and lined banneton basket for the second rise.
- Refrigerate overnight.
3 – Bake the bread
- The next morning, turn one loaf onto a piece of parchment paper and score the top of the dough with a sharp razor blade (one or two quick cuts for this type of bread). Bake in a covered pre-heated dutch oven at high heat for 35 minutes. Remove the lid, and bake 10 minutes more (until golden brown). Alternatively, you can bake the bread on a cookie sheet with steam in the bottom of the oven for 45 minutes.
- Cool on a wire rack completely before serving.
Storage
I like to store my bread in a sealed plastic bag or ziploc bag in the freezer for long storage or at room temperature for 1-3 days. Sourdough bread, like most things, is best eaten fresh!
What to do with stale leftover sourdough bread
Bread is always best on the day that it’s made, which leave the question: what do we do with bread that starts to become less fresh tasting? Well, certainly, do not throw it out! Here are my favourite ways to use leftover sourdough bread.
Try making:
- Toast
- Avocado toast
- French Toast
- Baked in the oven with cheese on top (or as my kids call it, “Cheesy bread”
- Toasted BLT
- Grilled cheese
- Paninis
- Bread pudding
- Croutons
Why you will love this recipe
I think you’ll love this recipe for the same reasons that I do. It’s an easy recipe with simple ingredients that yields incredible results every time! Seeded sourdough bread is some of the best bread out there, in my opinion, and the buttery flavour and satisfying bite of pumpkin seeds makes this one for the books! It’s beautiful, it’s delicious, and it’s pretty simple to bring together.
You will need:
- Ingredients (see recipe card)
- Mixing bowl
- Measuring cups and spoons OR a kitchen scale
- Stirring spoon
- Bench scraper
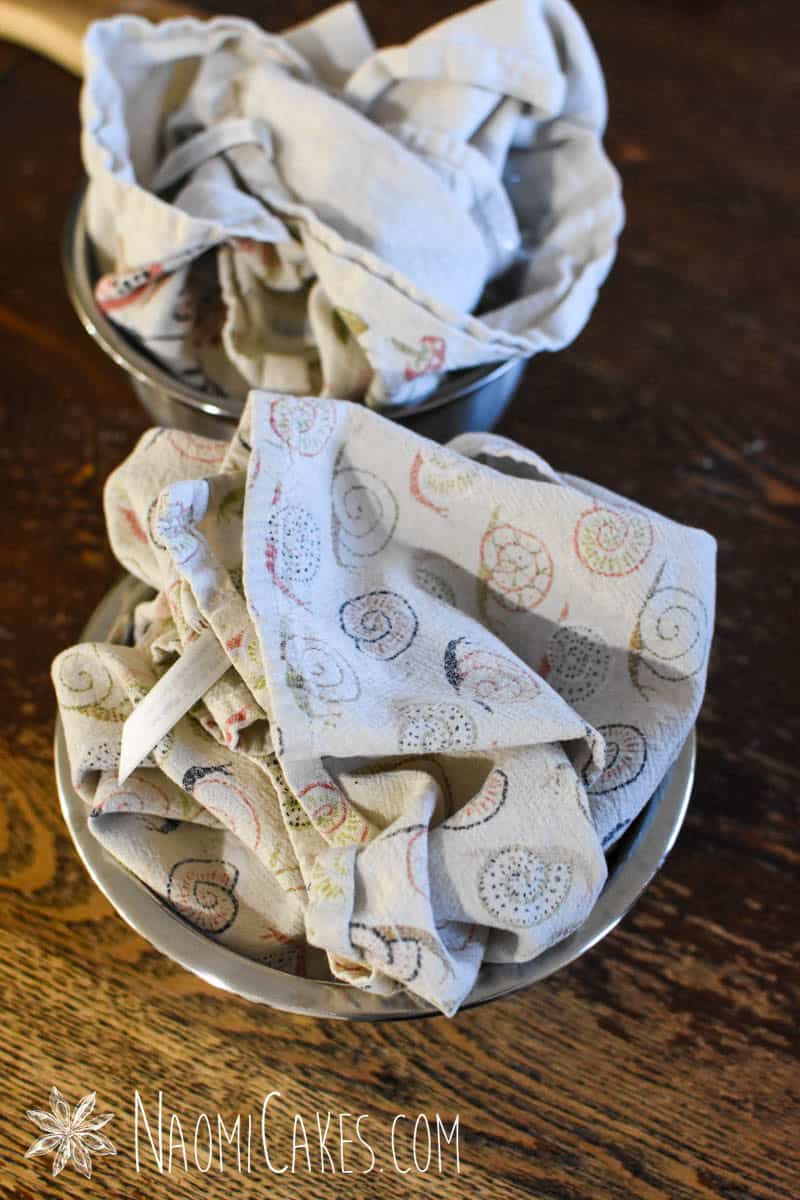
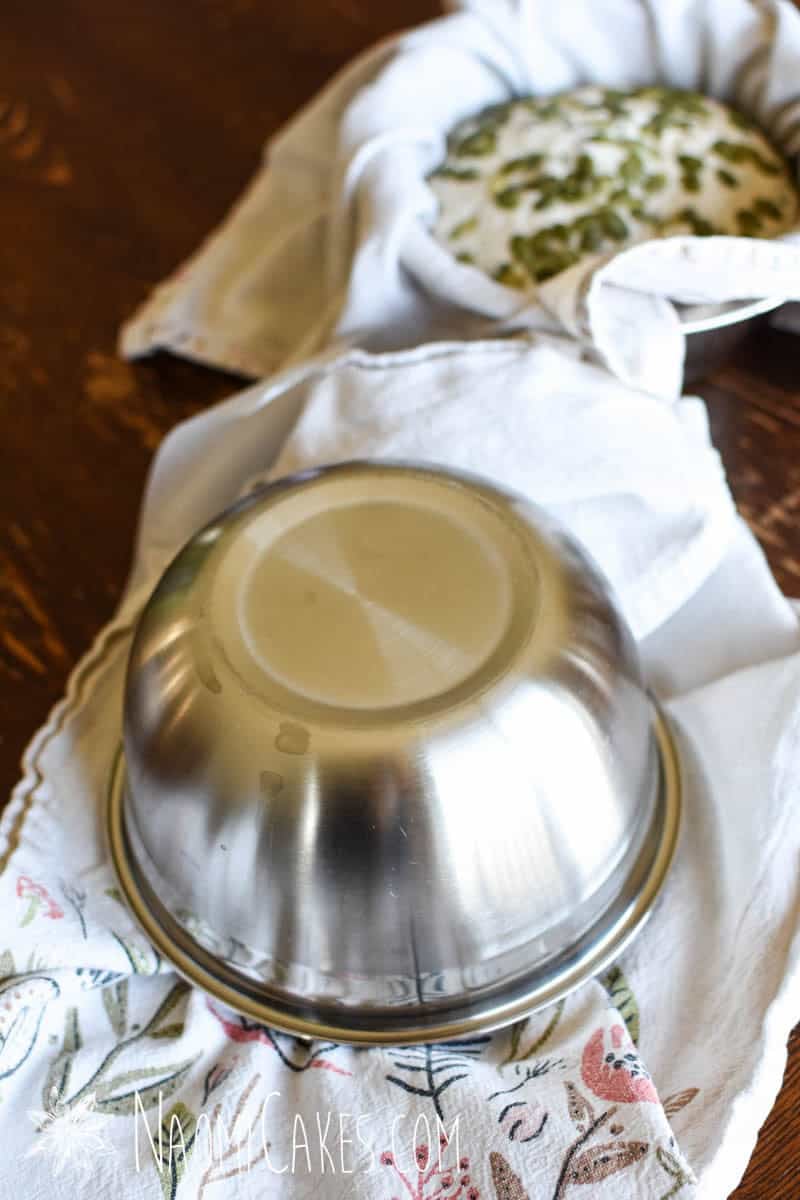
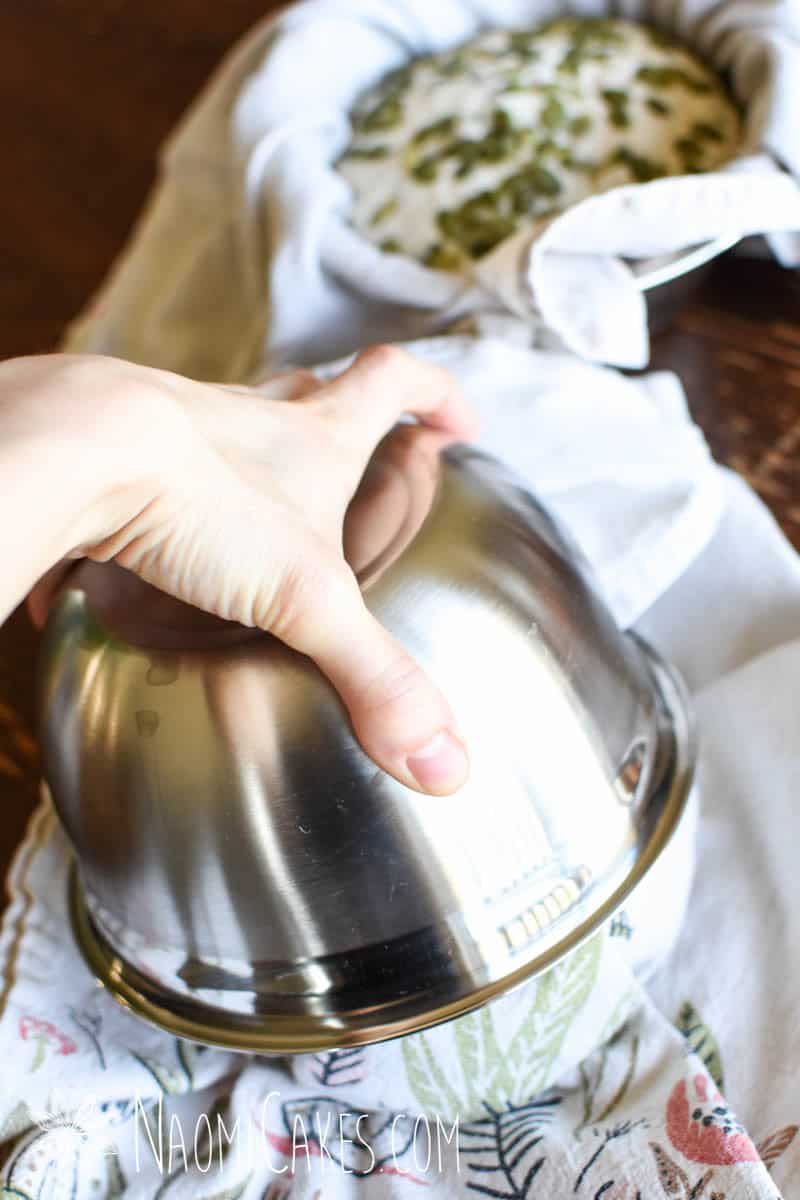
- 2 round or oval banneton baskets or 2, 7″ bowls with tea towels
- Plastic wrap (optional)
- Parchment paper
- Scoring tool (or a sharp knife)
- Dutch oven (or baking sheets and a pan with sides to create steam in the oven)
Note: This sourdough kit includes many of the supplies listed above.
Sourdough Pumpkin Seed Bread
This bread is some of the best! For reliable results, weigh your ingredients with a kitchen scale.
Ingredients
- 5-1/2 cups (800g) all purpose flour +up to 1/4 cup of flour if the dough is very wet, but not more than that.
- 2-1/3 cups (575g) water
- 1 Tbsp (15g) salt
- 1-1/4 cups (200g) active sourdough starter
- 1-2/3 cups (250g) pumpkin seeds divided
Instructions
-
In a large mixing bowl, combine the flour, water, salt, starter, and 2/3 cup (100g) of the pumpkin seeds until a soft, shaggy dough forms (make sure all of the dry flour gets incorporated into the dough). Cover with a damp tea towel and allow this to rest 20-30 minutes.
-
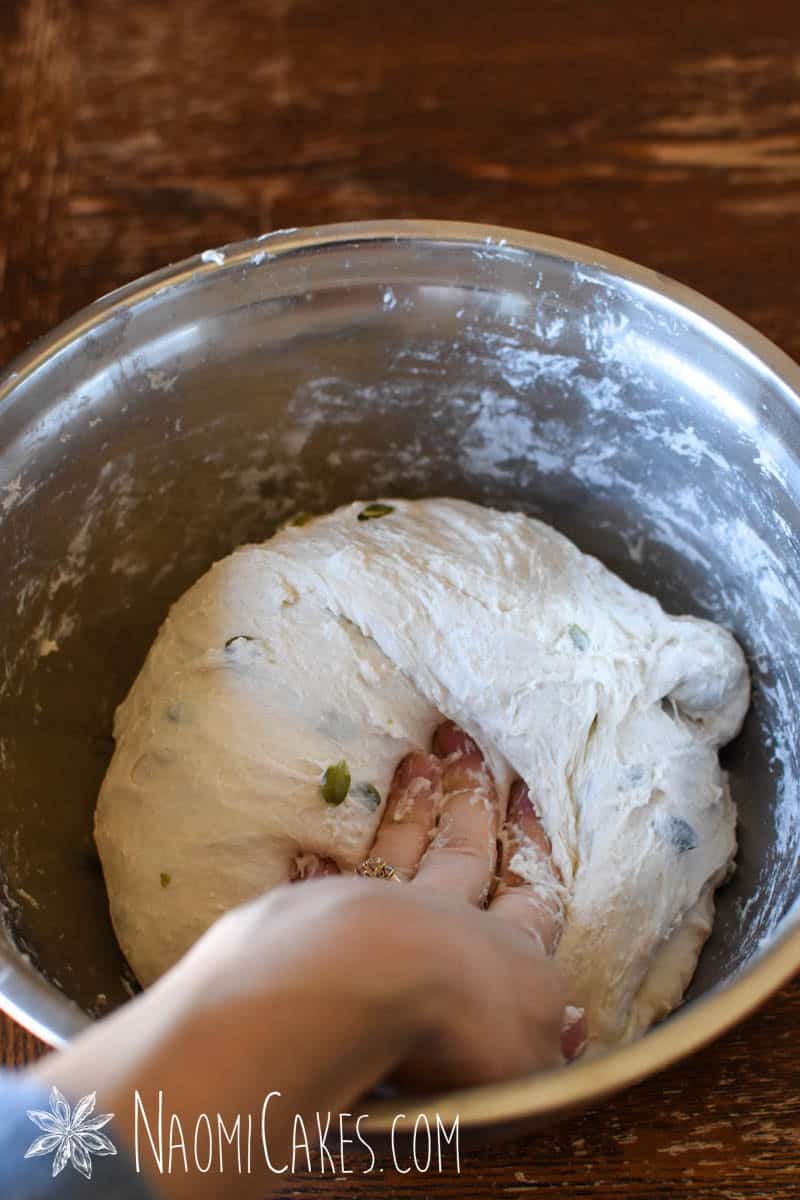
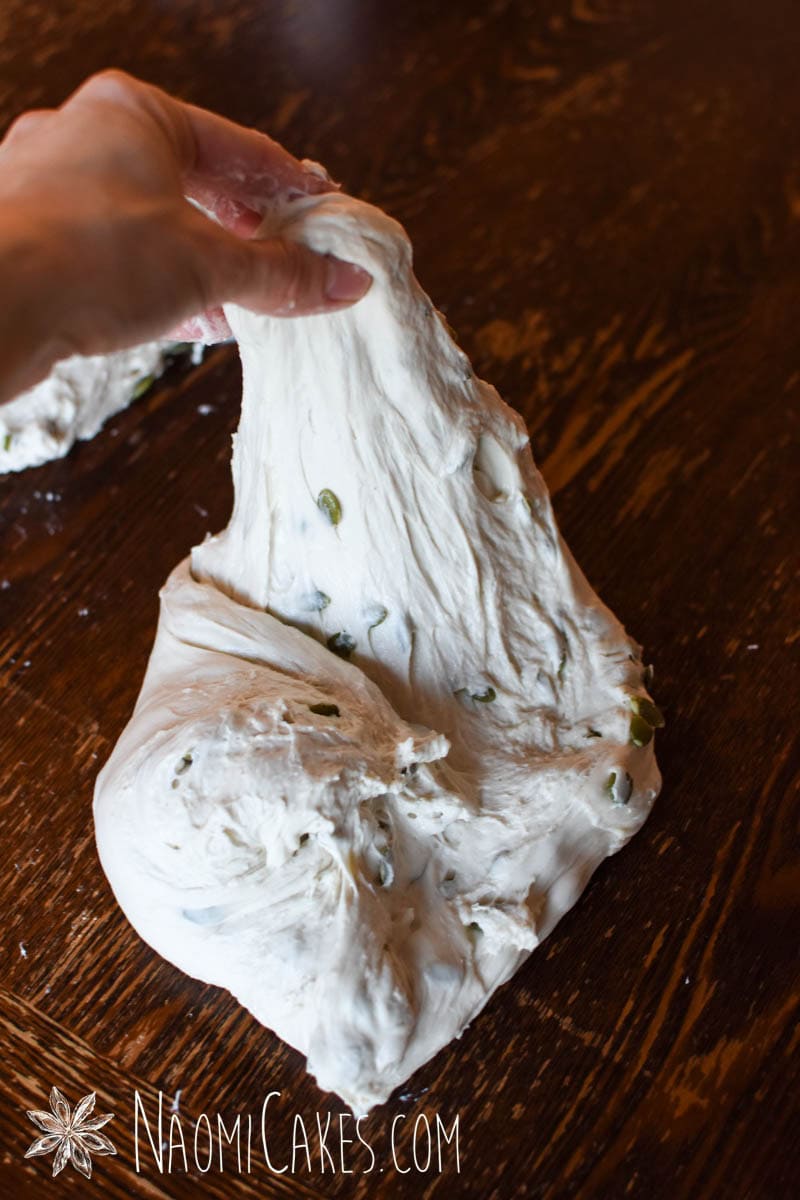
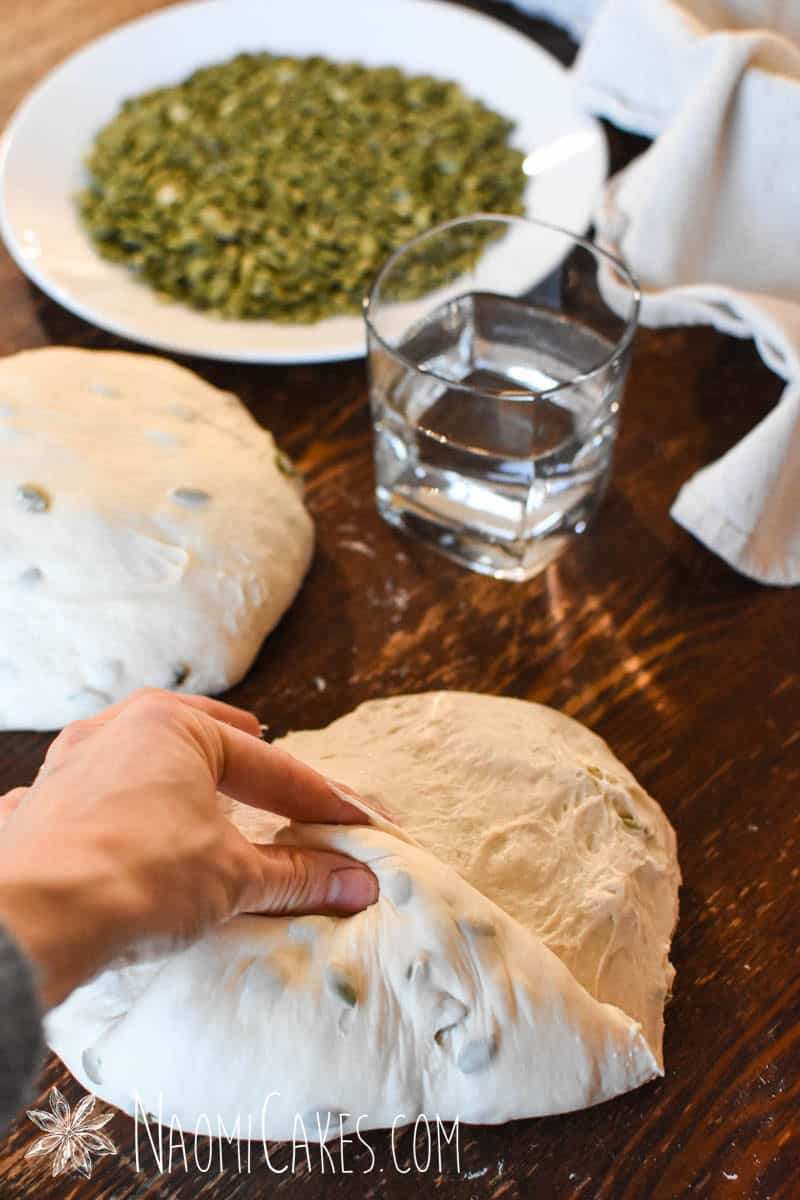
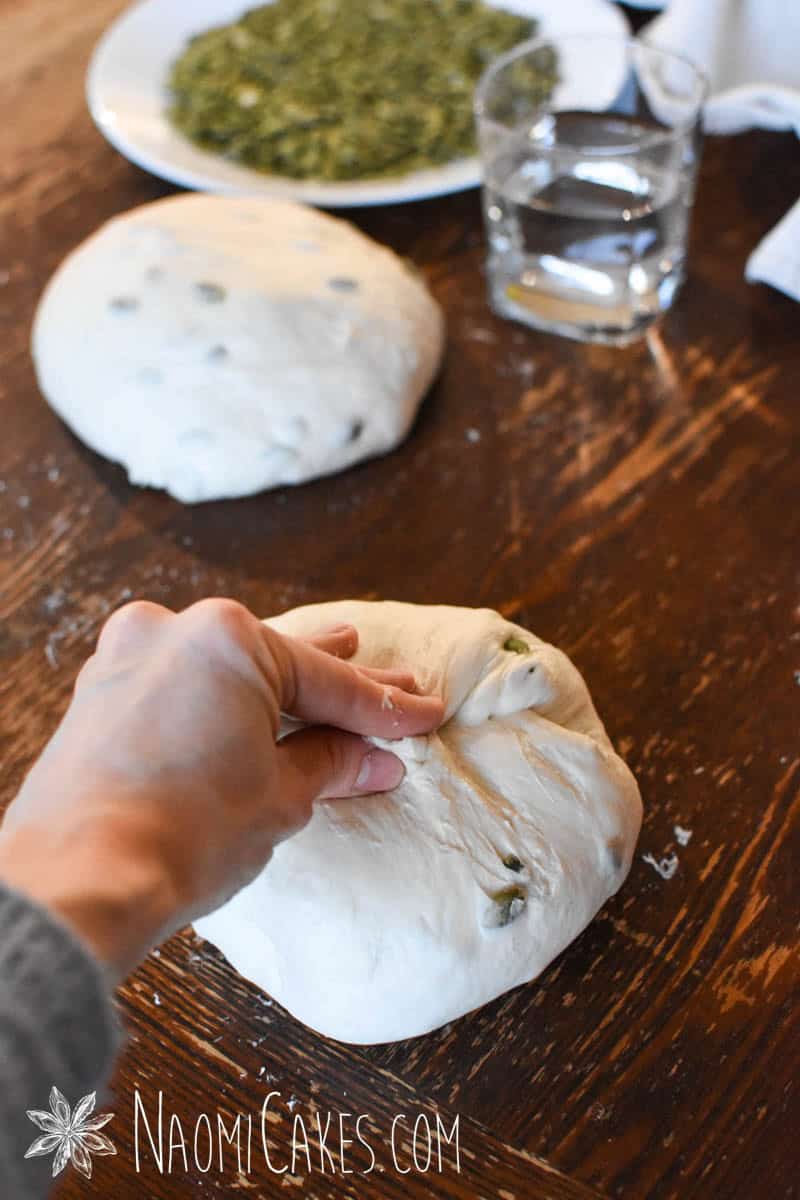
Stick your hand under the dough, grab a handful, and pull it up as high as you can without breaking it. Fold the stretched dough down over the top of the whole amount. Repeat this process from different sides of the dough 4-5 times, or until the dough isn’t “loose” anymore and it begins to feel stronger, or “taut”. Cover, and allow this to rest 30 minutes.
-
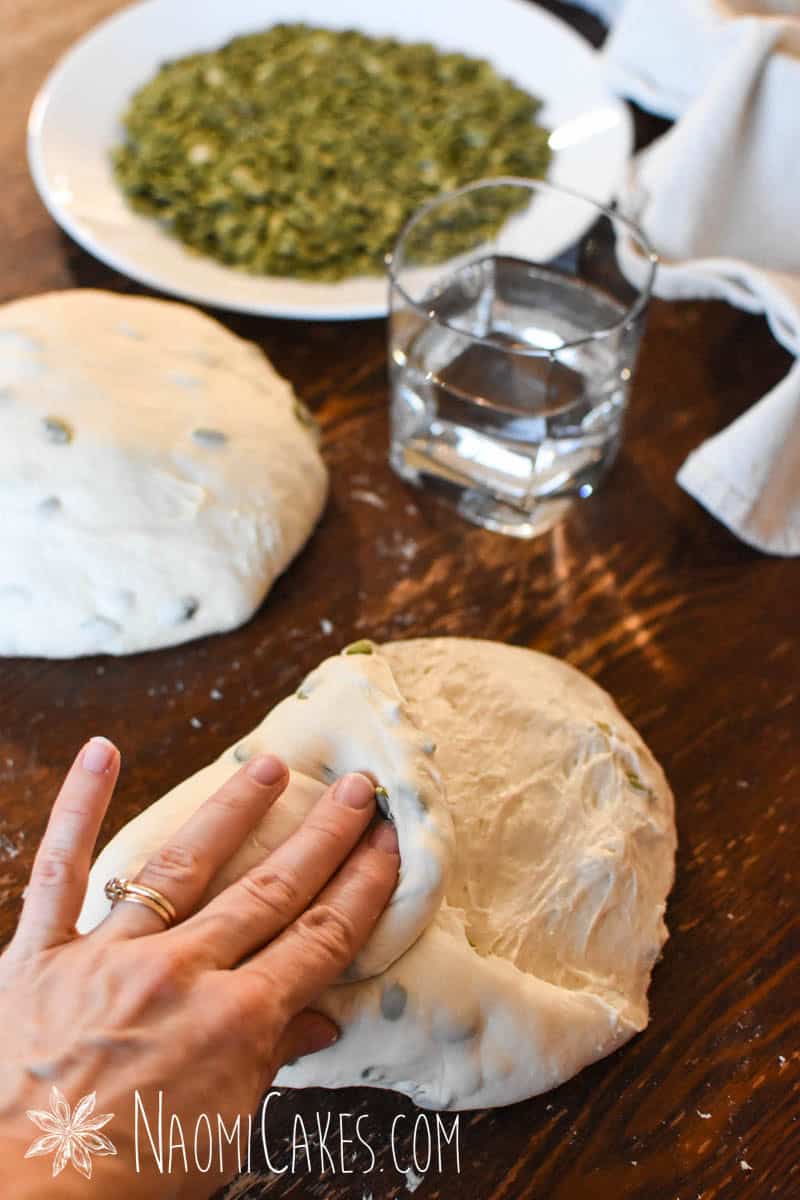
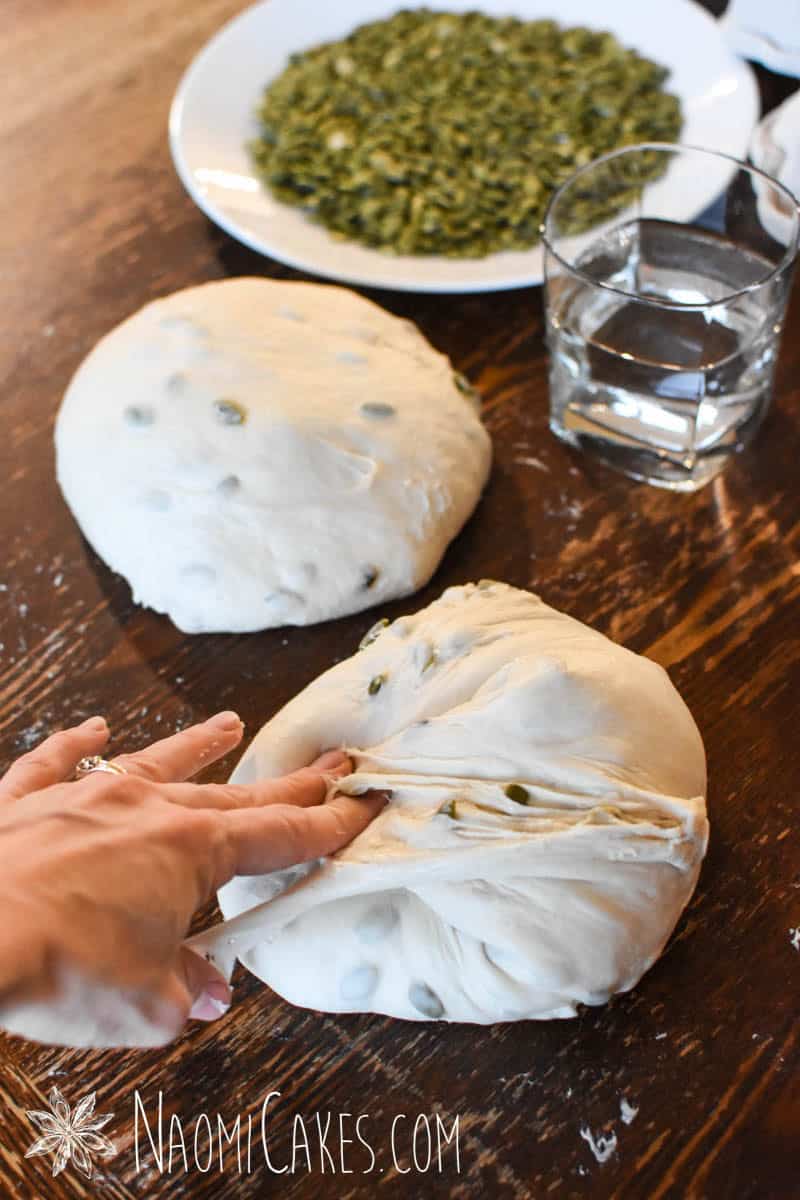
Repeat the stretch and fold process, folding 3-4 times, or until the dough begins to feel stronger (harder to stretch) again. Cover, and allow to rest another 30 minutes.
-
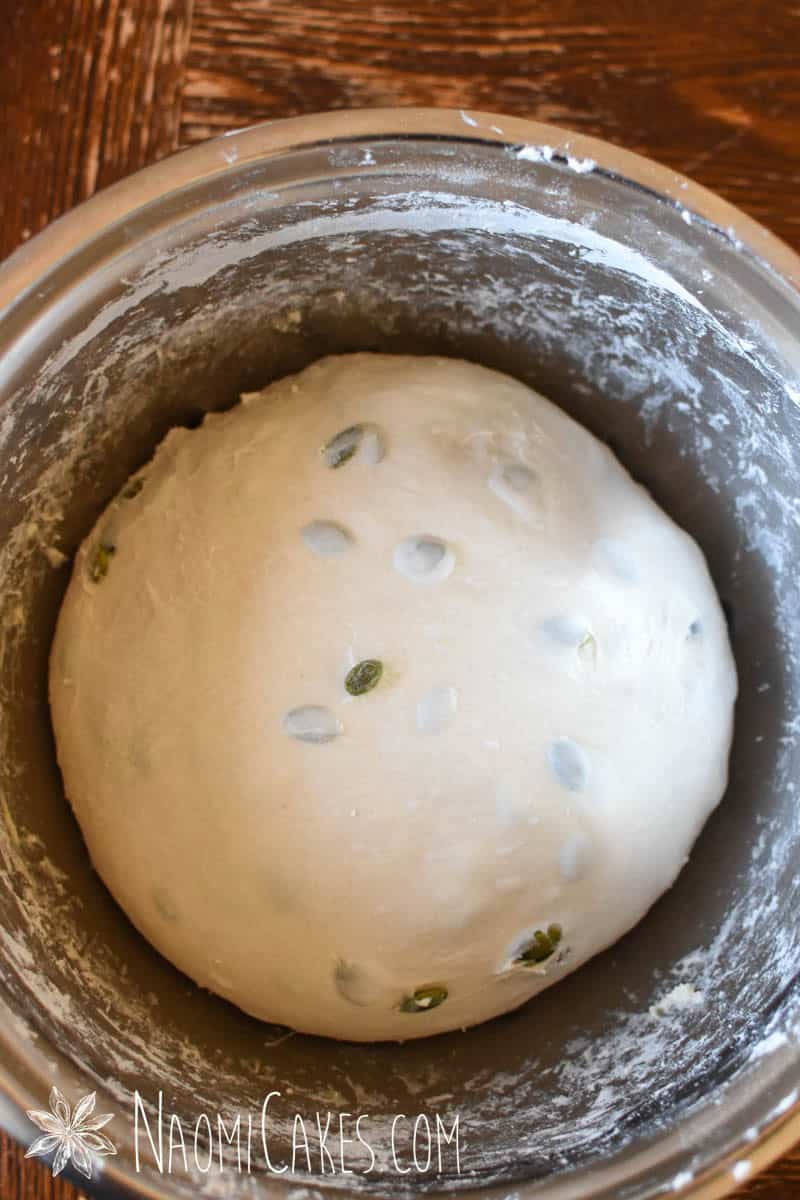
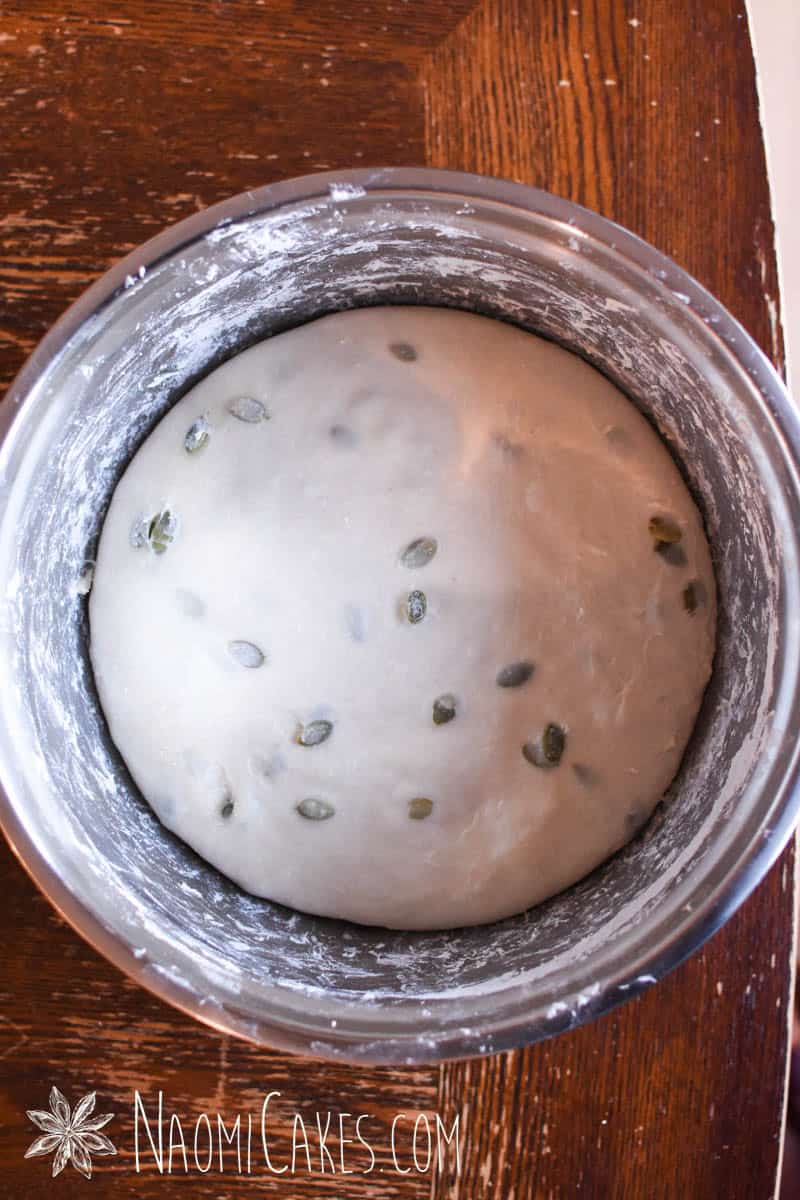
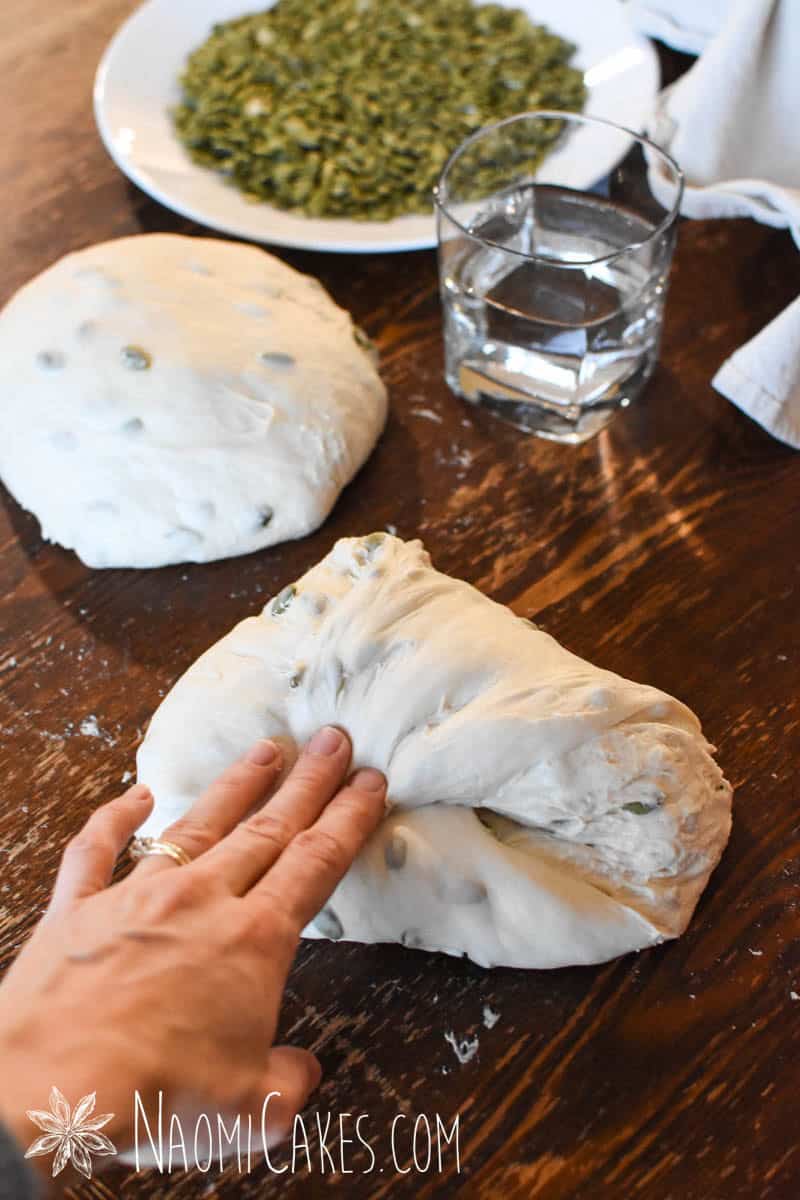
Repeat the stretch and fold process one final time, again folding 3-4 times, or until the dough feels taut and smooth. Cover, and allow to rest 3-6 hours or until the dough is doubled or nearly doubled in bulk.
-
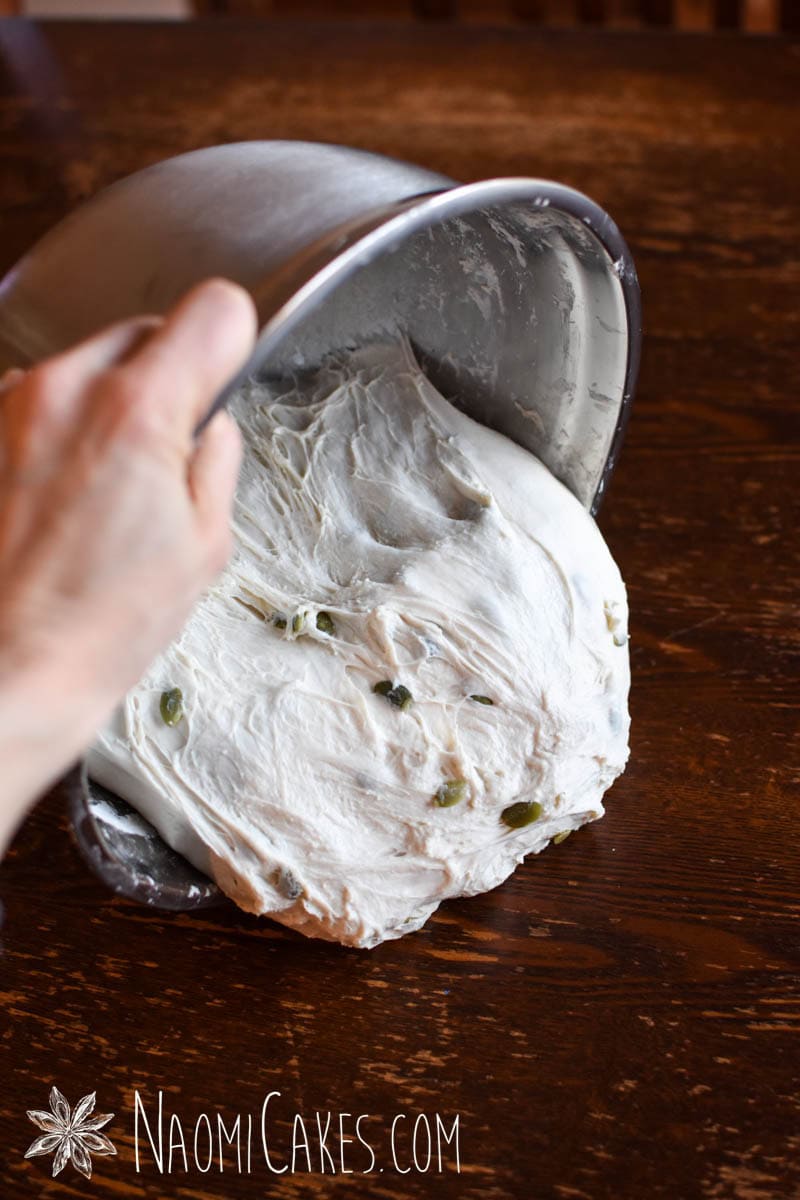
For the pre-shape (optional):
-
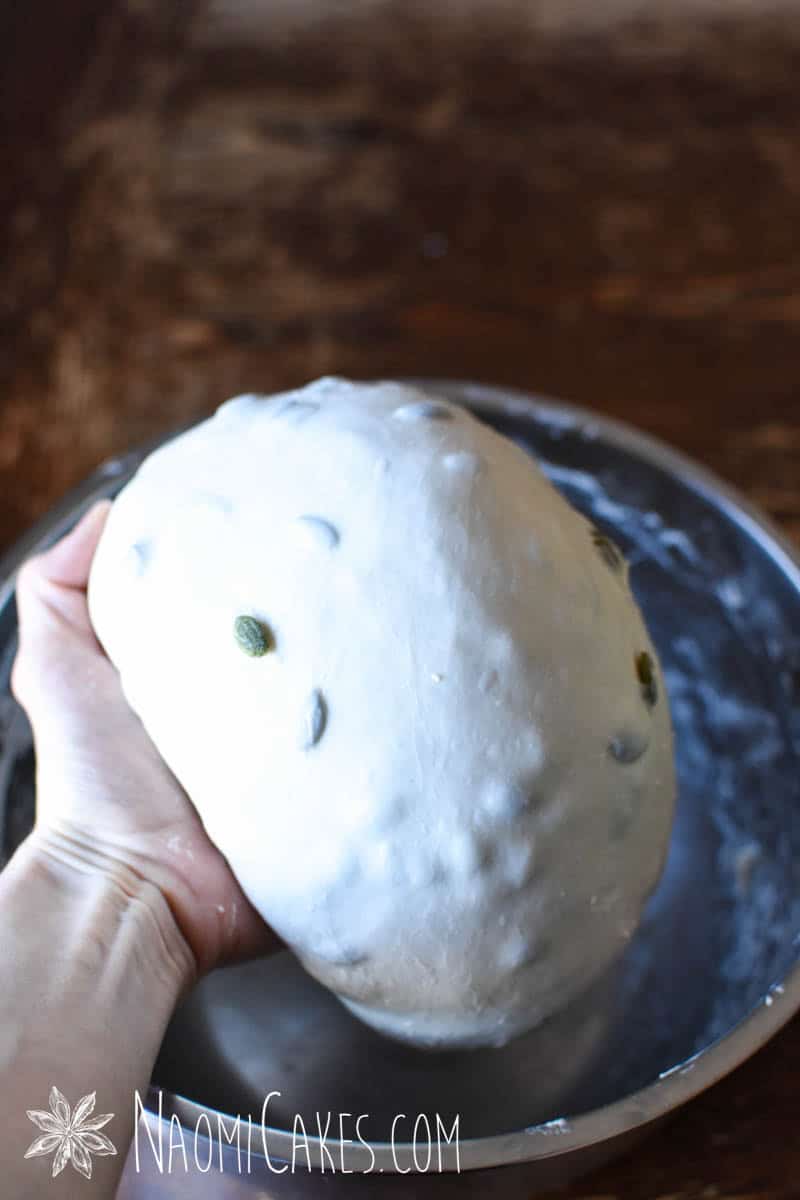
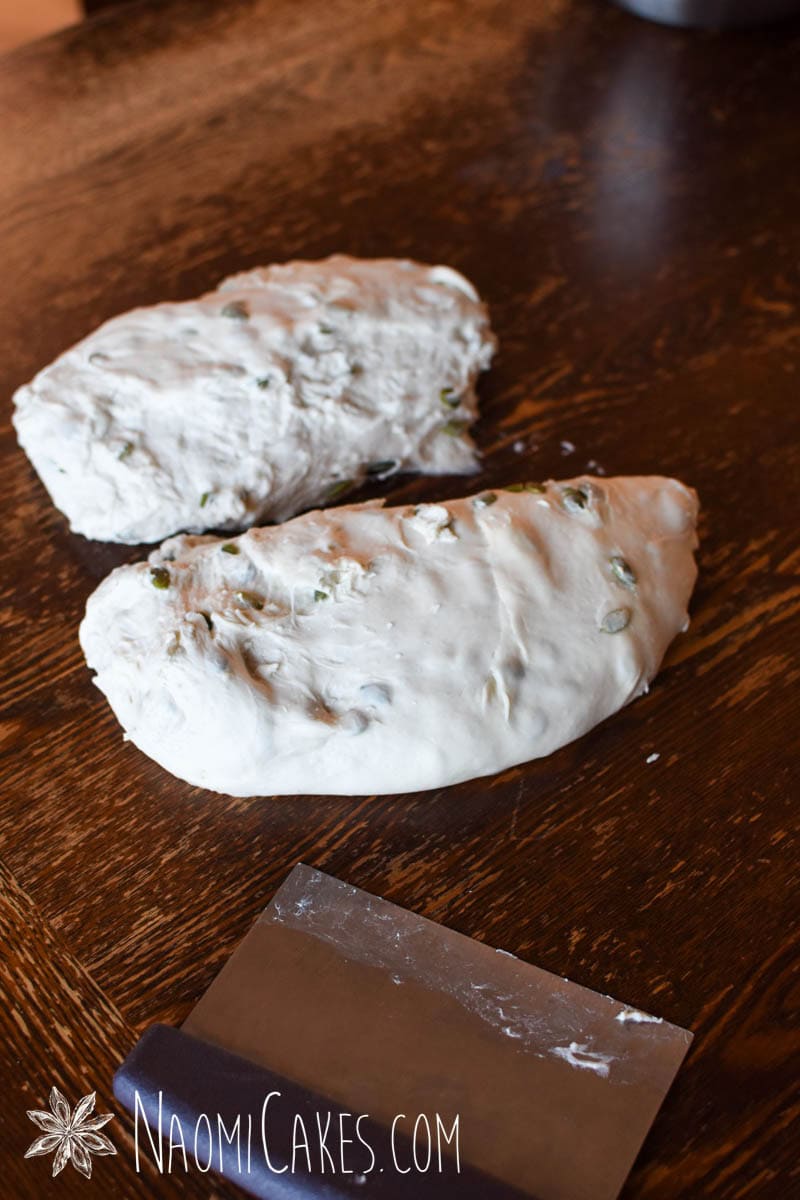
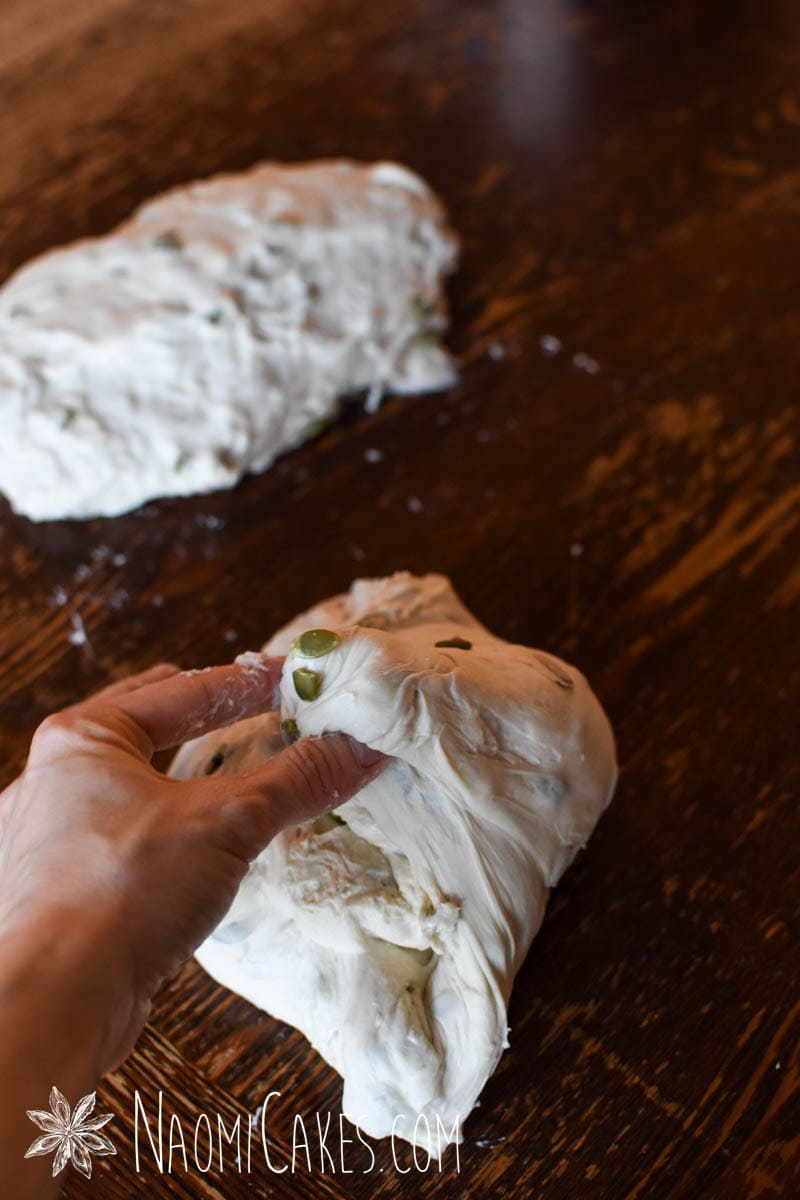
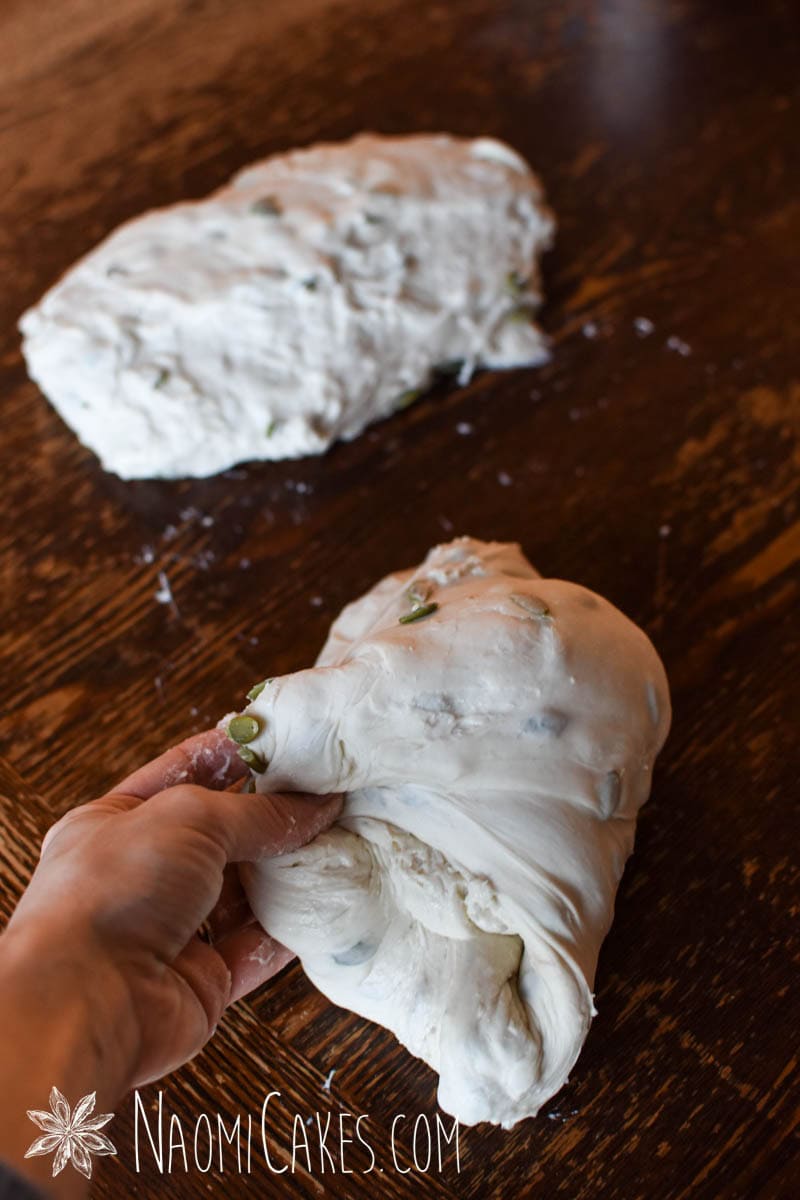
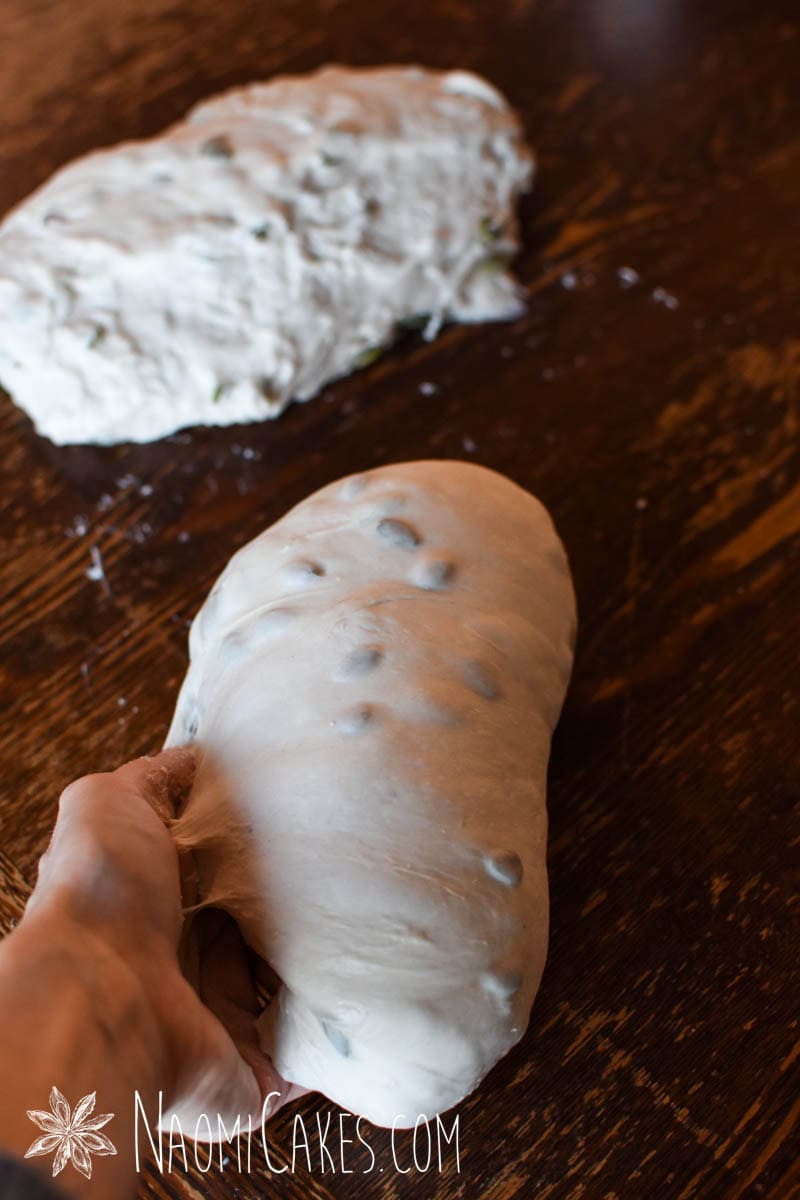
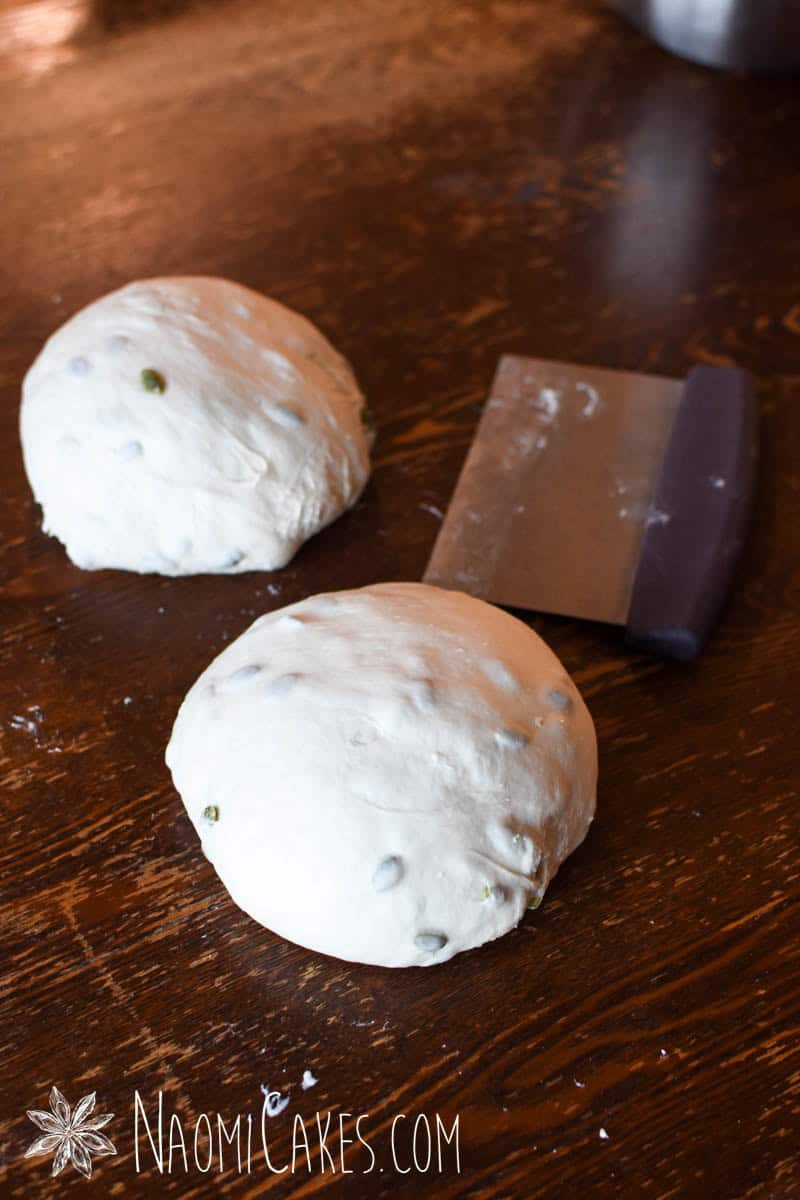
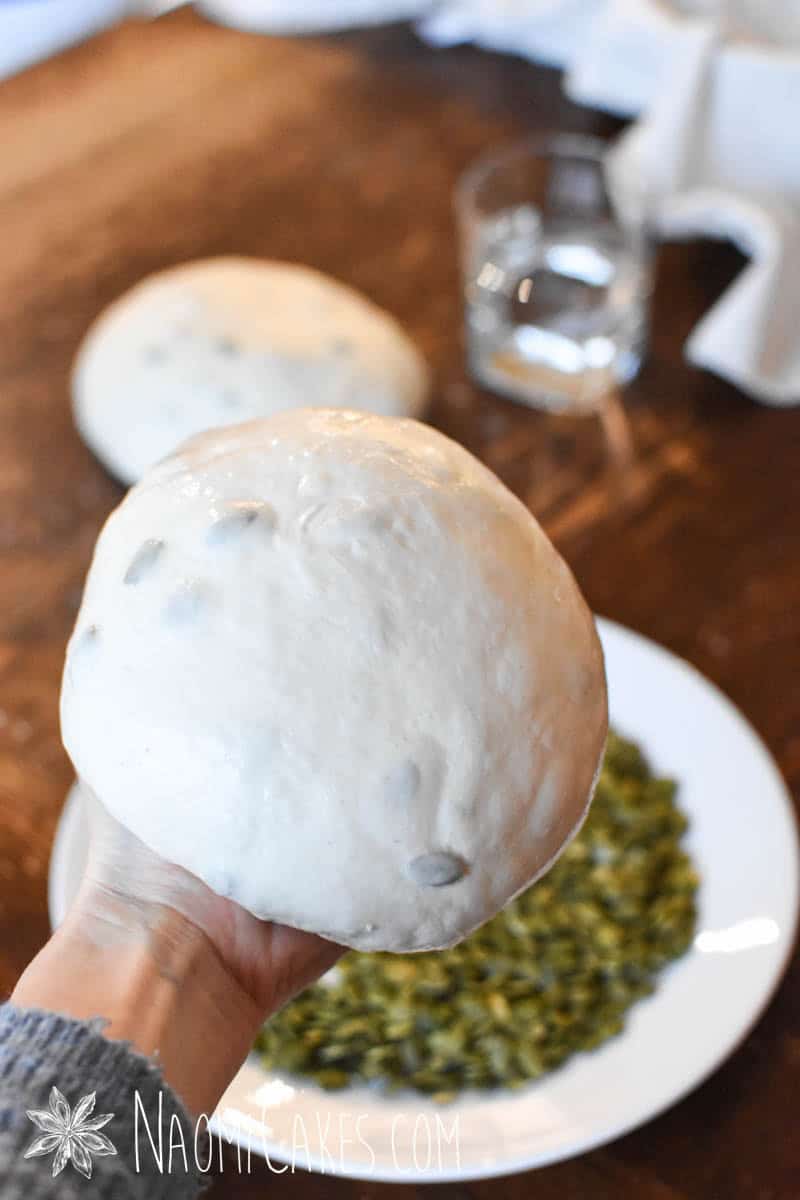
Turn the dough out onto a clean, unfloured work surface. Divide it into 2 equal portions, and stretch one piece of the dough out into a square. Pull the corners of the the square into the centre, and then repeat “stretching and folding” the edges into the centre (from each corner, about 3-4 more times) until the dough comes together into a smooth ball. Turn upside down, and repeat with the other section of dough. Cover, and allow these to rest 30 minutes.
-
If you choose to skip the pre-shape, you can place your shaped loaves smooth-side down into flour-dusted banneton baskets or bowls at this point.
-
Shape the dough:
-
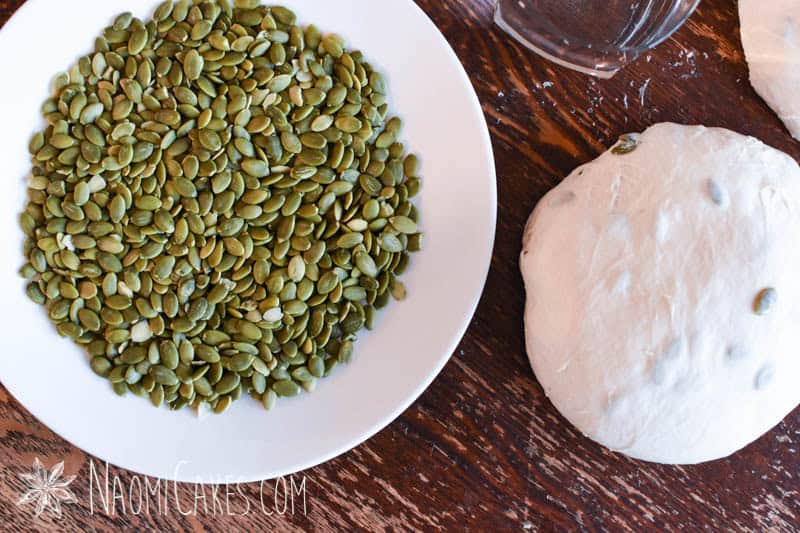
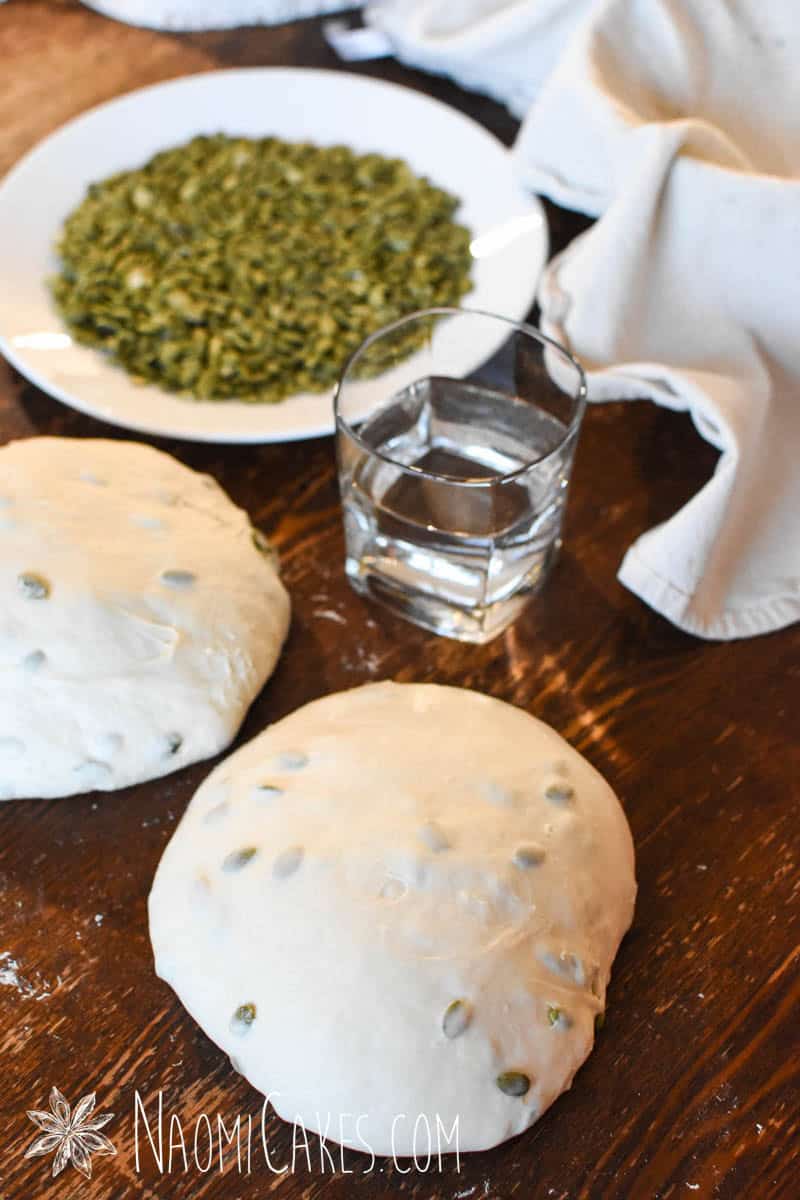
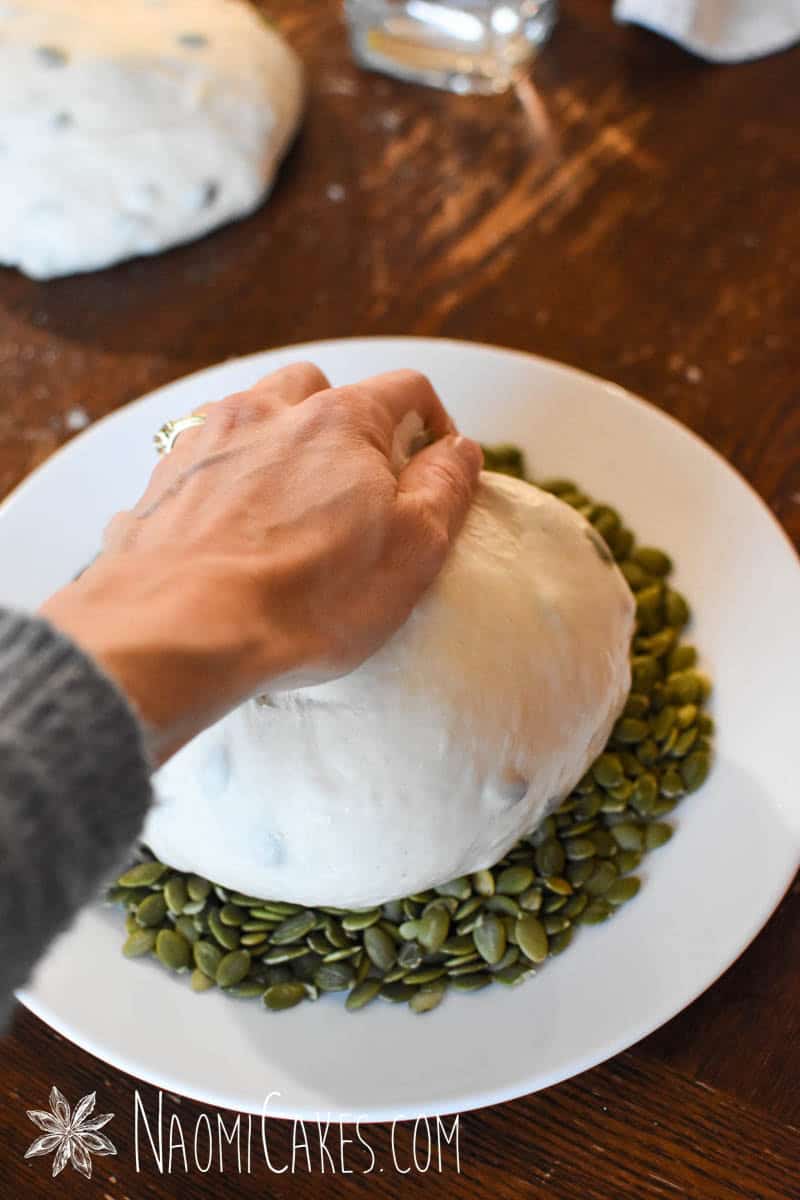
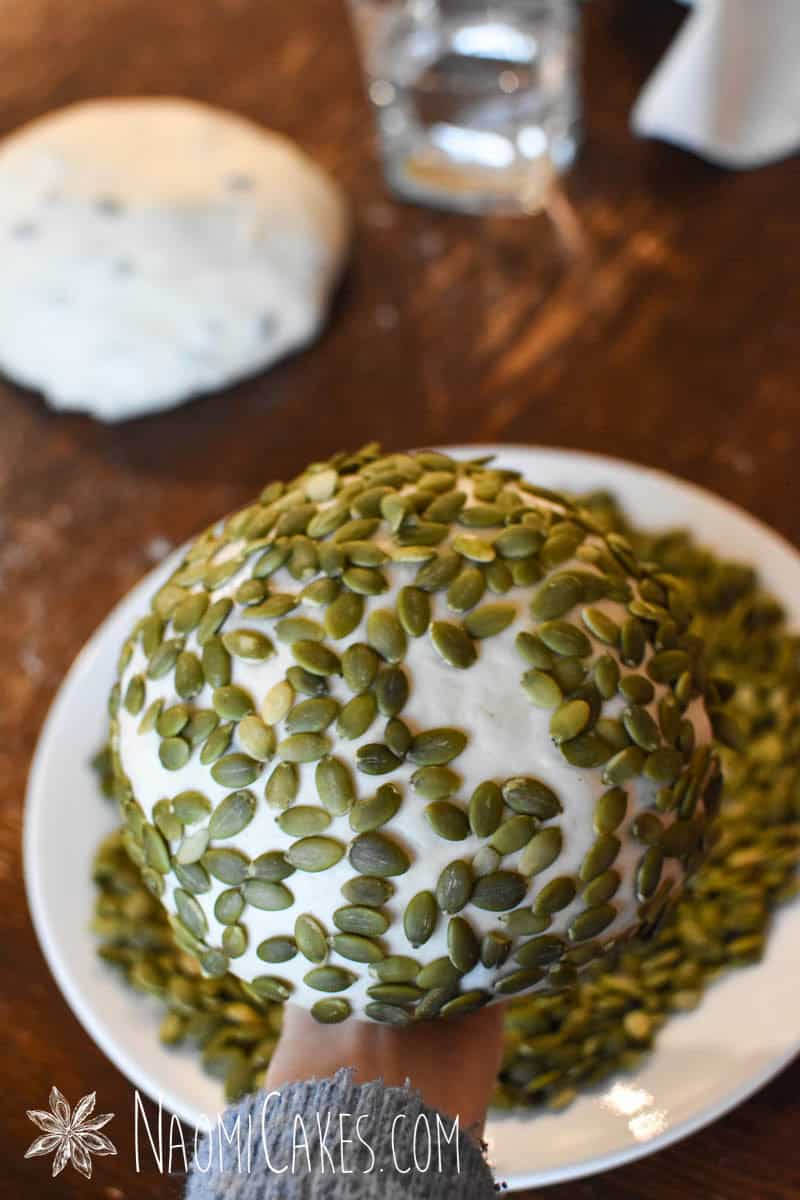
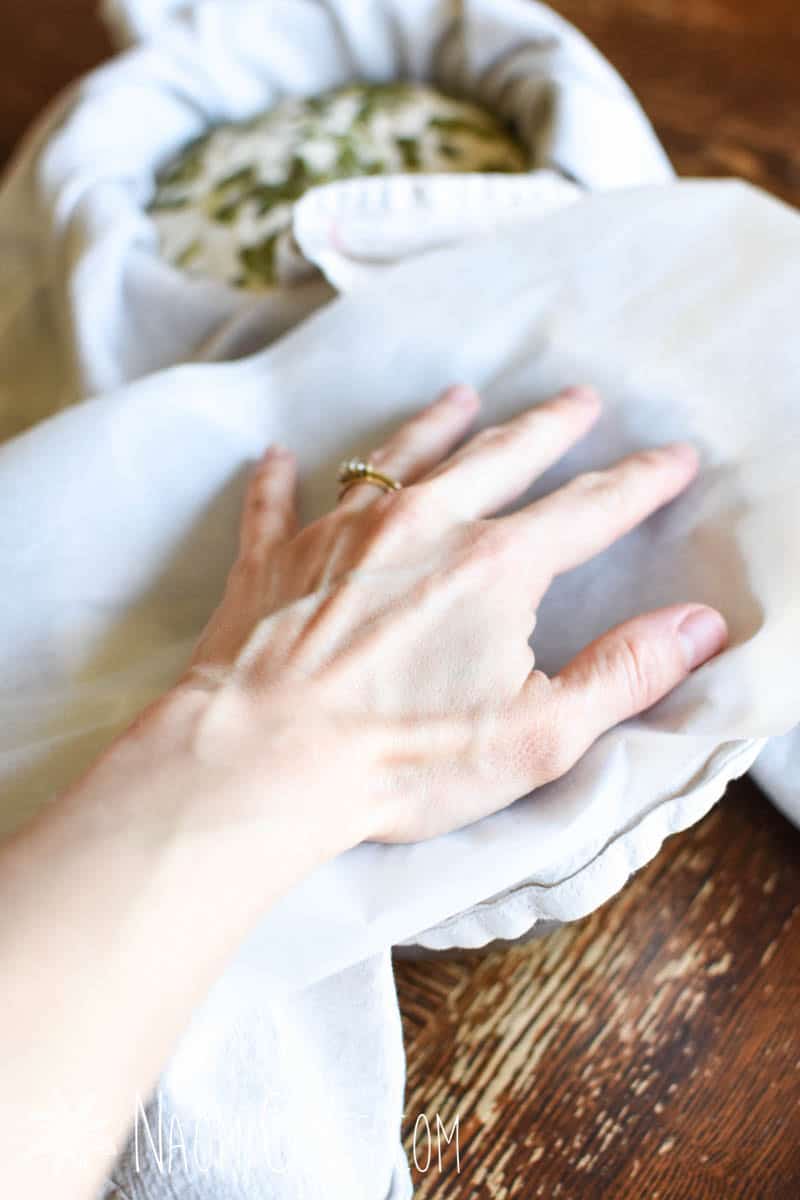
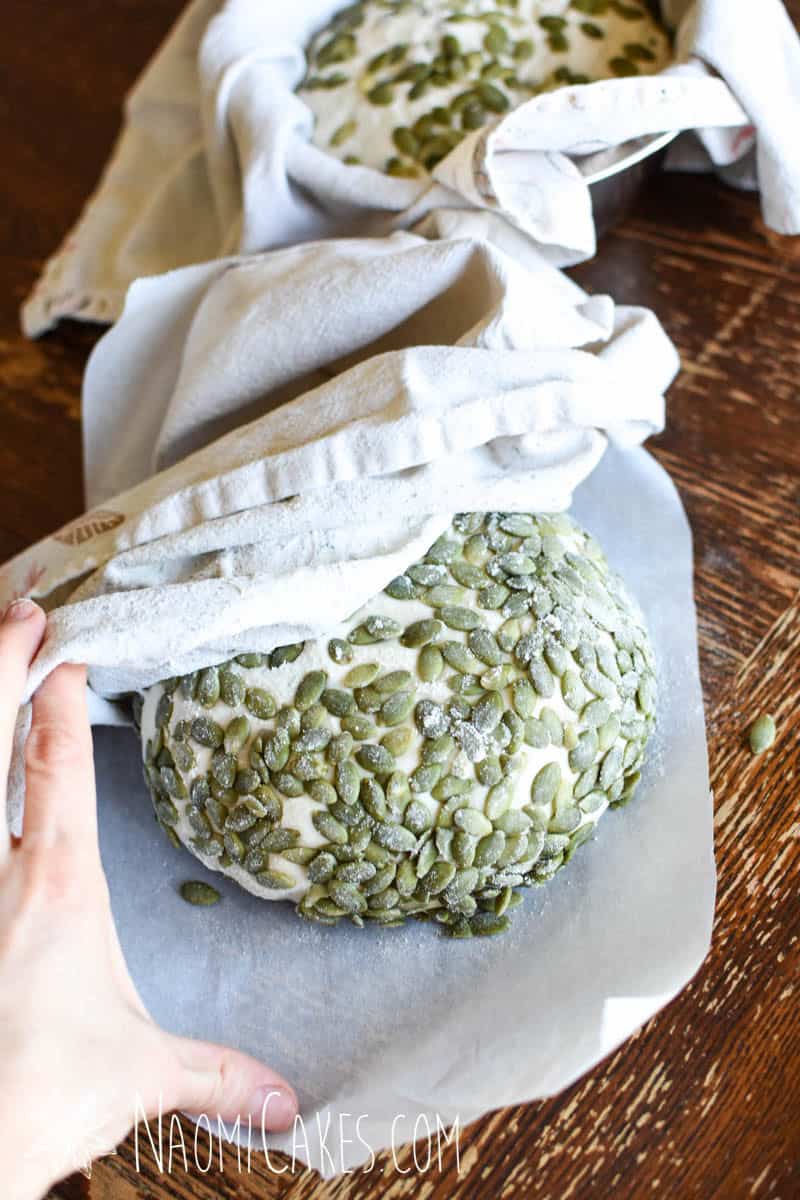
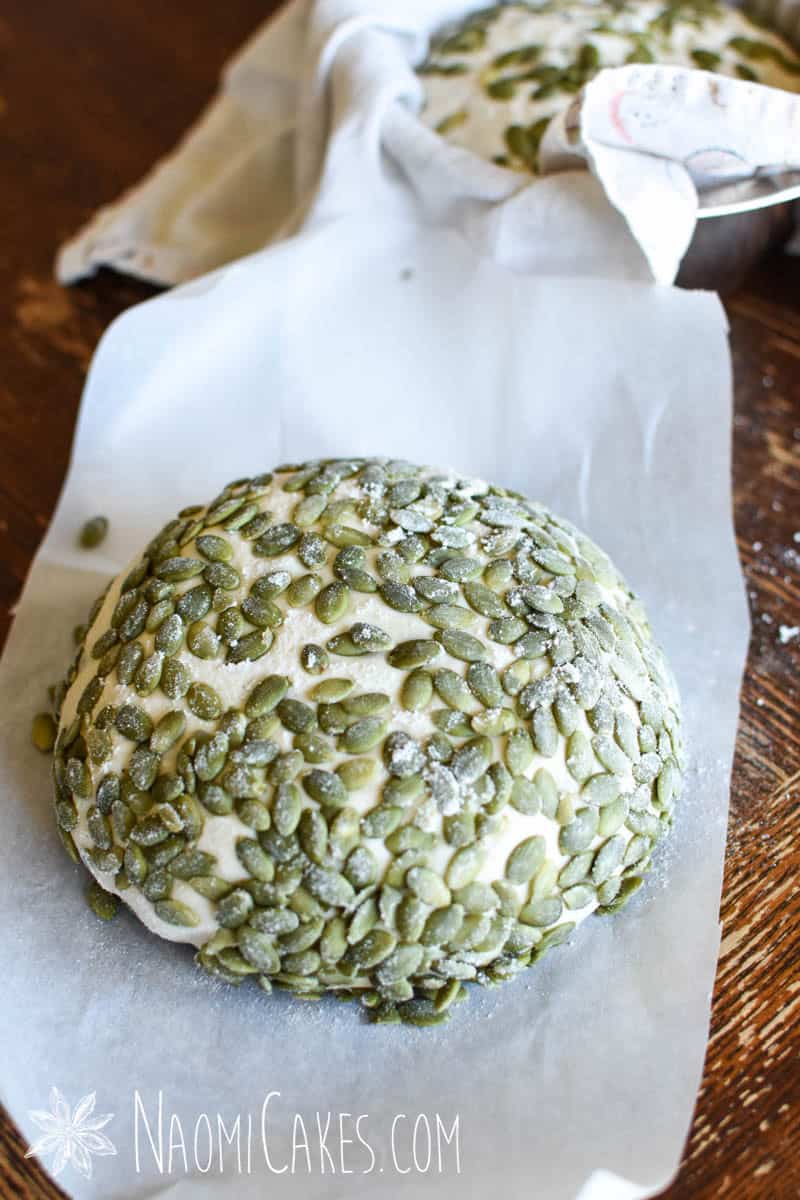
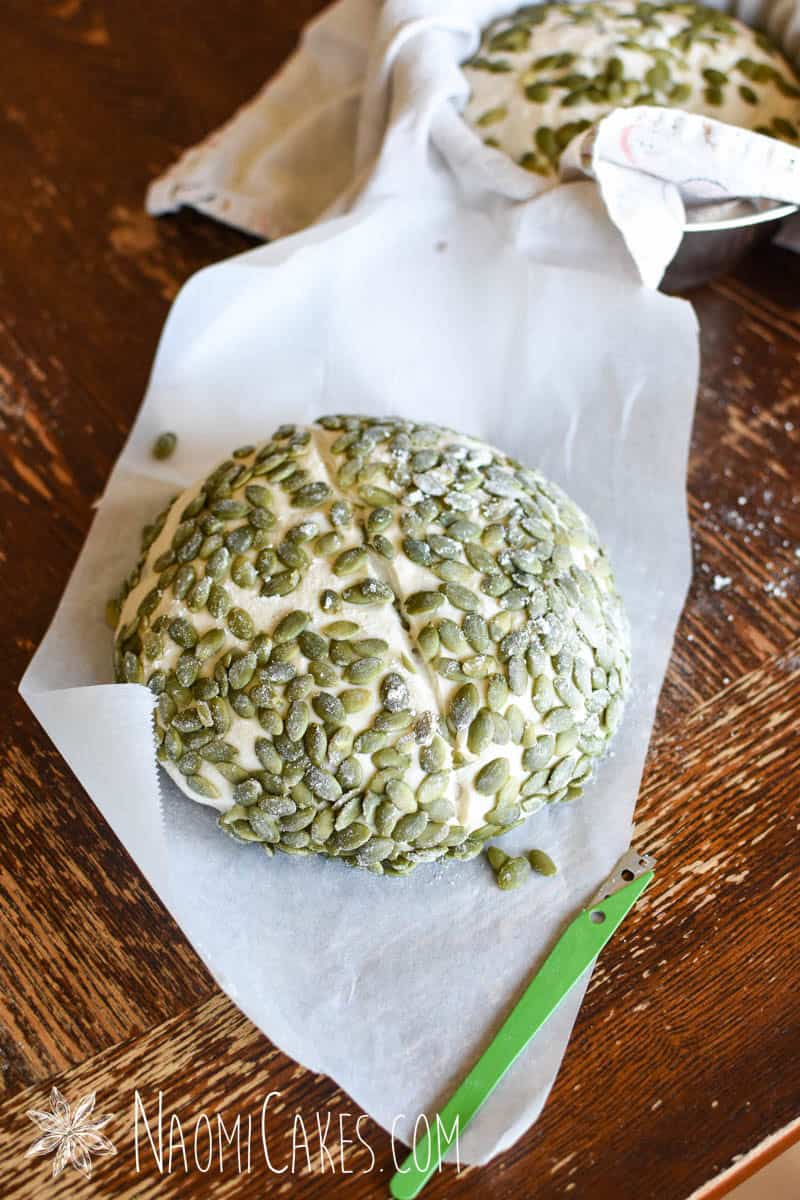
Pull each pre-shaped loaf into a square again, and stretch and fold the corners into the centre again. Roll the dough into a loaf shape, and pat the outside with a clean paper towel dipped in water, to make the surface of the dough sticky. Put the remaining pumpkin seeds (1 cup or 150g) onto a large plate, and roll the sticky dough in seeds to cover it. Place the loaf seed-side down into a lightly floured banneton basket or bowl* lined with a tea towel. Repeat with the second loaf.
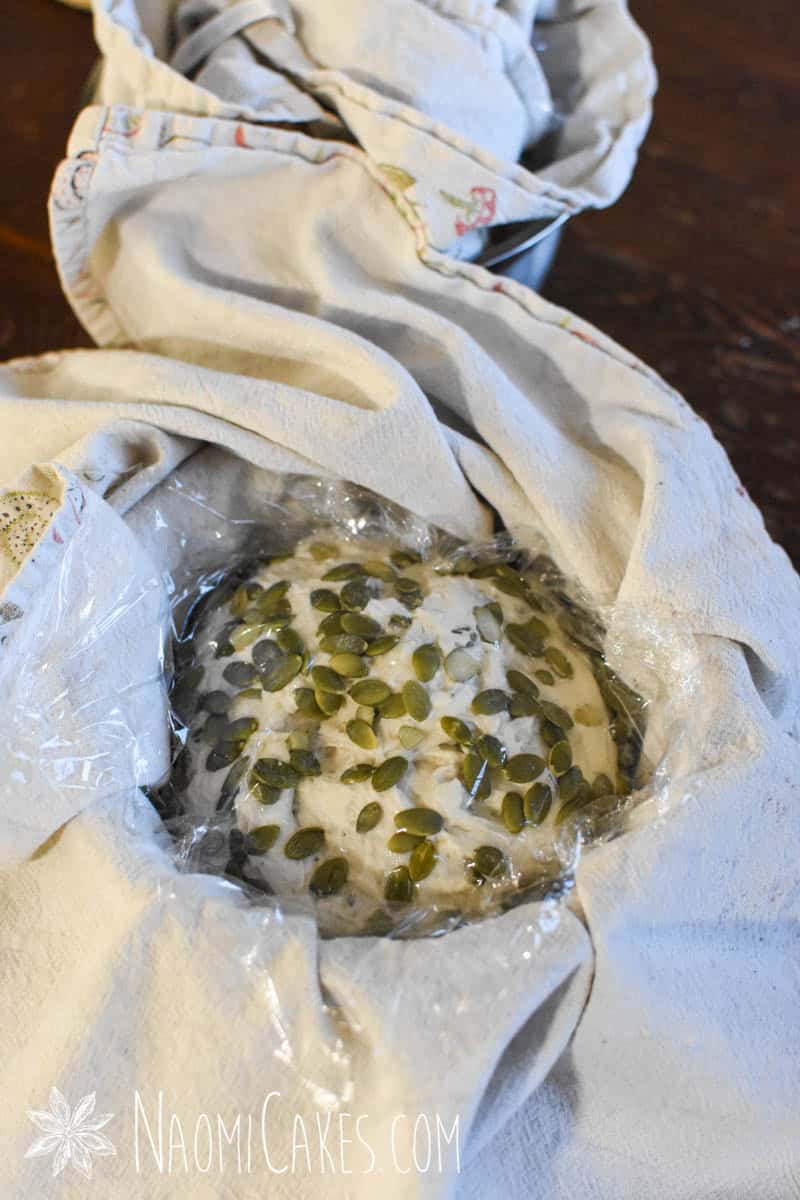
-
Sprinkle the tops with more pumpkin seeds, if desired, and cover with a bit of plastic wrap (optional). Fold the towel over top, and place the loaves immediately into the refrigerator. Allow to rest in the fridge until the next morning.
-
Bake the bread:
-
The next morning, place a dutch oven into a cold oven, and preheat to 425 degrees F. Set the timer for 15 minutes.
-
Uncover the bread and remove the plastic wrap. Turn out onto a sheet of parchment paper, and score with a sharp knife or razor blade (one or two slashes is good for this recipe).
-
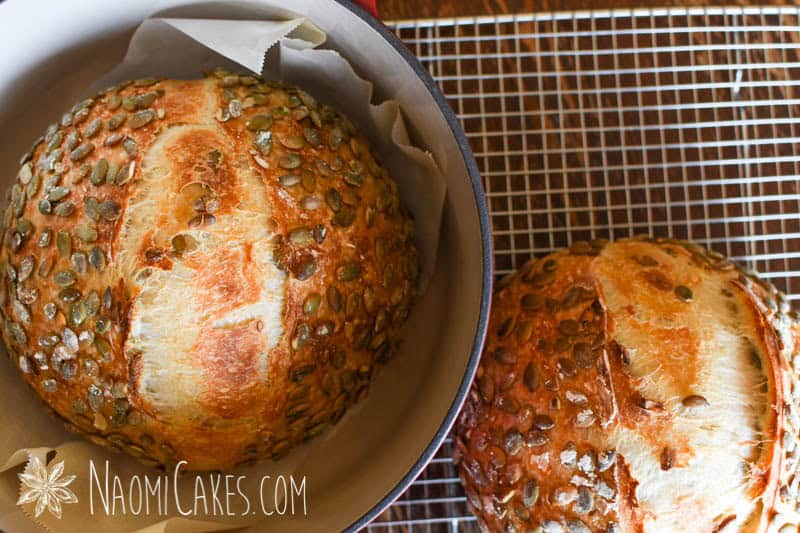
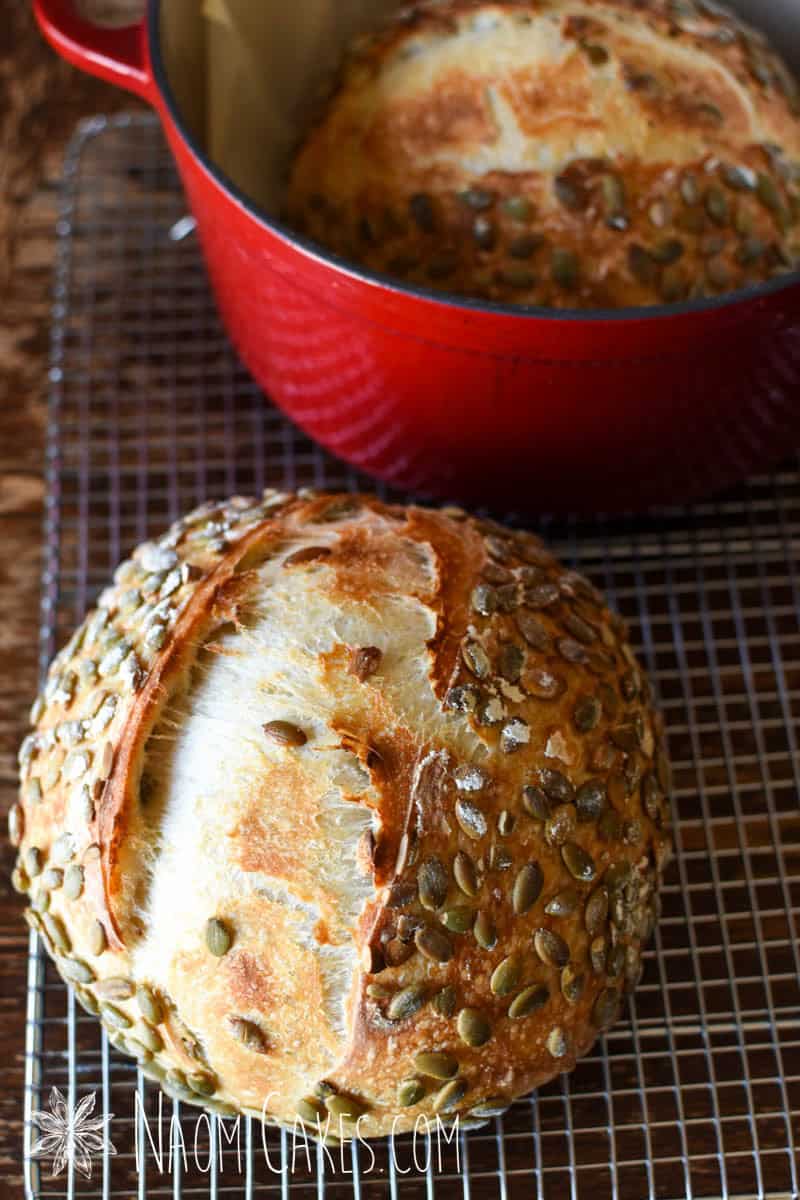
Once the dutch oven has been in the oven heating for 15 minutes, take it from the oven, remove the lid, and lift the bread into the hot dutch oven by the parchment paper sheet. Cover, and return to the oven for 35 minutes.
-
Remove the lid from the dutch oven, and allow the bread to bake 10 minutes more, just to brown it. Repeat with the second loaf, or save it for the next day to bake it fresh. Cool fresh bread on a wire rack. For best results, cool the bread completely before slicing into it.
Recipe Notes
*To use a bowl instead of a basket, the perfect size for these loaves is a bowl that measures about 7 inches across the top and about 4 inches deep.
Step-by-Step: How to Make Sourdough Pumpkin Seed Bread
First stretch and fold:
Second stretch and fold:
Third stretch and fold:
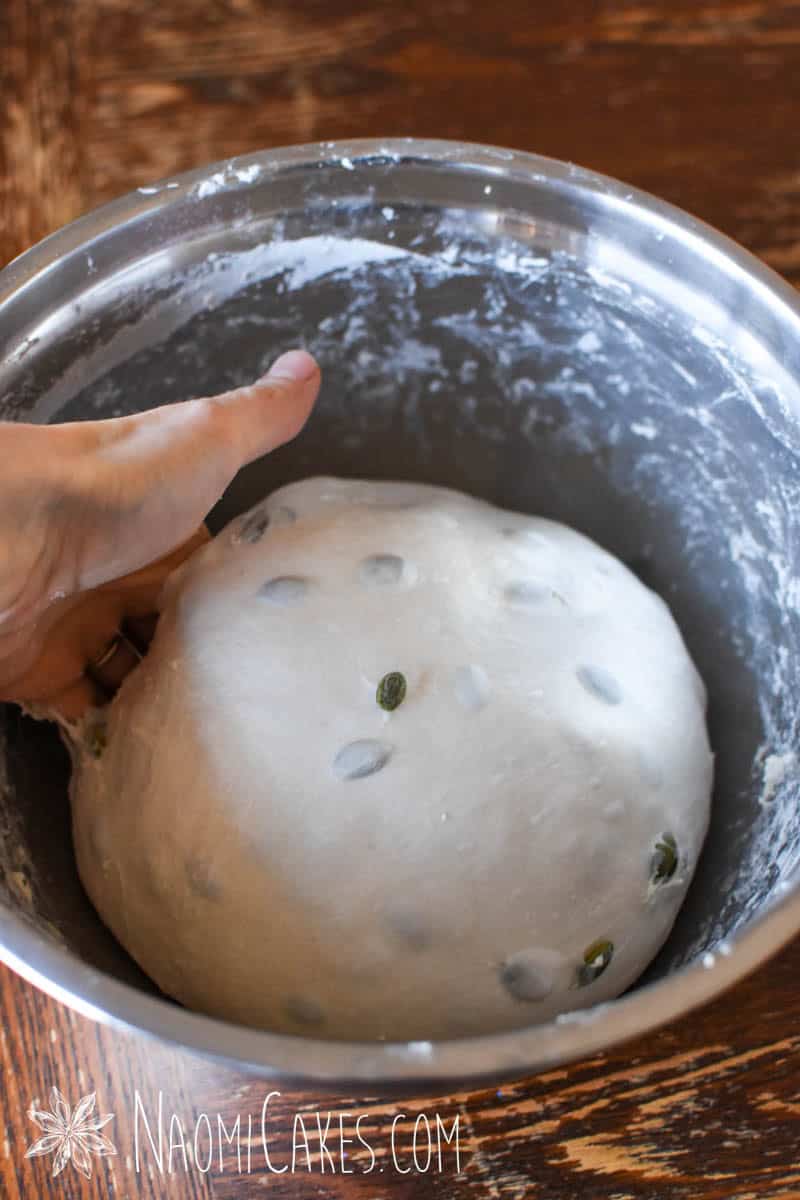
Bulk ferment:
Pre-Shape:
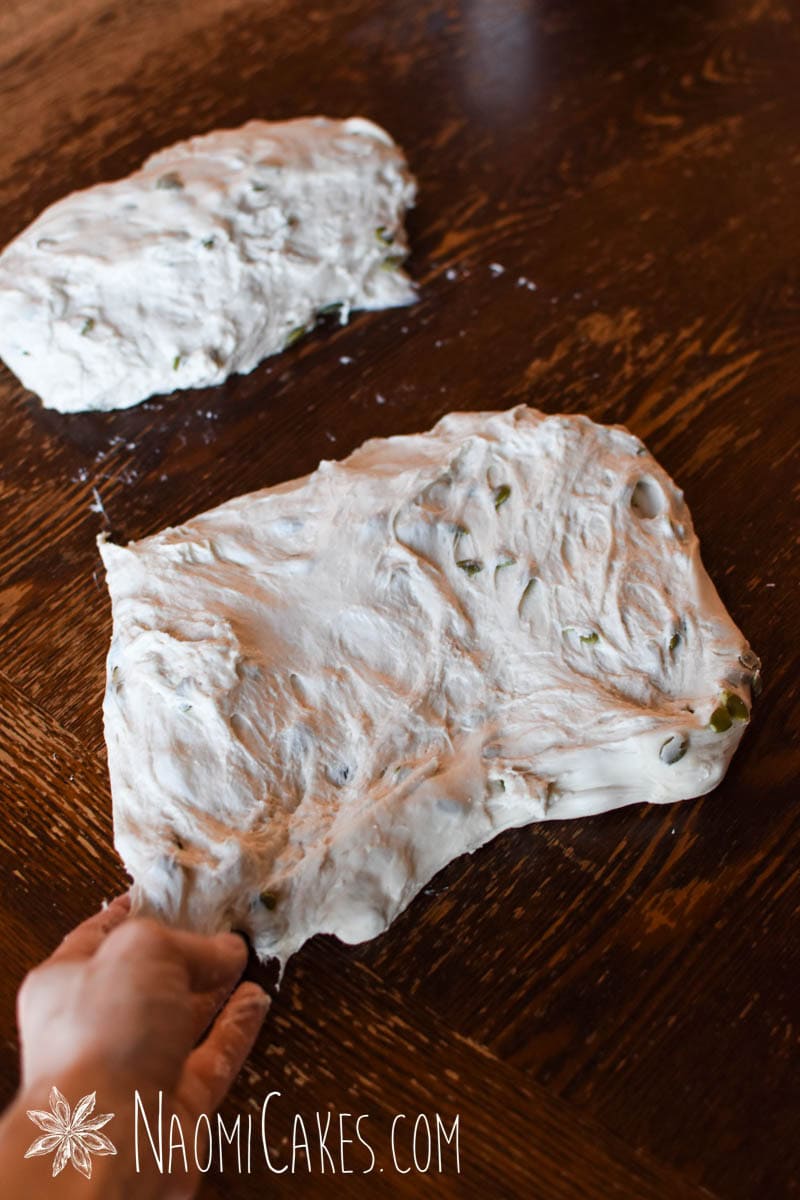

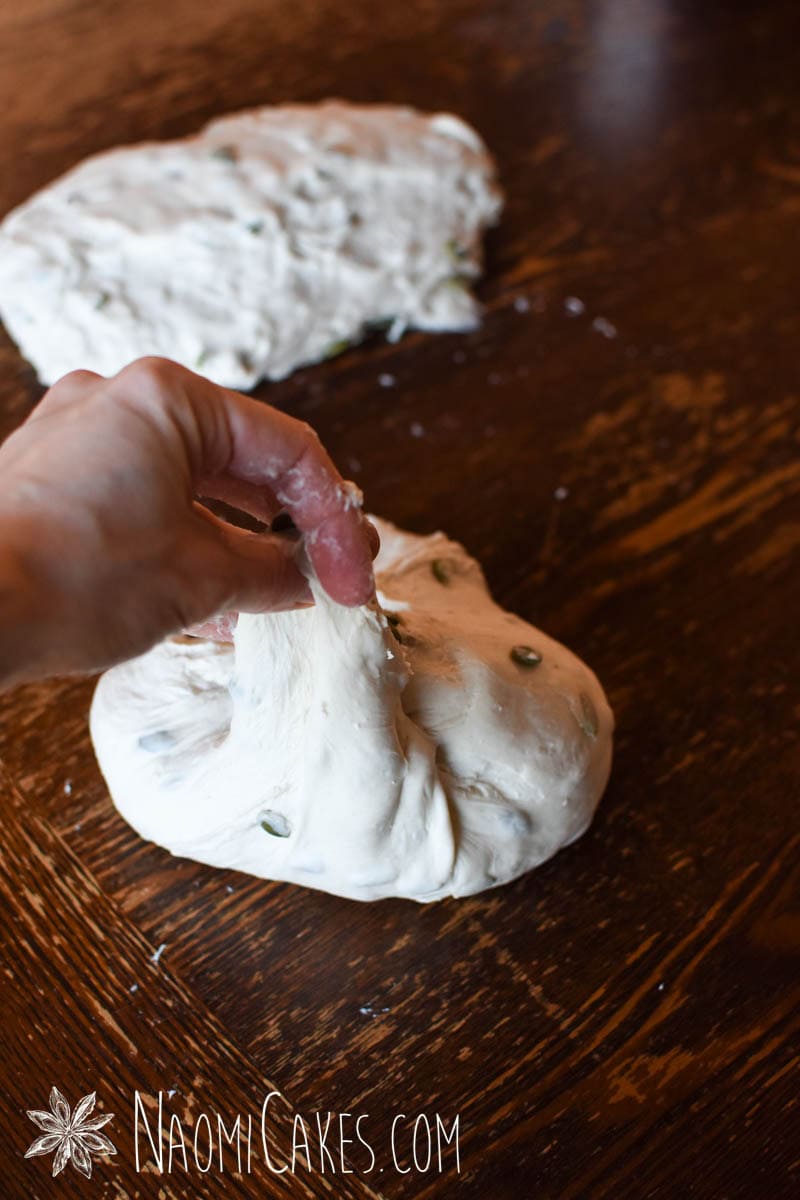
Shaping the bread:
Baking the bread:
If you like this recipe, you may also like:
- Easy No-Knead White Sourdough Bread
- Sun Dried Tomato and Cheese Sourdough Bread
- Sourdough Everything Bagels
- Simple Sourdough Crêpes
That’s all for today! If you like this recipe, make sure to leave me a comment below or tag me in your photos on Instagram @naomicakesofficial. I’d love to see your beautiful work!
Bye for now,
–Naomi
This post contains affiliate links.
Can roasted salted seeds be used?
Yes, for sure! I’ve used both with great success.