
How to Make Sourdough Starter from Scratch [Tutorial]
Ok my friend, it’s time: today’s the day that you learn how to make a homemade sourdough starter of your very own. I’ve done this now many, many times – and always with this method I find consistent, easy, and great success!
In this post, learn all about what a starter is, troubleshooting sourdough starter, and how to make one from start to finish! This simple sourdough starter recipe is all that you need to get you going on your bread baking journey.
In this post:
- What is sourdough starter?
- What is sourdough bread?
- How to make a successful sourdough starter
- How long does it take to make sourdough starter
- What to do with sourdough discard
- How to get a sourdough starter to rise in cold temperatures
- The best environment for making sourdough starter
- When is my sourdough starter ready to use?
- The “Float Test”
- There is a grey or brown liquid on top of my starter: is that normal?
- Do I have to use my starter every day?
- How to “Feed” your sourdough starter
- When you have too much starter: how to use it all and prevent waste
- Strategic feeding method for a large amount of starter
- Making sure you never run out
- Making a white sourdough starter
- How to revive a sluggish sourdough starter
- You will need
- Simple sourdough starter tutorial and step-by-step instructions
- Recipes to make with your new starter
What is sourdough starter?
Sourdough starter is an active culture created by a mixture of flour and water together and allowing them to ferment over time. The live culture that develops in a sourdough starter is sometimes called “wild yeast,” and it from this culture that sourdough bread is able to ferment, produce gas/air bubbles, and rise into beautiful loaves of bread.
This is the old-world traditional method for leavening bread, rather than the modern way of using commercial yeast to make your bread. Sourdough bread is a much longer process than using dry active or instant yeast.
What is sourdough bread?
Sourdough bread is an ancient process of making bread that involves using natural wild yeast (sourdough starter) instead of traditional or instant yeast. The starter culture in the bread allows the rest of the dough to become leavened over time, creating those beautiful artisan loaves of crusty, slightly tangy (or “sour”) homemade bread.
Sourdough bread has a depth of flavour that is unmatched by almost every other type of bread out there, and the process of making it is extremely rewarding. It’s true that it takes a long time to make bread by this method, but I am confident that you will appreciate the results of your effort!
How to make a successful sourdough starter
Having done this process many times at this point, here are some tips (and reasons!) that I’ve found help to make this process work out the best. Check out the tutorial at the bottom of this post for the details of how it’s done, but otherwise here are some helpful tips!
1. Use whole wheat or rye flour
I recommend using whole wheat flour because I have found that these two types of flour, for whatever reason, seem to yield consistently good results. You can apparently use all purpose flour as well, but since I have yet to make a really good starter that began that way, I recommend sticking with these more hardy flours.
Once you have created an established starter, you can easily switch to feeding it with unbleached white flour to create a white starter (I do this all the time).
2. Use a clean jar every time you feed it
During the initial process of catching a good starter, you want to keep it in a clean jar every time so that mould doesn’t have the opportunity to form, especially around the mouth of the jar.
3. Use filtered water
This part may or may not be necessary, but clean water from our taps can sometimes have a higher concentration of chlorine, which can kill live cultures in fermented foods. I have known some people to create great homemade starters with tap water, but just to be safe, I recommend going with clean filtered water (such as distilled water). Personally, I just use water from my Brita filter pitcher.
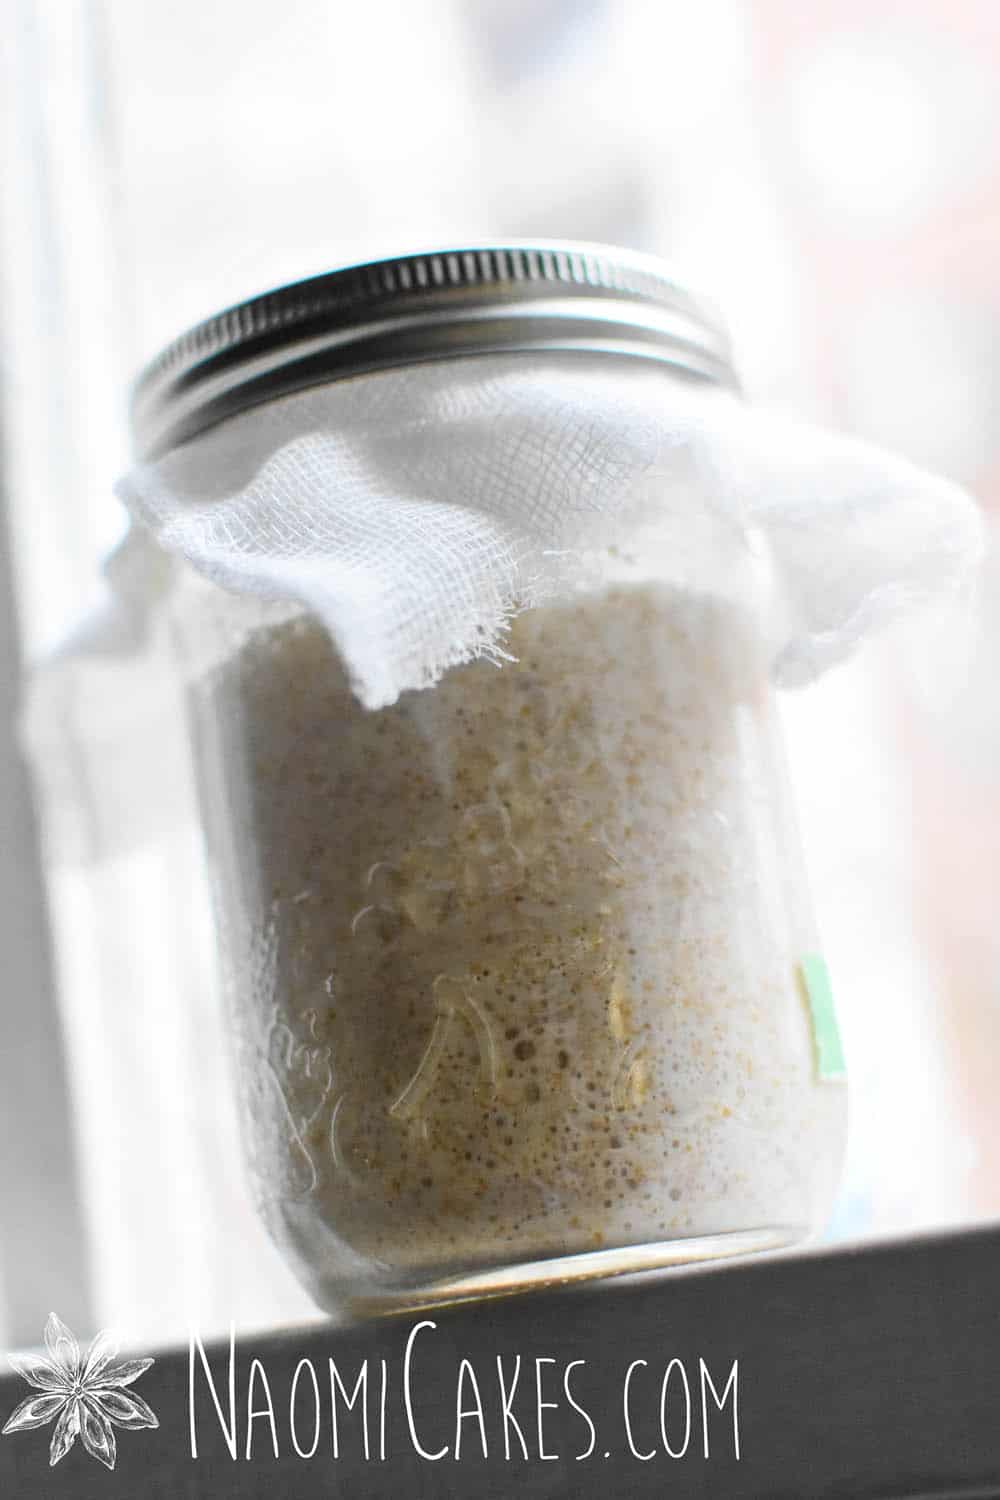
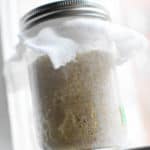
4. Use a loose fitting lid, or a mason jar lid ring with cheesecloth (as pictured in this post)
Using cheesecloth is also optional for this process, but a key part of catching a good starter is allowing some access to the air. There are a couple of reasons for this:
- The starter culture is actually caught (in part) from the air, so letting the starter breathe is a good way to get it going.
- As the starter begins to ferment and gases begin to expand inside of it (creating those beautiful air pockets), you will want to allow the gases to escape from the jar without building up inside of it.
How long does it take to make a sourdough starter?
You can usually make a sourdough starter from scratch for a few minutes a day for 7-14 days, depending on your environment and the type of flour you use. I find that my starters usually take off around days 9-10 of the starter making process.
What to do with sourdough discard
Sourdough discard is the name that describes sourdough starter that is dormant or extra starter that you’ve built up through the process of creating a sourdough starter. Some people will tell you to “Throw it away,” but there are so many great ways to use it! Use your sourdough discard to make sourdough crêpes, mock sourdough bread, waffles, pancakes, muffins… You name it. Go ahead and Google or look up “sourdough discard recipes” on Pinterest, and you’ll find plenty of great options!
How to get a sourdough starter to rise in cold temperatures
The first time I made sourdough starter was in an old, drafty apartment in the middle of a freezing Canadian winter. No matter how hard I tried, I could not seem to get the thing to rise!
After a little sleuthing, I learned that putting your starter on top of an appliance that produces a steady amount of warmth would help. My starter, after that, lived on top of my fridge all winter long – and there, I’m happy to report, it thrived!
The best environment for making sourdough starter
For optimal results making a sourdough starter, try letting your starter rest in a moderate room temperature environment or even in a warm place. Cold temperatures will slow the whole process down or maybe even halt it entirely!
Dry, moderate temperatures are the best for creating and maintaining a healthy sourdough starter.
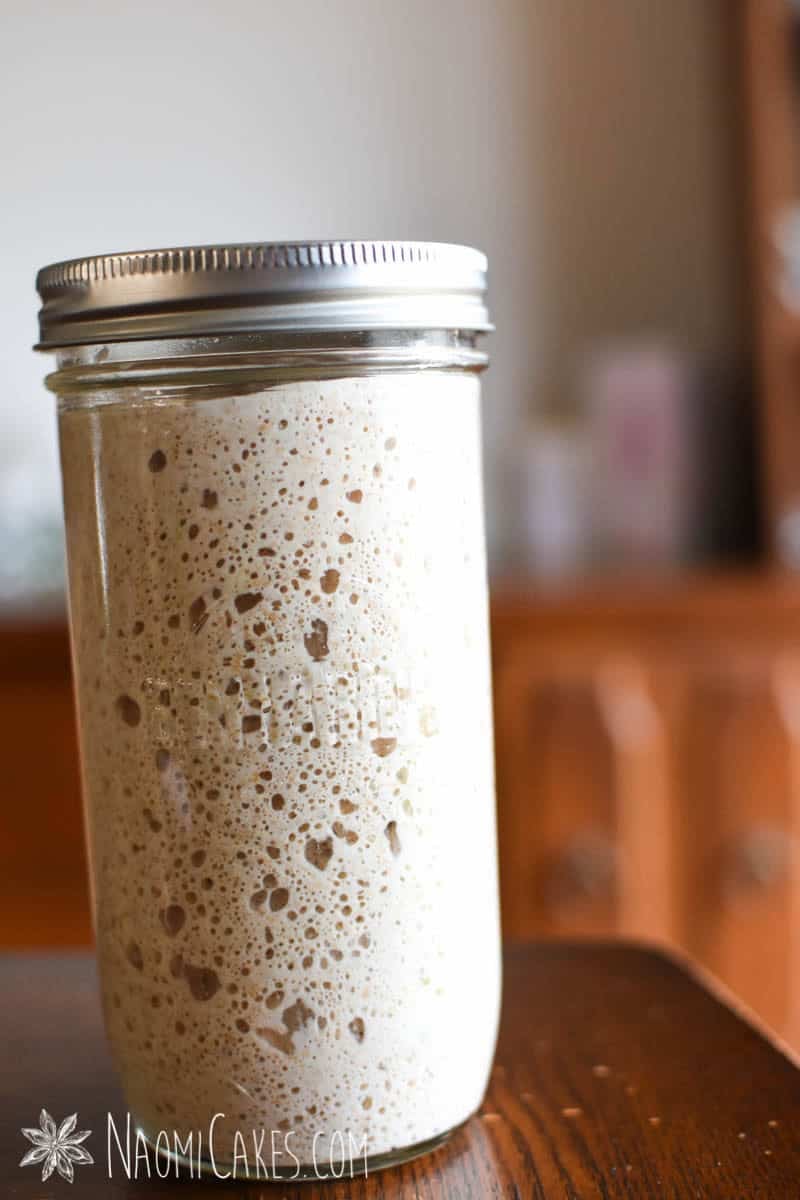
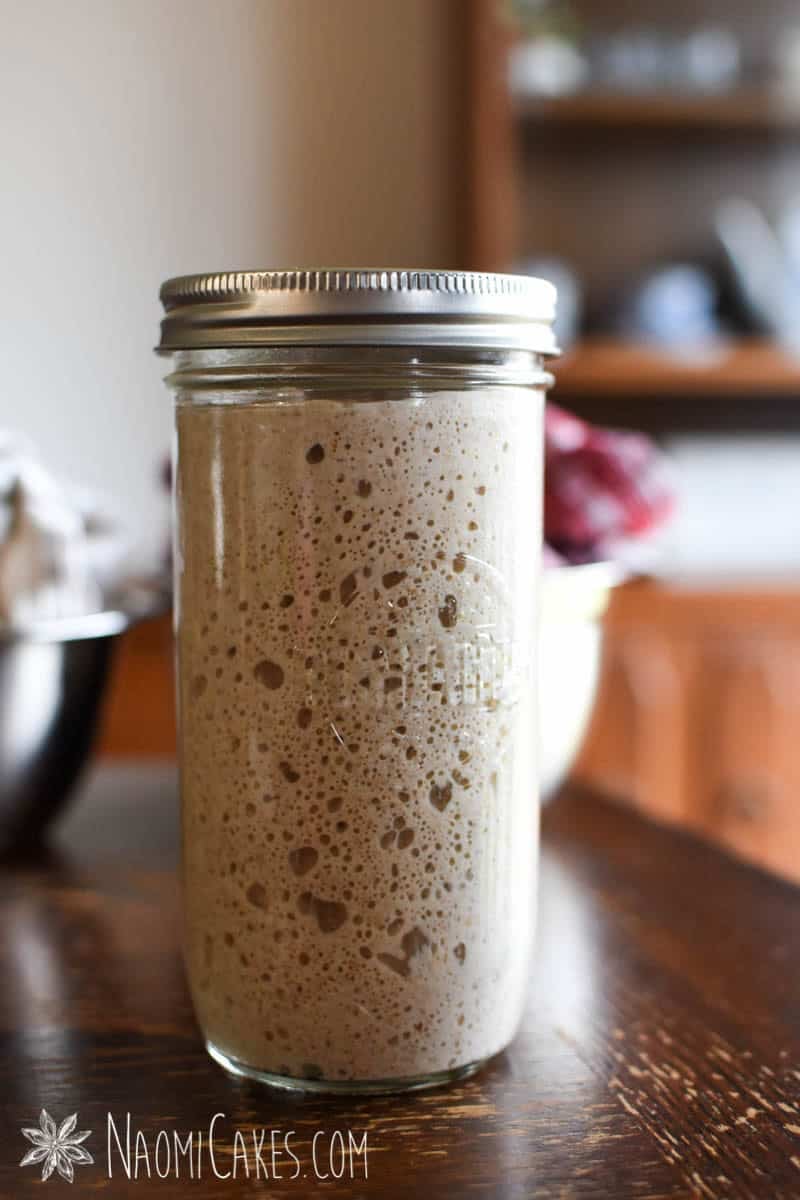
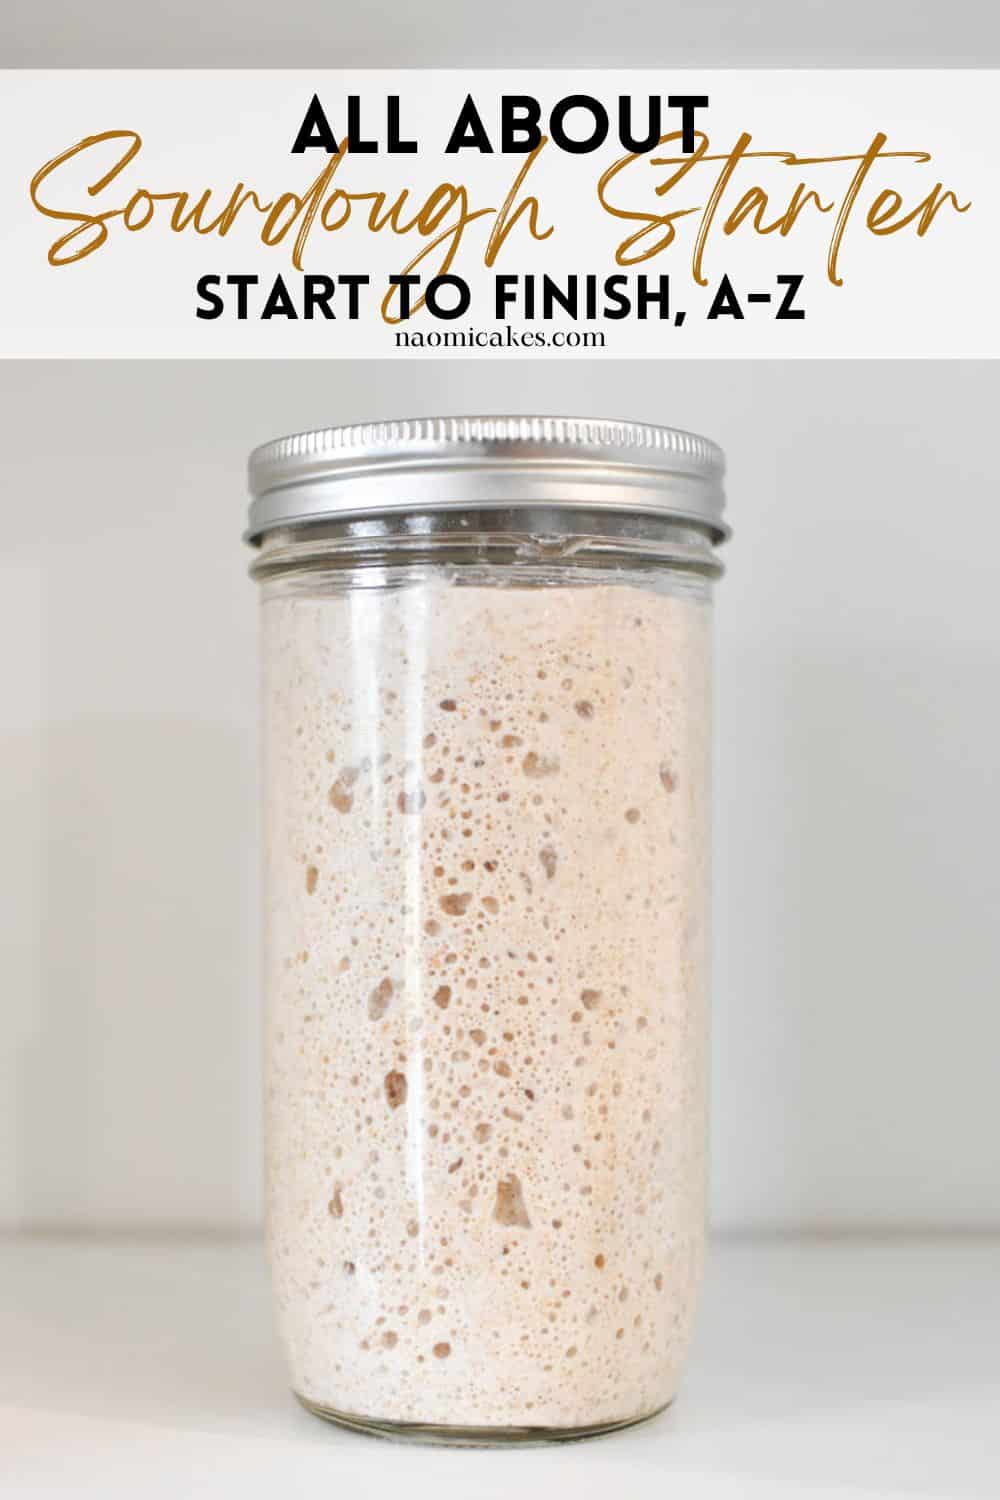
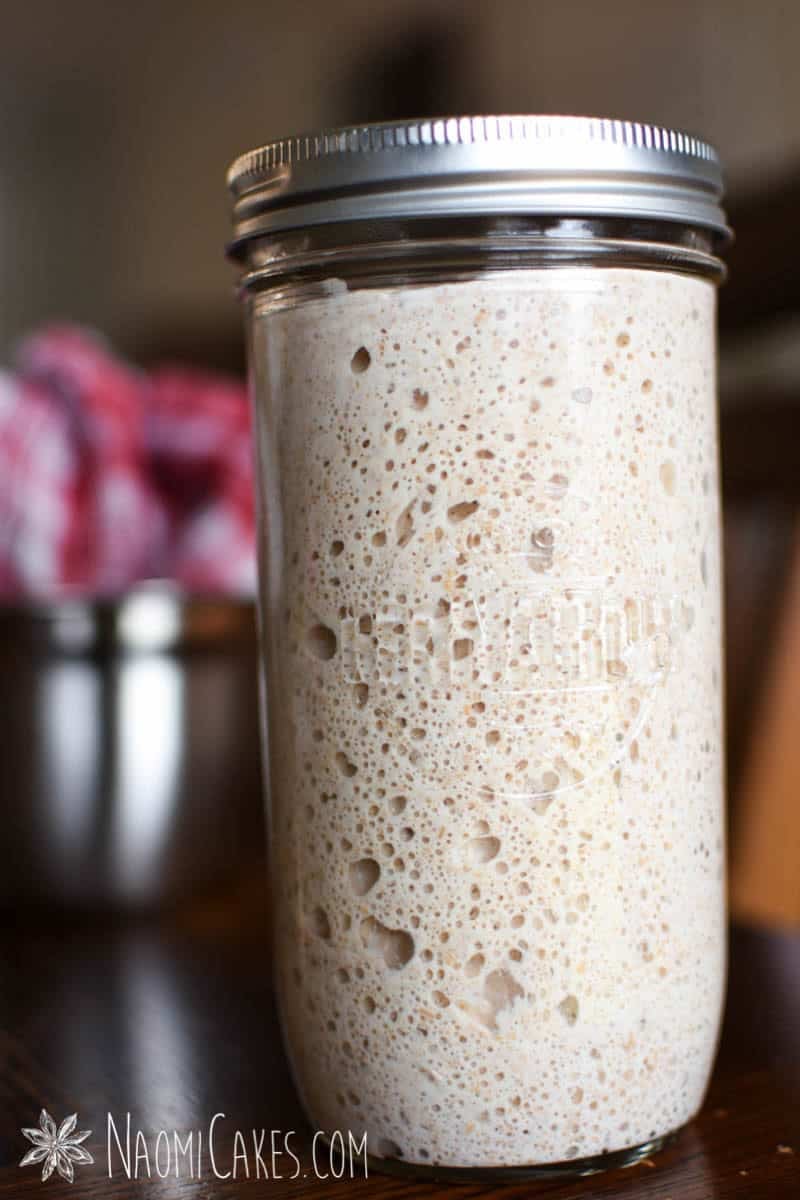
When is a sourdough starter ready to use?
A healthy starter should double or triple in volume 8-12 hours after you feed it. The time it takes to expand will vary depending on the age/health of your starter, temperature conditions, and humidity.
A great way to know for sure that your starter is ready to use is to use “The float test” (see below).
The float test
The float test is when you drop a little bit of fed, bubbly, active starter into a glass of water. If the starter floats to the top, it is ready to use! If it sinks to the bottom, it is not active enough to make a loaf of bread rise.*
*If your starter has risen quickly and fallen back down a little bit (ie, you can see the evidence of a risen and fallen starter in your bowl or jar), and it does not pass the float test but still looks healthy and bubbly, it may still be ok to use for making bread. I have done this with great success in the past, when I’ve known that my starter is active and healthy, and I performed the float test maybe an hour or two after the starter had begun to collapse.
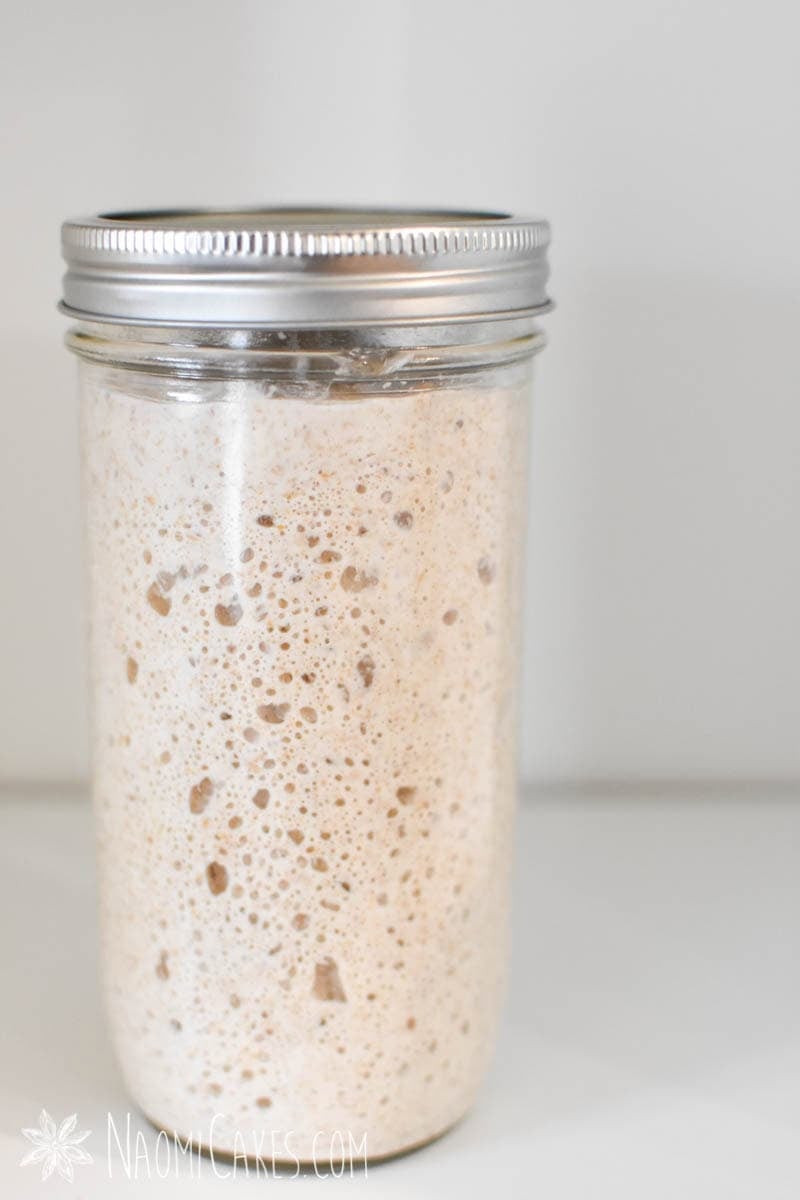
There is a grey or brown liquid on top of my starter: is that normal?
After using your starter, you should either feed it again or keep it in the fridge to prevent bad bacteria/mould from forming. While the starter remains unused in the fridge, it will begin to separate, and often the liquid that forms on top will become grey or brown in colour.
This is called “Hooch” and it is very normal. You can stir that back into your starter or pour it off the top and resume feeding it as normal.
Do I have to use my starter every day?
No. If you want to bake with it every day, then by all means you can; however, if you’re just baking for your own family then you likely won’t need to use it more than 1 or 2 times a week.
I like to keep my starter in the fridge all the time, and then just pull it out and feed it the night before I want to make my dough.
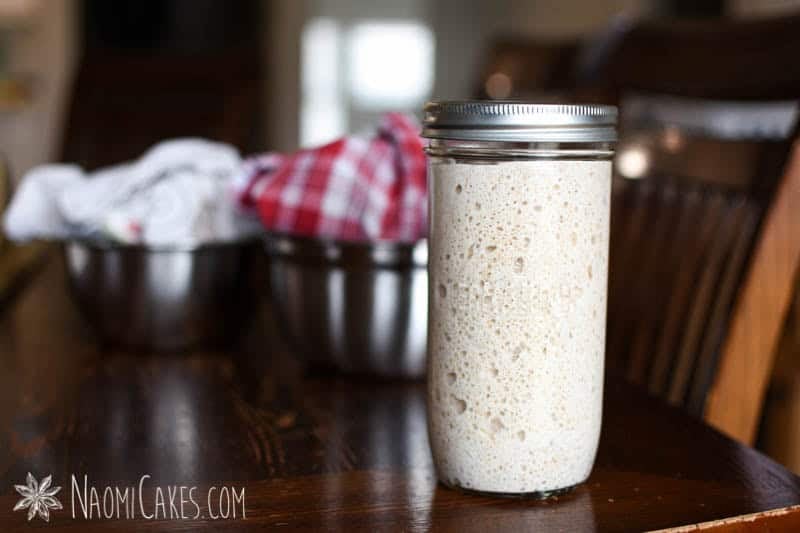
How to “Feed” your sourdough starter
Every time you feed your sourdough starter, you will stir together equal weights of starter, flour, and water. This means that its volume will triple every time you feed it.
I like to always have a little bit (ideally at least about 50-70 grams) leftover to feed for the next time I want to bake.
When you have too much starter: how to use it all and prevent waste
One thing that you will find quickly with making sourdough starter is that it multiplies – and quickly! While it’s true that you never want to run out of sourdough starter, you also don’t want to accumulate too much.
You can use excess starter to make sourdough discard recipes (such as sourdough crêpes or mock sourdough bread), or you can just be strategic about how you use and feed your starter so that it never gets out of hand.
Strategic feeding method for a large amount of starter
If I have a lot of starter in the fridge and want to start using it up, I only feed enough from that large amount that I can use all of my activated starter (fed starter) in one go (leaving a little bit still in the fridge for next time).
As an example, if a recipe calls for 150g of active sourdough starter, I make sure to only feed 50g of my existing starter (provided that I have at least 50g leftover for next time). This way the amount I have activated is exactly 3x50g (50g water, 50g flour, 50g starter = 150g), and I can use it all for my recipe.
Making sure you never run out
As I mentioned before, you never want to run out of starter completely. After all, it takes quite a while to make, and you want it to be able to mature over time!
To make sure I always have enough to keep, I try to make sure that there’s always a little bit more than I need for one baking day in the fridge. For example, if I only have about 70g of starter left in my jar in the fridge, I might feed it all, weigh out my 150g for my recipe, and then return the rest of the starter to the fridge for my next baking day.
Keeping some starter around for next time will ensure that your starter gets more and more mature over time (making better and better loaves of bread). Additionally, keeping some around means that you may never have to start the process of getting a new starter going over again!
Making a white sourdough starter
While it’s true that this recipe calls for whole wheat flour, this starter doesn’t have to be a whole wheat starter.
Once your starter is established, you can switch from feeding it with whole wheat flour to white bread flour or all purpose flour. I just recommend, if you wish to do this, that you use unbleached or organic white flour to feed your starter, as bleached flour can impact the life and health of your starter culture.
How to revive a sluggish sourdough starter
If you have a starter that seems to have lost its zest for living, you can revive it by giving it its favorite meal: whole wheat or rye flour! I find that this happens to me most often if I have been feeding my starter with all purpose flour.
I know there are many different ways that people recommend getting a sluggish starter to come alive again (including adding a different/larger amount of flour, feeding the starter more often, or adding something like caraway seed), but I have honestly found just a richer, heartier flour (like whole wheat or rye) to work well every time getting my starter back to business.
Another good thing for making your starter happy again is to make sure that your starter’s environment is good (you’re letting it rest in a warm place) and that your jars or containers for holding it are clean and void of soap residue.
I also find that a sluggish starter may need a few feeds to get back to a really lively state, so be patient. Give your starter a couple of days to get back on its feet.
To make a sourdough starter, you will need:
- Whole wheat flour or rye flour
- Filtered water
- Kitchen scale or measuring cups
- Mason jars (I used pint jars and quart jars for this tutorial)
- Cheesecloth (optional)
- Painter’s tape or a rubber band, to see how far your starter has risen
- Spoon or chopstick to stir the starter
Simple Sourdough Starter
My foolproof method for making an active sourdough starter!
Ingredients
- Whole wheat flour
- Filtered water
Instructions
Day 1
-
In a clean mason jar (I used a pint jar to start), measure 50g whole wheat flour and 50g water into the base, and stir them together. Put the lid on, but don’t tighten the seal – leave it nice and loose.
Day 2
-
“Feed” the starter with another 50g flour and 50g water, stir till combined, and replace the lid as before.
Day 3
-
Spoon 50g of the mixture into a clean pint jar, and add another 50g flour and 50g water, stirring them together. Replace the loose fitting lid as before. Discard the excess starter, or save it in the fridge to make sourdough crêpes or some other delicious wonder later!
Days 4 & 5
-
Repeat as on Day 3.
Day 6
-
Spoon 50g of the mixture into a clean quart jar, and add another 50g flour and 50g water, and stir them together. Replace the lid as before, and discard the excess starter.
Day 7
-
Again, repeat the directions as on Day 6, using a clean jar every day.
Day 8+
-
Then, every day ever after… Keep repeating this process (as on Day 6), unless you want to take a break for a while. After that you can put the starter in the fridge, and try to feed it once a week to keep it alive.
-
Between day 7 and day 9, you should notice that the mixture begins to double and triple in volume inside of the jar. To test if it’s ready to make bread, spoon a little bit into some water. If the mixture floats, it’s ready!
Recipe Notes
You can mark the outside of your jar at the level of your freshly fed starter with painter’s tape or a rubber band so that you can easily see how much your starter has risen each day.
Simple Sourdough Starter
To get the best results making your own sourdough starter, you will need to mix equal parts of water and flour together repeatedly over the course of 7-10 days. Here’s the breakdown of how you should go about this process to begin your sourdough journey, with detailed instructions day-by-day, explaining how to begin the starter that makes the fermentation process possible.
Sourdough starter is made with a feeding ratio of 1:1 by weight (50 grams water and 50 grams flour), or 1/3 cup of flour to 1/4 cup of water by cup. Making a starter by weight is my preference, but I have also made it with cups having great success as well.
Note: If you want to see photos of this process step-by-step and day-by-day, you can check out my sourdough Instagram story @naomicakesofficial.
Step-by-Step Instructions:
Day 1:
In a clean mason jar (I used a pint jar to start), measure 50g whole wheat flour (1/3 c.) and 50g water (1/4 c.) into the base, and stir them together. Put the lid on, but don’t tighten the seal – leave it nice and loose. Allow it to rest in a warm spot (or at least, at room temperature).
Day 2:
“Feed” the starter with another 50g flour and 50g water, stir till combined, and replace the lid as before.
Day 3:
Spoon 50g of the mixture into a clean pint jar, and add another 50g flour and 50g water, stirring them together. Replace the loose fitting lid as before. Discard the excess starter, or save it in the fridge to make sourdough crêpes or some other delicious wonder later!
Days 4 & 5:
Repeat as on Day 3.
Day 6:
Spoon 50g of the mixture into a clean quart jar, and add another 50g flour and 50g water, and stir them together. Replace the lid as before, and discard the excess starter.
Day 7:
Again, repeat the directions as on Day 6, using a clean jar every day.
Then, every day ever after… Keep repeating this process (as on Day 6), unless you want to take a break for a while. After that you can put the starter in the fridge, and try to feed it once a week to keep it alive.
Between day 7 and day 9, you should notice that the mixture begins to double and triple in volume inside of the jar. To test if it’s ready to make bread, spoon a little bit into some water. If the mixture floats, it’s ready!
Note
You can mark the outside of your jar at the level of your freshly fed starter with painter’s tape or a rubber band so that you can easily see how much your starter has risen each day.
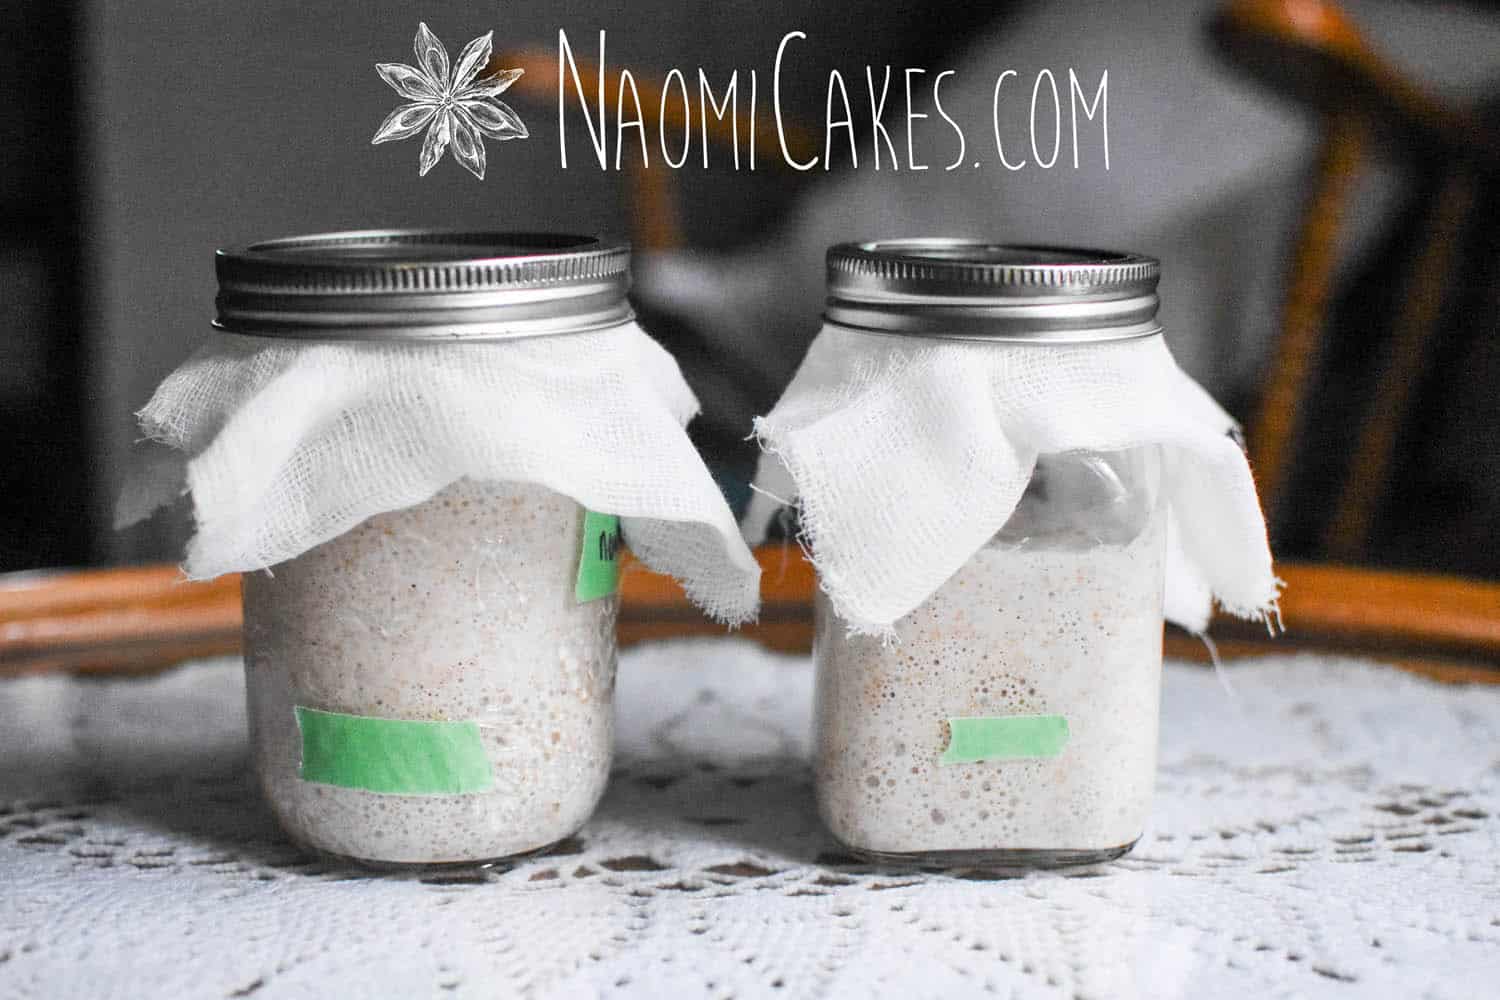
You can see that I used cheesecloth and a lid for each jar in these photos. This is just a way of ensuring that the gases can escape from the jars as the starter develops. If you use a clean mason jar and a tight fitting lid, this step is not necessary for catching a good starter.
Recipes to make with your new starter:
There are a million recipes out there for sourdough everything – from sourdough bread to sourdough pancakes to sourdough cakes and cookies… you name it! Once you have an active starter, the world is your oyster with what you can make. Here are a few of my favorites for you to check out:
- Easy No-Knead White Sourdough Bread
- Sourdough Montreal Style Bagels
- Sourdough Dark Rye Pumpkinseed Rolls
- Simple Sourdough Crêpes
I hope this helps you! Let me know how your sourdough starter journey is going, and feel free to ask questions in the comments below! I’m happy to help if I can!
Bye for now,
Naomi
This post contains affiliate links.
4 Comments