
Easy Natural Christmas Ornaments [DIY Tutorial]
Last week I showed you all how to dry oranges in the oven, and now I’m going to share a tutorial for these natural Christmas ornaments, featuring dried oranges and cinnamon.
If you’re looking to the perfect DIY ornaments to make this holiday season, I think you’ll find that this tutorial is just the thing!
Using natural materials to decorate for Christmas
If you love the old fashioned Christmas look, natural items and materials are a great way to make the Christmas season take on a vintage feel and theme. Using sustainable materials to make Christmas ornaments is one of the best ways to bring the beauty of nature into your home.
You can make your own Christmas decorations with pine cones, cranberries, popcorn, tin, clay (or salt dough), wood, and other natural elements. I also love incorporating spices like star anise, cinnamon, whole cloves, and oranges or clementines for their beautiful look and incredible smell.
My own Christmas theme
My personal Christmas tree is sort of a blend of the natural/wooden/homemade look and the sparkly/magical look. I always find myself especially drawn to the more rustic styles for decor, and these beautiful ornaments are a perfect way to bring some of that into my home!
If you are like me, I hope you enjoy this natural Christmas ornament tutorial. If you have some other favorite natural items to use for your own Christmas decor, make sure you drop a note for me in the comments – I’d love to gather some inspiration from you as well!
A fun project to make with kids
This is a really fun project to do on your own or with kids, if they are old enough to tie knots and follow directions!
My little ones are not quite at that skill level yet, so they just watched me work on these… and then smelled them with me, since they smell like Christmas, all bundled up in a neat little package.
If your kids are a little older, this is a really simple way to make Christmas tree ornaments as a family for one of those easy DIY projects that brings the family together.
Tips for making your own natural Christmas decorations
I recommend reading through the directions first, and then batch working. Cut all of your embroidery thread and ribbons ahead of time, arrange your supplies on the table in front of you, and then start putting these together!
Make these ornaments on a cold night with a lit candle, a cup of hot apple cider or hot chocolate, and a friend or family member. Also, feel free to change things up; use your creativity to create whatever fun variations of this tutorial you can dream up!
Other natural elements to incorporate into these ornaments:
These ornaments are simple to make, and could be easily added to without making them too much more complicated. Elements to consider substituting or adding to these ornaments would be:
- Raffia or twine (instead of ribbon)
- Star anise (in addition to the oranges)
If you have more ideas than these, let me know down in the comments – I love to hear the creative ideas you guys come up with!
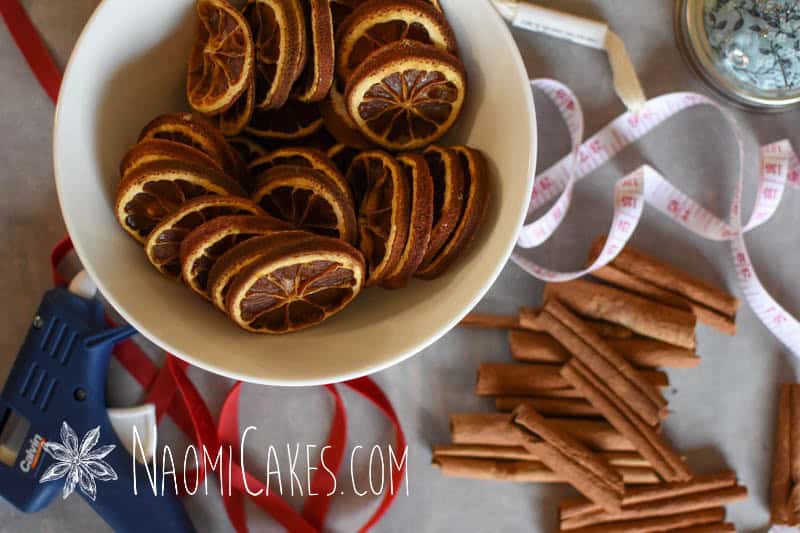
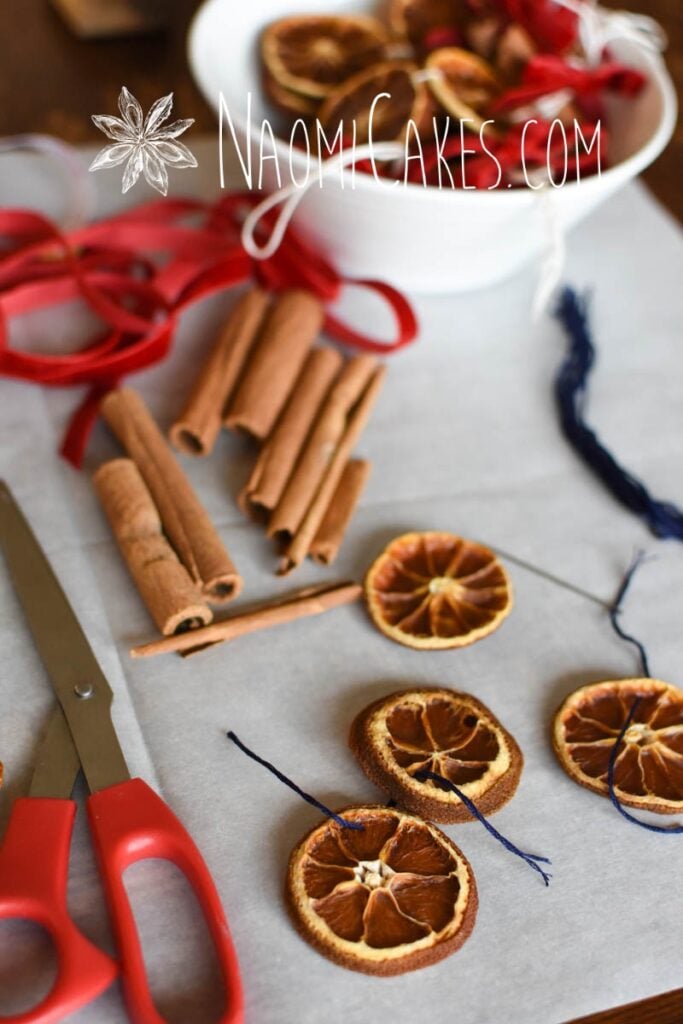
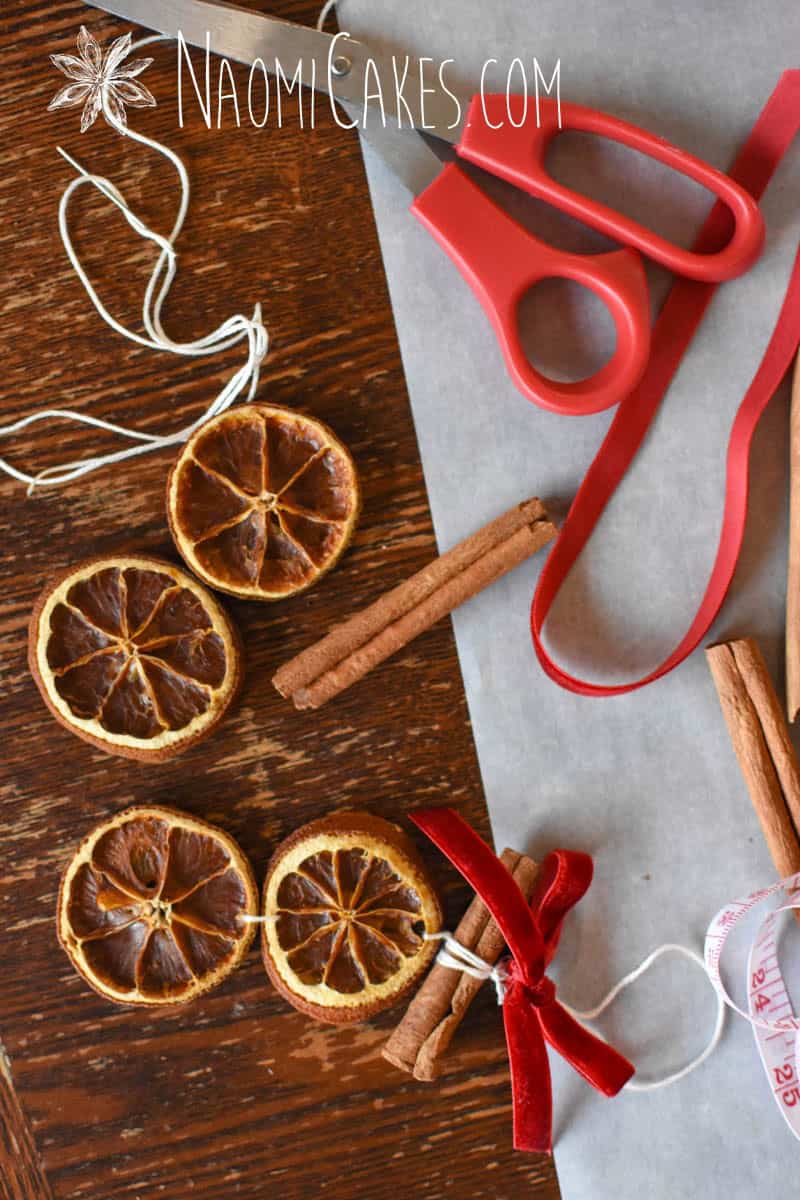
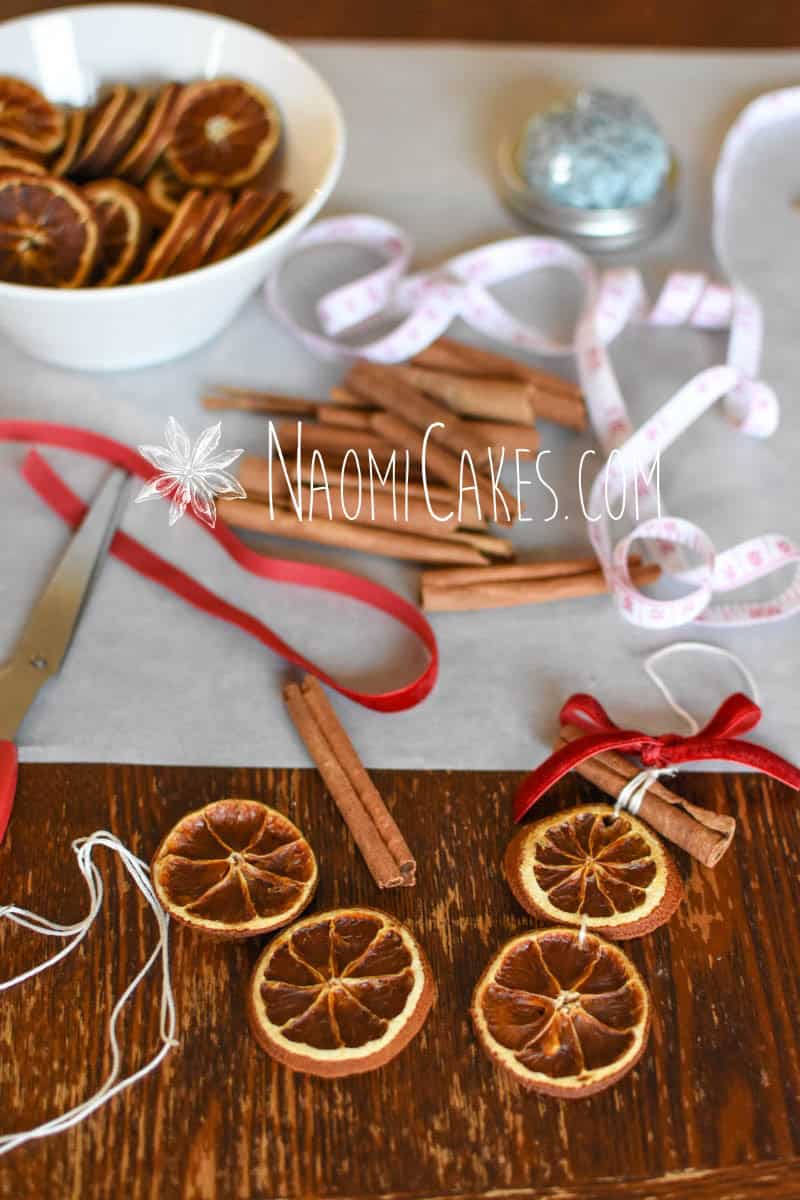
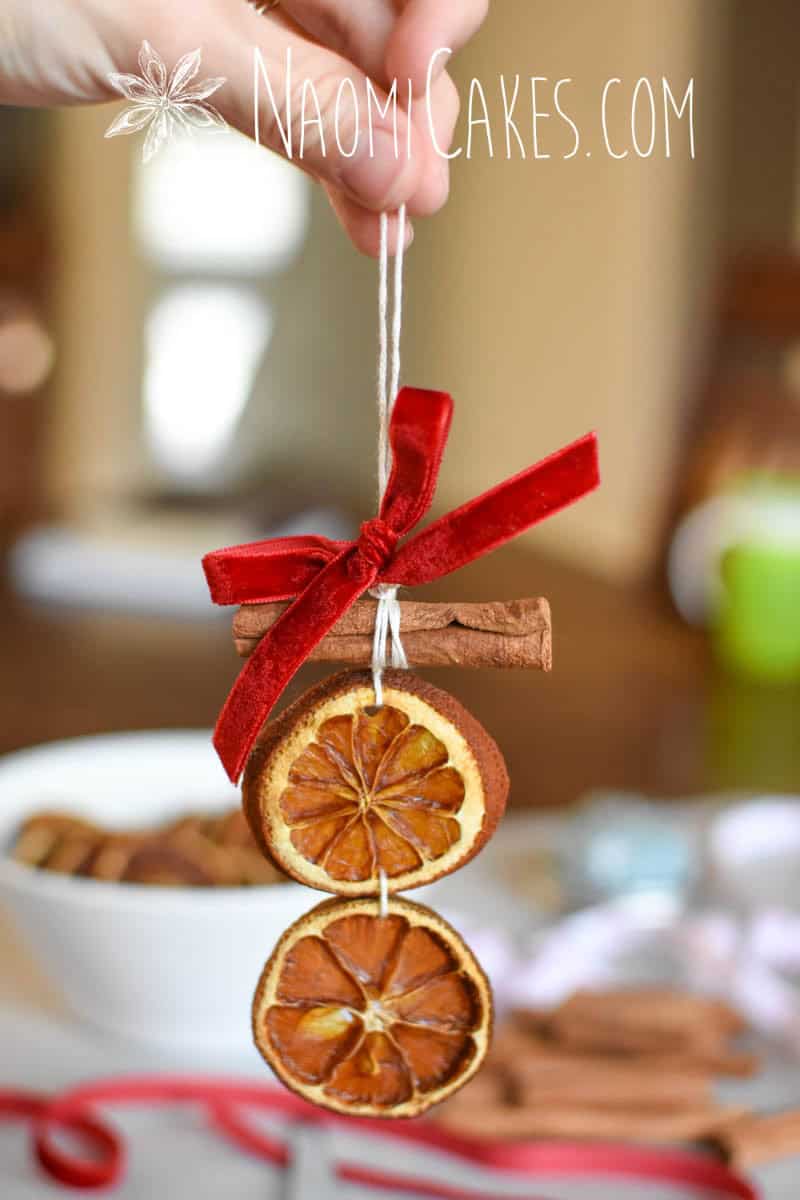
You will need:
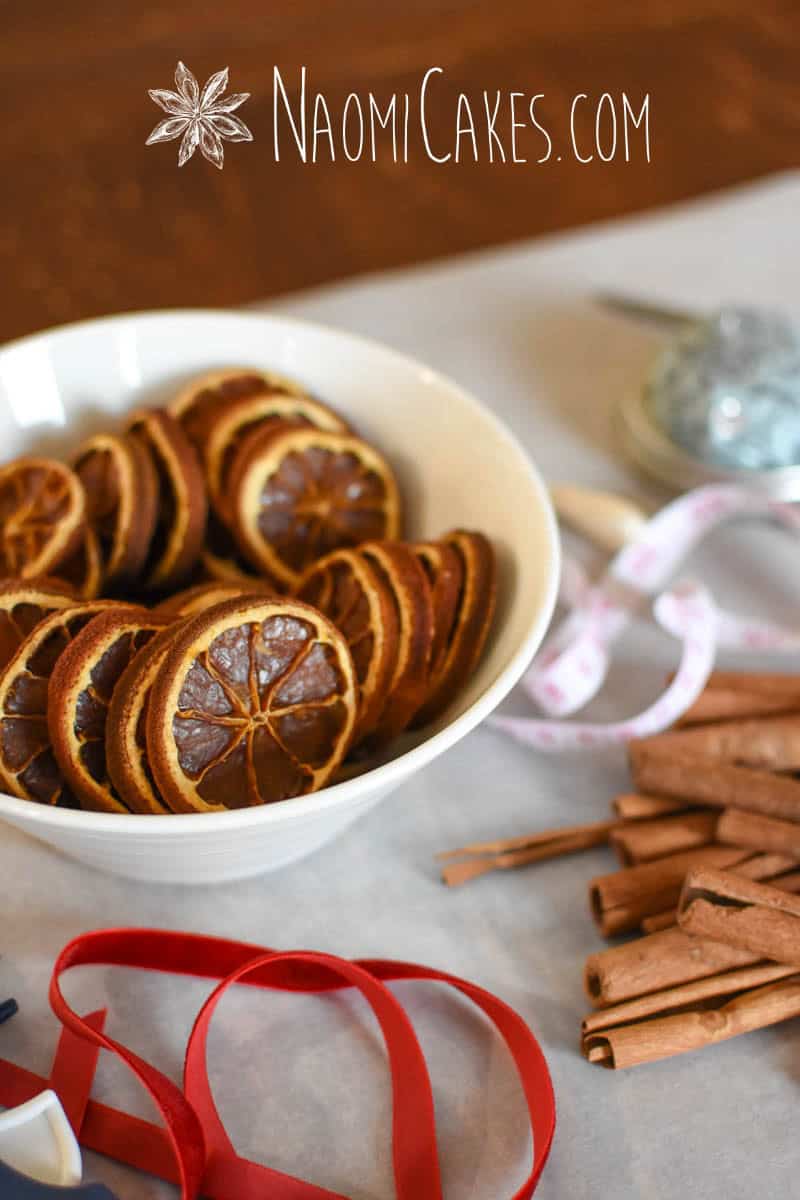
- Dried orange slices
- Cinnamon sticks
- Cream or coloured embroidery thread
- Embroidery needle
- Red ribbon (I used a velvet ribbon for mine)
- Scissors
- Measuring tape
- Glue gun (optional)
(Make sure to scroll past the printable tutorial card to see step-by-step images with the instructions!)

How to Make Natural Christmas Ornaments with Dried Oranges and Cinnamon
A simple tutorial for making handmade natural Christmas ornaments with dried oranges and cinnamon. Perfect for an old-fashioned Christmas!
Ingredients
- Dried orange slices
- Cinnamon sticks
- Cream or coloured embroidery thread
- Embroidery needle
- Red ribbon I used a velvet ribbon for mine
- Scissors
- Measuring tape
- Glue gun optional
Instructions
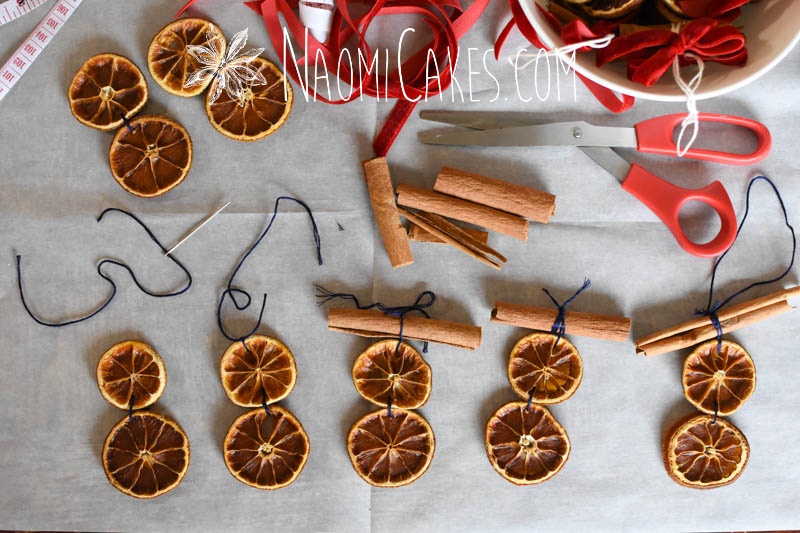
Step 1: Arrange the oranges and prepare the cinnamon
-
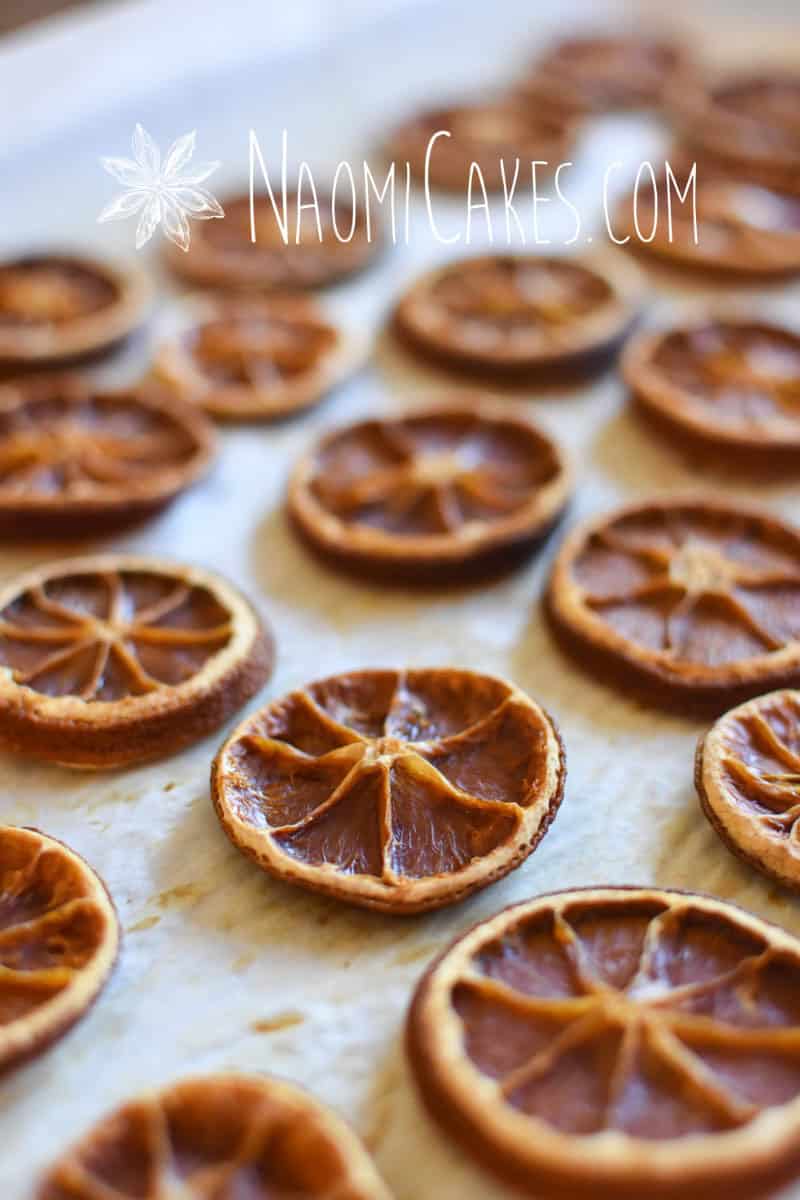
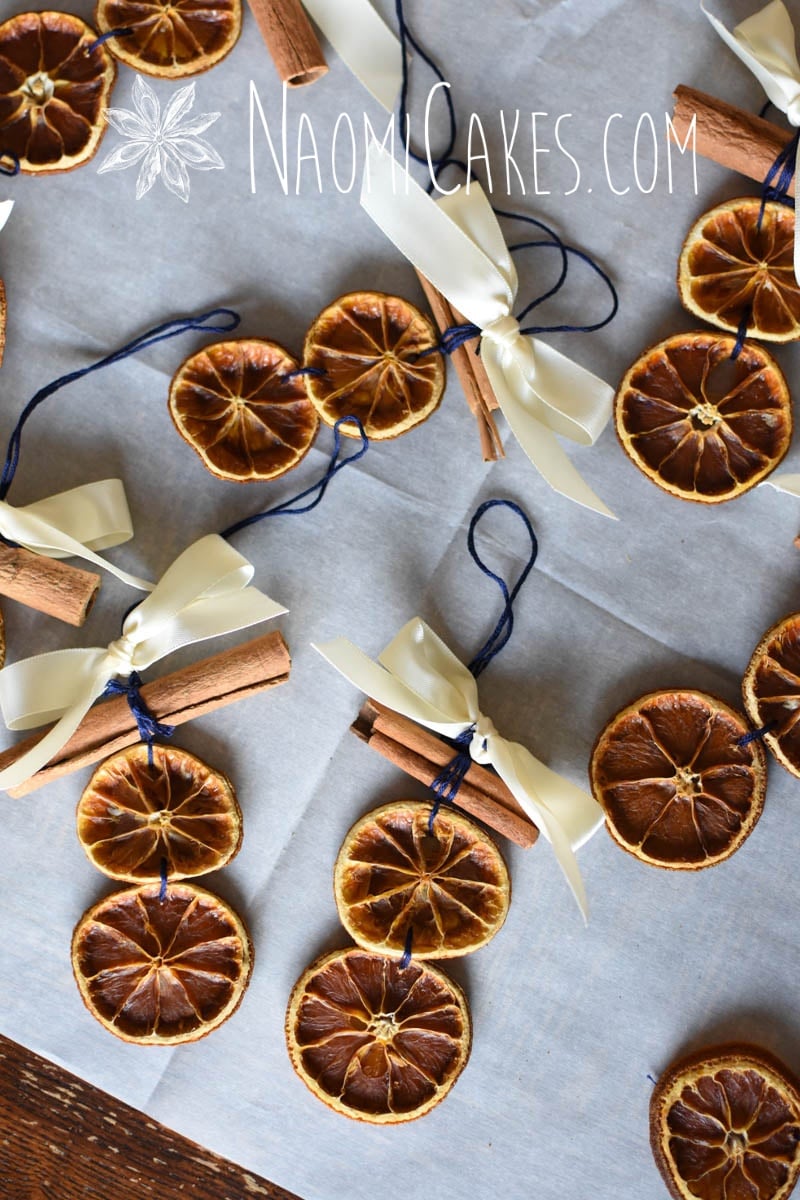
Arrange the orange slices by size. I like to use the a smaller slice one on top, and then a larger one on the bottom for each ornament.
-
Break enough cinnamon sticks in half to accommodate each 2-orange slice ornament with one half-piece of cinnamon.
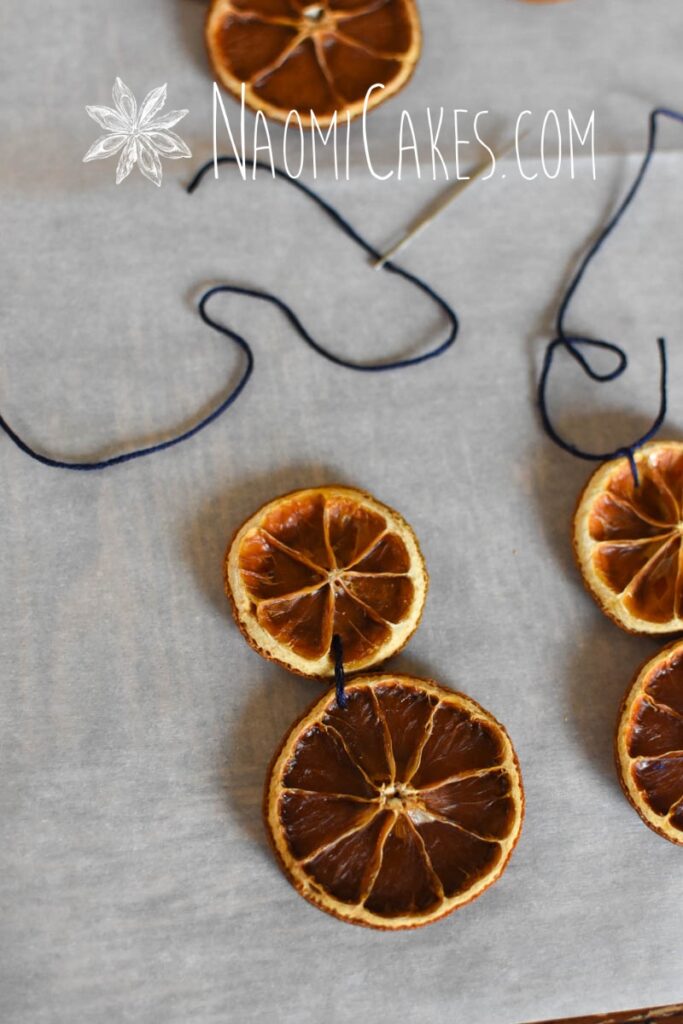
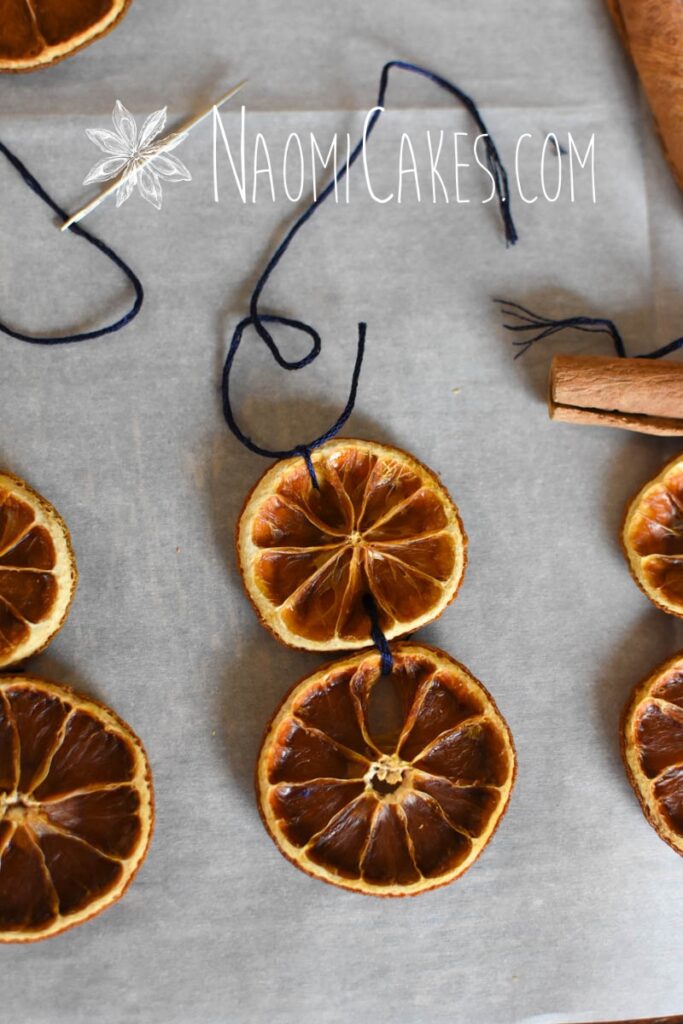
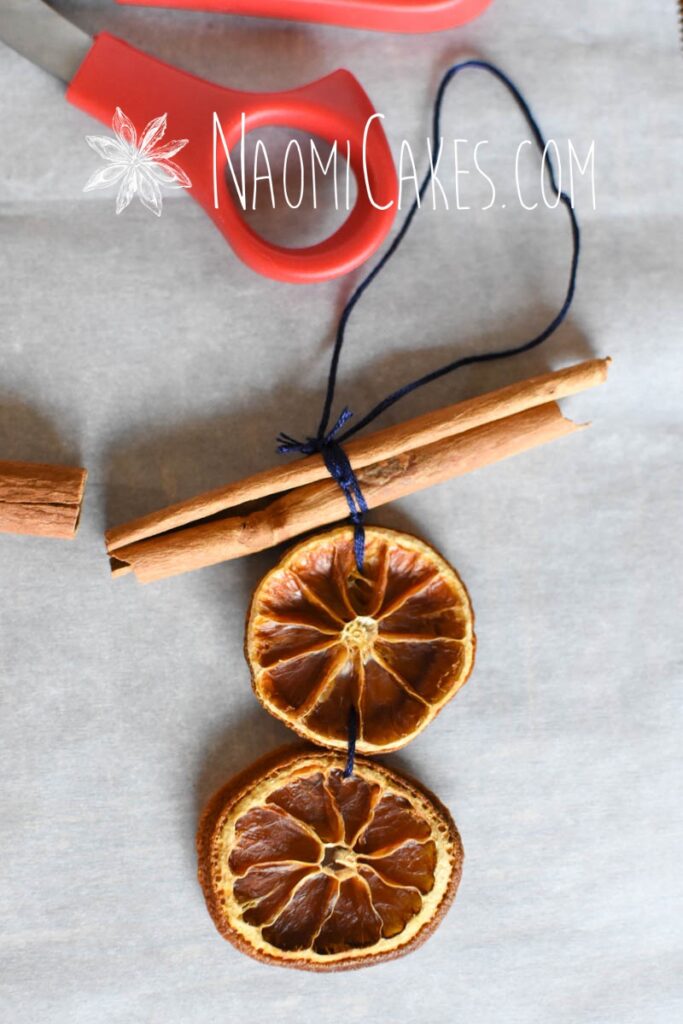
Step 2: Bind the oranges together
-
Thread your embroidery needle with a 4"-6" length of embroidery thread, and poke the needle through the top of the large (bottom) orange slice and loop it around to come through the bottom of the small (top) orange slice.
-
Remove the needle, tie a double knot, and cut the excess string away.
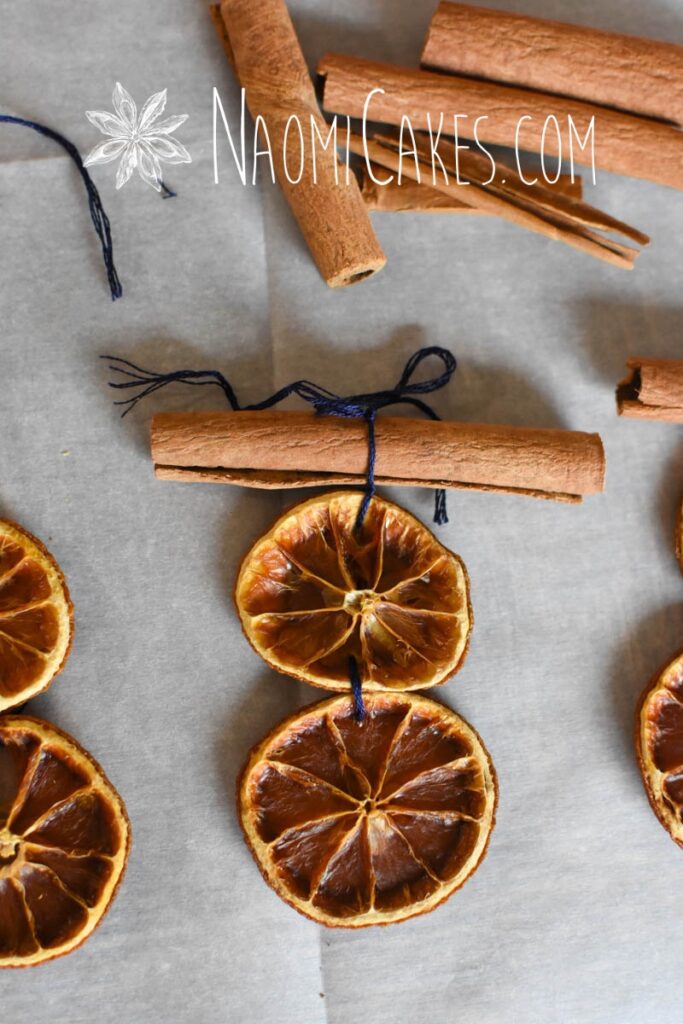
Step 3: Top with Cinnamon
-
Thread the needle again with a 10"-12" length of embroidery thread.
-
Poke the needle through the top of the smaller orange, and tie it securely with a double knot, leaving one end about 1-1/2" on one side, and the rest of the thread (with the needle) on the other side.
-
Tie the the threads together tightly over the cinnamon stick, securing with a double knot on top.
-
Loop the rest of the long piece of thread around the cinnamon stick a few times, and then tie it securely in place with a double knot on the back of the stick (I used the needle to help with this part).
-
Trim the excess string.
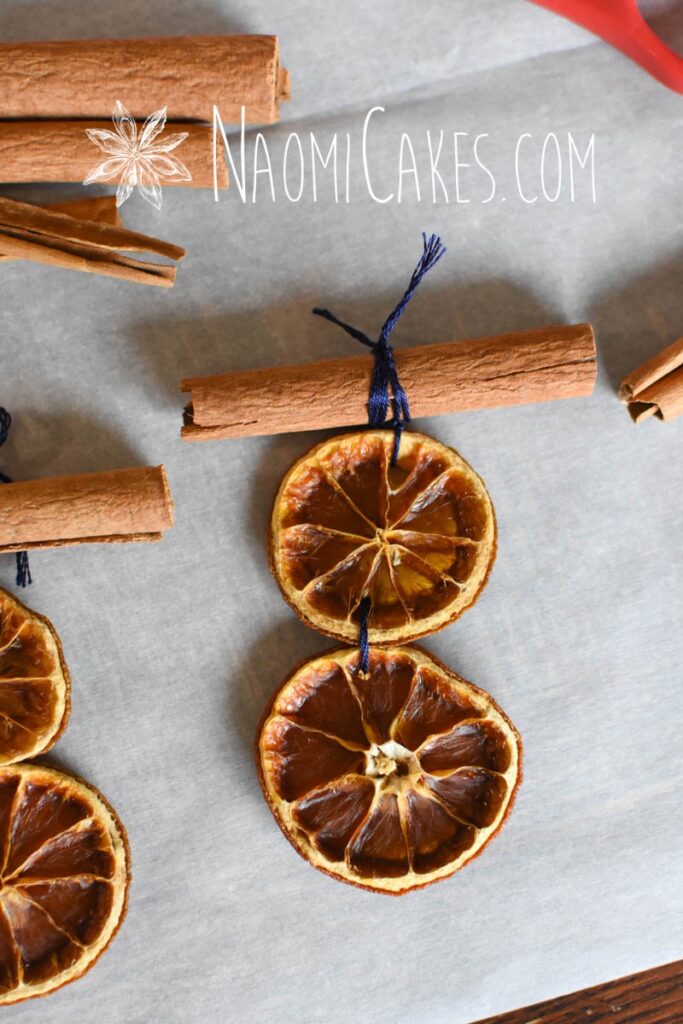
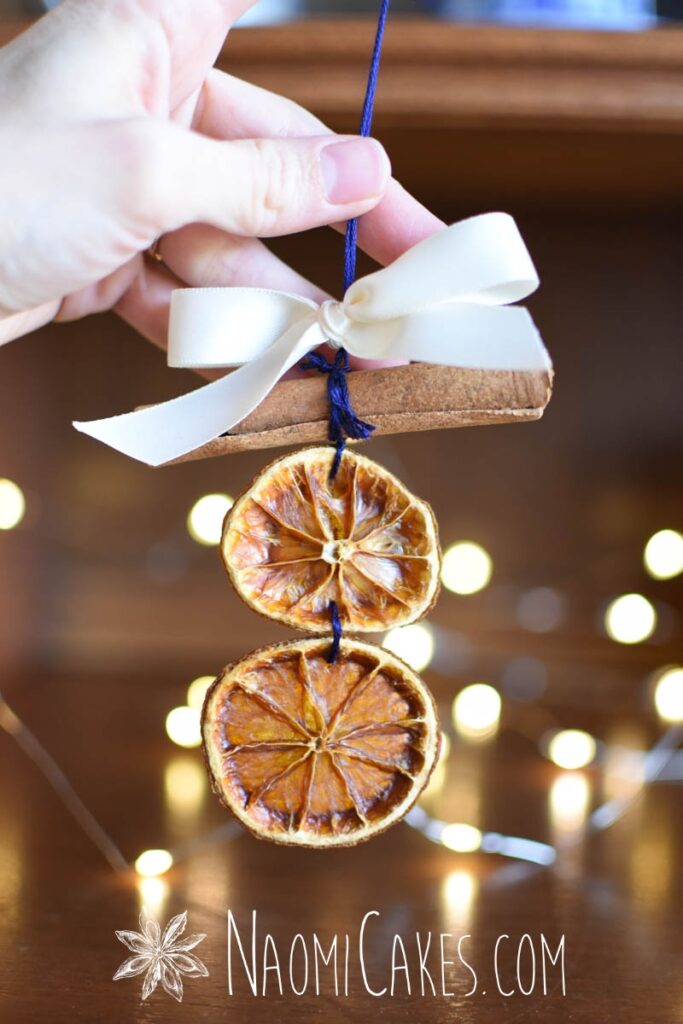
Step 4: Make the loop
-
Thread the needle again with another 10"-12" length of embroidery thread.
-
Slide the needle underneath the thread wrapped around the cinnamon stick to pull the new thread through. Remove the needle, tie the ends together, and then slide the knot down against the cinnamon stick.
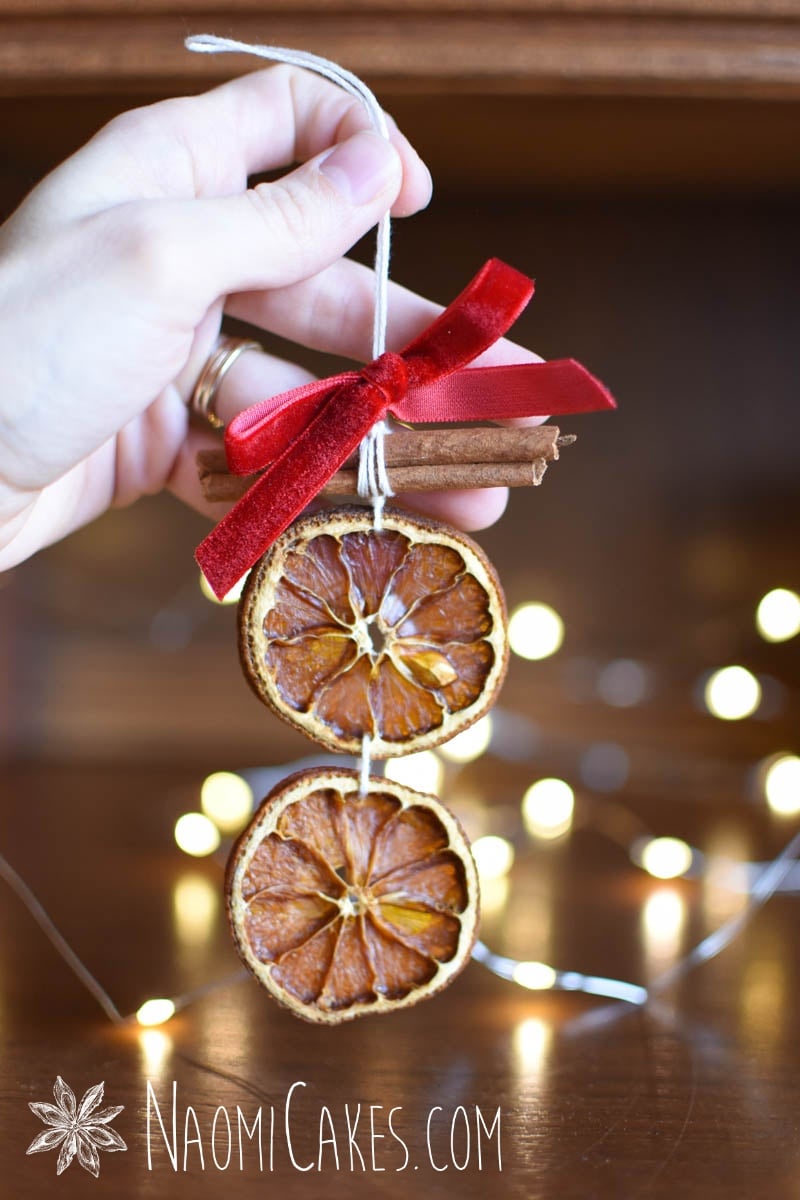
Step 5: Add the bow
-
Tie a 12"-18" length of red ribbon to the base of the string, right above the cinnamon stick. Trim the ends if necessary to make it look even.
Step 6: Glue the strings in place (optional)
-
Using a hot glue gun, put a little glue dot onto the back of the cinnamon stick where the embroidery thread is wrapped around to glue them together.
-
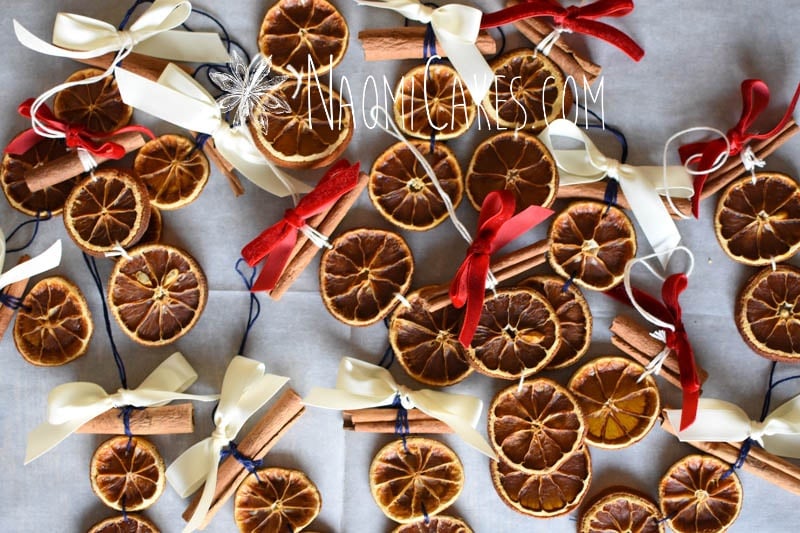
Allow the glue to dry completely. Decorate with your ornaments as desired.
Recipe Notes
These ornaments can be kept for next year! Store them in a clean, dry place (I keep mine in a freezer bag, inside my Christmas decor storage bins).
How to Make Natural Christmas Ornaments with Dried Oranges and Cinnamon
1 – Arrange the Oranges and Prepare the Cinnamon
- Arrange the orange slices by size. I like to use the a smaller slice one on top, and then a larger one on the bottom for each ornament.
- Break enough cinnamon sticks in half to accommodate each 2-orange slice ornament with one half-piece of cinnamon.
2 – Bind the oranges together
- Thread your embroidery needle with a 4″-6″ length of embroidery thread, and poke the needle through the top of the large (bottom) orange slice and loop it around to come through the bottom of the small (top) orange slice.
- Remove the needle, tie a double knot, and cut the excess string away.
3 – Top with Cinnamon
- Thread the needle again with a 10″-12″ length of embroidery thread.
- Poke the needle through the top of the smaller orange, and tie it securely with a double knot, leaving one end about 1-1/2″ on one side, and the rest of the thread (with the needle) on the other side.
- Tie the the threads together tightly over the cinnamon stick, securing with a double knot on top.
- Loop the rest of the long piece of thread around the cinnamon stick a few times, and then tie it securely in place with a double knot on the back of the stick (I used the needle to help with this part).
- Trim the excess string.
4 – Make the loop
Thread the needle again with another 10″-12″ length of embroidery thread.
Slide the needle underneath the thread wrapped around the cinnamon stick to pull the new thread through. Remove the needle, tie the ends together, and then slide the knot down against the cinnamon stick.
5 – Add the bow
Tie a 12″-18″ length of red ribbon to the base of the string, right above the cinnamon stick. Trim the ends if necessary to make it look even.
6 – Glue the strings in place (optional)
- Using a hot glue gun, put a little glue dot onto the back of the cinnamon stick where the embroidery thread is wrapped around to glue them together.
- Allow the glue to dry completely. Decorate with your ornaments as desired.
Note: These ornaments can be kept for next year! Store them in a clean, dry place (I keep mine in a freezer bag, inside my Christmas decor storage bins).
If you like this tutorial, you may also like:
- How to Dry Oranges in the Oven [Tutorial]
- A Natural Christmas Tree: Popcorn Garlands [Tutorial]
- Homemade Christmas Cards [Tutorial]
- Homemade Gingerbread Ornament Window Garland [Tutorial]
Have you made any other homemade Christmas decorations? If so, what are your favorite? Let me know in the comments!
Thanks for stopping in! Back soon,
Naomi
This post contains affiliate links.