
10 Great Ways to Decorate Cake Pops [How-To Guide]
Ok my friends, let’s jump right in. Here are a few different easy ways to decorate cake pops! Obviously there are so many more ways than just these to decorate them, but I wanted to share a few that I’ve done before to see if I can, perhaps, inspire you guys.
Below I will outline some different cake pop designs (with pictures) that I’ve made over the years, and break it down in detail how to make them! Are you ready?
What are cake pops?
Cake pops are the cake version of a lollipop, with cake on the end instead of candy. They are basically little balls of crumbled cake mixed with frosting and melted chocolate that get scooped out of a bowl, stuck onto the end of a lollipop stick, and decorated to be as adorable as you can possibly fathom. Sounds pretty good, right? They’re easy to make, super cute, and also delicious.
How cake pops are made
As I just mentioned, cake pops are made with crumbled cake (either homemade or from a boxed cake mix) and a few other ingredients like frosting and melted chocolate. Once made, the little cake balls are refrigerated to become cold, stuck onto the end of the cake pop sticks, and dipped in melted chocolate or dipping fondant (I like to dip mine in candy melts, which is a type of chocolate coating that is easy to thin, and extremely easy to work with). From there, the decorating portion comes in.
If you would like a recipe for homemade cake pops (and step-by-step directions for dipping them in chocolate), check out my Chocolate Cake Pop Recipe here!
You will need:
To make cake pops, you will need a few basic supplies. Here are the basics:
- Ingredients (see this recipe)
- Large bowl or a stand mixer
- Measuring cups and spoons
- Truffle scoop or mini ice cream/cookie scoop
- Lollipop sticks or wooden pop sticks
- Double boiler, glass bowl and pot, or a glass jar (for melting chocolate and dipping)
- Parchment paper
- Styrofoam block or cake pop stand
Again, for a step-by-step guide (and recipe!) for making cake pops, check out this post.
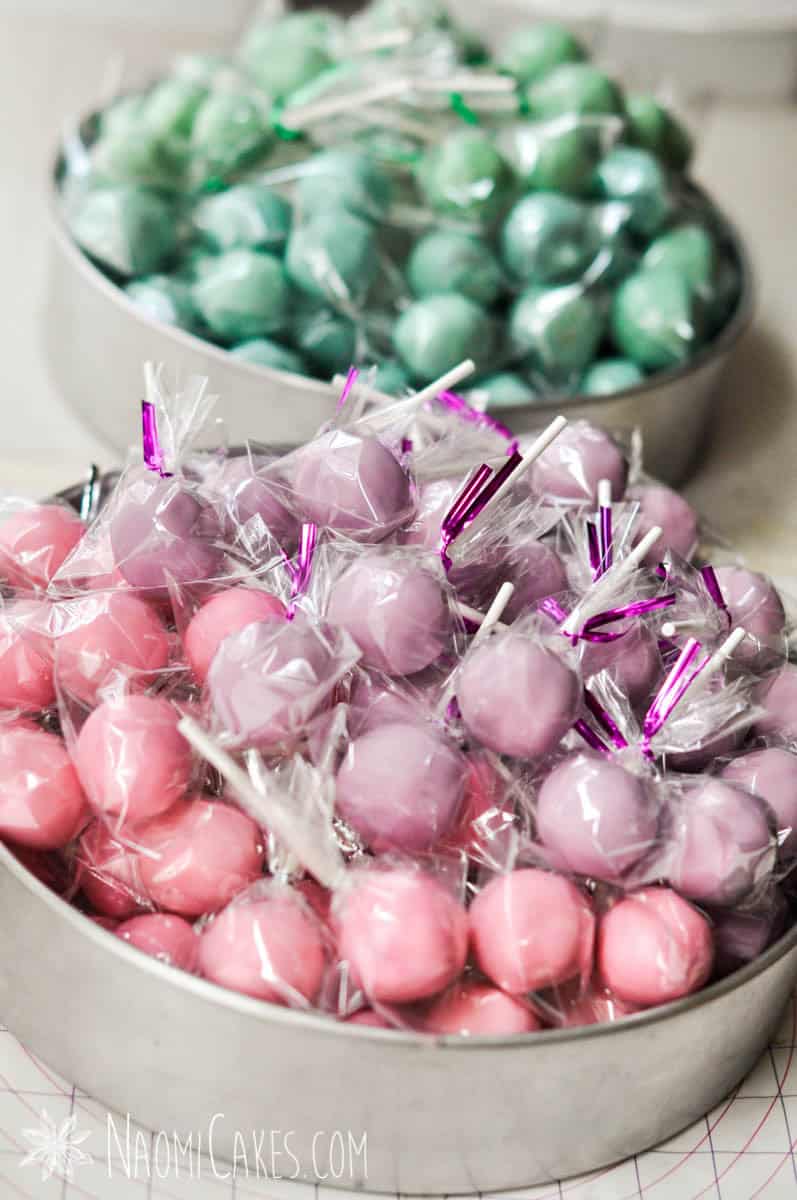
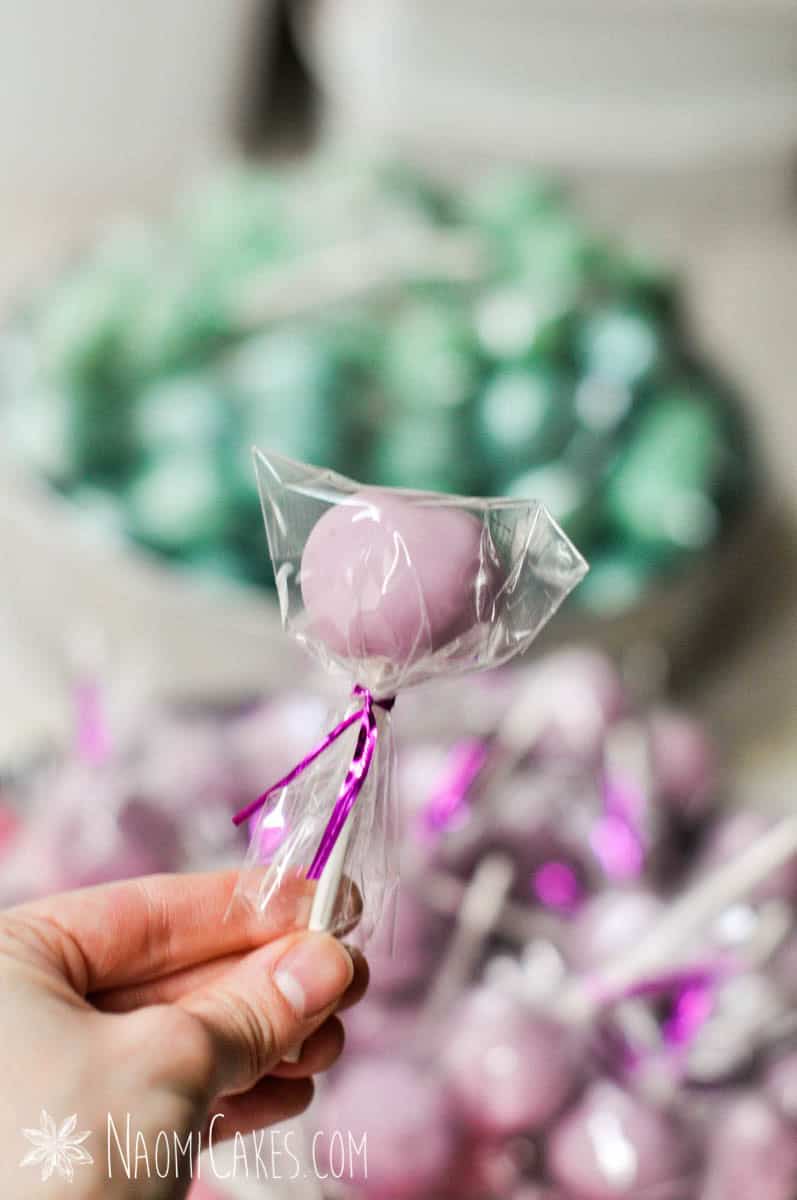
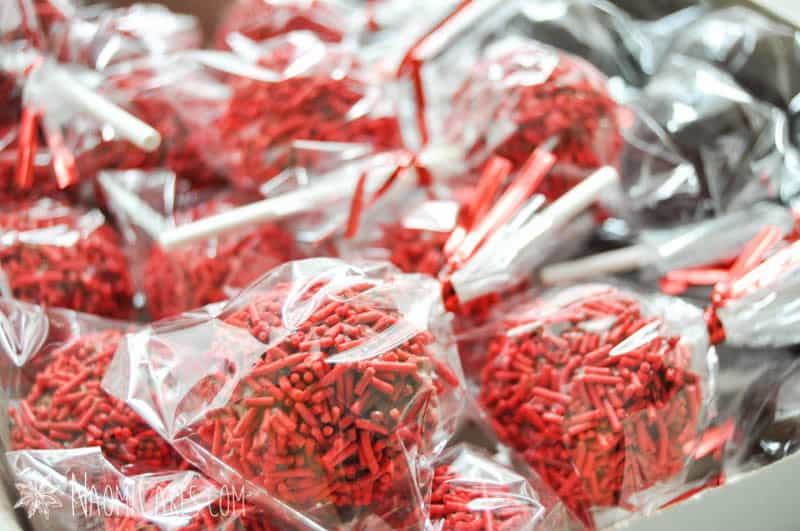
Cake pop packaging
I like to package cake pops in cellophane bags, with a white twist tie and a bit of satin or curling ribbon. In my experience, this is the best way to keep them fresh and protect them from damage to the coating. Plus, you can see the pops beautifully through the clear bag!

Display options for cake pops
You can buy a cake pop stand, make your own, or fill up some fun buckets/bowls with mountains of pre-packaged cake pops for a generous and pretty display (as pictured further in this post).
To make your own cake pop stand, you can decorate styrofoam cake dummies with paper, fabric, ribbon or lace, and then stuff them full of cake pops! Check out my paper cake tutorial for some inspiration here – or go ahead and scroll down to check out my own homemade circus themed cake pop stand (made with styrofoam dummies and tickets).
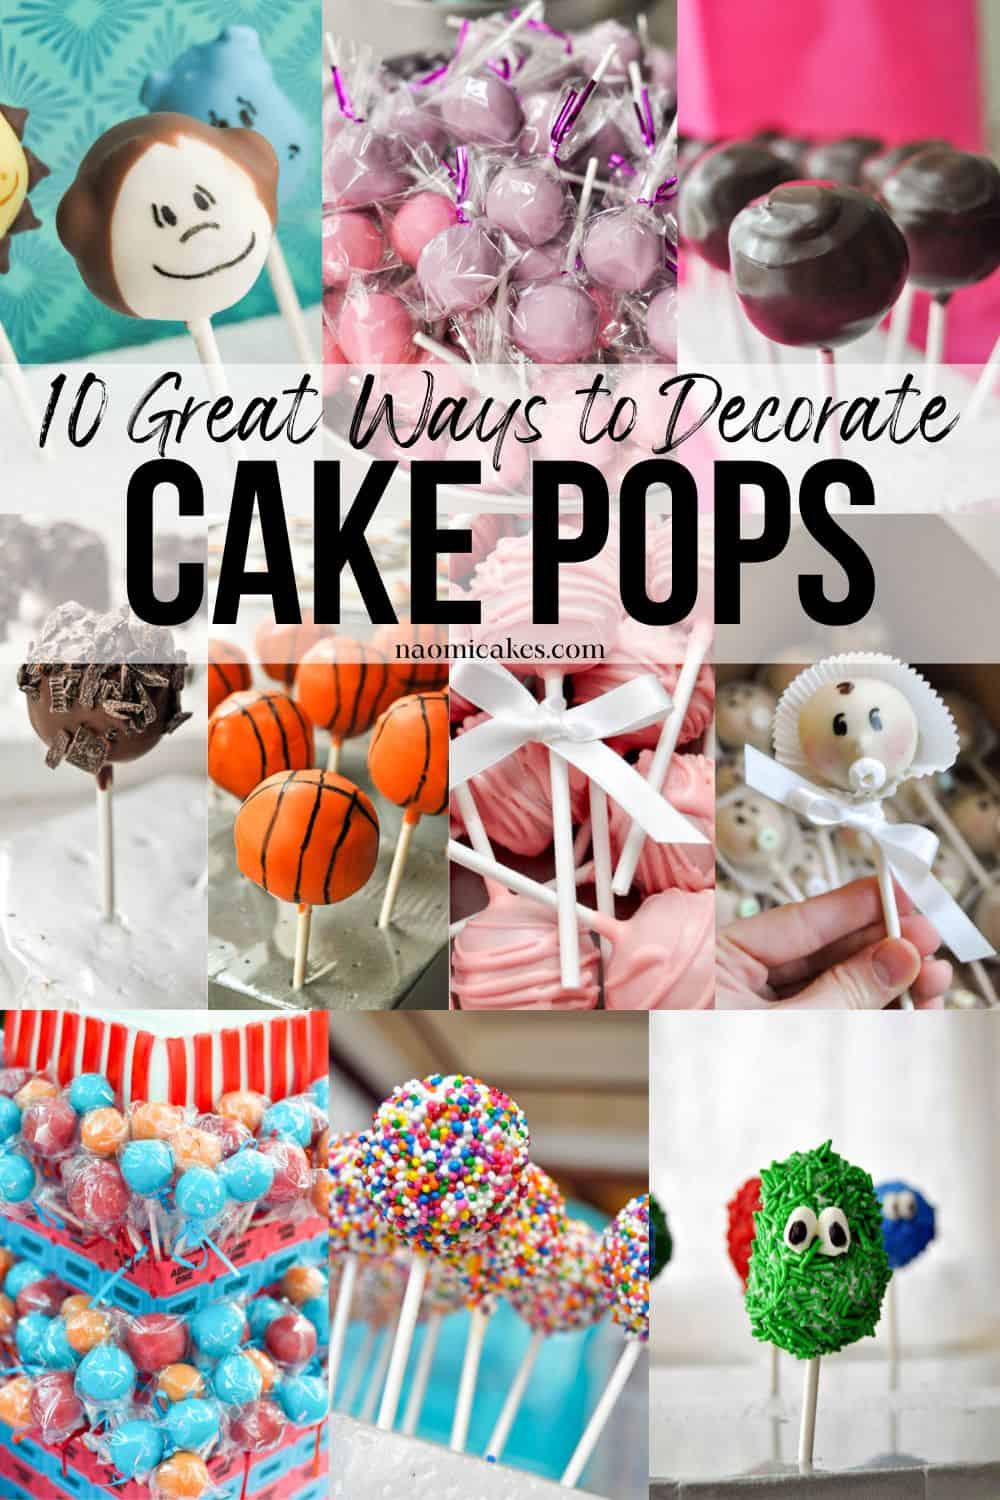
10 Great ways to Decorate Cake Pops
Without further ado, here are 10 great ways to decorate cake pops! As I’ve briefly mentioned before, in order to make any of these designs you’ll need to check out my Cake Pop Recipe & Tutorial so that you can learn how to make the cake pop filling and coat it in chocolate effectively!
1 – Chocolate dipped cake pops
Sometimes simple is best, and chocolate dipped cake pops are always a winner! To make the “Swirled” look on the outside of these pops, just allow the chocolate to begin to harden, and then re-dip the pops in melted chocolate, and swirl the edge of the pop against the side of the bowl or glass you’re dipping them in for a little bit of a swirled look. Allow the pops to set upright in a styrofoam block at room temperature.

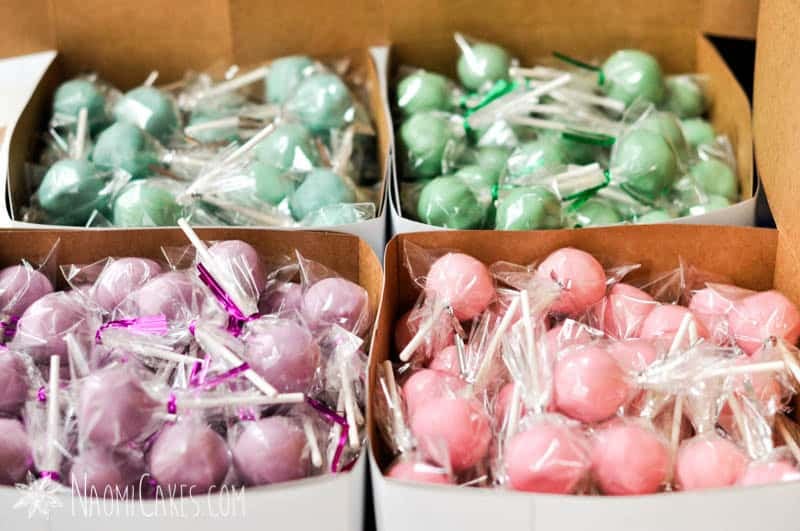
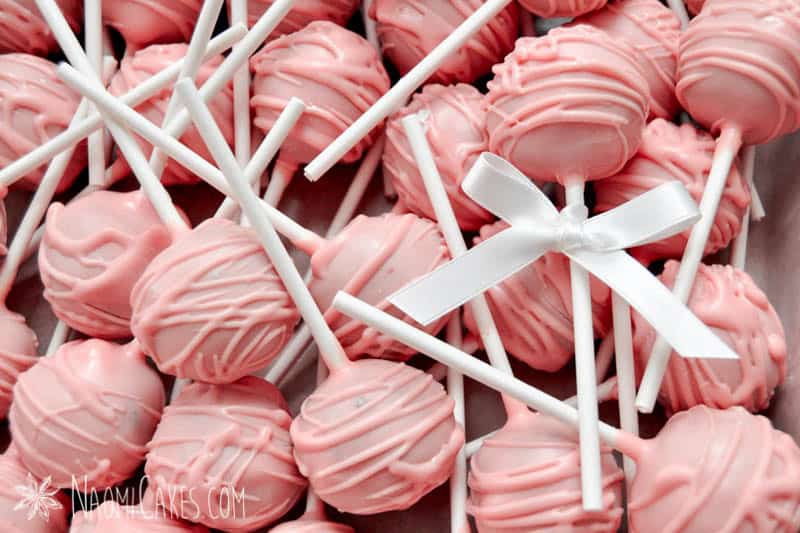
2 – Colour themed cake pops
Whether it be bridal showers, baby showers, birthday parties or weddings, cake pops can be tinted just about any colour to match the theme of your occasion! Check out these pastel coloured cake pops, made by mixing white chocolate with a bit of coloured candy coating chocolate, or by adding a bit of gel food colouring.
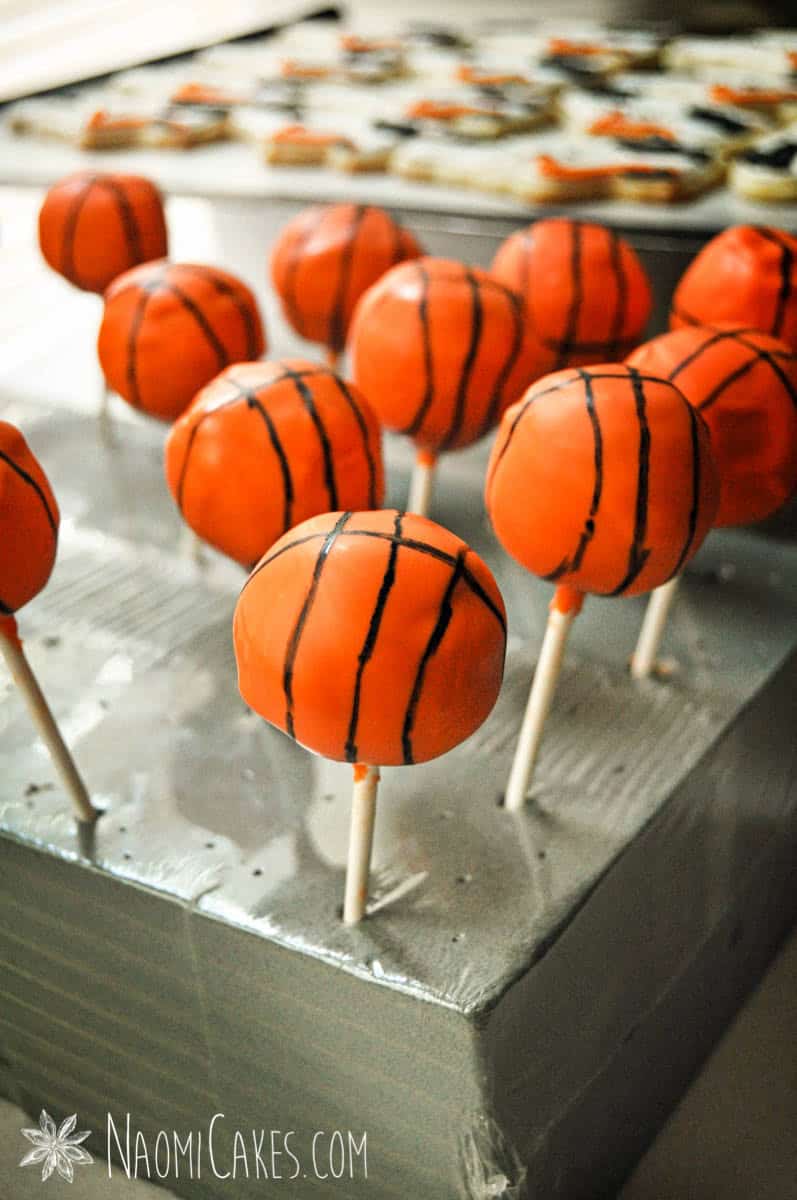
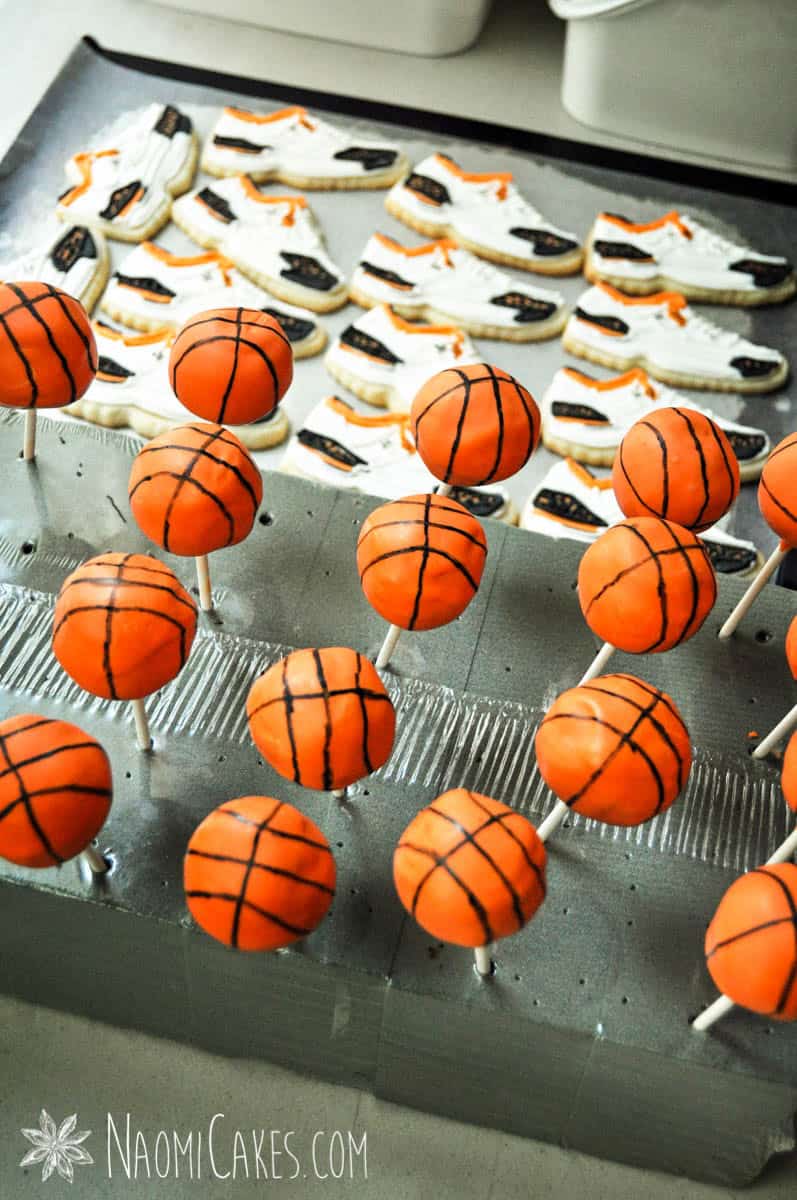
3 – Sports themed cake pops
These adorable basketball themed cake pops were made with orange coating chocolate and a black edible marker. You could use these same tools (in different colours) to create many different types of balls, such as baseballs, footballs, and tennis balls (to name a few).
Note: The running shoe cookies in the background were made with this cutter.
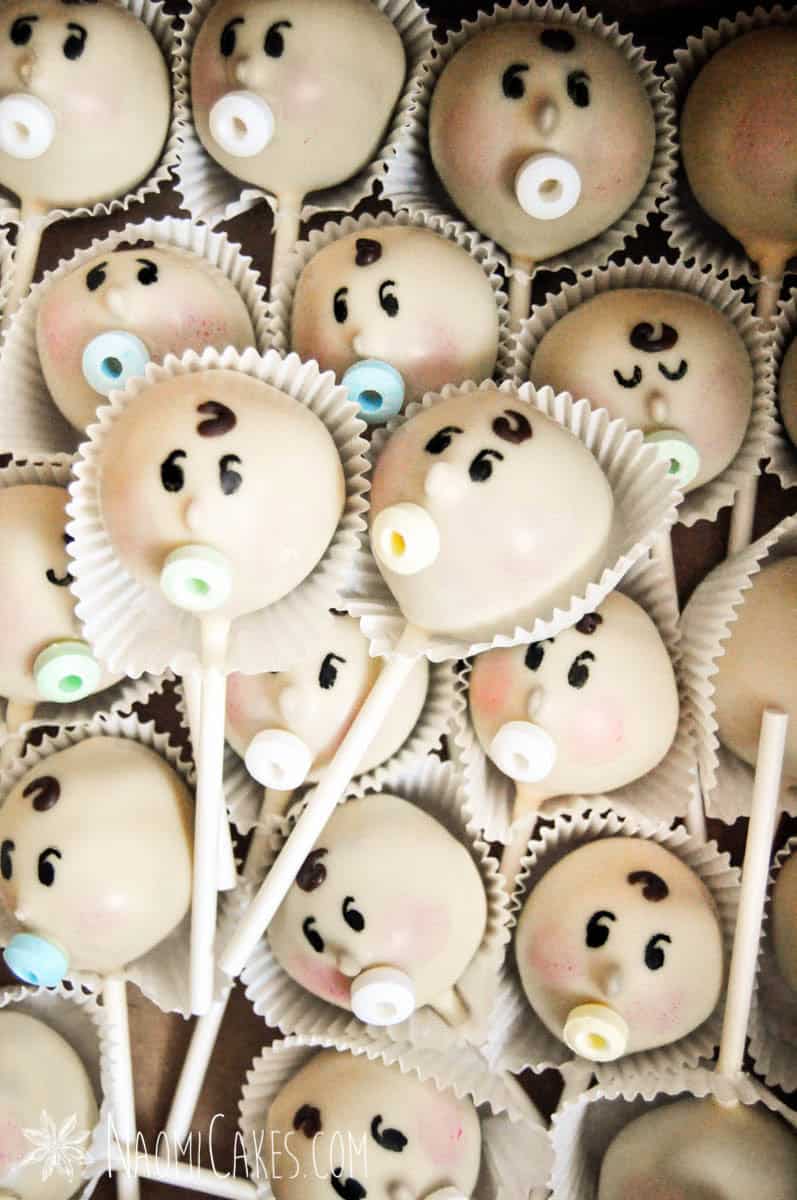
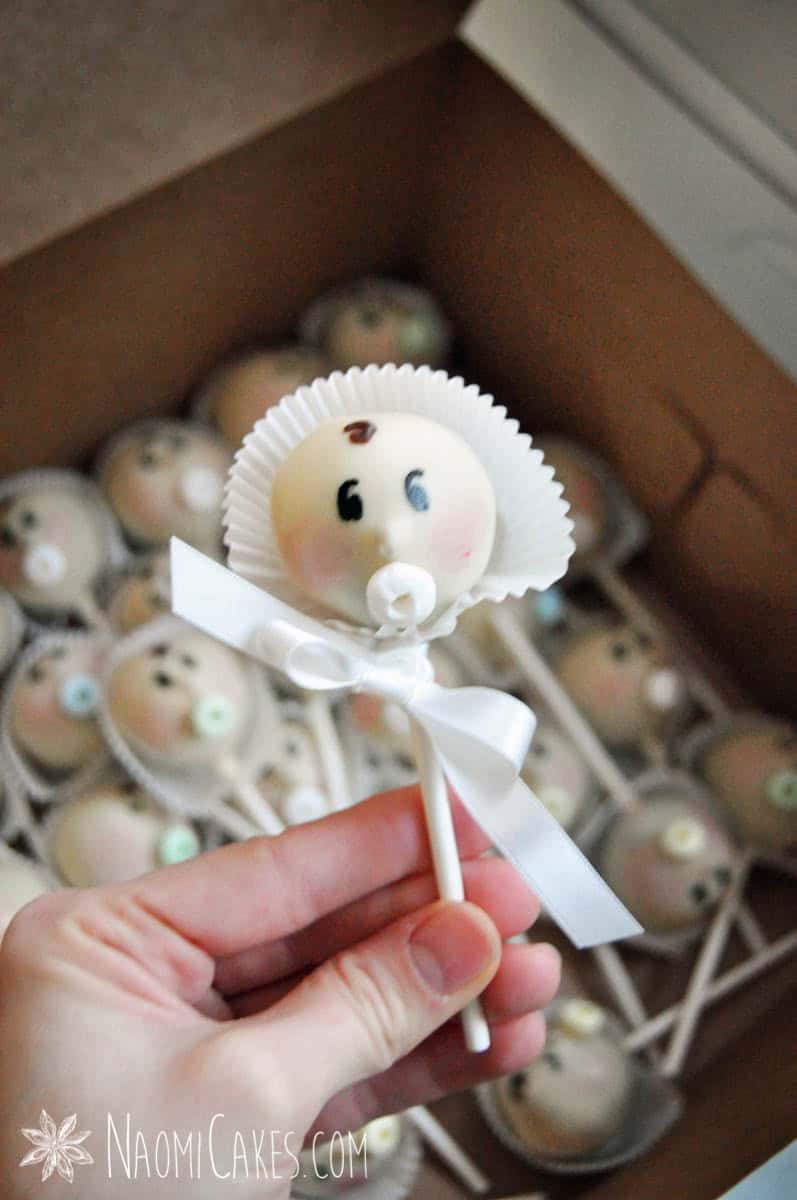
4 – Baby shower cake pops
Planning a baby shower? These adorable baby pops are easy to throw together and so, so cute! Here’s how these were done:
- Melt some white chocolate with 1 or 2 orange melting wafers to make a very light peach skin colour (or adjust to the skin colour you are wanting to make).
- Insert a hulled sunflower seed into the middle of each of your cake pop balls (for the nose), before coating them in the skin-coloured chocolate.
- Dip the cake pop in your melted skin-coloured chocolate, allow the excess chocolate to drip away, and gently press a coloured candy (from a candy necklace) under the nose for the pacifier.
- Once the chocolate has set, draw on the eyes with an edible marker, and brush the cheeks with a little bit of pink petal dust on a clean paint brush.
- Pipe a little swirl of milk or dark chocolate for the hair, and then puncture the cake pop stick through a candy cup for the baby bonnet.
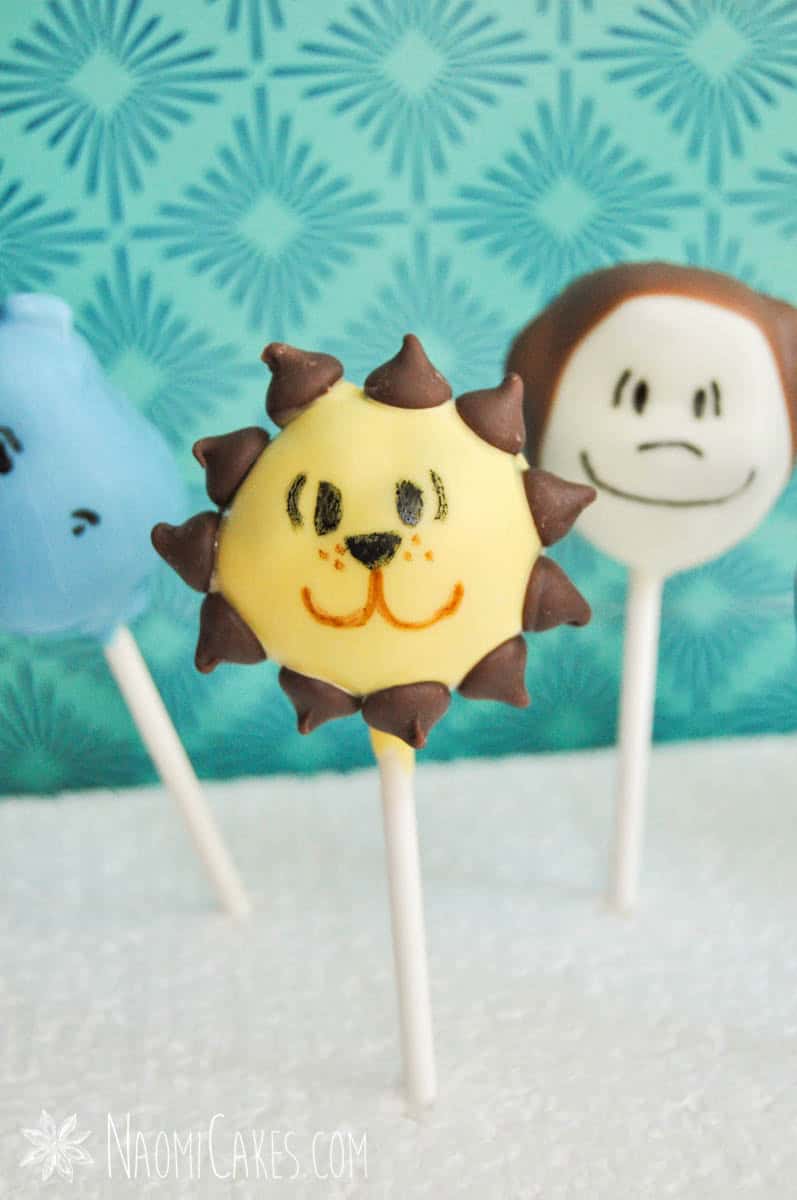
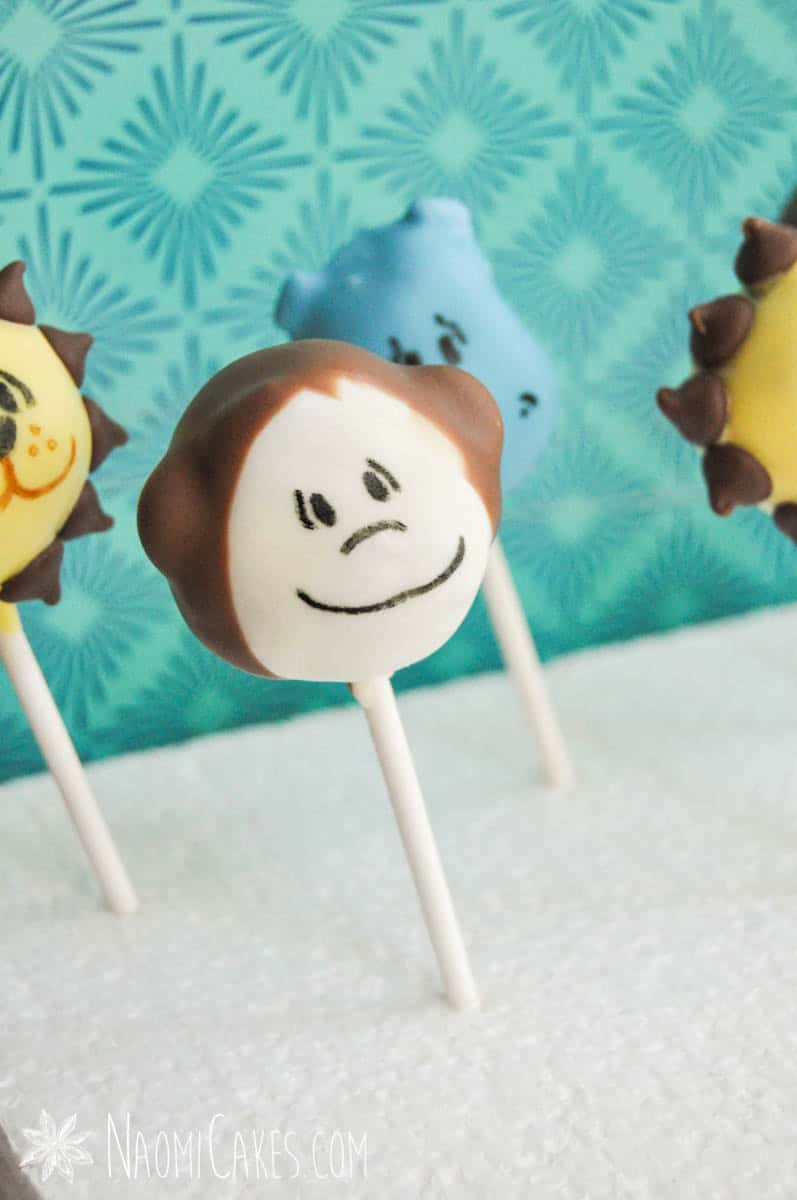
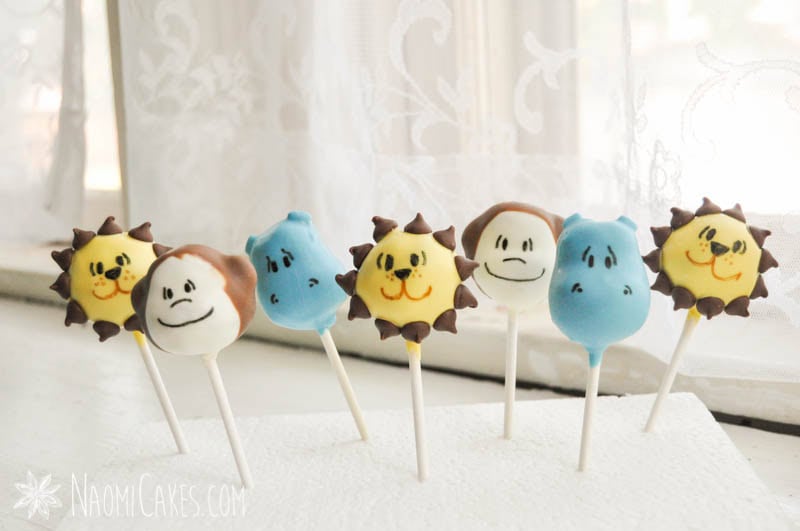
5 – Animal cake pops
These adorable animal cake pops are great for kids’ birthday parties! Here’s how to make them.
For the lion:
Dip the cake pop in yellow candy melts, and then stick chocolate chips around the face for the mane. Draw the face on with black and red edible markers.
For the hippo:
Using your fingertips, shape the cake pop filling into pear-shapes before dipping them in chocolate coating. Cut a couple of pieces of chocolate with a sharp knife, and stick them into the uncoated pop for the ears on top. Dip the cake pop into blue melting chocolate, and draw the face on with edible black marker.
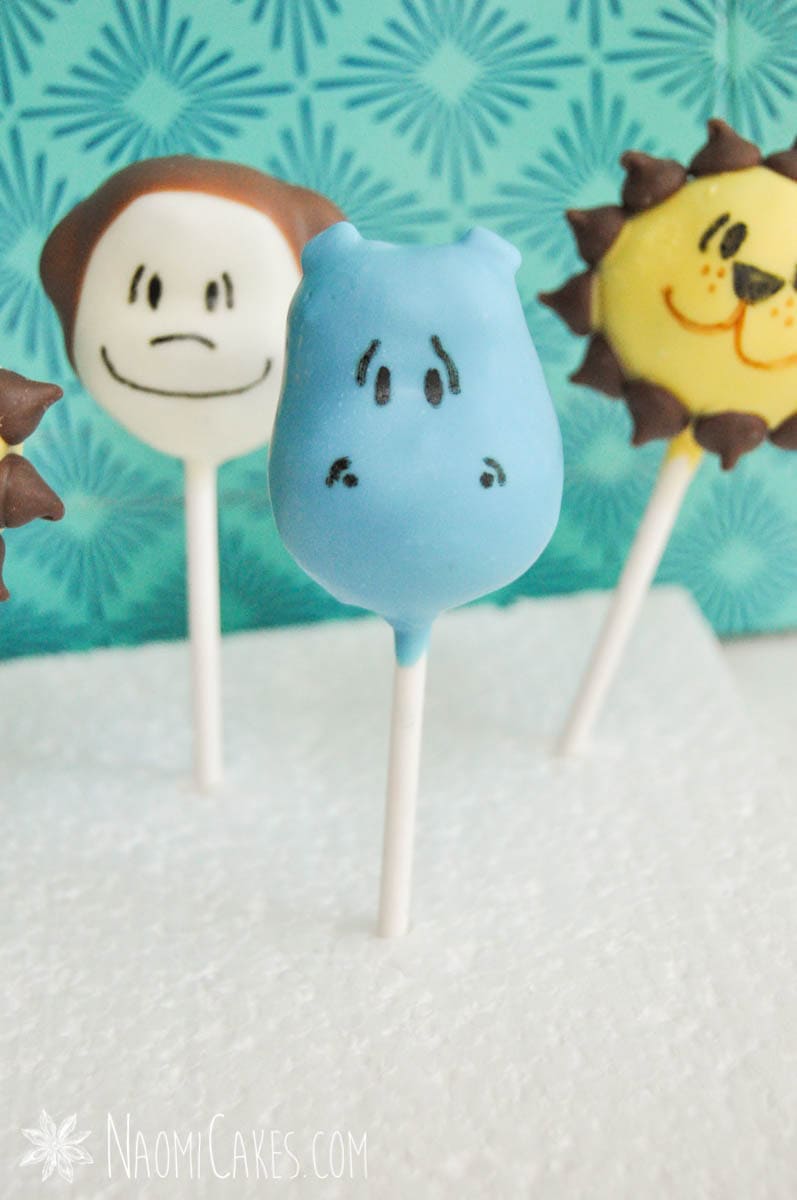
For the monkey:
Stick two Cheerios into the sides of an uncoated cake ball (for the ears). Dip the pop in white chocolate, and allow it to set completely. Dip it again into milk chocolate, keeping the chocolate off of the face area, and covering the ears and the back of the head. Allow the chocolate to set, and draw the face on with edible marker.
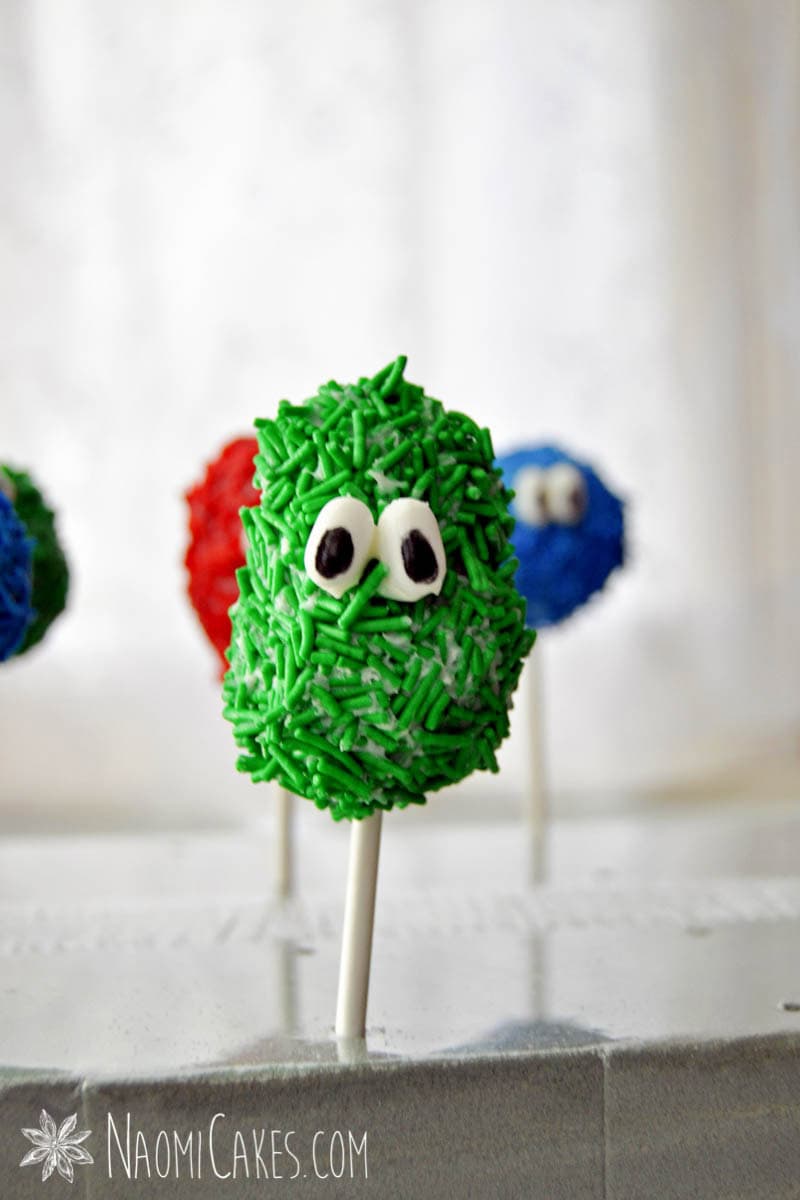
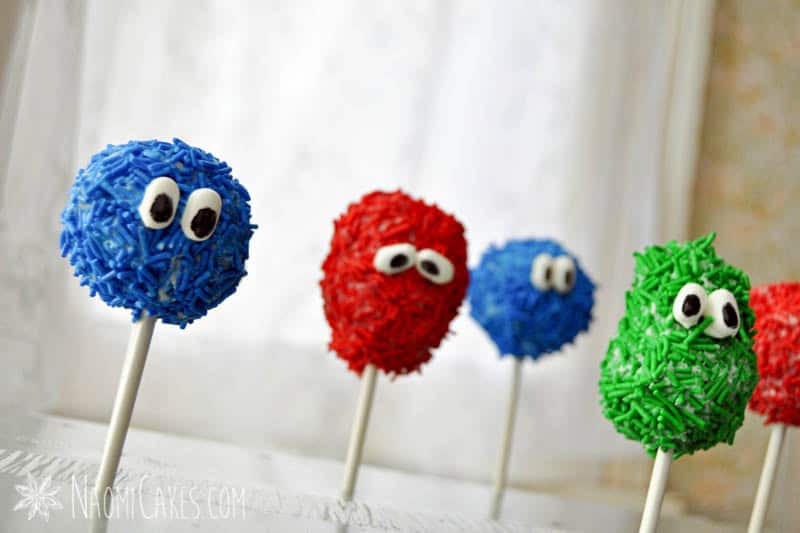
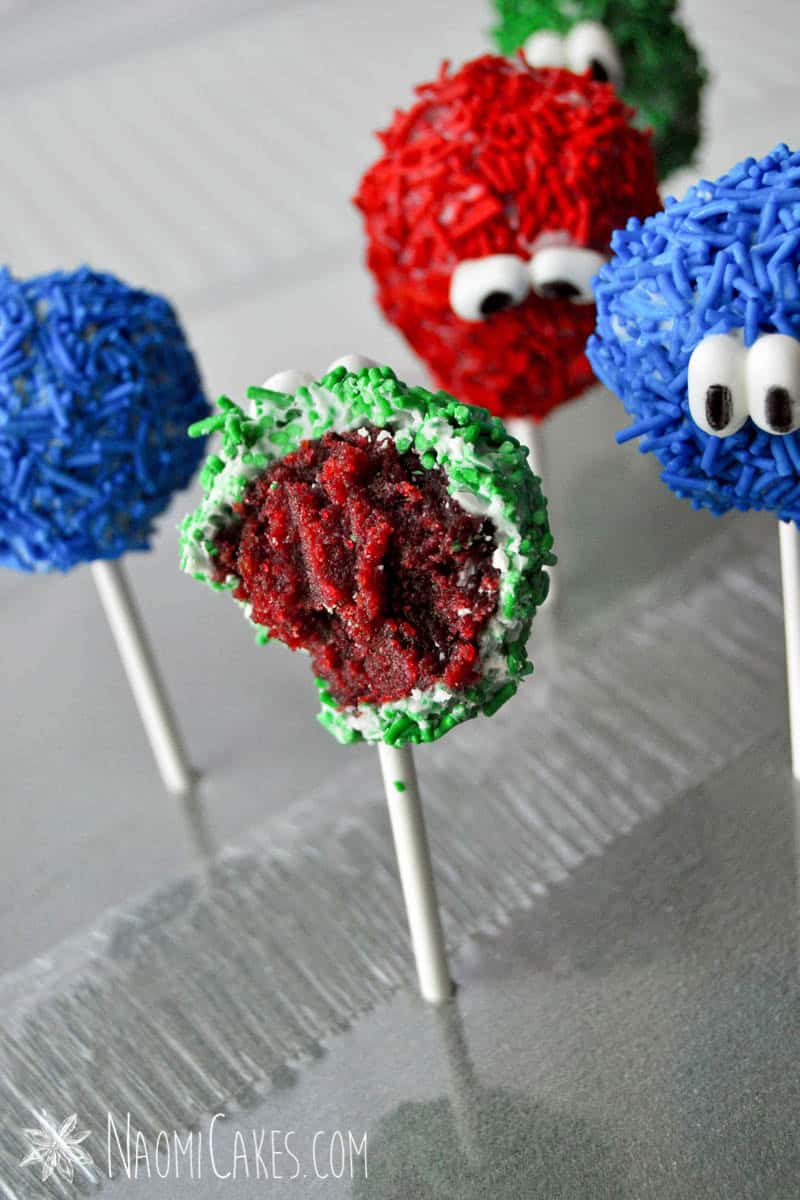
6 – Monster cake pops
These adorable little monster cake pops are fun to make and so easy! To make these, simply use your fingertips to make them the shapes you want them to be, dip them into melted white chocolate, and then again into coloured long sprinkles. For the eyes, stick two Tic Tacs onto the pop with melted chocolate, and draw the pupils in the middle with an edible black marker.
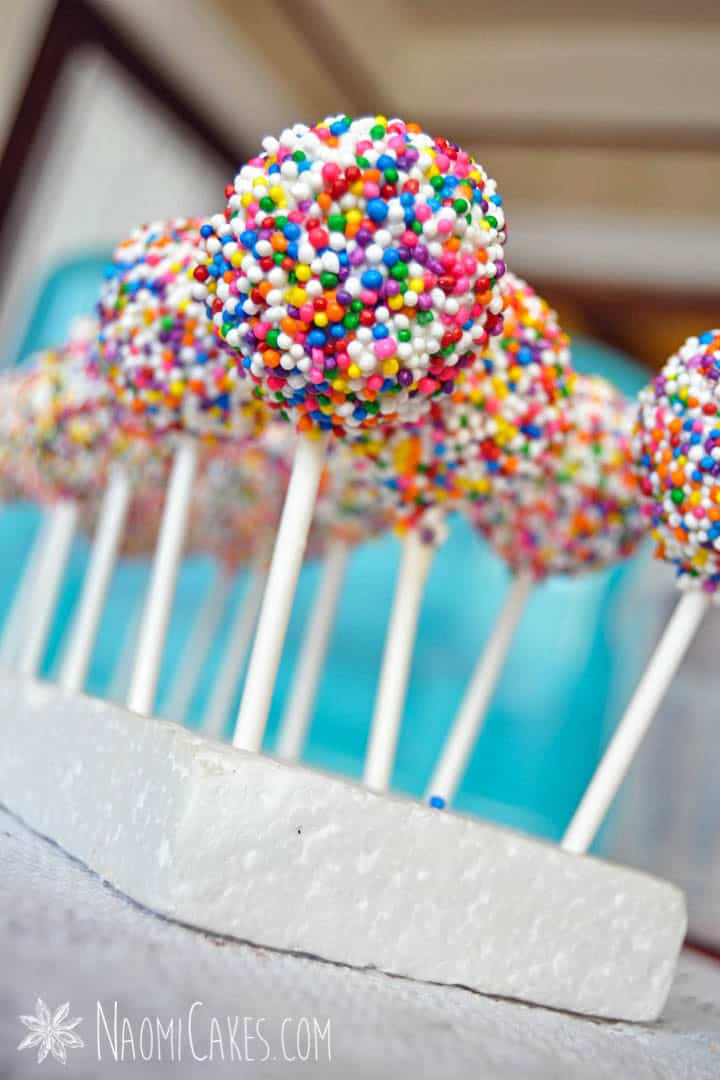
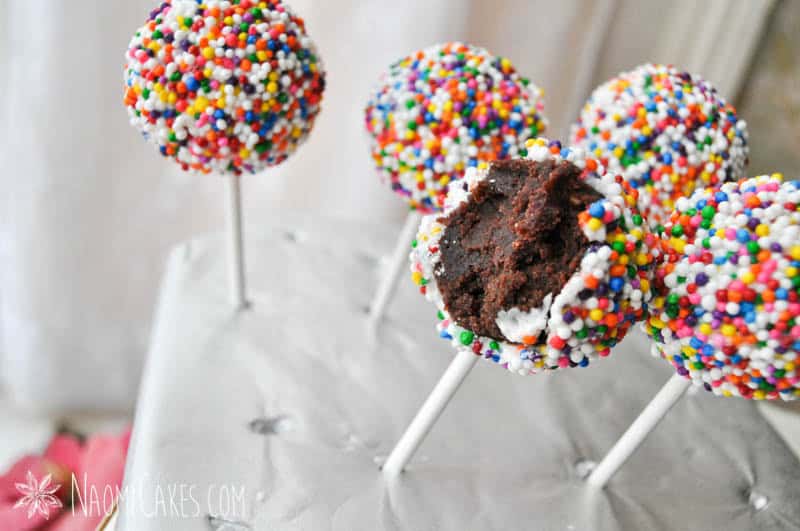
7 – Birthday party cake pops
Nothing says a birthday party like colourful, fun sprinkles! You can find a complete, comprehensive tutorial for these beautiful pops here.
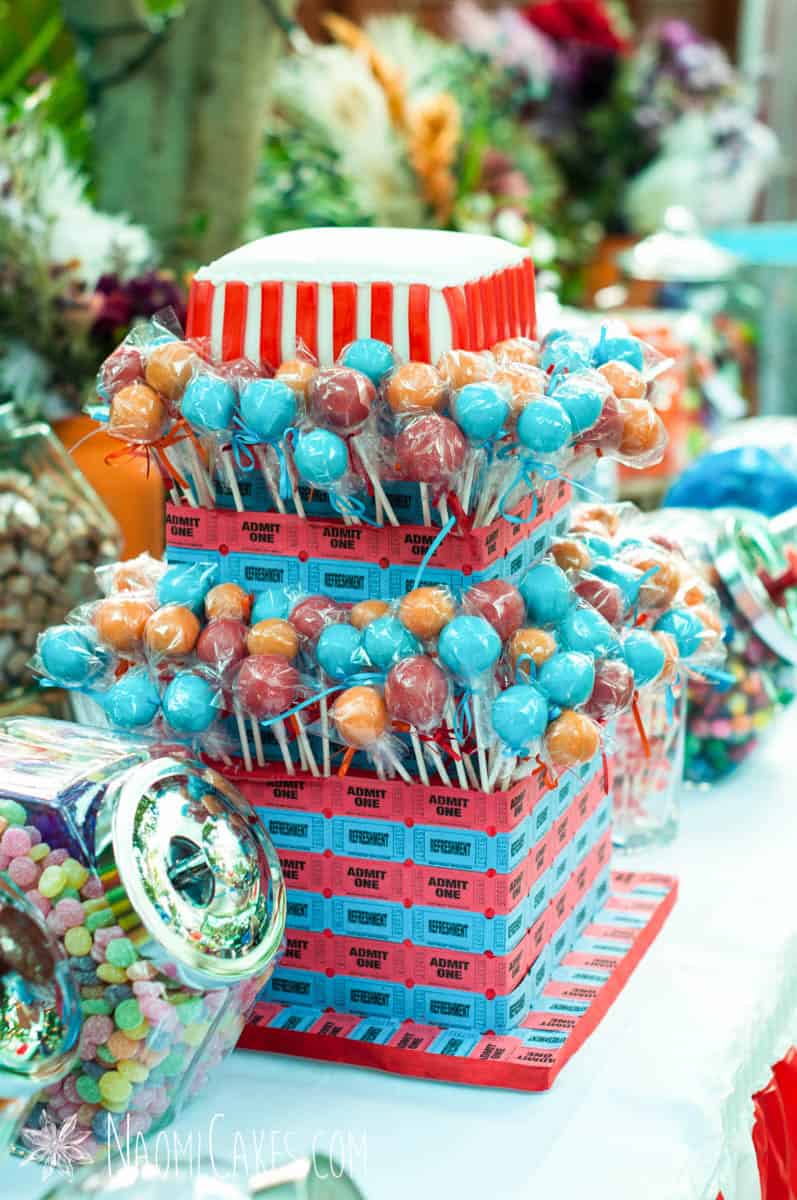
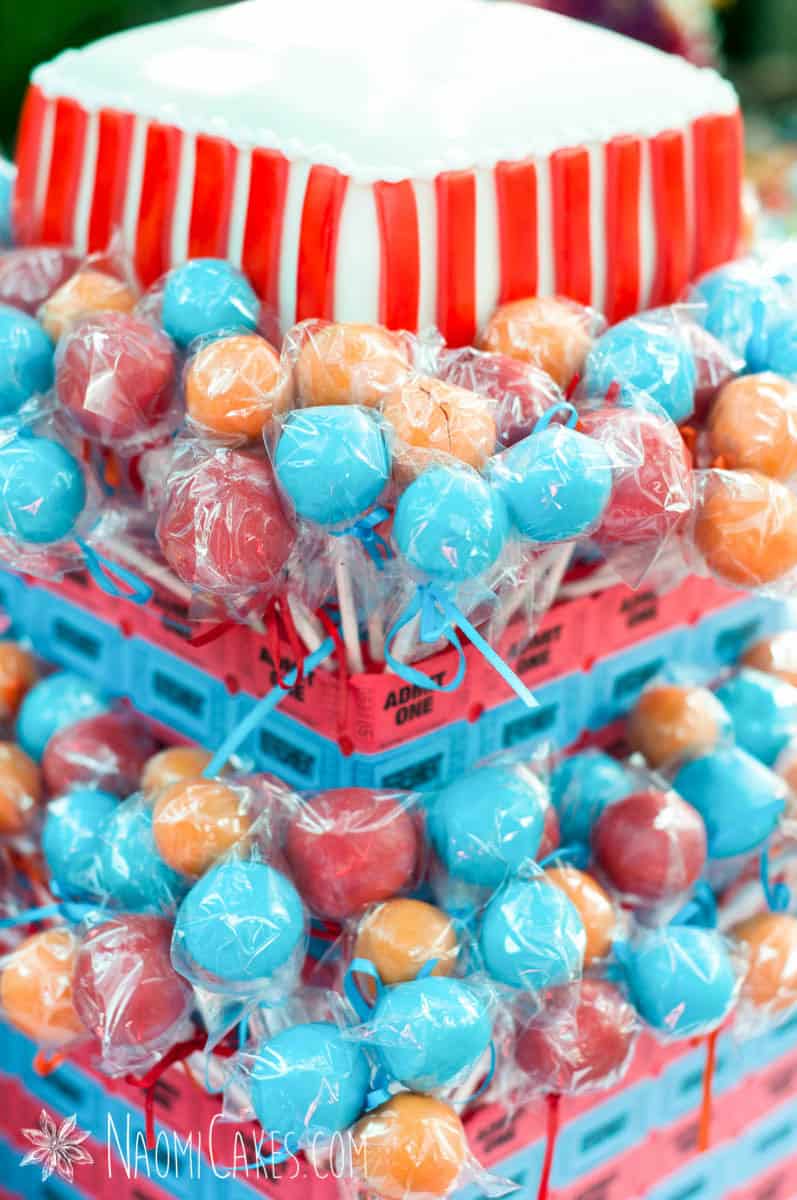
8 – Circus/carnival cake pops
The key to this adorable circus/carnival themed cake pop display is the stand! The pops themselves are just colourful, packaged cake pops.
You can make a stand like this with a 6″ square cake on top (with vertical red stripes), and then another 6″ square cake dummy (for the cake to sit on), two 8″ square cake dummies, and two 10″ square cake dummies. Then, purchase some colourful tickets, and glue them into place! You can set your cake pop stand onto a 12″ or 14″ cake drum covered with tickets and trimmed with red ribbon.
9 – Wedding cake pops
To make wedding cake pops, it’s all about colour and flavour. You can adjust my chocolate cake pop recipe to make other flavours (details in that post, so go check that out!), and beyond that (unless you specifically want bold colours), I recommend going with soft, light colours, and chocolate drizzle or edible pearl sprinkles for decor.
You can also check out my Paper Cake Tutorial for an idea for how you might display them!
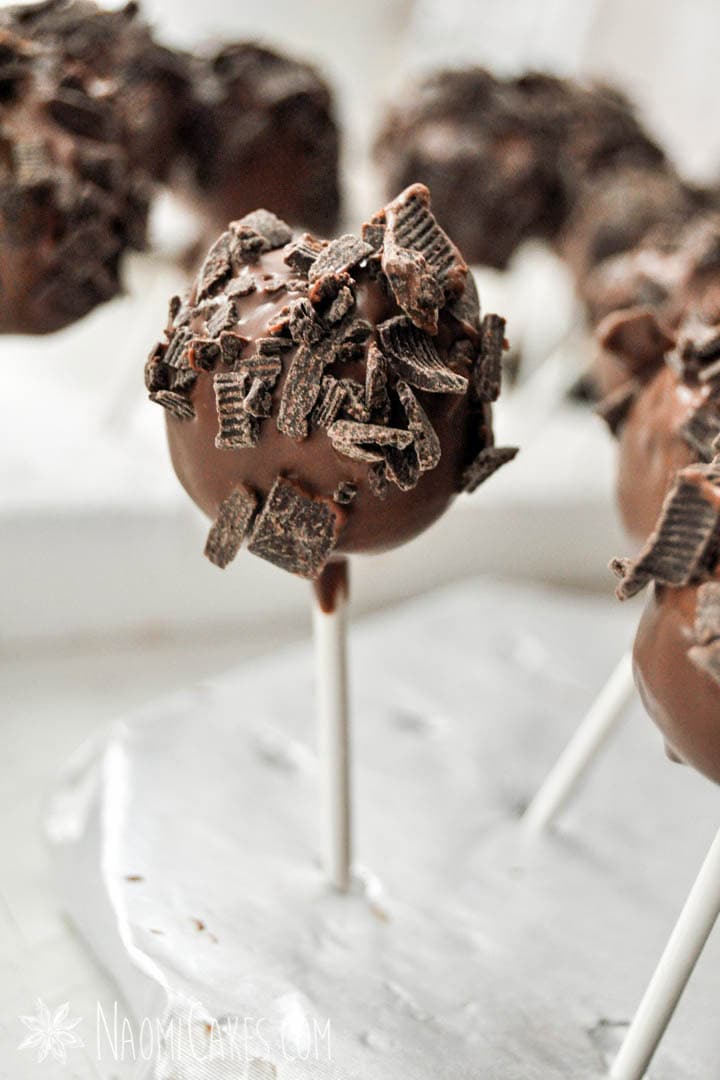
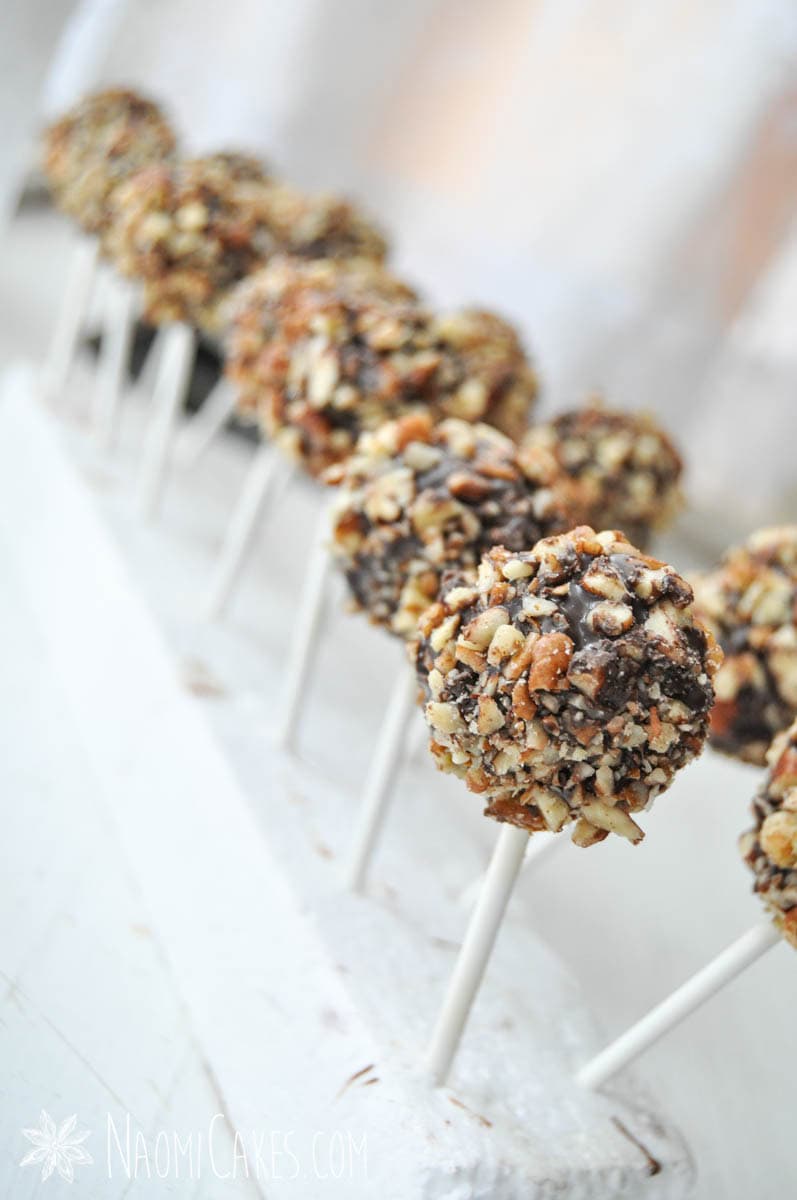
10 – Gourmet cake pops
Here is my favourite way to make cake pops: with regular chocolate coating, and then chocolate shavings or chopped nuts on the outside. You can make chocolate curls with a vegetable peeler, and then sprinkle them onto the pops before the chocolate coating has set.
Sprinkles for every occasion:
Beyond those ideas, here are some sprinkles I like to recommend as great options for decorating all throughout the year, for all occasions! If this is your first time making cake pops (or if you’re short on time), this is probably the easiest way to decorate them and make them look spectacular!
- New Year’s sprinkles
- Valentine’s Day sprinkles
- Superbowl sprinkles
- St. Patrick’s Day sprinkles
- Easter sprinkles
- Canada Day sprinkles
- 4th of July sprinkles
- Back to School sprinkles
- Harvest sprinkles
- Thanksgiving sprinkles
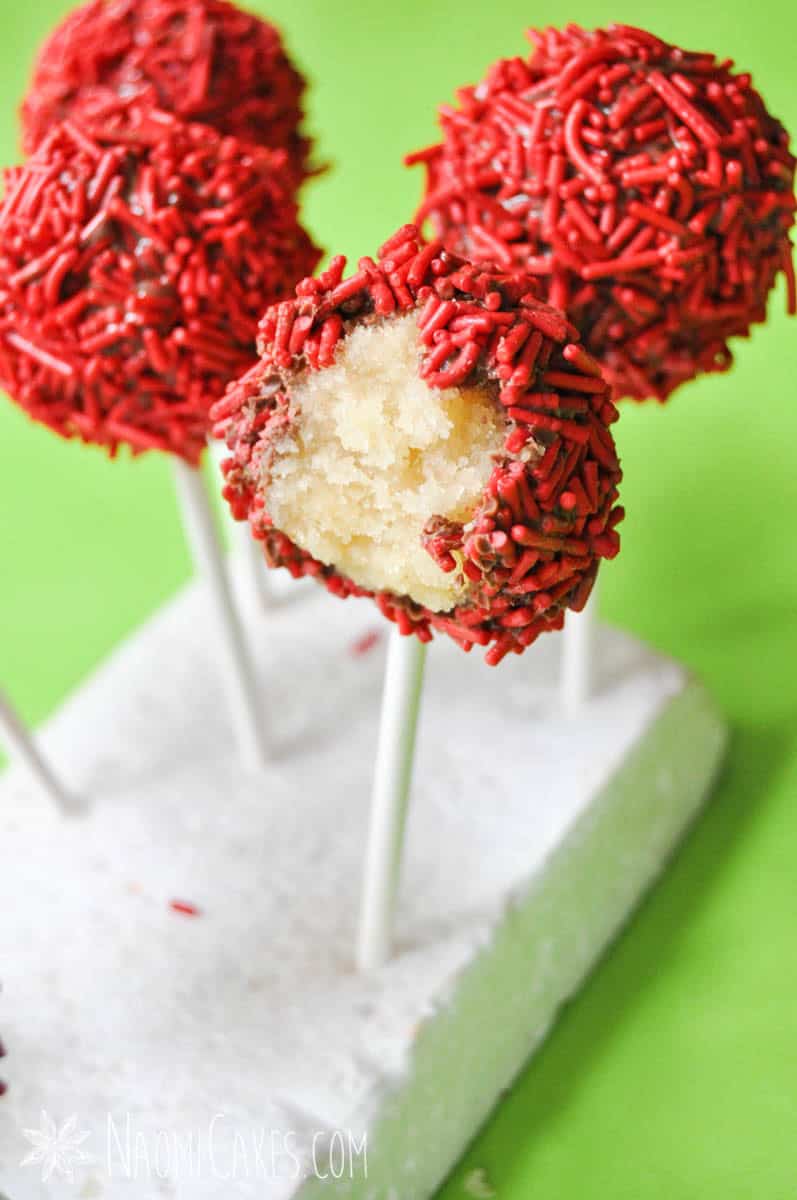
- Christmas sprinkles (or as pictured in this post)
- Birthday sprinkles
- Baby shower sprinkles (Boy or Girl)
- Wedding sprinkles
- Anniversary sprinkles
- Graduation sprinkles
If you like this post, you may also like:
- How to Make Chocolate Cake Pops
- How to Make Chocolate Oreo Pops
- Chocolate Covered Strawberries
- The Easiest, Fastest Way to Frost Cookies
That’s all for today! Let me know if you have any more ideas that you would add to this list; I’d love to hear what you come up with! Also, as always, if you’ve been inspired… tag me in your photos on Instagram @naomicakesofficial! I always love to see what you’re making.
Bye for now,
–Naomi
This post contains affiliate links.