
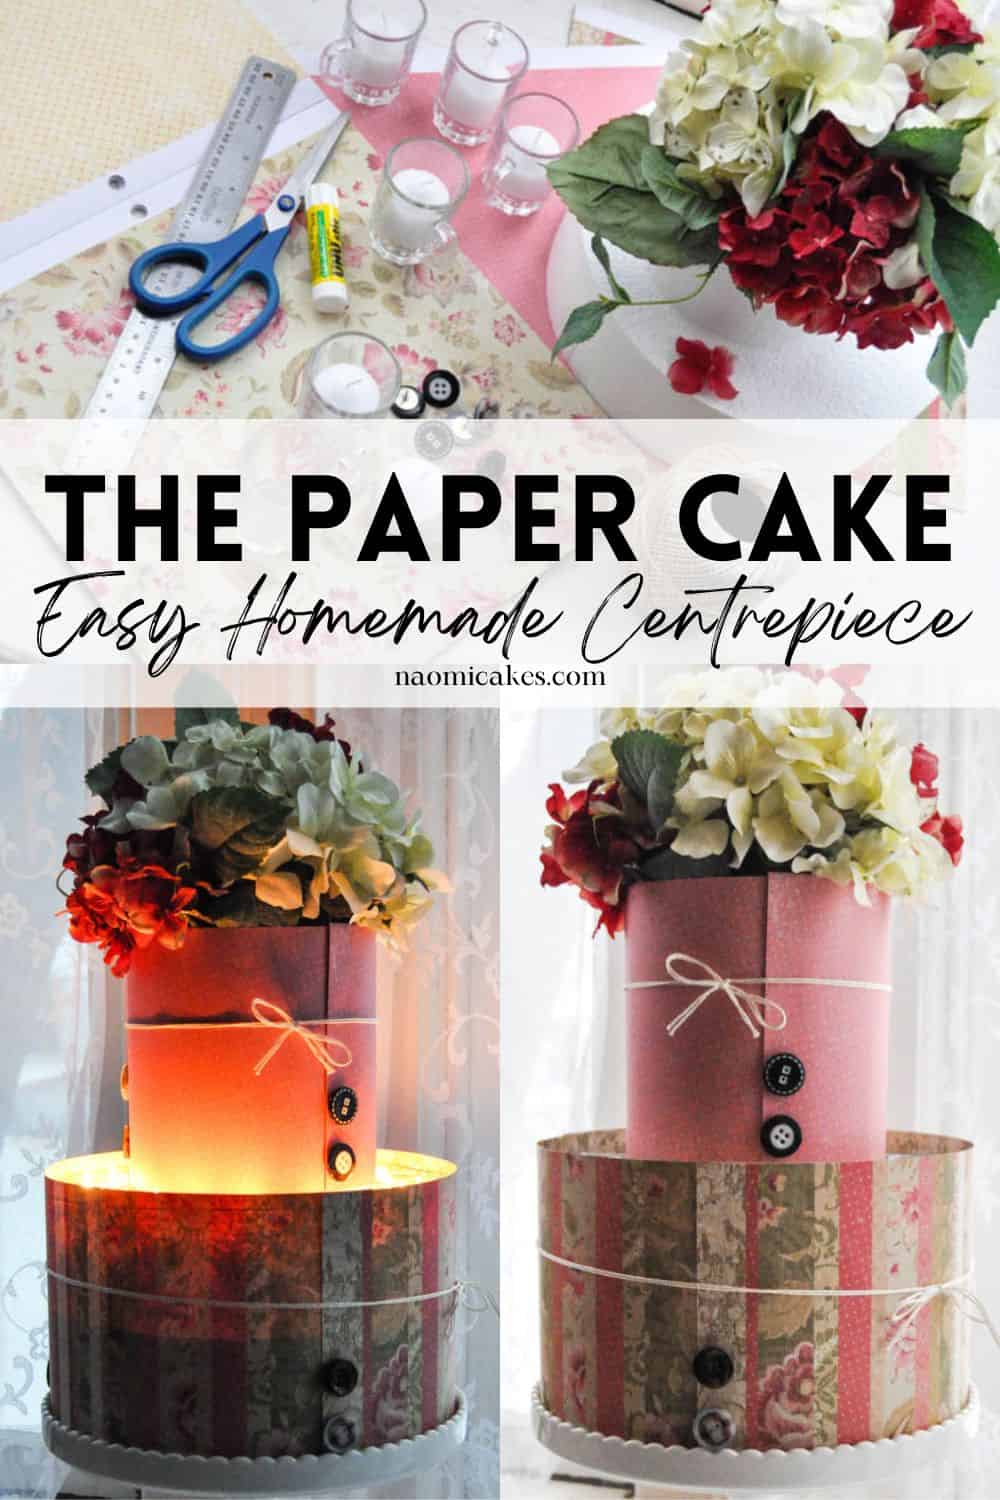
DIY Wedding: Paper Cake Centrepiece [Tutorial]
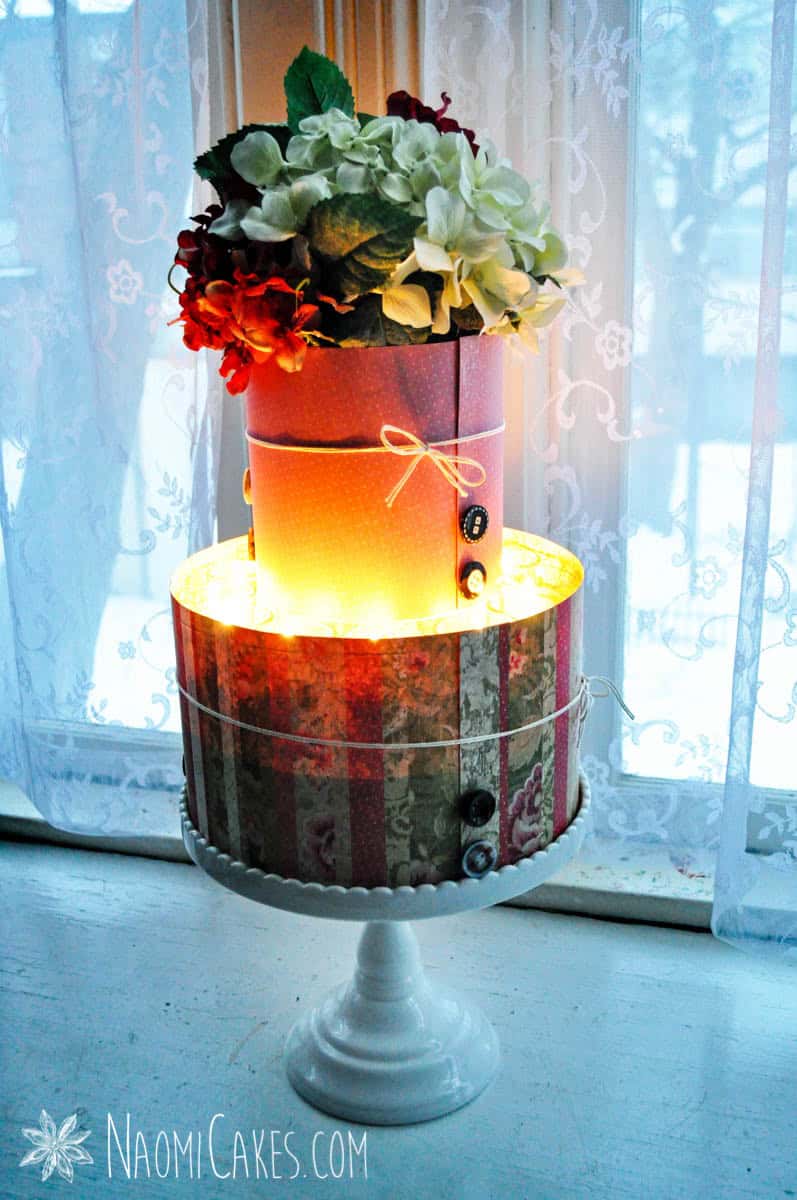
This simple paper cake centrepiece is a great way to add unique charm to any occasion. These beautiful colourful cakes can be made with any colour scheme and can be lit up with battery powered lights for a gorgeous glow in evening light.

Before you begin: a necessary disclaimer
This post is actually an old one, and I have to confess: way back in the day (I’m talking way back), I lacked the necessary foresight to see that making this paper cake with candles is a definite fire hazard! That said, the cake in the pictures (until I can update them) is as I originally created it, but I absolutely do not recommend making this craft with real candles!
You can easily make exactly the same thing with battery powered candles or lights. I’ll make my suggestions for which ones further on in this post!
The cake centrepiece: a bit of history
I had the idea to create this paper cake because my parents famously had a different cake on every table for the guests at their wedding reception. My mom came from a Mennonite family, and their community of incredible cooks and bakers catered the wedding and made the cakes for each table.
As I’ve learned more about my Mennonite background, grown in my love of cooking and baking, and become a cake decorator, I’ve enjoyed thinking back on the occasion that began my family as I know it. I treasure this little piece of my family’s history, and of course, I think it’s a fabulous idea!
What kind of paper to use for making a paper cake
For this tutorial, I used double sided scrapbooking paper. You could also use coloured card stock if you wanted a solid colour for your design, but personally I love the different patterns and colours available in the scrapbook paper world!
At the end of the day, a thick, good quality paper is going to work just fine (65-80lb paper, or 180-200gsm).

What kind of candles/lights to use
As I mentioned earlier, my original design for the paper cake used real candles. This is an absolute fire hazard (although I’m happy to report, I didn’t have a fire result from mine)! That said, I would recommend using battery powered votive candles, battery powered tea lights, or in a pinch, fairy lights for your paper cake.
How to make button tacks
When I made this paper cake back in the day, I found these adorable little button tacks (pictured) at the Dollar Store! Since then, it’s been hard to find exactly the same thing, but it would be really simple to make your own. Here’s how:
Get yourself some flat thumb tacks, hot glue, and large assorted buttons. Secure the buttons onto the head of each tack (carefully; don’t burn your fingers!), and allow them to dry.

You will need:
- 2 6″x3″ round cake dummies*
- 1 10″x3″ round cake dummy
- Patterned scrapbook paper, in the colour(s) of your choice (12″x12″ heavy card stock)
- Button thumb tacks (see note above for how to make button tacks) or diamond thumb tacks
- 12 battery operated tea lights, votive candles, or a couple of strings of fairy lights
- Silk flowers (I used assorted red and cream hydrangeas with the leaves/stems, arranged in a 6″-8″ diameter swag and fastened together with twist ties or floral wire)
- String, ribbon or raffia
- Glue stick
- Scissors
- Ruler
- Sticky tack or hot glue
- White cake pedestal, for display
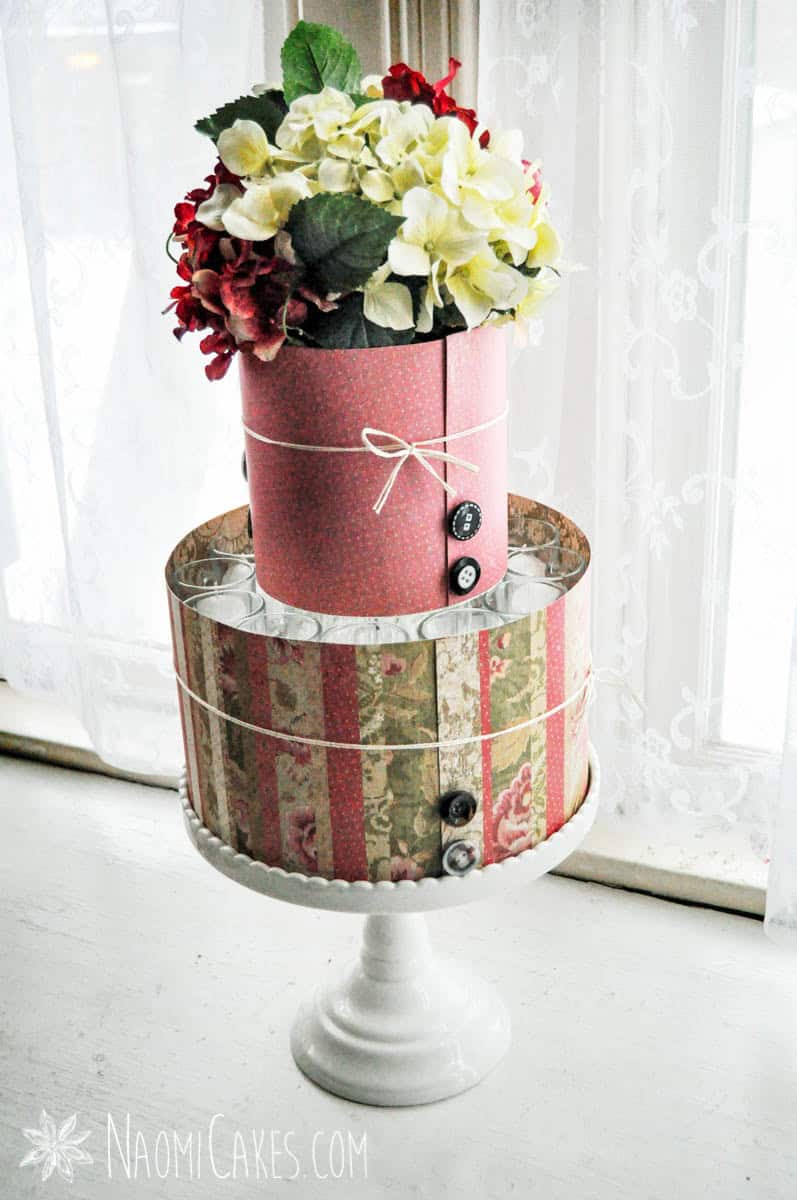
*In these photos, I used 4 small cups (2-2.5″ tall) or candle holders to elevate the top tier. You can make your paper cake with glass as I did, OR (I would recommend) use a second 6″ styrofoam tier to elevate the top tier.
Paper Cake Centrepiece
This beautiful, creative centrepiece idea is a great way to make a softly lit centrepiece for any occasion!
Ingredients
- 2 6"x3" round cake dummies*
- 1 10"x3" round cake dummy
- 4-6 pieces Patterned scrapbook paper in the colour(s) of your choice (12″x12″ heavy card stock)
- 8+ Button thumb tacks see note above for how to make button tacks or diamond thumb tacks
- 12 battery operated tea lights votive candles, or a couple of strings of fairy lights
- 4 stems silk flowers I used assorted red and cream hydrangeas with the leaves/stems, arranged in a 6″-8″ diameter swag and fastened together with twist ties or floral wire
- string, ribbon or raffia
- 1 Glue stick
- 1 Scissors
- 1 Ruler
- Sticky tack or hot glue
Instructions
-
*In these photos I used 4 small cups (2-2.5" tall) or candle holders to elevate the top tier. You can make your paper cake with glass as I did, OR (I would recommend) use a second 6" styrofoam tier to elevate the top tier.
How to Make the Paper Cake
-
To get started, elevate the top 6″ round cake dummy from the 10″ bottom tier by 2-3″ with glass or an extra layer of styrofoam (it should stand about 6″ tall).
-
Cut the paper in halves (6″ strips), and wrap the strips of paper around the 6″ and 10″ dummies, gluing and/or tacking them into place and at the seams with buttons or diamond tacks.
-
Measure the circumference of the cake tiers with string, ribbon, or raffia, and add about 12 inches to the length. Cut at least 2 lengths of this for each tier, and tie them around the centre of the cake tiers (so that you have two doubled lengths of wrapping material on each tier.
-
Set the top tier in place with tack or glue to keep it secure, and then arrange the candles or tea lights around the base of the 6″ tier.
-
Arrange the flowers into a 6″-8″ swag, fastening the stems together with twist ties or floral wire. Set the flowers on top of the 6″ tier to finish the cake.
-
Display with the lights on.
How to Make a Paper Cake Centrepiece
1 – Elevate the Top Tier
To get started, elevate the top 6″ round cake dummy from the 10″ bottom tier by 2-3″ with glass or an extra layer of styrofoam (it should stand about 6″ tall).

2 – Wrap the tiers in paper
Cut the paper in halves (6″ strips), and wrap the strips of paper around the 6″ and 10″ dummies, gluing and/or tacking them into place and at the seams with buttons or diamond tacks.


3 – Tie the cake tiers with string, ribbon or raffia
Measure the circumference of the cake tiers with string, ribbon, or raffia, and add about 12 inches to the length. Cut at least 2 lengths of this for each tier, and tie them around the centre of the cake tiers (so that you have two doubled lengths of wrapping material on each tier.

4 – Secure the paper cake into position
Set the top tier in place with tack or glue to keep it secure, and then arrange the candles or tea lights around the base of the 6″ tier.

5 – Top with Flowers
Arrange the flowers into a 6″-8″ swag, fastening the stems together with twist ties or floral wire. Set the flowers on top of the 6″ tier to finish the cake.
6 – Display
Display on a cake pedestal (or cake plate) with the lights on.

If you like this tutorial, you may also like:
- Rustic Wedding Cookies [Tutorial]
- Baby Onesie Cookies [Tutorial]
- How to Make a Naked Cake [A Step by Step Wedding Cake Guide]
- Easy Homemade Christmas Cards [Tutorial]
I hope you enjoy this tutorial! At some point I hope to get back in here and make a new battery-powered version for updated pictures. Any requests for colour scheme?
As always, if you make a paper cake, please tag me in your photos on Instagram @naomicakesofficial. I’d love to see your beautiful work!
Bye for now,
Naomi
This post contains affiliate links.
Oooh! I love this idea!
Yup. Definitely love this one. I just pinned it on Pinterest. 🙂
How absolutely creative. Love this idea. Great job.