
Rustic Wedding Cookies [Tutorial]
These cookies are simple enough on a white backdrop to lend the elegance of a wedding; yet at the same time, the design and colour scheme work well for the rustic look. Oh, and the best part: These cookies are really easy to make.
What qualifies as a “Rustic” wedding?
Rustic weddings have gained popularity in the last number of years, featuring various outdoor elements such as wood, flowers, feathers, and stones. Weddings with this theme will often have the elegant design of a classy occasion mixed with the rustic charm of the great outdoors.
How to serve rustic wedding cookies:
I have made thousands of beautiful sugar cookies for various occasions, and most often they packed up and set at each place setting as wedding favours. You can serve them in any number of ways, however. Try using these cookies for any of the following:
- Shower favours
- Wedding favours
- Dessert table treats
- Wedding party gifts
- Reserved seating weights (for outdoor venues)
Can a beginner make these cookies?
Yes, absolutely! The feather might look intimidating, but I promise, it’s not– and honestly, you can cheat on that one easily anyway, so no stress. These cookies are fun to make and simple to execute. (I’ll explain the cheater method in embossing section of my tutorial below.)
Do you need a lot of special equipment to make these cookies?
No, you do not! All you need is a round cookie cutter, rolling pin, clean paint brush and a couple of other tools. I’ll include a complete list of what you will need below (a lot of this you can find in your own kitchen, or just use something similar in its place).
You will need:
- Baked, round sugar cookies
- White or ivory rolled fondant ((1kg or about 2-2.5 lbs)
- Crisco or cornstarch, for rolling
- Rolling pin
- Straight pins
- Round cookie cutter (use the same size that you used to make the cookies)
- Plastic wrap
- Clear piping gel or royal icing
- Brown gel food colouring or brown liquid food colouring
- Water
- New, clean paint brush
- Small cell stick or other fine-tipped decorating tool (a shish-kabob stick will work)
- Small decorator spatula
- Small stitching wheel (optional)
- Fondant smoother (optional)

Rustic Wedding Cookies Tutorial
Makes about 24 cookies.
1 – Bake & Cool the Cookies
First, bake the cookies according to your recipe directions. You can use one of my recipes, or just use your favourite basic sugar cookie recipe.
Here are some of my recipe options if you need a little help. Any of these will work great (use a single batch for this tutorial):
- Classic Sugar Cookies
- Chocolate Sugar Cookies
- Lemon Poppyseed Cookies (made without the glaze)
2 – Roll the Fondant
- Knead the fondant on a clean surface lightly greased with crisco or sprinkled with cornstarch until smooth and pliable.
- Roll the fondant out until it’s about 1/8″-1/4″ thick; prick any air bubbles with a straight pin, and smooth out the pin prick spots with the palm of your hand.
- Cut the fondant into circles using the same cookie cutter you used to make the cookies. Smear a little piping gel or royal icing all over the surface of one of the cookies, and place a circle of fondant over top. Smooth out with a fondant smoother, if desired.
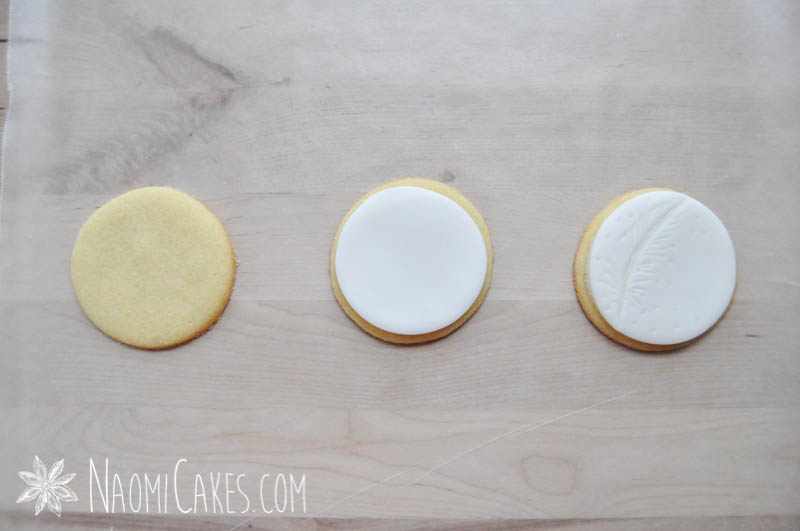
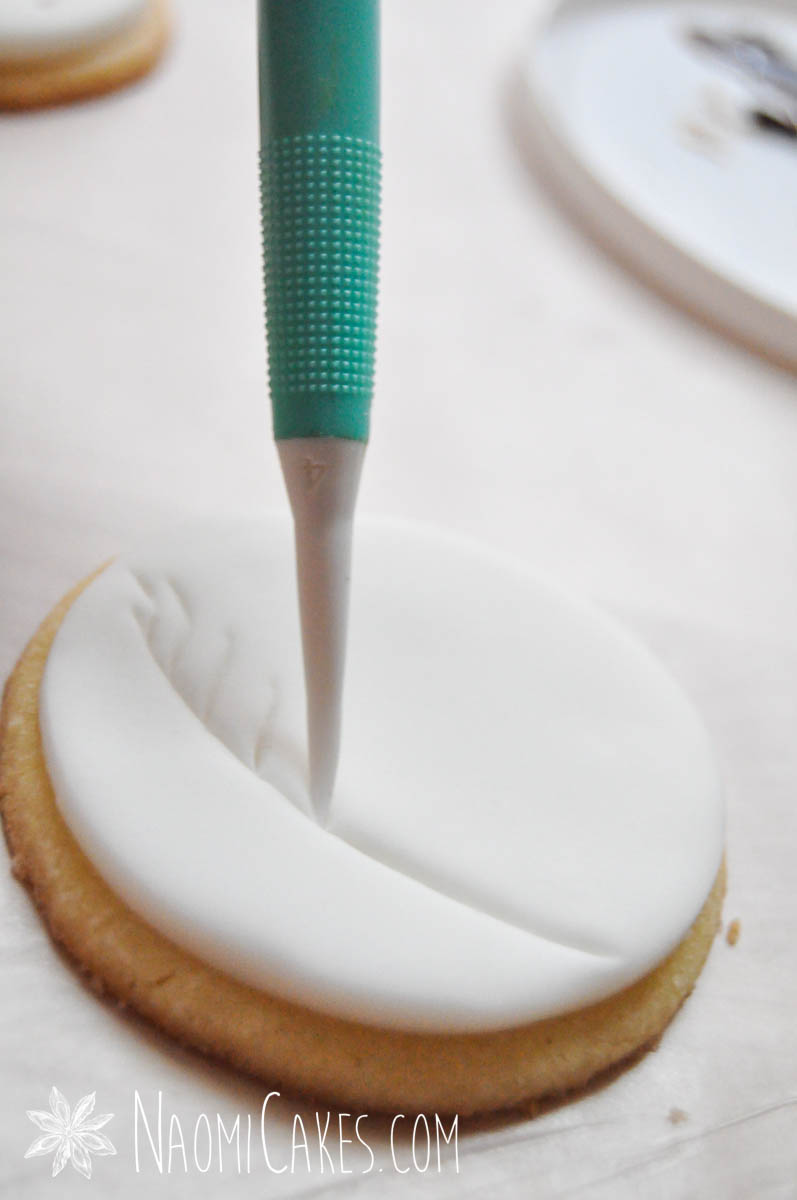
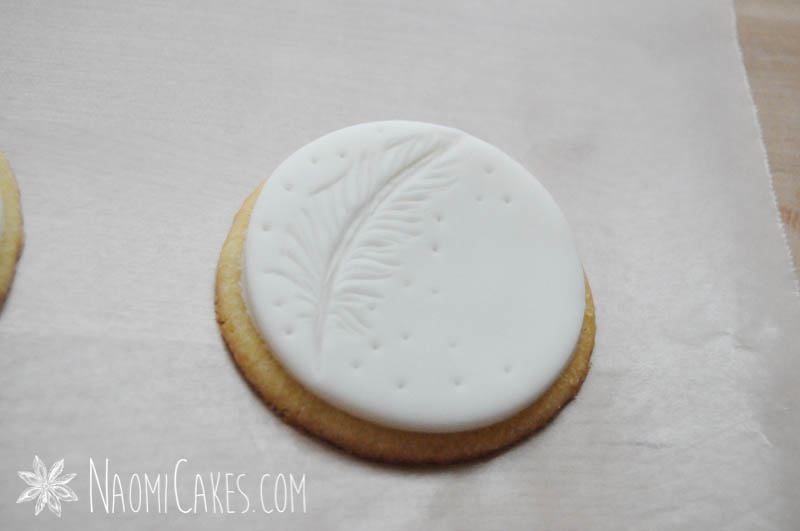
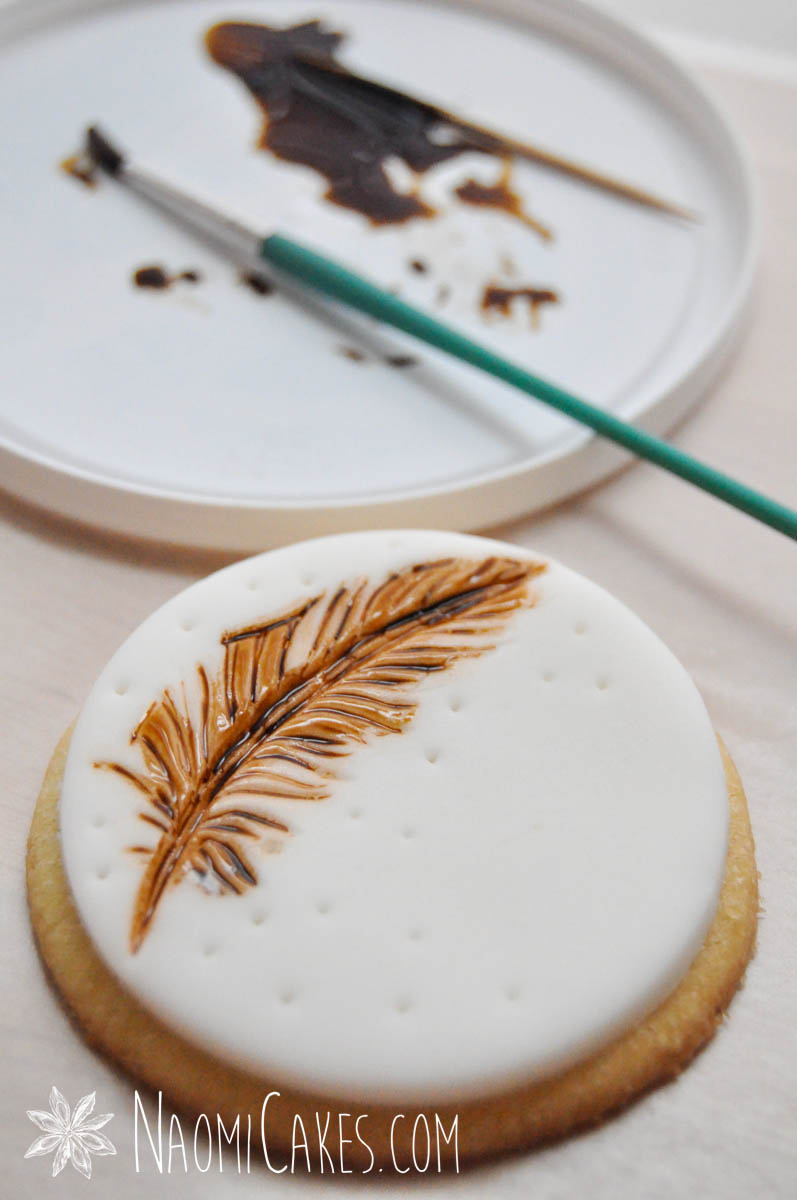
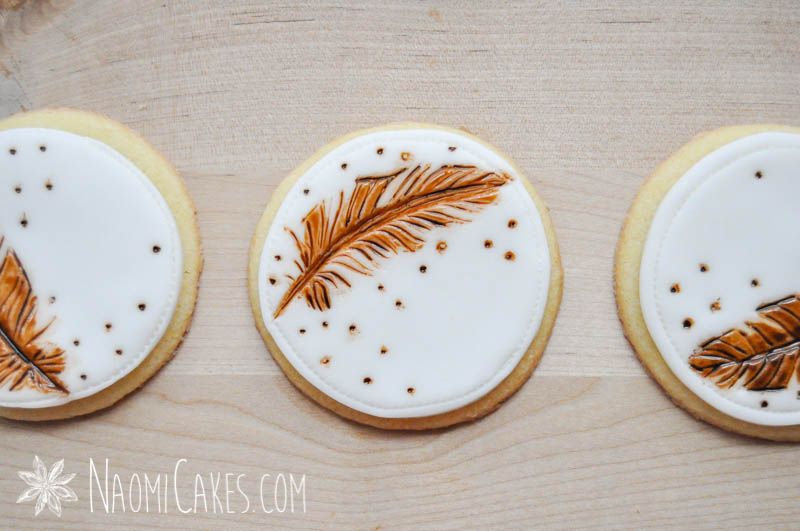
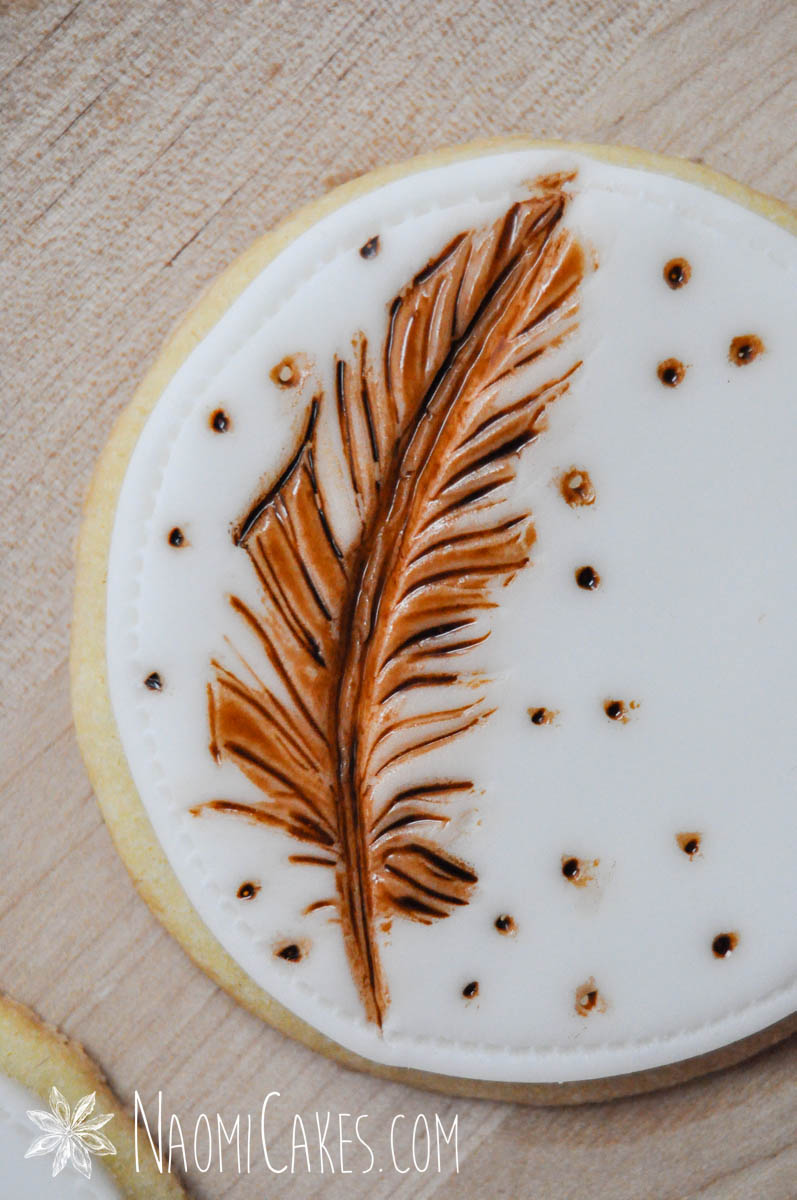
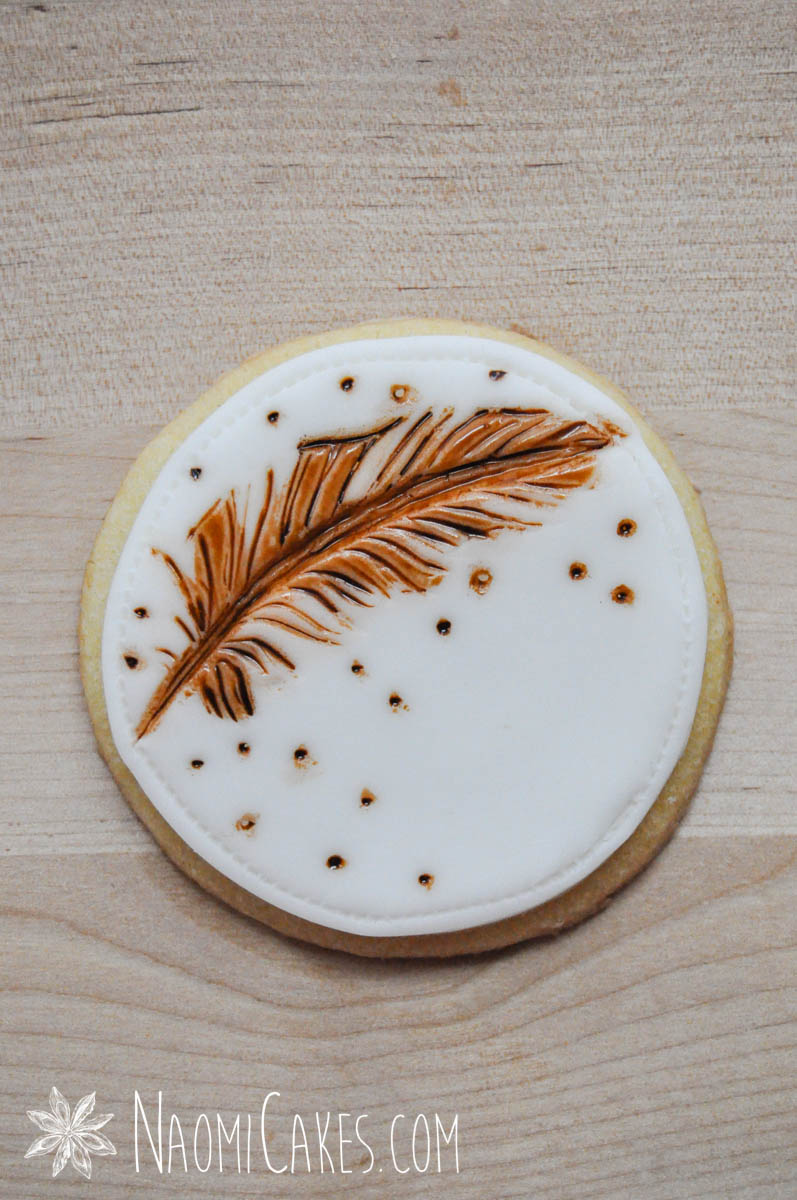
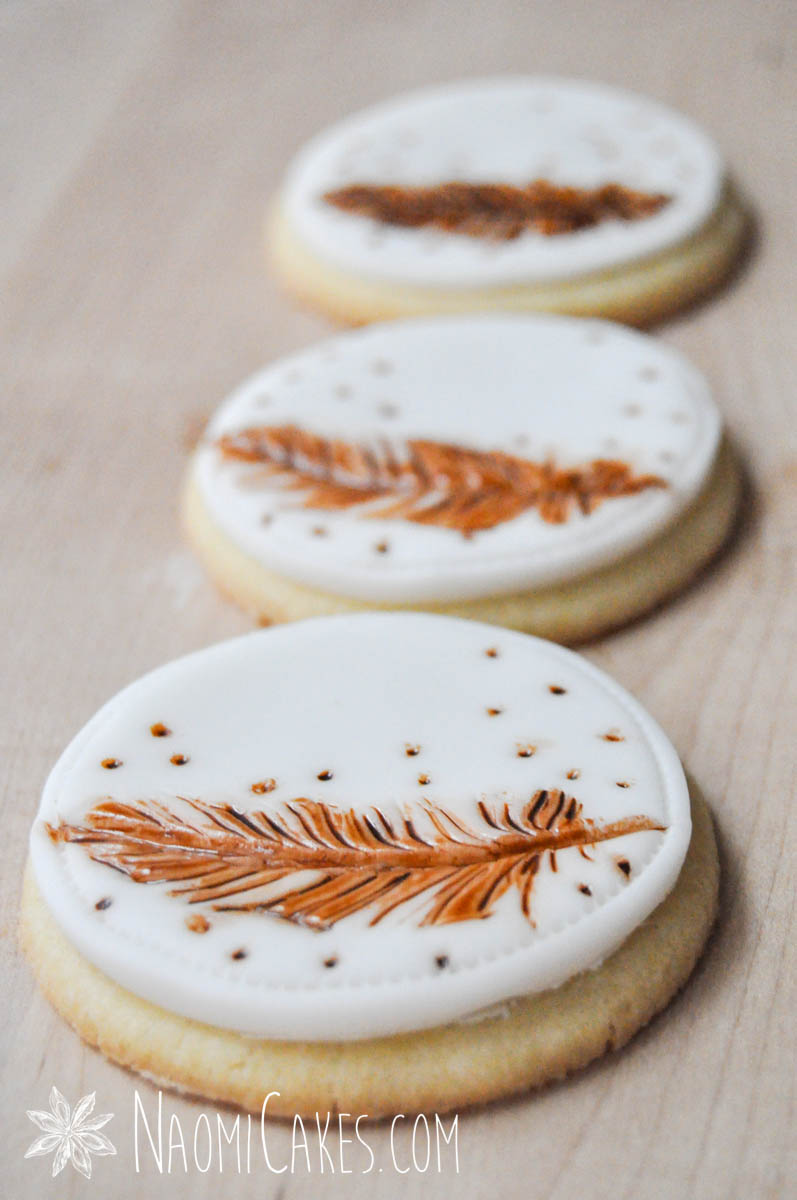
3 – Hand-Emboss the Feather
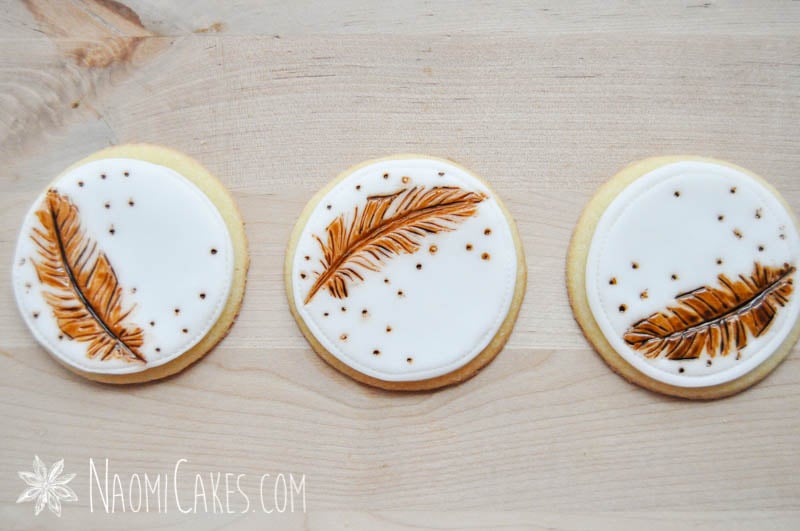
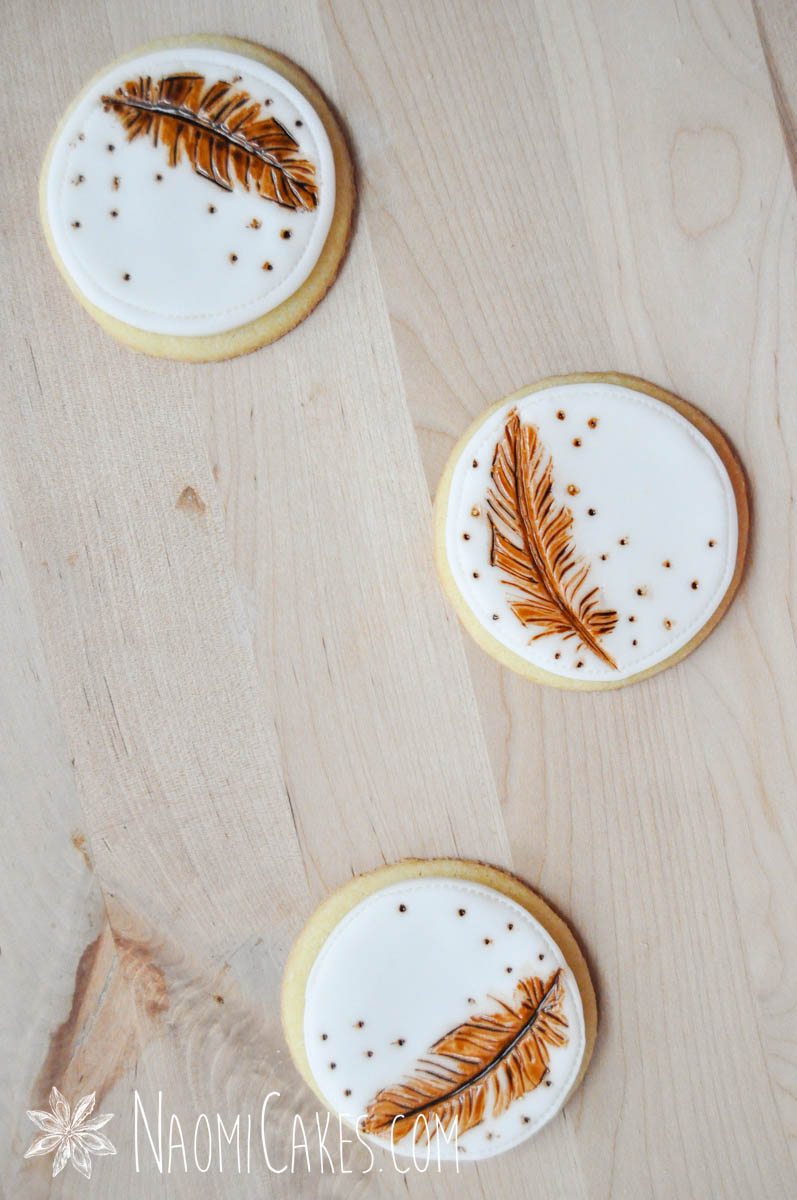
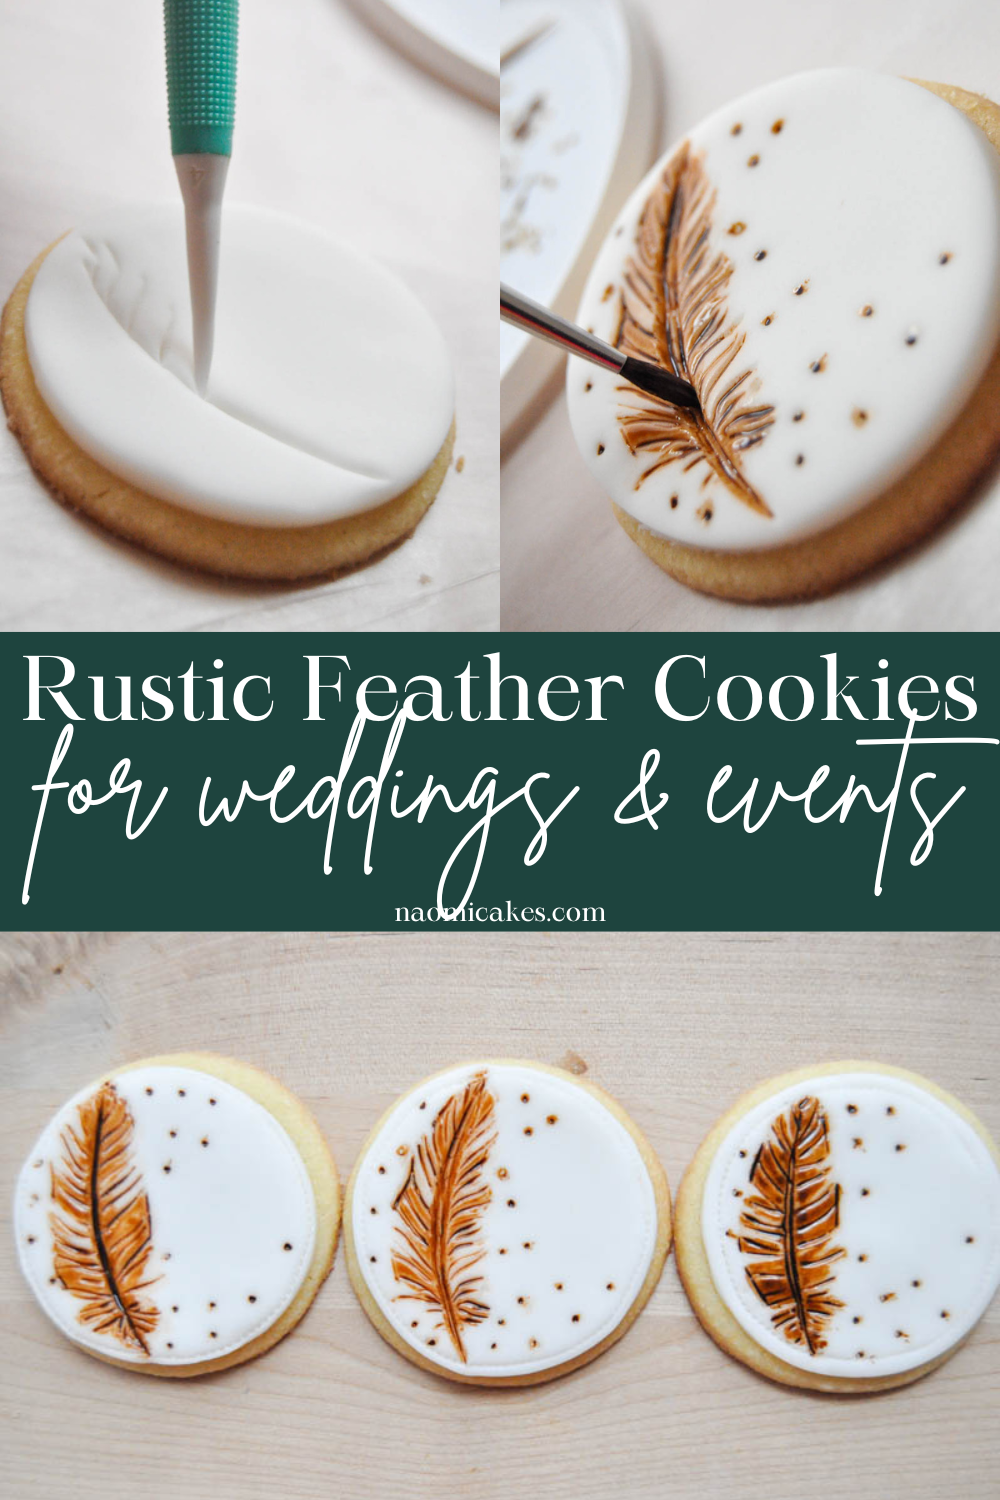
On the soft fondant circle, emboss by hand the shape of a feather with a cell stick or shish kabob stick. Add little “Fairy dust” dots around the feather (see the pictures for reference).
You can create the feather shape with the thin end of a cell stick, shish kabob stick, or another tool that works for you – Even a pin or toothpick would work in a pinch!
You can also “cheat” on this step and press a clean (new) rubber stamp or metal charm into the fondant to create the shape for you.

Paint the Feathers
Starting notes:
- I usually use gel food colour for this, mixed with a bit of water. You could also use liquid colour for this if you would prefer, but I always have gel on hand, so that’s what I use (and also, it’s usually hard to find liquid colour in a perfect brown).
- I find that I can control the colour best by dipping the end of a toothpick into the gel, setting it down on a plate or small container lid, and then adding a bit of water to that. Then I mix the colour and water together with the brush, using the stronger colour on the toothpick for more definition if I want it, or the more watery part for weaker colour.
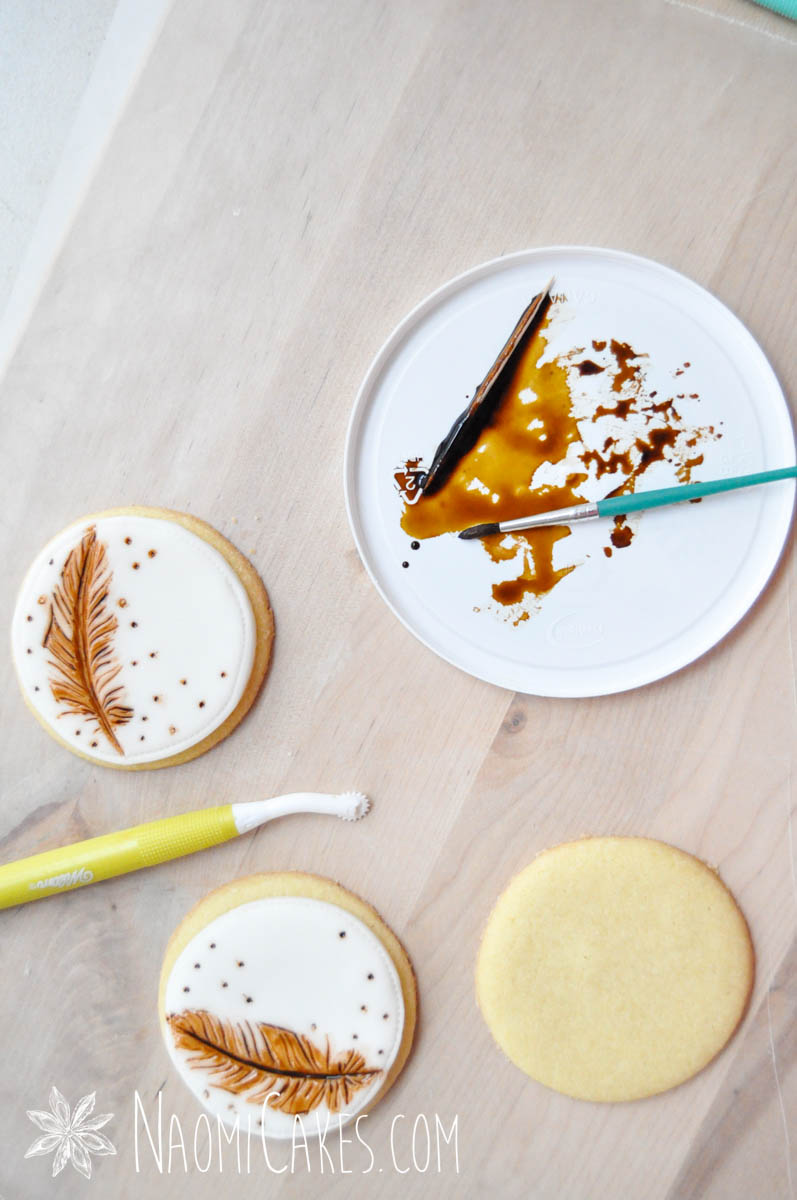
Instructions:
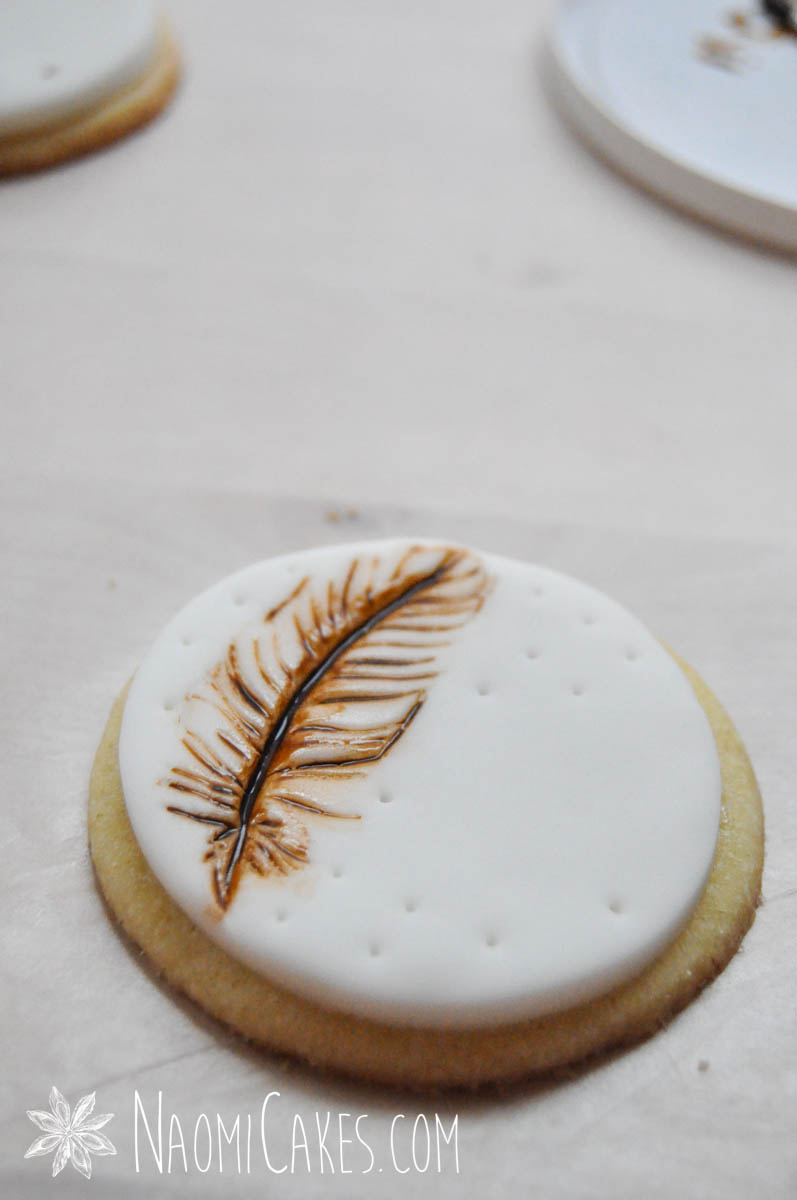
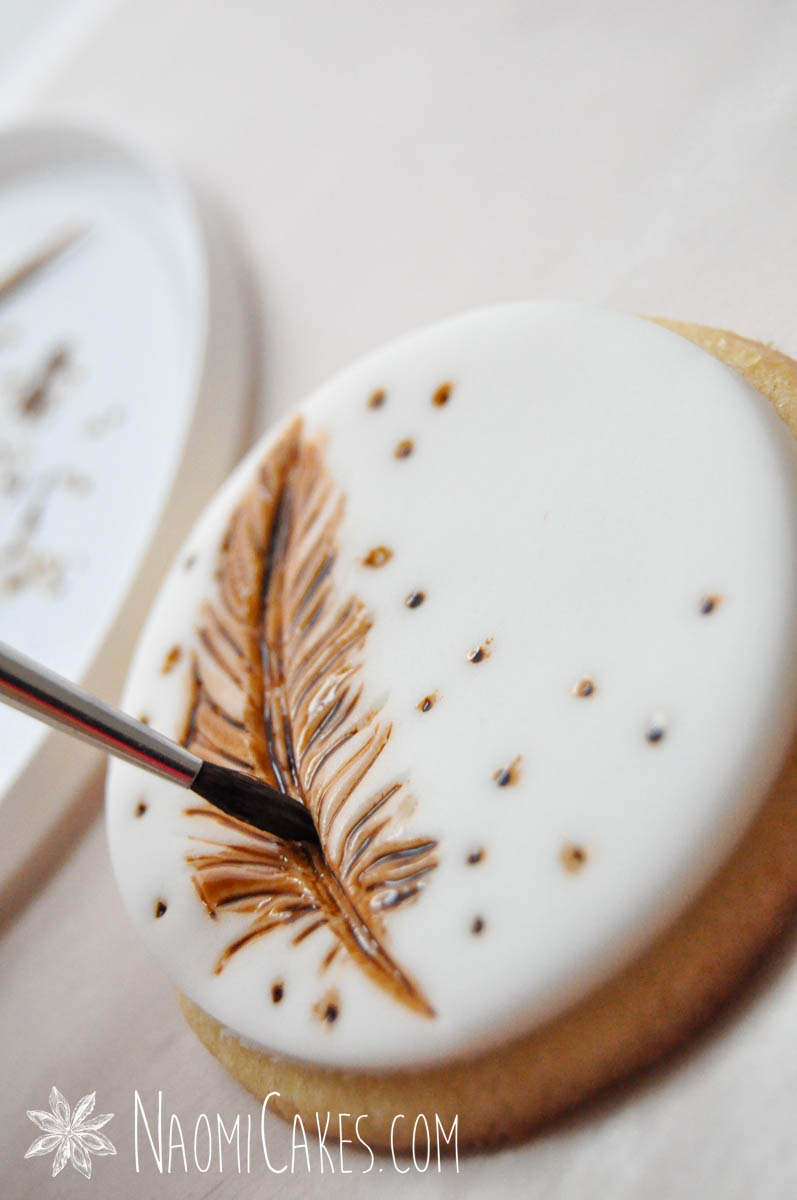
- Brush over the whole outside of the feather generously with food colouring, letting the liquid fill up the crevices of the design.
- Using your finger or a soft clean cloth, gently wipe the colour away completely, drawing your finger in toward the centre of the feather, so as not to smear it all over the cookie. This should leave most of the colour left only in the crevices of your design (pictured below).
- Using your paint brush, go back over the feather a little more carefully, painting food colouring into the sections that you want more fully covered, and creating definition where you want it. Then, using the tip of the brush, fill in the little dots.

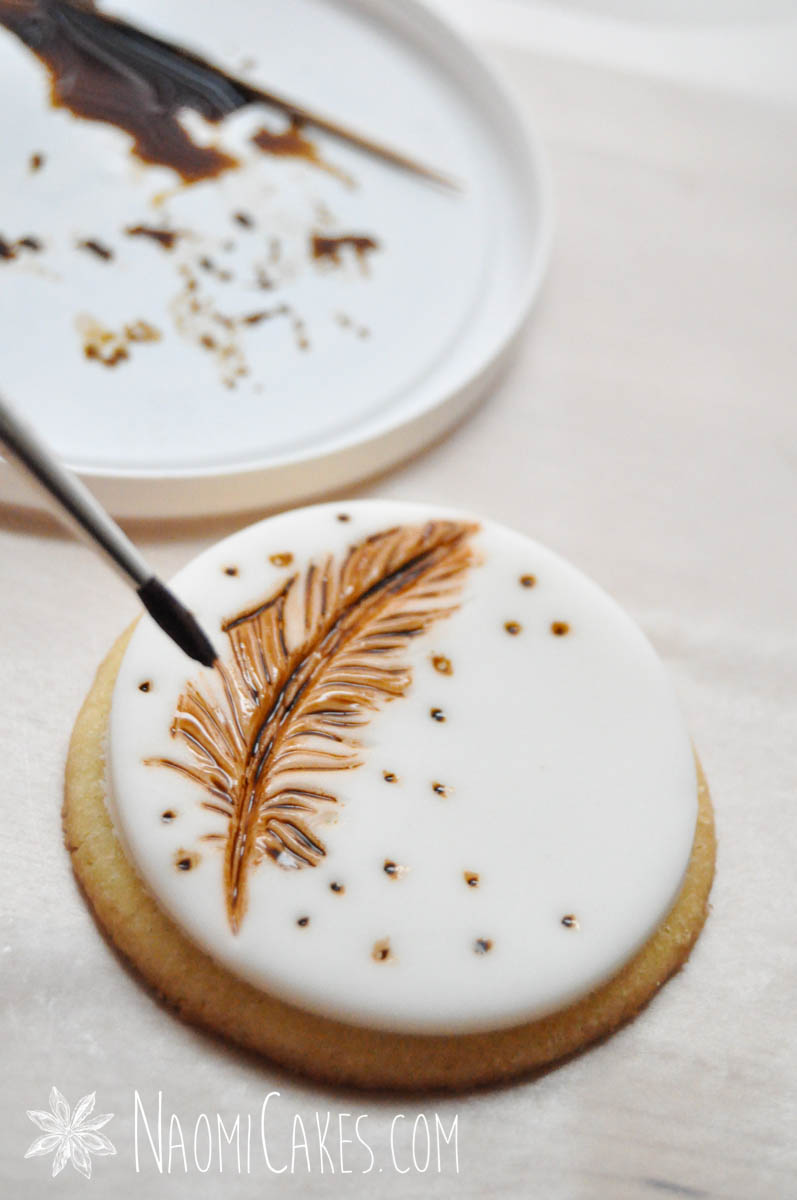
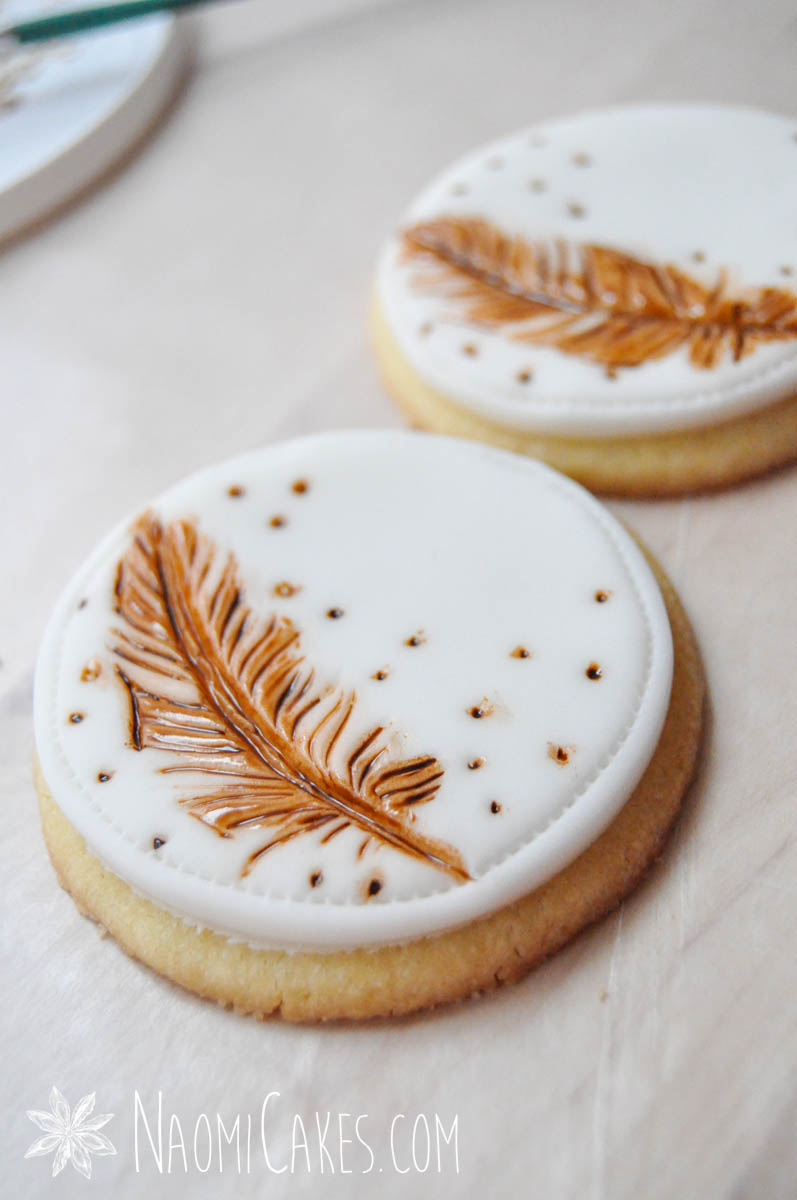
Add the Stitching
Run the stitching wheel around the edge to create a border. You can also omit this if you like it better without, or pipe a border with royal icing around the edges instead for a different finish.

Dry the Cookies
Allow the cookies dry completely before packaging them in cellophane or whatever you’re planning to use (about 12-24 hours).
And now before I go… Which way do you think YOU would like them better: With the stitching or without? I can’t decide… Although I think, I’m leaning more toward saying I like them best with the border.
Leave your opinion in the comments! And as always, if you make these, tag me in your photos on Instagram @naomicakesofficial – I love to see what you guys make!
Thanks for reading!
–Naomi
This post contains affiliate links.
These are beautifully elegant cookies. I was looking for just such a design for my daughters wedding cookies. Thanks for the tutorial!
I prefer the border, they look more finished. Great tutorial! I have a feeling I'll be using it many different times with many different themed parties I host!
I just love the way you designed the cookies. I really want to buy these lovable cookies for weddings next time.
Are these able to be frozen?
Tammy–
You can freeze the cookies, but the fondant finish will let off condensation if it is frozen and ruin the design. They can be decorated 3 days in advance, though – And then just keep them at a cool room temperature until they are served.
Thanks for your comment!
Thanks for sharing your tutorial. My son is having a falconry party shortly and these would be perfect for the party bags. Hope you don't mind ;0) They are beautiful.
Thank you for such a beautiful tutorial. I thought it was a stamp and I could not believe how easy they seem to be. I will surely try them. To me, with or without the stitching line they look fine and making a perfect circle is a little bit of stress to me. I will make little dots if I wanted another finish.