
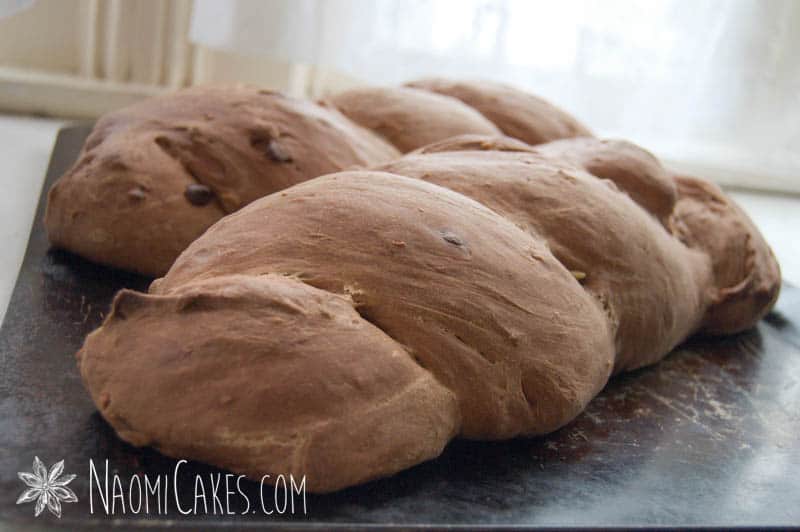
Chocolate Walnut Bread [Recipe]
Looking for an easy, beginner friendly chocolate bread recipe? Well my friend, I do believe you have found it. This chocolate walnut bread recipe is soft as a cloud, not too sweet, perfectly chocolate kissed, and amazing toasted with butter.
A chocolate bread recipe with yeast
Unlike the typical cake-like quick breads made with chocolate, this recipe is a simple way to make chocolate bread with yeast. Cocoa is added directly to the bread dough to give it a chocolate flavour, and minimal sugar is added. This is a perfect recipe for breakfast, brunch, or afternoon tea!
Different ways to make chocolate bread with yeast
There are a few different ways to make chocolate bread with yeast. Here are a few of them:
- Cocoa and sugar added to the dough
This recipe is made this way. If you don’t add sugar to the dough, cocoa will give it a darker look without the same sweet “chocolate” flavour. You can take a peek at this recipe to see what I mean. - Real chocolate in the dough
Again, this recipe does add chocolate chips to the dough- but you can also add chocolate chips, shavings, or chunks to a regular white bread for a bit of that salty/chocolate combo that is so delicious. - Sourdough or Yeast dough
This recipe is a yeast chocolate bread recipe, but you could also add chocolate to a sourdough bread recipe for an incredible variation.
The easiest chocolate bread recipe
This recipe is great for beginners since it is truly so easy to make. Even if this is your first time making bread, you should be able to pull this one off pretty easily– and if you don’t want to bother doing the rope shape, you can just plop this dough into a greased loaf tin and bake it that way (following the directions exactly the same otherwise).
Tips for making chocolate walnut bread
- Make the dough with less flour.
When making sweet dough, a softer consistency dough will help yield that light-as-a-cloud quality which makes sweet breads so delicious. To make the dough easier to handle, use a little bit of oil or melted butter on your fingertips to keep it from sticking as you work with it. - Bake the bread at a lower temperature.
Sweet breads are usually baked at a lower temperature than traditional breads. This is due to the higher sugar content in the loaves, which would cause the bread to burn at high heat, sometimes even before it’s finished baking! If your oven bakes hot (ie, most things come out a little more toasty than they should), try baking your bread at a temperature 25 degrees (fahrenheit) lower than the recipe suggests.
How to store chocolate walnut bread
I always store my bread in ziploc bags or other storage bags that are freezer-safe. You can slice it and freeze it, or just keep it in a sealed bag on the counter to prevent it from drying out.
Homemade bread is best on the day it is made, or toasted 2-3 days afterward. In very warm/moist environments, the bread will go bad quickly, so you may want to store it in the fridge.
The best way to serve chocolate walnut bread
You can serve this bread in a number of good ways. Here are some ideas for you:
- Warm from the oven (plain or with butter)
- Toasted with butter
- With cream cheese or strawberry cream cheese spread
- With cream cheese and fresh fruit or jam
- Alongside your favourite cheeses
- On a charcutteri table
- As french toast
- In homemade bread pudding
You will need:
- Ingredients (see recipe card)
- Mixing bowls or an electric mixer
- Measuring cups and spoons
- Spatula
- Cutting board
- Chef’s knife
- Parchment paper (optional)
- Cookie sheet or loaf pan
- Cooling rack
- Ziploc bags or tight sealing storage container, for storage
Chocolate Walnut Bread
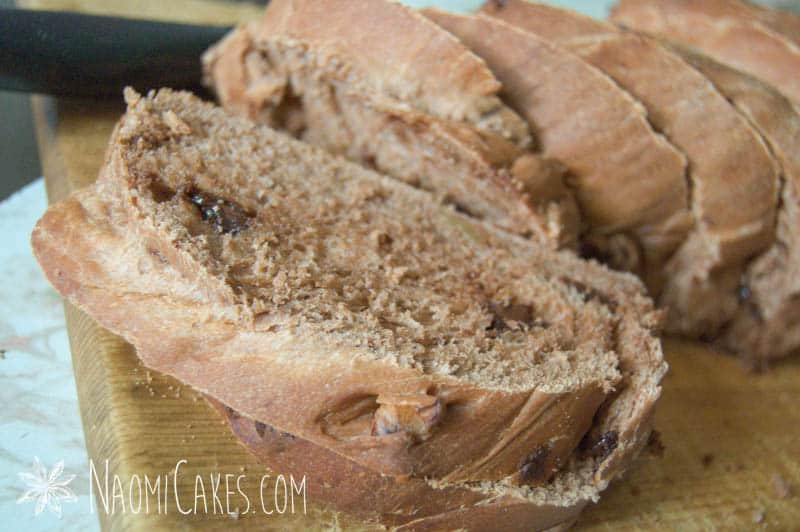
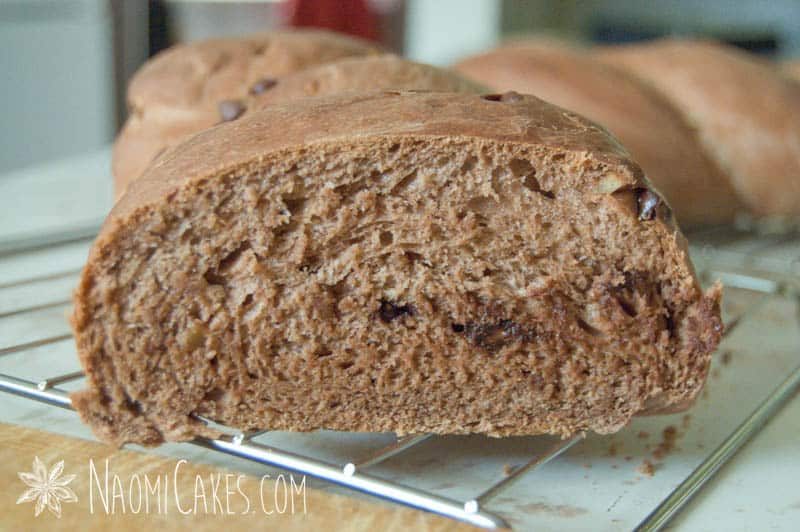
This recipe makes 1 large loaf of fluffy, soft chocolate bread with chunks of chocolate and walnuts throughout.
Ingredients
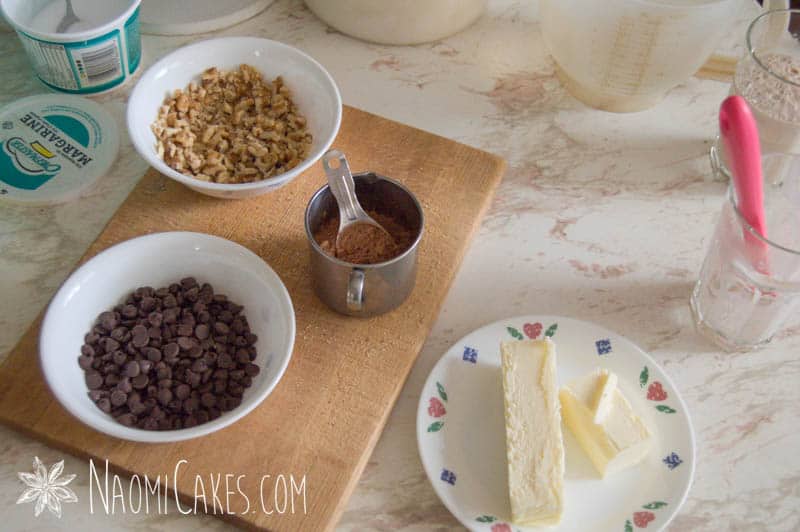
- 1/2 Tbsp. dry active yeast
- 1/4 cup lukewarm water
- 1/2 tsp. sugar
- 1 cup lukewarm water
- 1/3 cup sugar
- 1/2 tsp. salt
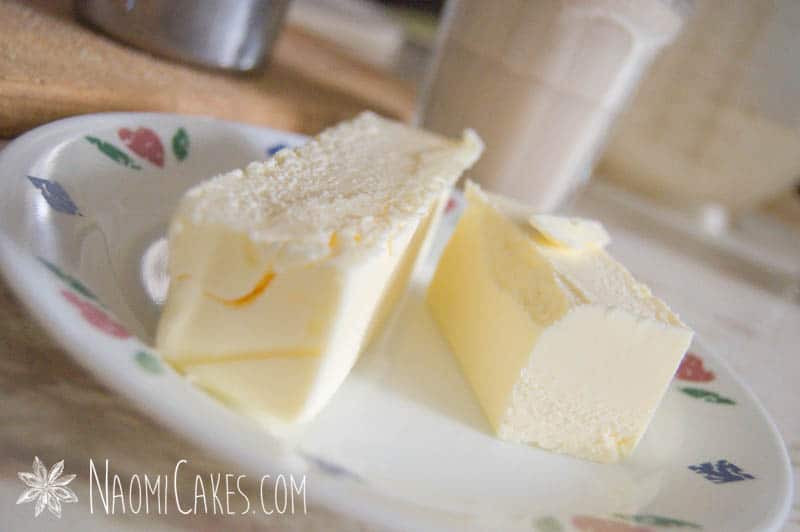
- 1/4 cup butter softened
- 1/4 cup walnuts
- 1/4 cup semi sweet chocolate chips OR chopped dark chocolate
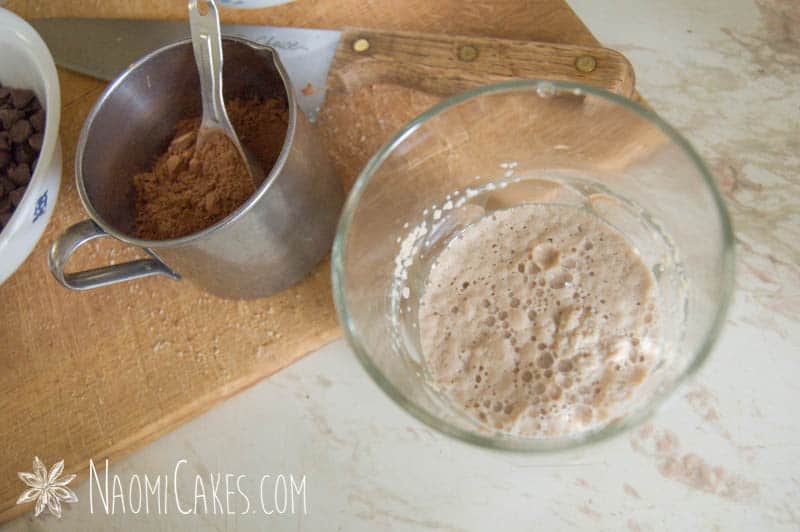
- 3 Tbsp. cocoa powder
- 3 cup flour more or less; read the instructions before adding
Instructions
-
Dissolve the yeast in 1/4 c. lukewarm water with 1/2 tsp. sugar and let this stand for about 10 minutes or until risen. If the yeast doesn’t rise, it is dead and you will have to start again.
To make the dough by hand:
-
In a large mixing bowl, combine the rest of the water, sugar, and salt. Stir to dissolve. Add the risen yeast mixture, and then add the butter, chocolate chips, and walnuts.
-
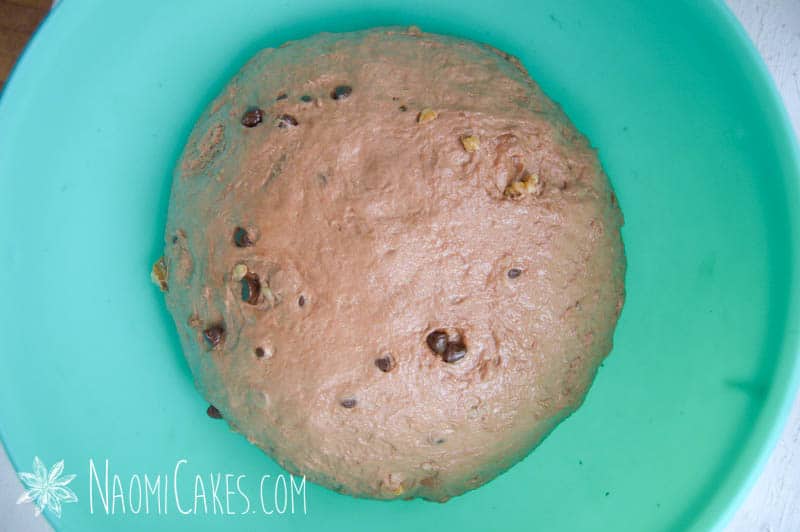
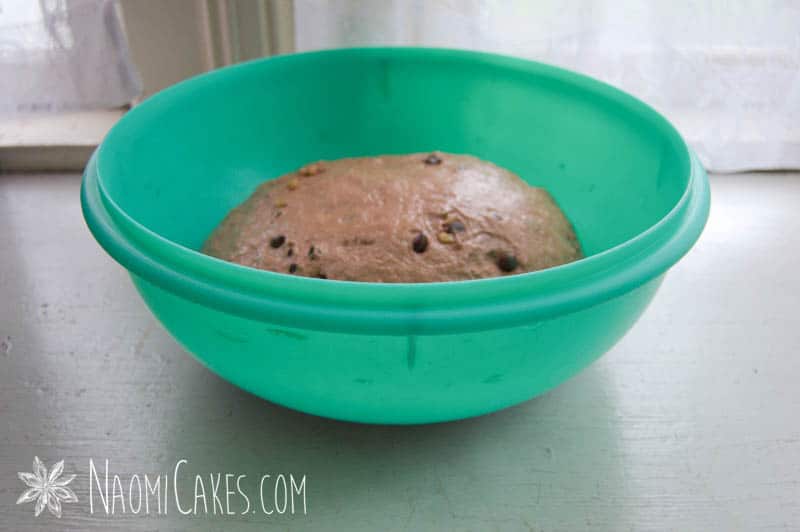
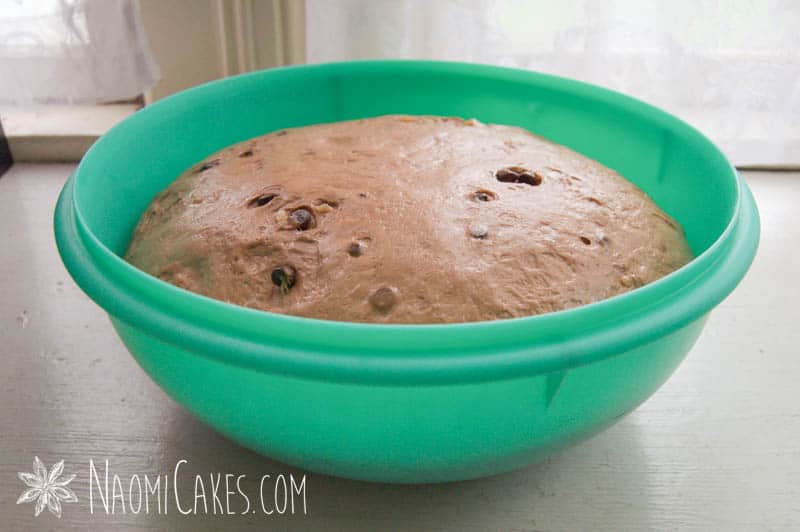
Add the cocoa and about 1 c. of the flour. Mix to combine, and continue adding flour, 1/4 c. to 1/2 c. at a time, until the dough becomes too difficult to stir. Turn out onto a floured work surface and knead, adding more flour as you go, until the mixture forms a smooth, soft dough with chocolate chips and nuts in it. Turn into a greased bowl, flip it upside down (smooth side up), and cover with plastic to rise or a damp tea towel to rise.
If you are making this bread in a stand mixer:
-
Combine the water, sugar, and salt in the bowl of the electric mixer, and add the yeast, butter, chocolate chips, walnuts and cocoa to that. Use the dough hook attachment and mix in 1 c. flour until it is well incorporated. Add more flour and mix, again until incorporated. Keep doing this until you get the consistency of a smooth, soft dough. Turn into a greased bowl and cover to rise.
Once the dough is made:
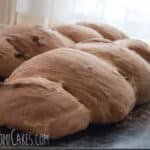
-
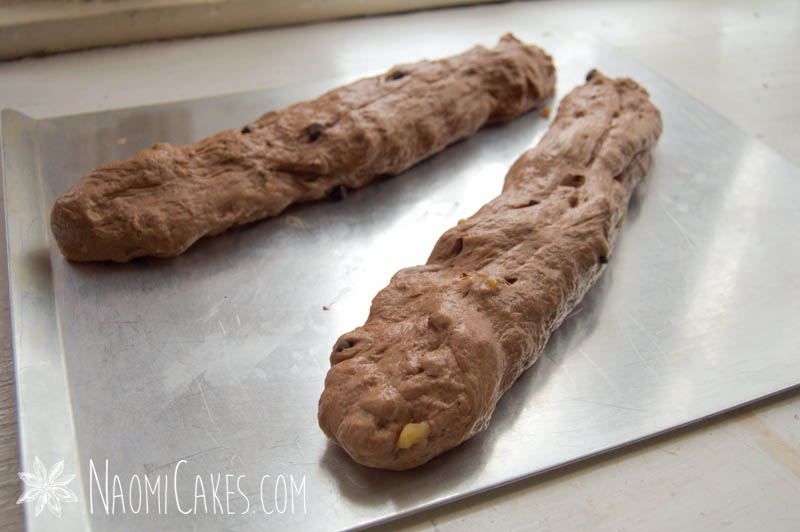
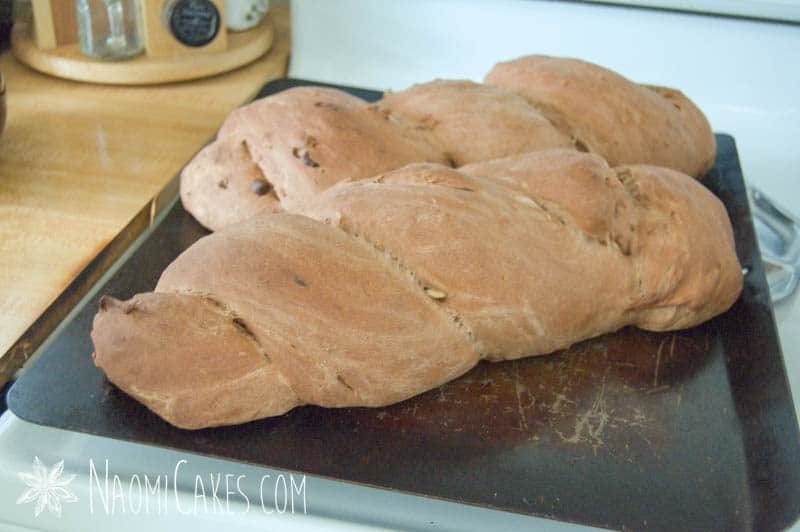
Let the dough rise for 1 hour or until doubled in bulk. Grease your hands with a bit of oil or butter and punch the dough down. Divide into 2 sections, and roll between your hands until you get two 15" ropes.
-
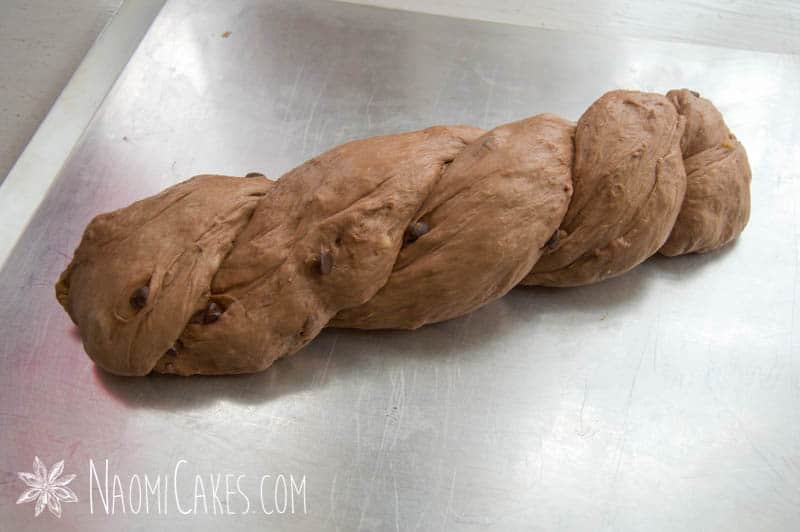
Twist the ropes together into a long loaf, pinching the edges to seal, and tucking the ends under to finish.
Alternatively: You can shape the dough into a loaf and set it into a lightly greased loaf pan.
-
Set the loaf onto a non-stick, parchment lined, or lightly greased pan. Cover loosely with a tea towel, and allow to rise 35 minutes. Preheat the oven to 350 degrees F and allow the oven to heat 10 minutes (for a total rising time of 45 minutes).
-
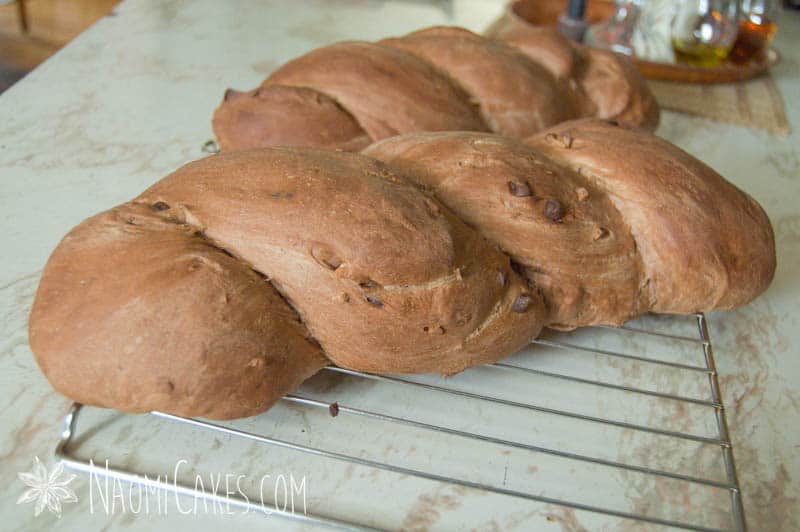
Bake the bread for 35 minutes, or until it sounds hollow when tapped.
-
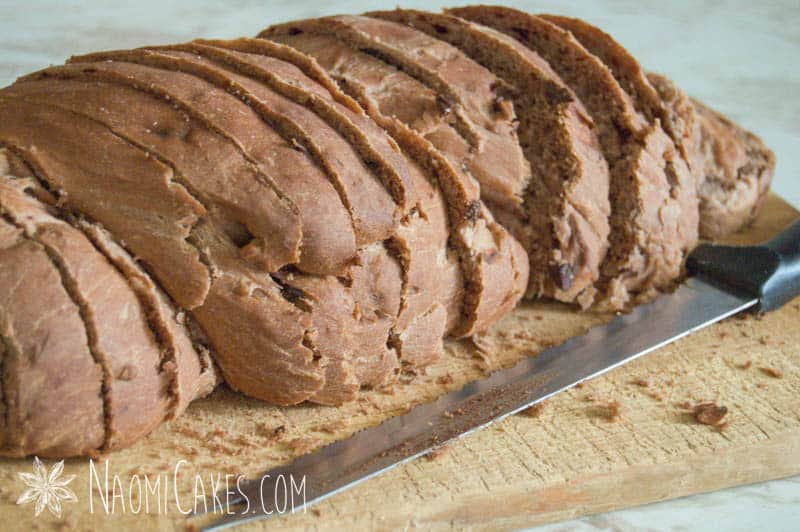
Cool completely on wire racks before slicing. Store in a sealed container or plastic bag.

Proofing the yeast
First proof of the dough
Shaping the dough
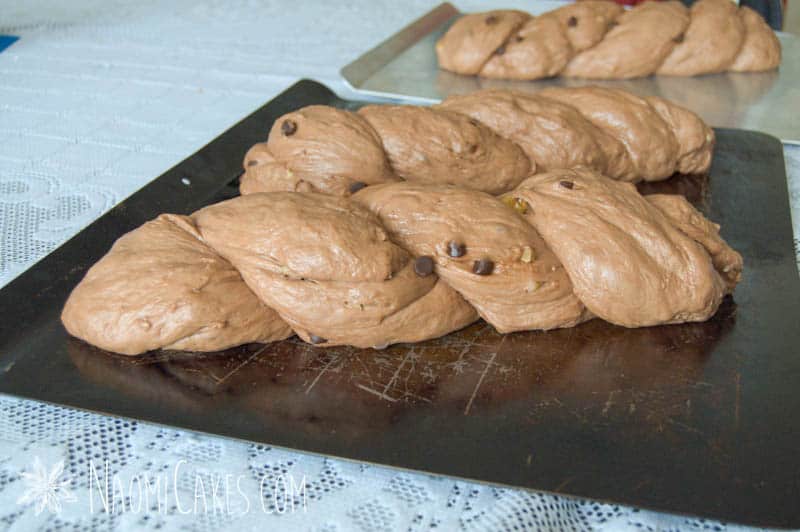
Baking, cooling, and serving the bread
If you like this recipe, you may also like:
I hope you enjoy this recipe! As always, if you make this bread, feel free to tag me on Facebook or Instagram @naomicakesofficial. I would love to see and show off your work!
–Naomi
This post contains affiliate links.
You had me first at dessert… then really pulled me in with bread! Wow, my two favorites rolled into one! Love it! P.S. I nominated you for the Liebster Award today. Can't wait to see your answers! http://rustichoney.com/2013/05/04/liebster-award/
I made 2 loaves of this amazing bread yesterday and one loaf has already been consumed! It is sooo good! —Jeanette W.
Is it all right if I use whole wheat flour?
You can use whole wheat flour, though it will yield a much heavier bread.
If you want to use partly whole wheat for health reasons, that won't alter the result too much — Though, I would use 1-2 cups and then add white after that.
All the best!
Thank you!