
Gum Paste Roses – The Medium Rose, Part 3/5 [Tutorial]
Today I want to teach you how to make an edible gum paste medium rose (half bloom rose). In previous posts, I shared with you the first two steps to get to this point: making the rose base, then the rose bud. Next, I’ll show you how to add rose petals to make these beautiful roses bloom into full sized roses.
Side note, let me tell you: making gumpaste roses (which definitely requires both hands) and taking pictures of the process (alone) is not easy. Especially when the sun dips behind a cloud every few seconds, making my camera settings need to be adjusted frequently. I feel like I should win some kind of prize!
Making gum paste roses for the first time
As I have mentioned before, I wanted to keep each piece of the directions as a separate tutorial, just to make sure you don’t get overwhelmed. Roses aren’t hard to make; they just have a lot of detail to think about.
If you are making roses out of gum paste for the first time, I hope this broken-down, easy approach will make the whole process feel more doable for you. Sugar flowers are so rewarding to make, and they create some of the most stunning cakes.
Making roses on toothpicks vs. floral wire
In my previous posts for this series, I mentioned that I’m teaching this rose tutorial for crafting sugar roses on toothpicks. This is a great way for beginners to learn how to make them; it is a simpler way to construct them, which should help you to get the hang of the process.
Once you’ve mastered this process, without too many special tools (I hope), you can branch into wiring roses and making beautiful calyxes and stems.
Some inspiration
I’ll share a picture for inspiration here. Here’s a wedding cake I made with white rose decorations, made using the method in this tutorial. Also, yes – you can make a cake like this too! (In case you needed someone to say it.)
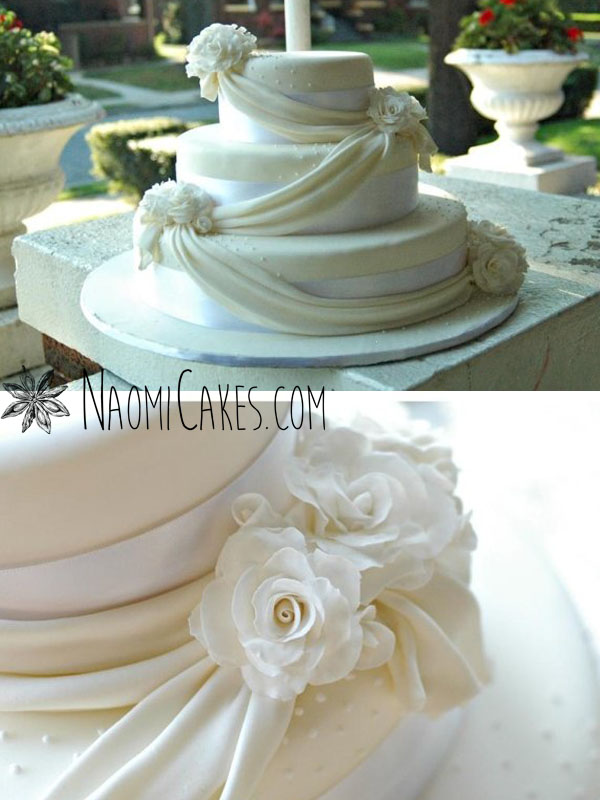
Use this tutorial to make roses for birthday cakes, wedding cakes, shower cakes, and more. They are beautiful gum paste flowers, and I know you will love them for whatever your creative mind can dream up.
Note: I used a fairly small rose cutter set for the cake in this picture, which as you may have guessed, makes a smaller rose. If you want to make larger roses, you can follow these directions exactly, using a larger cutter set instead.
You will need:
- Pre-made rose buds
- Gum Paste
- Vegetable shortening
- Plastic Wrap
- Glass of water
- Cornstarch (in a tea ball or cheesecloth bundle, for easy application)
- Rolling Pin
- Foam Mat
- Ball/Frill Tools
- Paint Brushes
- Cell stick (optional) – Some gum paste tool kits will include one of these
- Silicone veiner* (optional)
- Rose Cutter Set
- Styrofoam block
*The veiner in this tutorial is hard to find these days, but the silicone ones are much better!
IMPORTANT: Any leftover gum paste will dry out if it’s not kept well-sealed. I recommend wrapping it in plastic, putting it into a ziplock bag, and putting it into a sealed container to keep maximum freshness.
Tip: This tutorial is for making small roses, as pictured in the cake in the photo above. If you want to make large roses, you can just use a set of 3 large rose cutters (for making large petals) and follow the same instructions.


Medium Gum Paste Roses (Edible Roses)
This is part 3/5 on making gum paste roses @naomicakes.com!
Ingredients
- pre-made rose buds (enough for the number of roses you want to make) see my previous tutorial for this step
- 1 golf ball sized piece gum paste
- 1-2 tsp vegetable shortening
- plastic wrap
- 1 glass water
- 1 small fondant/gum paste rolling pin
- 3 rose cutters (set)
- 1 foam mat
- corn starch in a tea ball or cheesecloth bundle, for easy application
- 1 ball tool/frill tool
- 1 new/clean* paint brush *must be new or only used for this process to be food safe
- 1 cell stick optional
- 1 veining tool optional
- 1 piece styrofoam
Instructions
-
Lightly grease a clean work surface with some vegetable shortening, put a little on your hands, and knead the gum paste until smooth and pliable.
-
Roll the gum paste out until it is quite thin; about 1/8" or a little thinner.
-
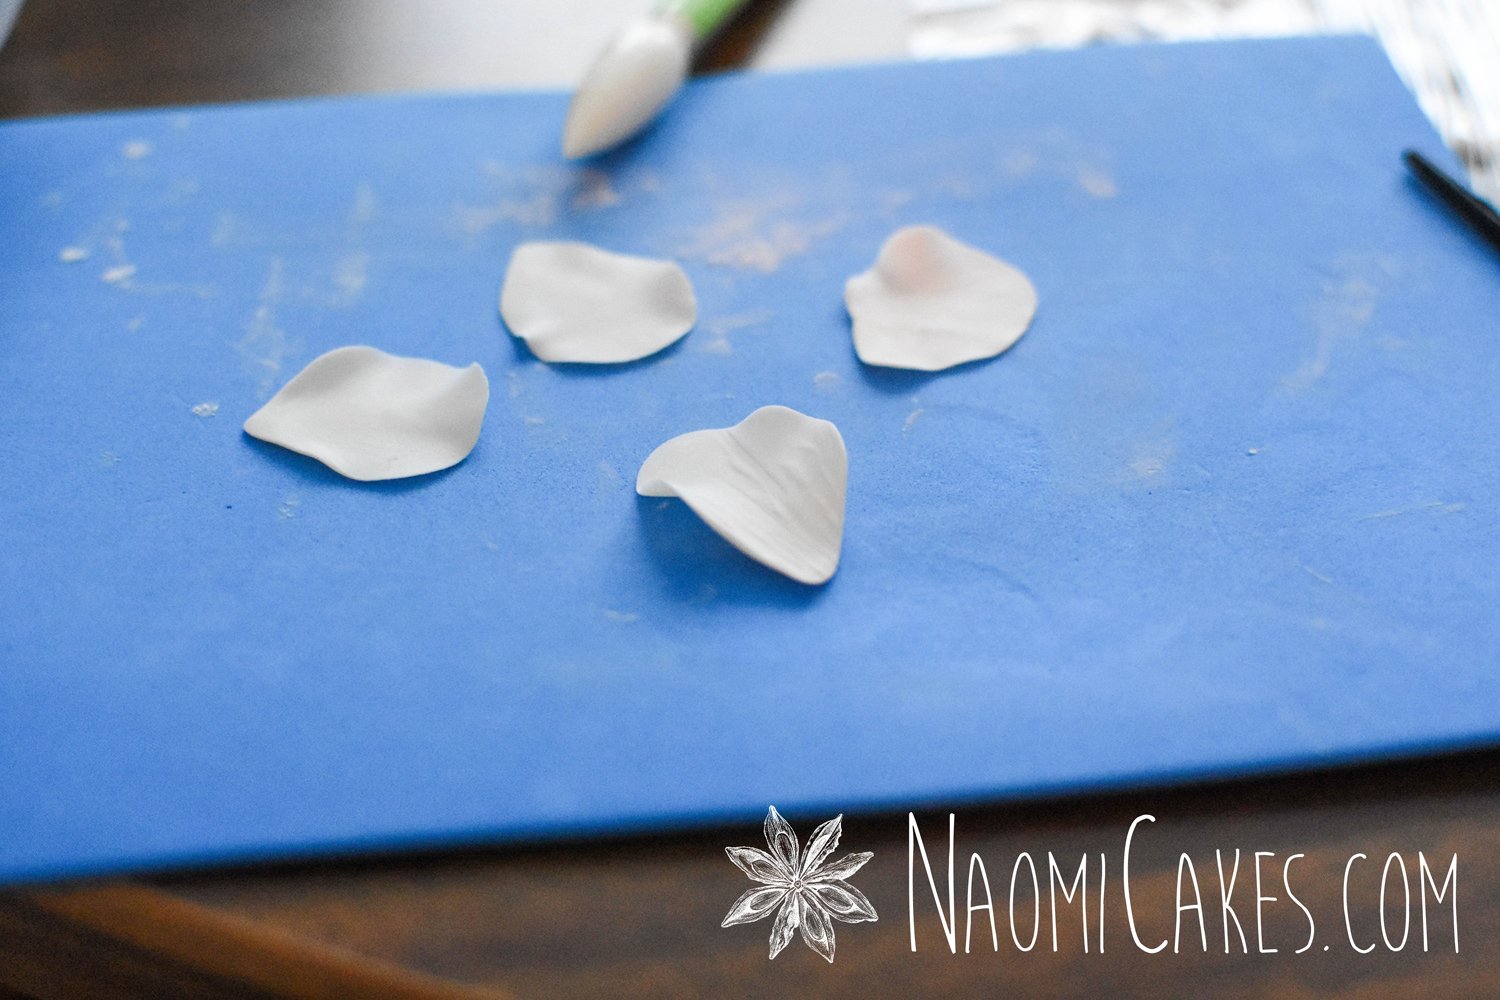
Using the middle sized rose petal cutter from your set, cut out 5 petal shapes per rose base (example, for 4 roses you would need 20 petals). Remove the excess gum paste from around the cut-outs, shape into a ball, and wrap in plastic. Set aside. Cover the cut rose petal shapes on the table with plastic until ready to use.
-
Lightly dust your foam mat with cornstarch to prevent the petals from sticking (I like putting it into a little homemade cheesecloth bag to make this most simple). Remove 1-5 petals from under the plastic at a time, and gently thin/frill the edges of each petal with the frill or ball tool (also dusted with cornstarch).
-
From the centre outward, roll the veining tool (or press the petals in a silicone veining tool) across the petals to make the impression of vertical veins on each one.
-
Dampen the base of one petal with water on the veined side, and wrap it (vein side in) around your pre-made rose bud, with the edge of the previous petal in the middle of the new one.
-
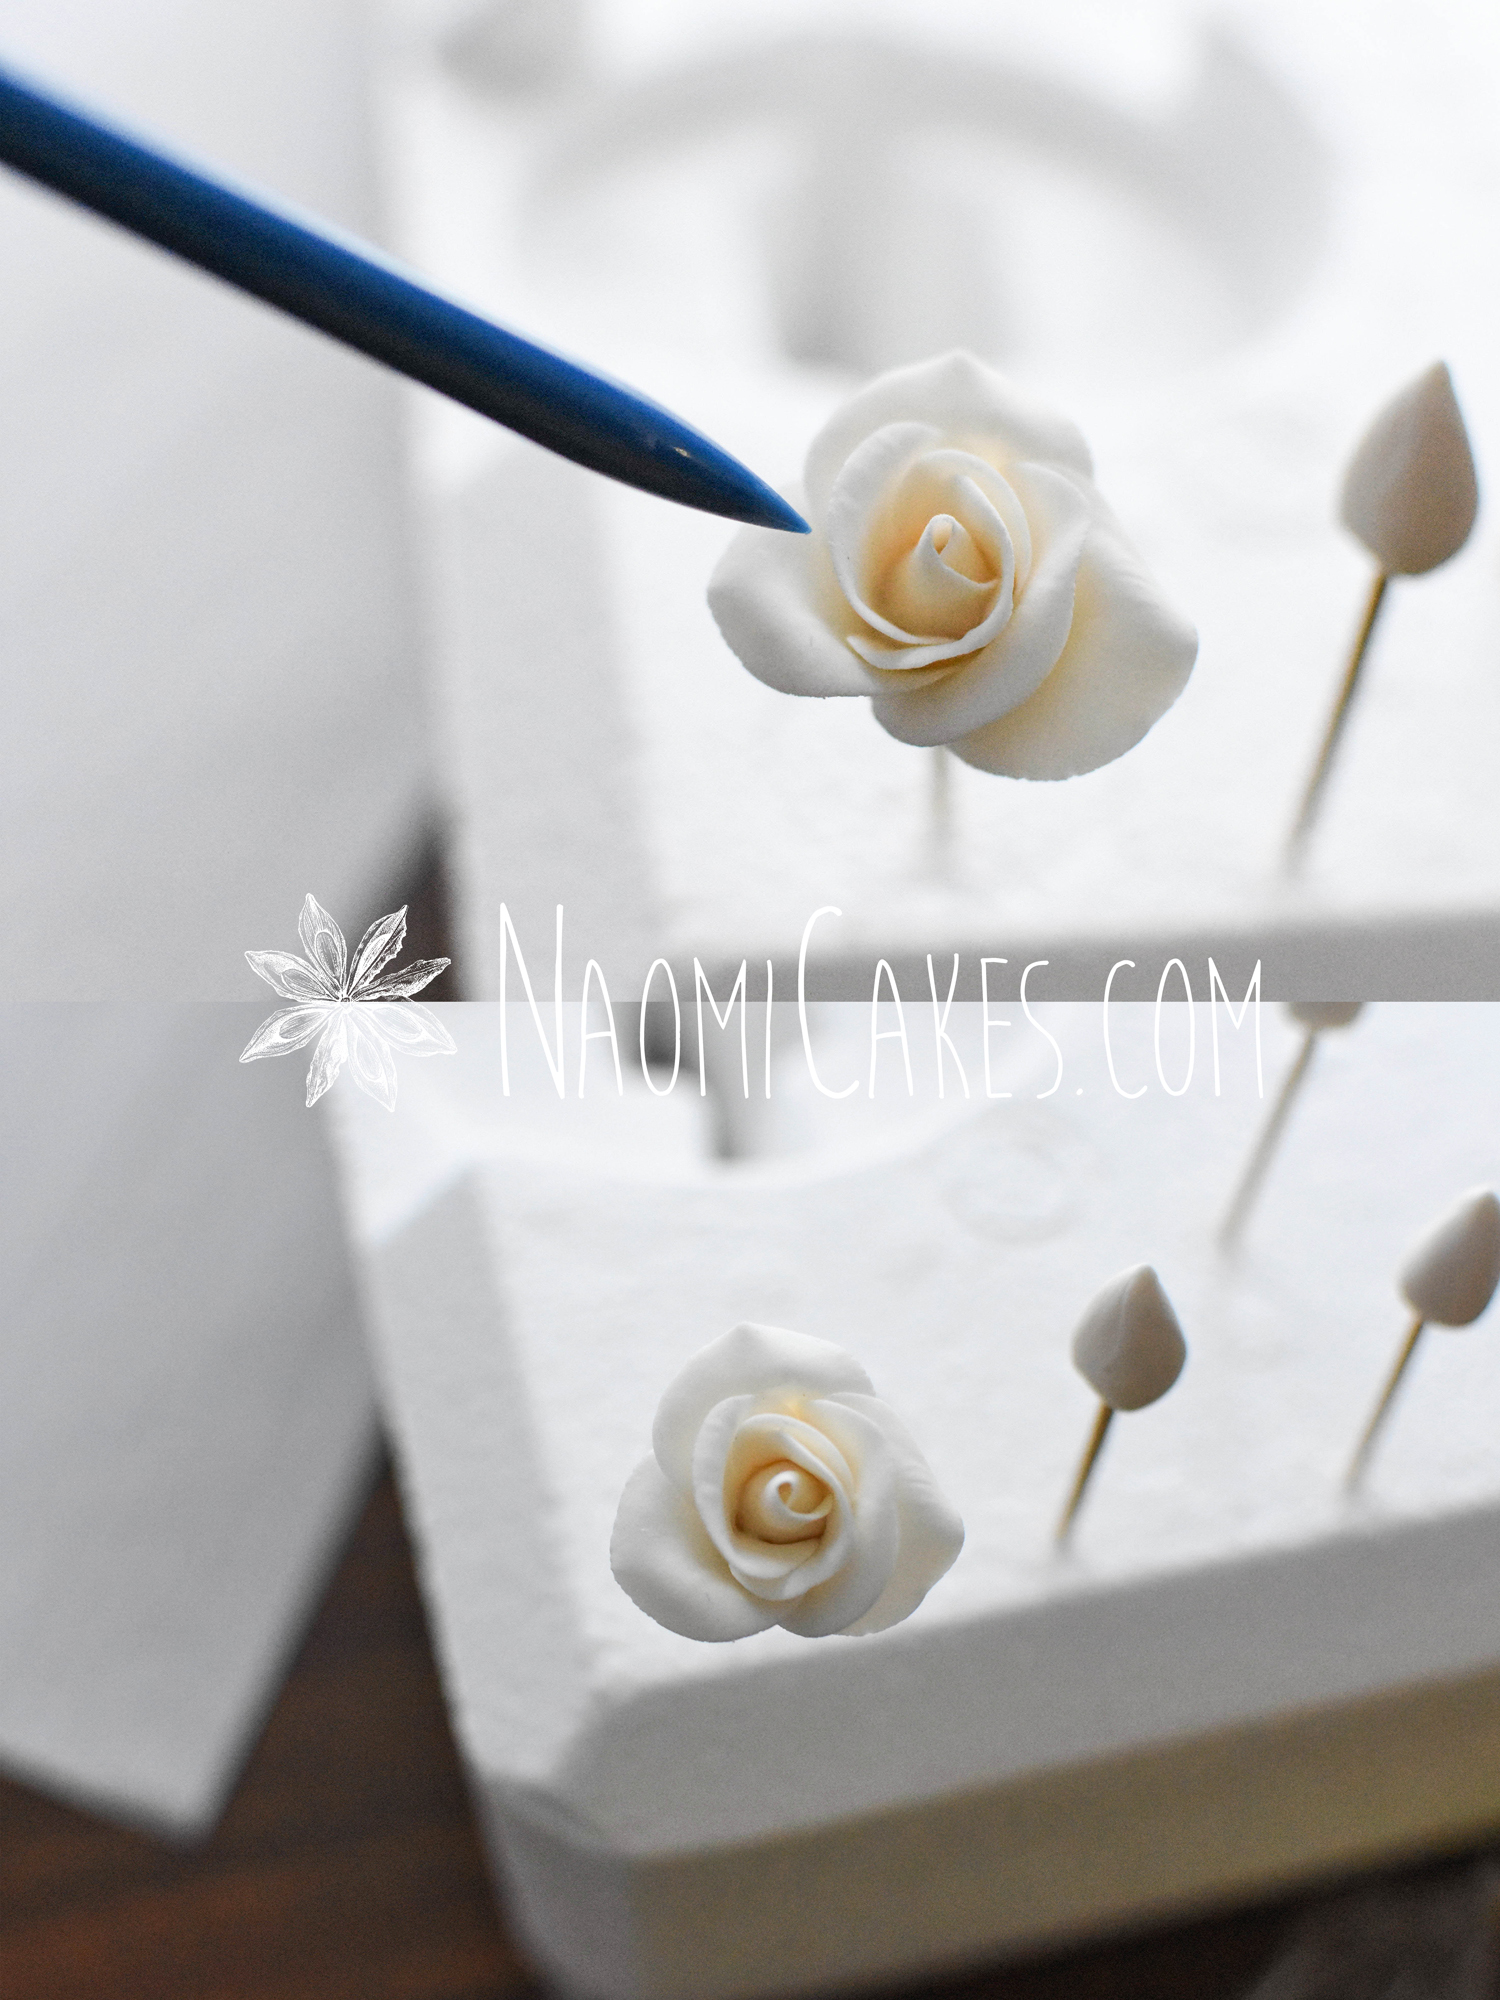
Moisten the tip of another petal on the veined side again, and tuck the edge of it underneath the first petal (vein side in), securing it to the bud at the moistened base. Repeat with the remaining petals, and frill the edges out with a cell stick or your fingertips. (See photos in this tutorial for reference.)
-
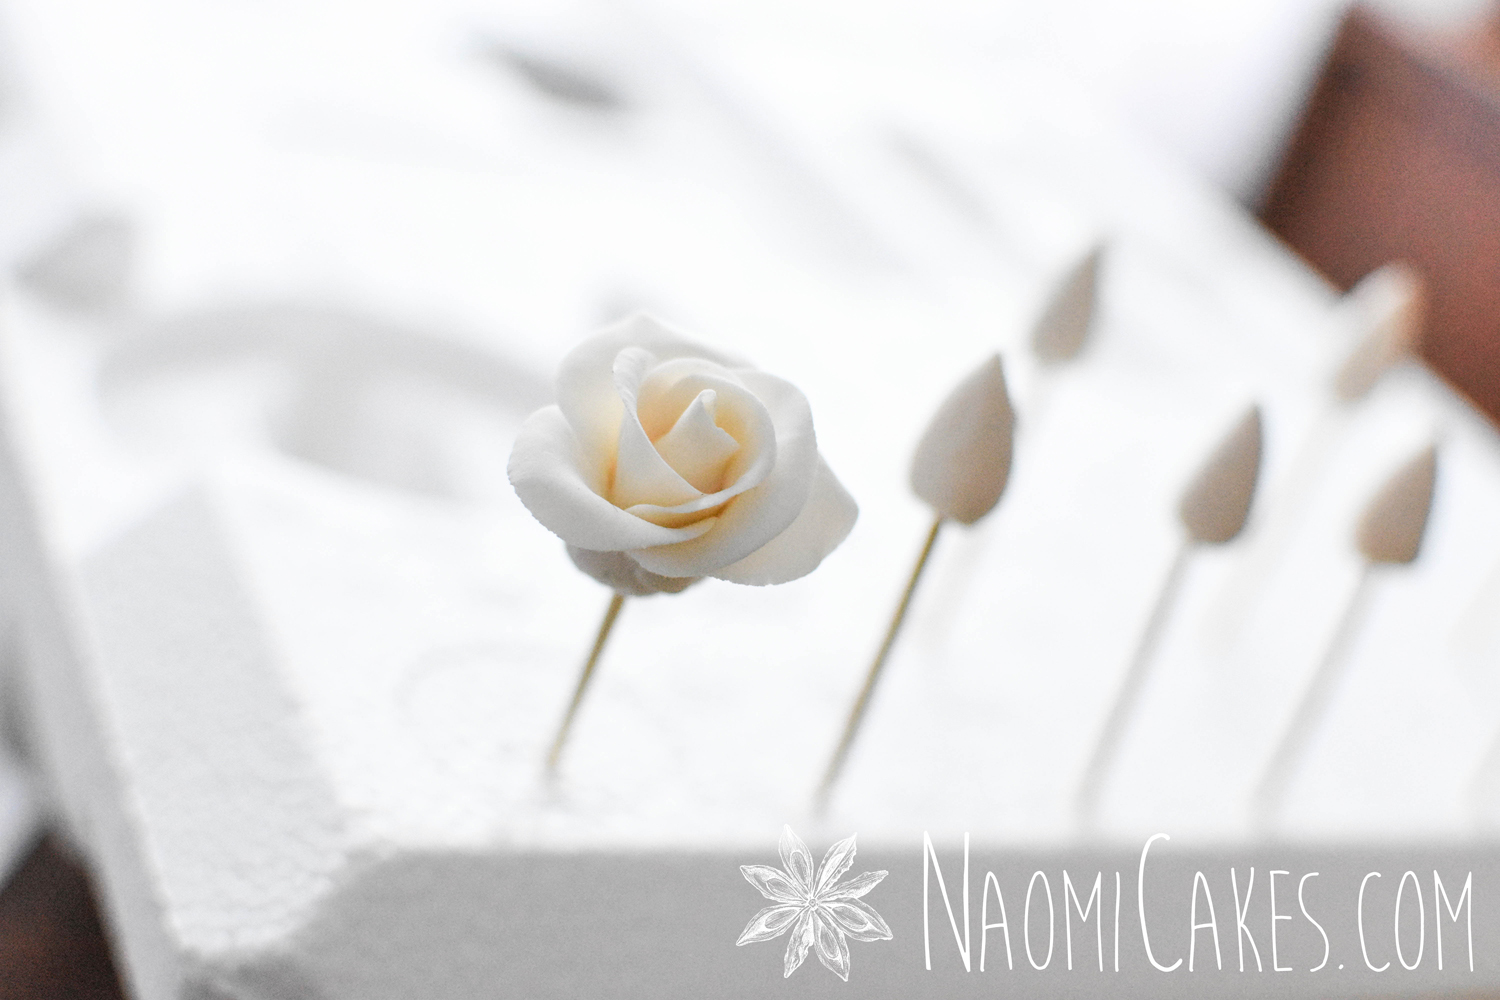
Stick the toothpick end into styrofoam so that the rose can stand upright, and allow the medium rose to dry completely (12-24 hours) or at least for 1 hour before continuing on to the next step.
-
The thoroughly dry roses will keep in a cool, dry place for several months in a closed container. Humidity will cause the roses to "wilt" and you may not be able to keep them.
Recipe Notes
IMPORTANT: Any leftover gum paste will dry out if it’s not kept well-sealed. I recommend wrapping it in plastic, putting it into a ziplock bag, and putting it into a sealed container to keep maximum freshness.
How to make medium (half bloom) gum paste roses
Here’s the step-by-step guide (with pictures)! Make sure to check out the printable tutorial as well, if you find that helpful. Let’s get started making one of the most popular gumpaste flowers: a gorgeous rose.
1 – Soften the gum paste
Lightly grease a clean work surface with some vegetable shortening, put a little on your hands, and knead a small amount of gum paste until smooth and pliable.
2 – Roll the gum paste till thin
Roll the gum paste out until it is quite thin; about 1/8″ or a little thinner.
3 – Cut out the petal shape pieces
Using the middle sized rose petal cutter from your petal cutters set, cut out 5 petal shapes per rose base (example, for 4 roses you would need 20 petals). Remove the excess gum paste from around the cut-outs, shape into a ball, and wrap in plastic. Set aside. Cover the cut rose petal shapes on the table with plastic until ready to use.
4 – Thin/frill the petals
Lightly dust your foam mat with cornstarch to prevent the petals from sticking (I like putting it into a little homemade cheesecloth bag to make this most simple). Remove 1-5 petals from under the plastic at a time, and gently thin/frill the edges of each petal with the frill or ball tool (also dusted with cornstarch).
5 – Vein the petals (optional)
From the centre outward, roll the veining tool across the entire petal to make the impression of vertical veins. Repeat with the remaining petals. Alternatively, you can use a silicone petal veiner for this step, pressing the petals between the silicone pieces (lightly dusted with cornstarch to prevent sticking).
6 – Attaching the first petal
Using your clean paint brush, dampen the base of one tear drop shape petal with water on the veined side, and wrap it (vein side in) around your pre-made rose bud, with the edge of the previous petal in the middle of the new one.
7 – Finishing the row of petals
Brush sugar glue (in this tutorial, water) onto the tip of another petal on the veined side again, and tuck the edge of it underneath the first petal (vein side in), securing it to the bud at the moistened base. Repeat with the remaining petals, and frill the edges out with a cell stick or your fingertips at the top of the petals to make the rose look more open.

8 & 9 – Dry the roses
Stick the toothpick end of the rose into styrofoam so that the rose can stand upright, and allow the medium rose to dry completely (12-24 hours) or at least for 1 hour before continuing on to the next step.
The thoroughly dry roses will keep in a cool, dry place for several months in a closed airtight container. Humidity will cause a sugar rose to “wilt” and you may not be able to keep them.
If you like this tutorial, you may also like:
- Gum Paste Roses – The Base, Part 1/5 [Tutorial]
- Gum Paste Roses – The Rose Bud, Part 2/5 [Tutorial]
- Rustic Wedding Cookies [Tutorial]
- Basic Piping Techniques for Cake Decorating [Tutorial]
- How to Frost a Cake with Buttercream (Smooth Finish) [Tutorial]
There you have it: another step done! If anything in this section is not making sense visually, the photos in my last two posts, the rose base and rose bud (linked above), will have more visuals for you. Make sure to check those out!
Thanks for following along! I’ll be back soon to teach you how to make the big, bright beautiful one – the full rose!
Bye for now,
Naomi
This post contains affiliate links.