
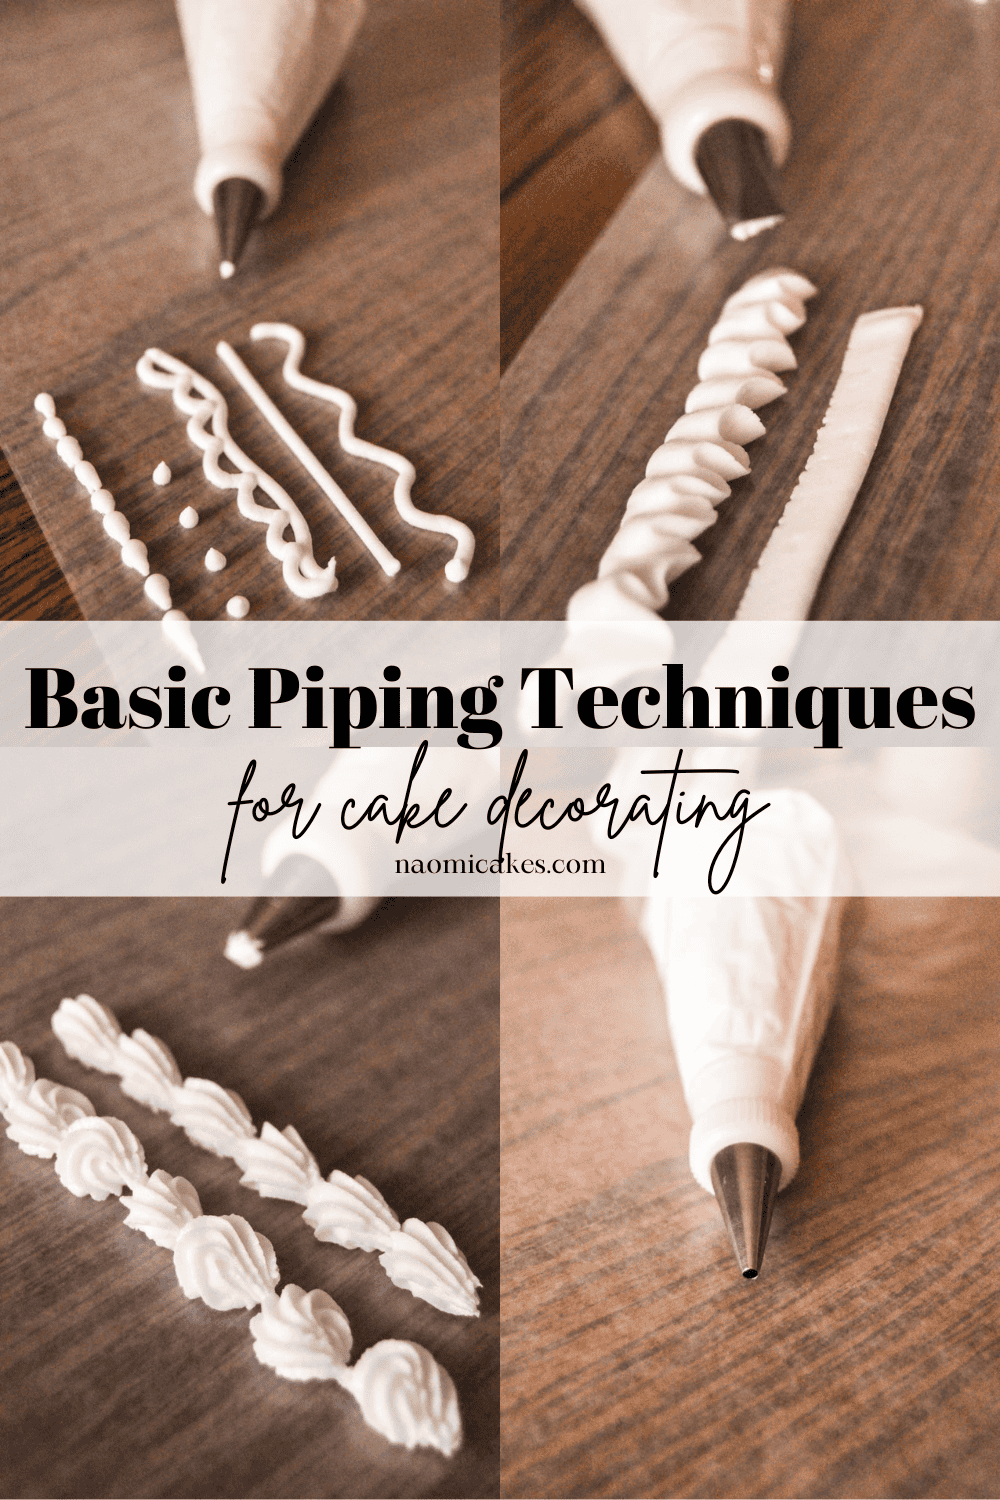
Basic Piping Techniques for Cake Decorating [Tutorial]
Today I am going to teach you some basic piping techniques, which can be used for just about any (and possibly every) cake you’ll ever make. In this post I’ll outline which are the best basic piping tips and how to use each one.
If you’ve ever browsed cake decorating supply stores, you’ll know that there are a lot more than these three basic tip shapes that I’m going to show you. If you’re just getting started making cakes, however, don’t let that overwhelm you. The three shapes I recommend in this post are a great place to begin!
The perfect canvas: making the cake
First, it’s important to make sure that you have a good handle on how to prepare a cake to be decorated. Check out the following two posts for the basics of baking and frosting the perfect cake!
These two things will provide a beautiful “canvas” on which to use your creativity, and believe me when I say that a well frosted cake makes a big difference to the finished product!
What are the basic piping tips?
The tips I use most often, for sure, are round tips and star tips. Later on in this post, I will recommend which sizes and what I use them for, along with instructions on how to pipe specific designs with those tips.
This tutorial will also go over the use of a rose/ruffle tip, which isn’t something you’re as likely to use often. However, it’s nice to know how to use it, since most piping tip kits will come with one of those! Also, if you ever want to learn to make buttercream roses, you’ll be investing in those tips anyway.
The directions included in this tutorial will teach you how to use all of those tips to create some simple, pretty piped designs for basic cake decorating.
Getting started: What are the best tips for piping?
If you or someone you know if just getting started with cake decorating, I would recommend buying a small piping tip kit. These kits usually come with the best standard piping tips for general use, but they will also include a few other somewhat commonly used tips for creating fun shapes and designs.
Piping writing: What is the best tip?
If you are wanting to pipe words and messages on cakes, I recommend a #3 round piping tip for most purposes. This tip is large enough for the icing to flow through the tip without breaking easily, but it is also small enough that the letters won’t blur together, making them easy to distinguish.
Metal vs. plastic piping tips: Which ones are better?
I have only ever used metal tips, and I like them for their durability and easy-to-clean design. There is no reason that plastic tips wouldn’t work as well, except that they may be susceptible to damage more easily. In my experience, plastic cake decorating tools (such as couplers and scrapers) tend to become yellowed and almost take on a tacky/sticky feel over time.
That said, if you are interested in making the investment for long-term use, my recommendation would be to use metal tips. If you already have access to plastic tips, however, there is no reason why you wouldn’t be able to use them to make beautiful cakes and cookies!
Disposable vs. reusable/cloth piping bags
Piping bags can be purchased in cloth form (with a shiny coating on the inside to repel butter and fat in frostings). They can also be purchased in plastic form, or they can be made in paper form (with parchment paper). I’ll list a few of the benefits to each kind of piping bag below.
Cloth piping bags:
- Pros: Less waste, comfortable to hold, easy to refill.
- Cons: They yellow over time and get that “sticky” quality to them, and they are not fun to wash.
Plastic piping bags:
- Pros: Easy/fast cleanup, comfortable to hold, easy to refill, washable if you want.
- Cons: More waste.
Parchment paper piping bags:
- Pros: Better for the environment than plastic, easy to have on hand, easy cleanup.
- Cons: Tricky to hold, cannot be refilled.
Why are piping tips numbered?
You have probably noticed that piping tips are all numbered. Piping tip numbers correspond to their type (acting as a sort of numbered inventory for easy search and reference). They also correspond to their size. Larger numbers usually belong to a larger tip. For example, a round tip #2 will have a smaller hole than a round tip #5.
One thing to note is that while most tips can be searched for by number, there are some variations between brands of which number belongs to which tip.
Used in this tutorial:
- Plastic piping bags
- Couplers
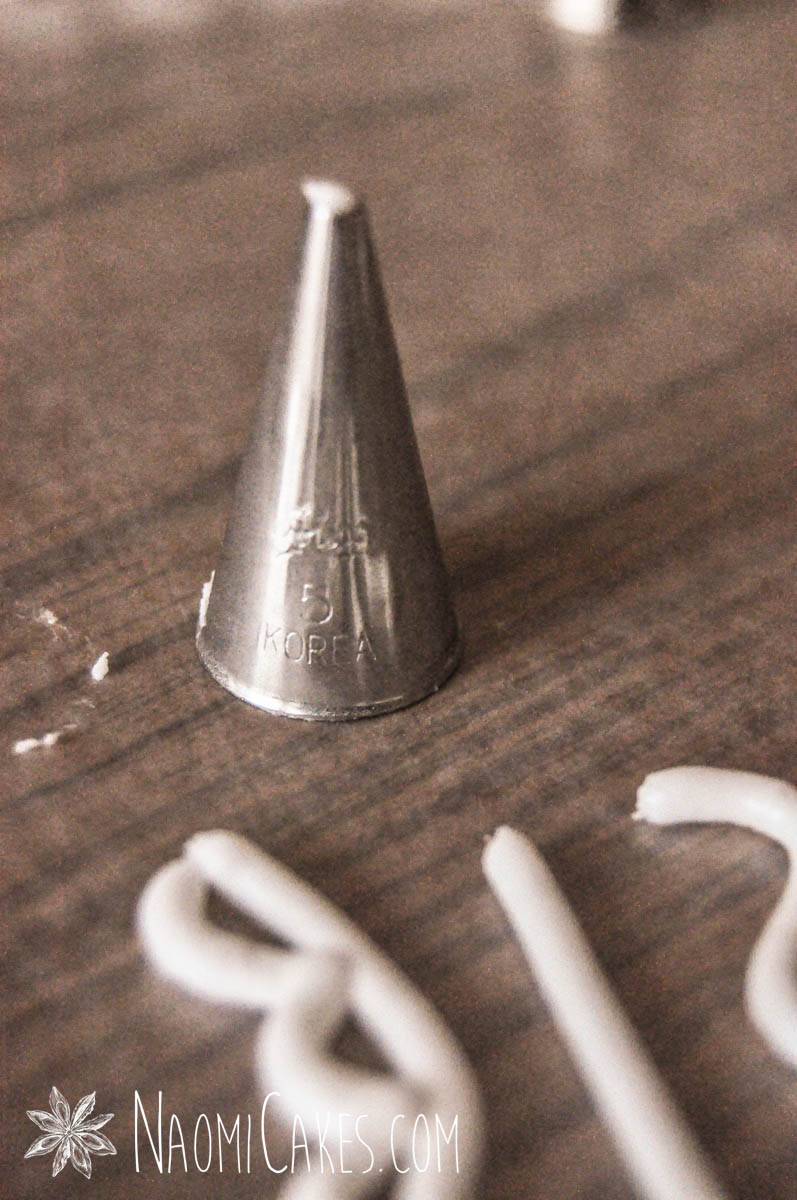
- Round piping tip #5
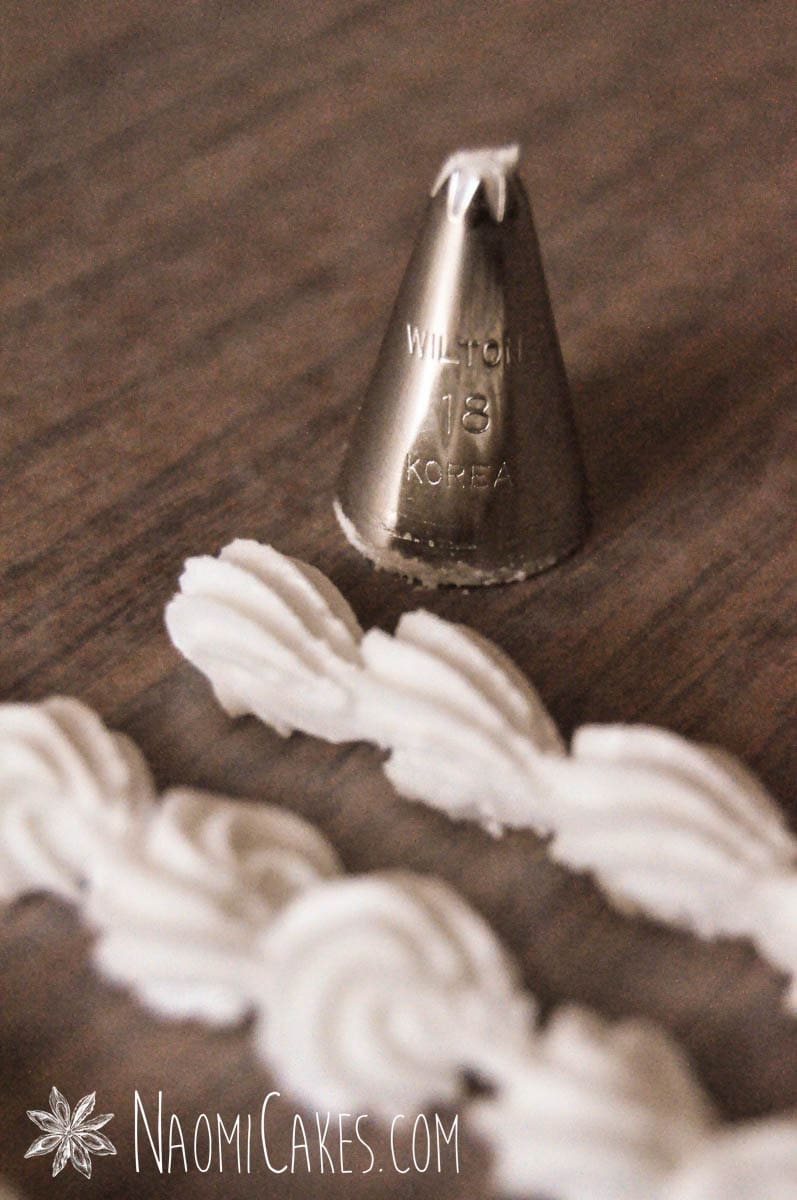
- Star piping tip #14
- Star piping tip #18
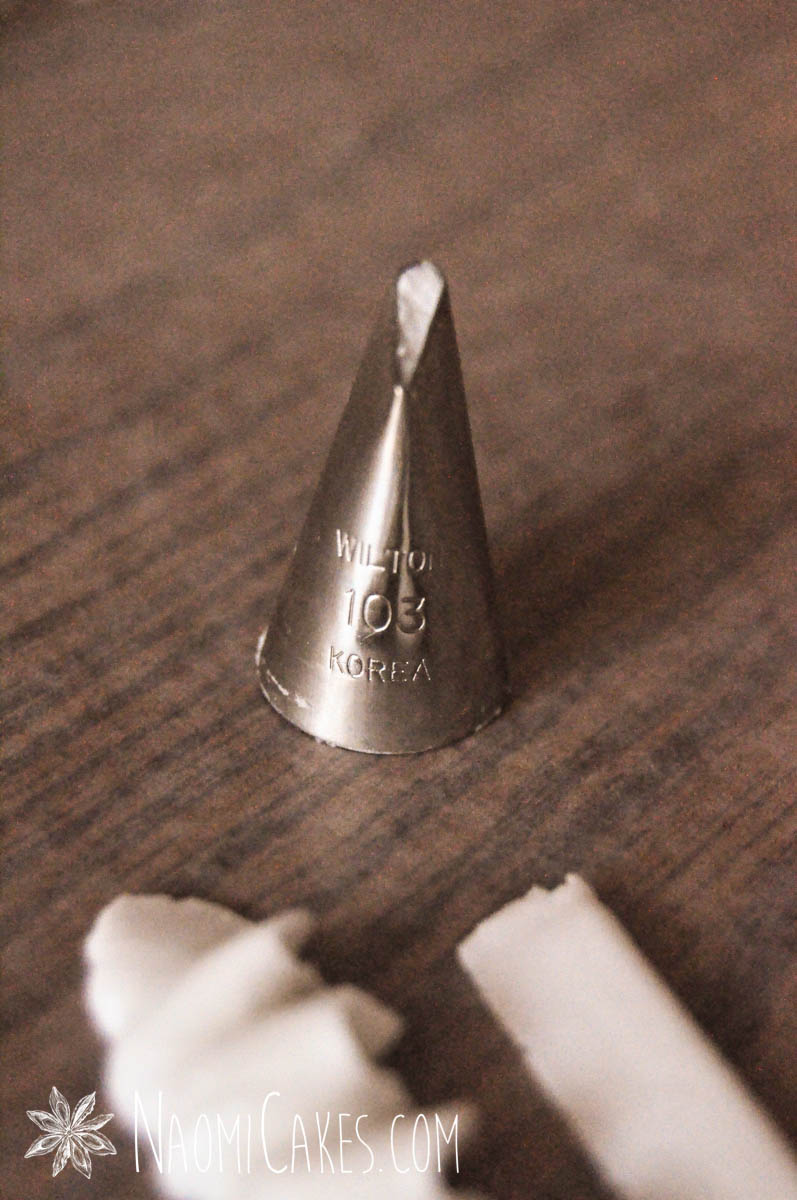
- Rose/ruffle tip #104
Round piping tips
Round tips are used for piping techniques such as writing, beading, or doing small detail work with intricate patterns. Larger round tips, such tip #5 are best for making bolder shapes and beads, while smaller tips like #1 and #2 are used for making fine lines and details.
For general use, I recommend having tips #2, #3, and #5 on hand. If you’re getting into the world of making wedding cakes and fine detailed cookies, however, I would recommend also having #1 (and possibly #0) as an option for creating those tiny lacy accents and details. Even for those, however, you may find that a tip #2 is adequate for most purposes.
Star piping tips
Star tips are used for piping techniques such as shell borders, stars, and rosettes. They are one of the most commonly used tips for creating borders around the edges of cakes, making the cake have a finished, professional look.
My favourite star tips to use are #14 and #18 (or something similar). The smaller tip is great for small shells, ropes, stars and rosettes. The larger one makes perfect tip for piping borders.
Which star tip to use for cupcake swirls
Any large star tip will make those gorgeous, large swirls on top of a cupcake. Try out a few different ones to decide your favourite! Personally, I love to a tip like Ateco’s #845 for my cupcakes.
Rose/ruffle piping tips
Tips #103 and #104 are basically rose or ruffle tips, for creating beautiful buttercream roses and gorgeous buttercream ruffles. I’ll show you a little bit of what these tips can do later in this post!
Basic piping techniques for cake decorating
Now that you’ve got a good idea of tips, materials and the cake itself, I want to go over the essentials of excellent piping. Here are a few important things for you to know!
1 – Frosting consistency
One important key to learning basic piping techniques is to make sure that your frosting is a good consistency for doing it well. For smaller tips (especially round ones), you are going to need a fairly soft/thin icing in order to keep it from breaking as it flows out of the tip. Thicker frostings can be great for piping shells and swirls, but you don’t want to have anything too thick for creating fine, thin lines.
2 – Holding the bag
In order to hold the bag securely, make sure that the end of the bag is neatly twisted up, keeping the icing contained and locked into the front of the bag. Hold the bag on the twisted part of the bag, to keep it secure, and squeeze the frosting with that hand. Guide the bag with your fingers on the other hand to keep it steady while you work.
Note: Don’t handle your bag too much, especially if you have a lot of butter in your frosting… It will melt in the heat of your hands!
3 – Pressure control
This is possibly the most important element to excellence in piping technique. Keeping consistent pressure will give you much better control over what you are making, and learning to let go of the pressure at the right times will prevent the icing from peaking or being drawn out into messy lines on your cakes.
To apply the proper pressure, you want to hold your bag securely and be confident in your work. Keep a good, steady amount of pressure when you want the icing to flow, and when you want to finish a shape, release the pressure completely.
Also, just a tip: make sure there is not too much icing in your bag. The smaller amount you have in the bag, the more control you have over it (and you will save your hands a lot of discomfort)!
4 – Practice
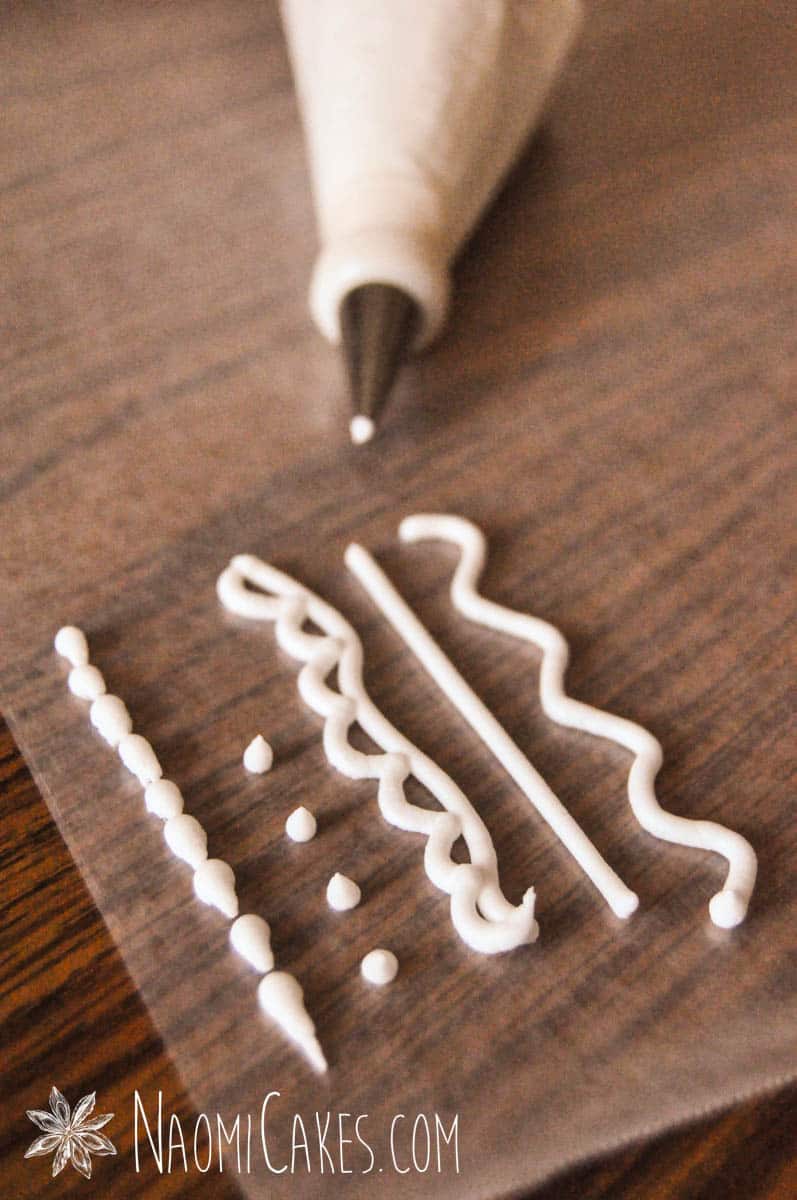
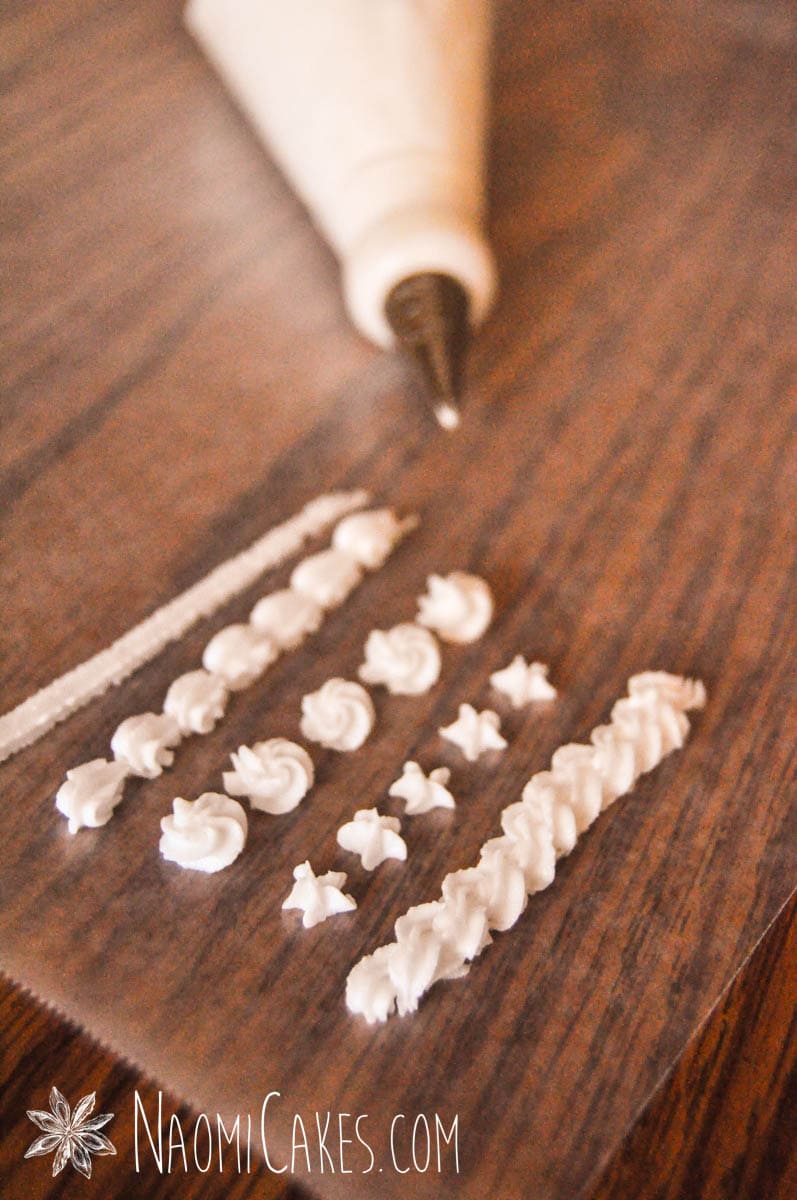
The best way to know what I’m talking about is to try it. Practice makes perfect! You’ll notice that if you give it too little pressure, the icing will break and you won’t have continuous, clean lines when you try to pipe. If you give the bag too much pressure, the icing will come speeding out of the bag, and usually build up in little blobs around your cake. So, again I say, practice. I started practicing exactly like I have piped the icing in these pictures: on wax paper. You’ll develop a feel for pressure consistency as you work and you will get to know icing consistency best by experience.
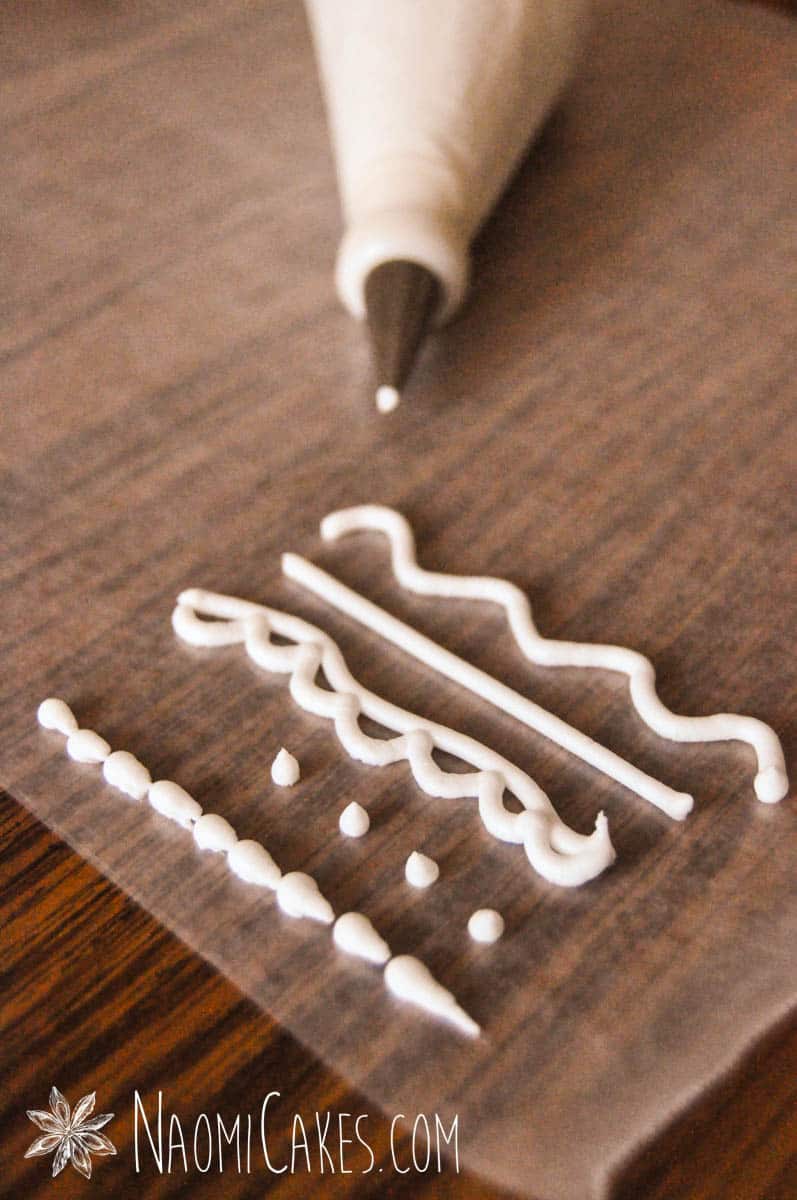
Round tips: basic piping technique
Round tips are pretty self explanatory. Squeeze, release pressure, and lift. Just move the bag in the shape you want it to go. Beading with a round tip is done the same way shells are done with a star tip (see below).
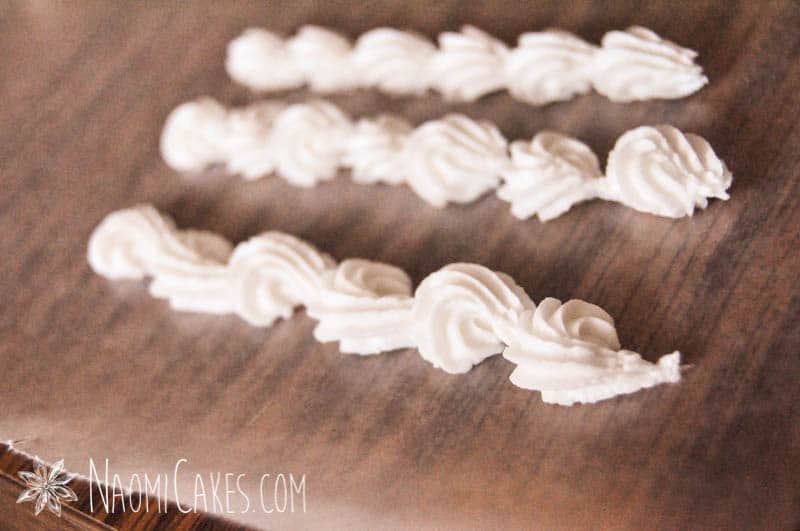
Star tips: basic piping techniques
Stars:
Squeeze till you get the star shape, then release, and lift. If you want to pack a whole bunch of stars together (like many character cakes are decorated), just make them smack beside each other so that the icing of one star squeezes into the gap of the one next to it. You don’t want any empty spaces between them. I recommend tip #14 for this technique.
Rosettes:
Squeeze in a tight circular motion, and then finish at the end of the circle by pulling the end of the rosette across the whole thing as you release pressure.
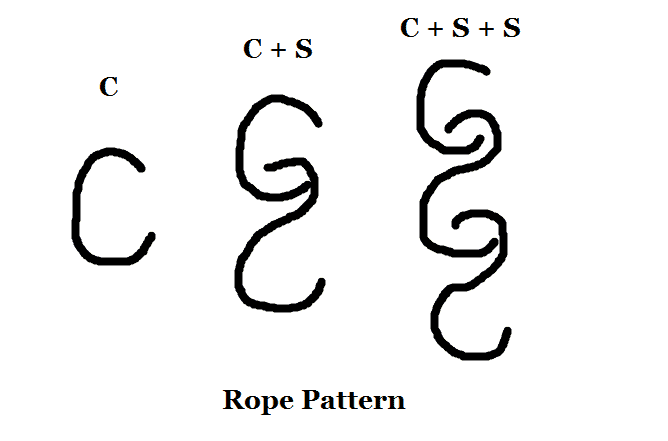
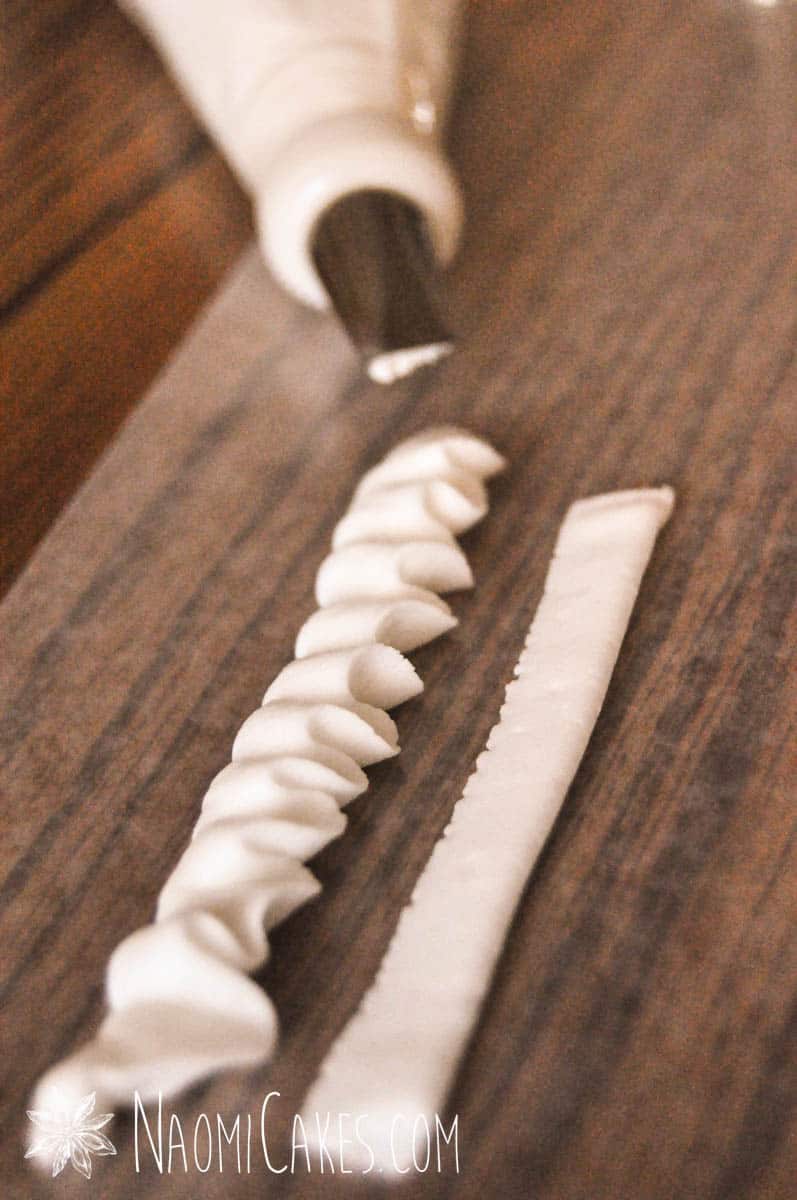
Ropes:
Make a little “C” shape on your work surface. Next, stick the nose of your piping tip at about 7:30pm on the “C,” squeeze, and pull it out to make backwards “S” which will cover up the rest of the base of your C and lay over top of it. The base of the S should make another small “C” shape beneath the original C; repeat the process, using all “S’s” to make the rope shape. Here’s a little diagram I made to show you this one, since my description is hard to follow without the visual:
Shells:
Hold the tip at a 30-45 degree angle against the surface you’re piping on. Squeeze, let it build up a bit, and pull back as you release pressure to allow a little “tail” of icing to trail off the end (like a teardrop shape). Then start the next shell a little distance from the first; squeeze, let it build up until it meets the end of the last shell, and pull back as you release again.
This is the same technique use to create beadwork with a round piping tip.
Reverse shells:
Make a sort of question mark shaped shell. Start piping the circular shape like a rosette, increasing pressure to build it up a little (on the top of the question mark), and then bring it down into the base of the question mark as you release pressure. Do the same thing for the next shell, this time making a backwards question mark shape. Each shell should be a reverse of the one before it. This technique makes a really nice, unique border.
Rose/ruffle tips: basic piping techniques
To make buttercream ruffles:
Hi Thank you for your great tips about Cake decoating ideas This is excellent suggestion for a beginner in decorating cake.
Love it!
This is great! thanks for sharing your knowledge!