
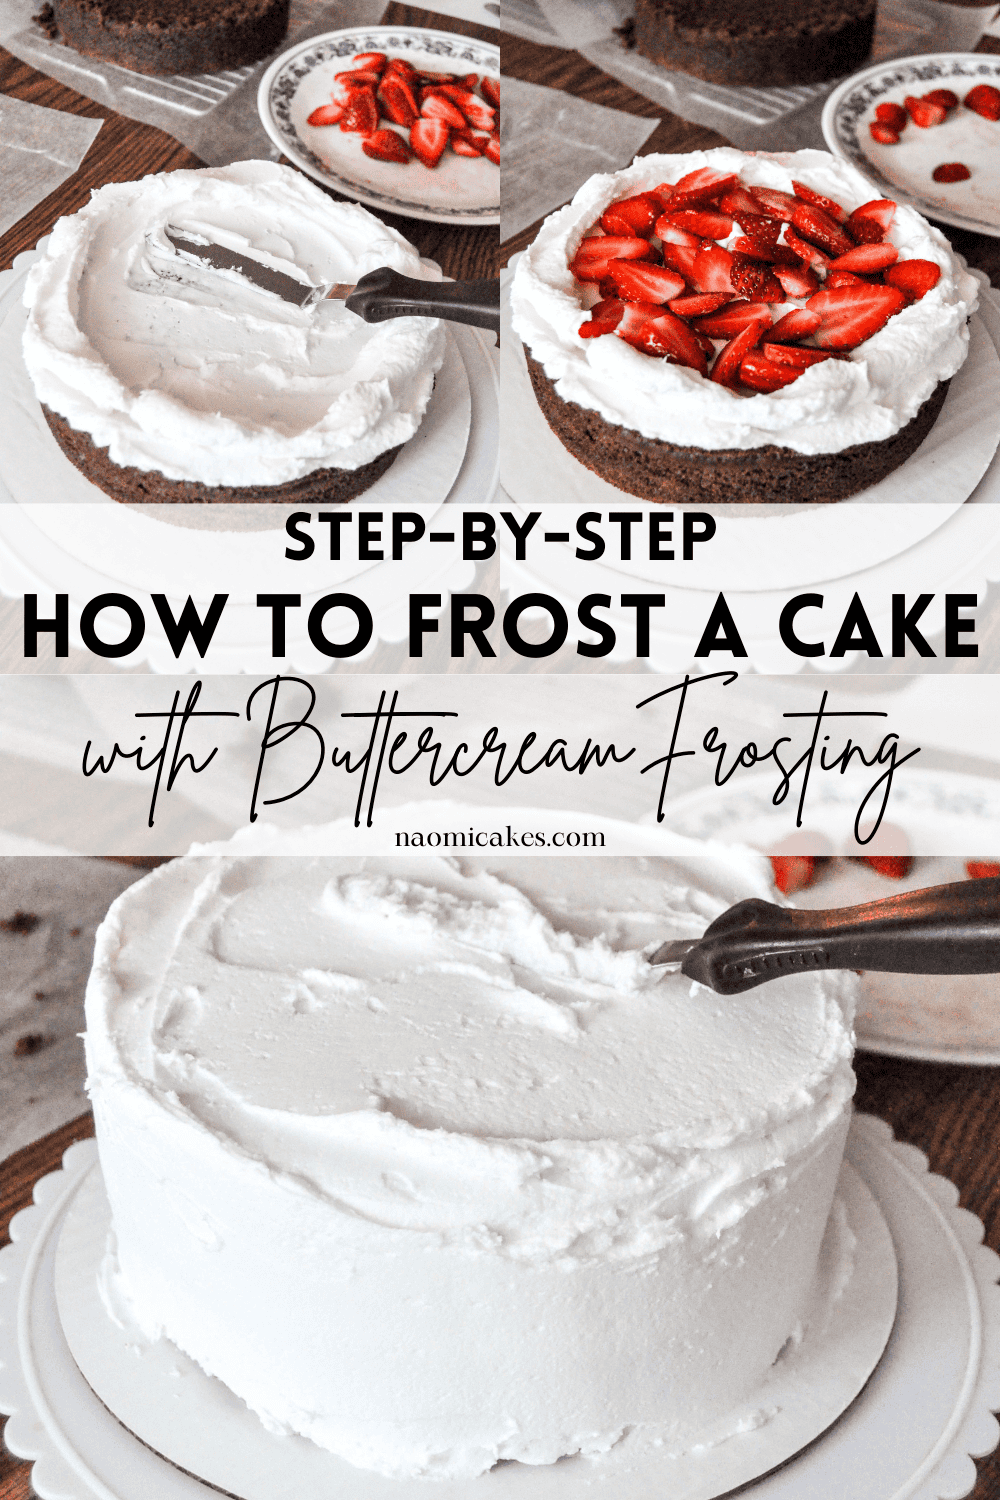
How to Frost a Cake with Buttercream (Smooth Finish) [Tutorial]
Today I’m going to teach you all, the best I possibly can, how to frost a cake with buttercream to get a smooth, crumb-free surface with nice, sharp edges. Decorating a poorly frosted vs. a well frosted cake is like the difference between painting on dry mud and painting on a brand new canvas. So, let’s learn how to make a beautiful canvas, shall we?
Baking the cake correctly
First, you’ve got to make sure the cake is baked in good pans, with straight, clean edges. To do that, you’ll want to make sure that you’re using cake decorating pans (the kind with straight, not angled, sides), and you’ll want to make sure that you line the cake pan with parchment paper before you bake it. These two tips alone will make frosting the cake much easier and more professional!
How long to let a cake cool before frosting
The cake should be completely cool (ie, not at all warm) before you frost it. Since most icing recipes call for some kind of fat (butter, shortening, etc), the cake will begin to soften or even melt the frosting while you ice it if you jump the gun on this; so, be patient!
The only exception I would ever make to this rule is to frost a barely warm sheet cake that is still in the pan, when I’m late for the party I’m bringing it to (and the cake is going to stay in the pan until I serve it). Otherwise, let the cake cool (or even refrigerate it to let it get cold) before adding the frosting.
Making the perfect frosting
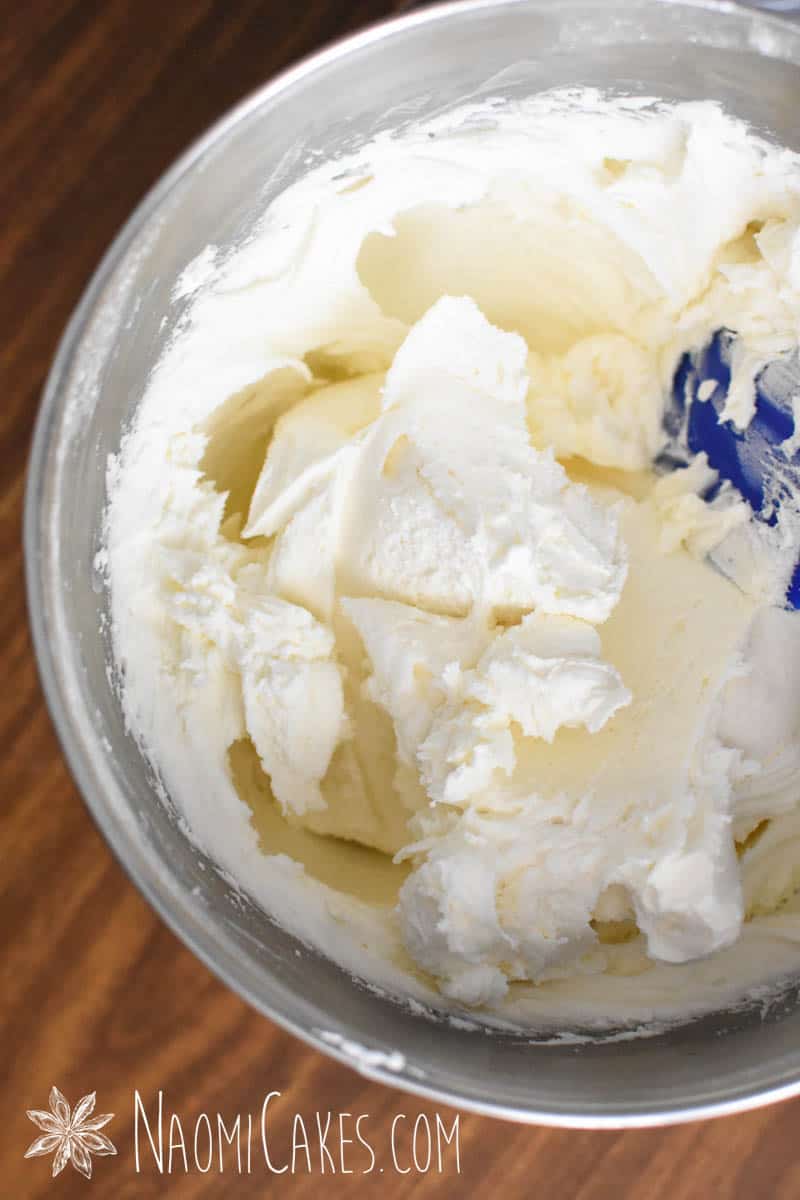
The best buttercream icing for frosting cakes is one that has a nice, thick consistency but fluffy texture. You want something that will hold its shape but “smear” nicely (ie, not sticking together into a blob).
To make things easier on you, here is an example of a basic buttercream recipe; hopefully this will give you an idea of consistency, and help you get started frosting incredible cakes!
Note: For an 8″ cake, you’ll probably want to double this recipe to frost your cake.
Easy Buttercream Frosting
This creamy, smooth frosting makes a perfect base and piping frosting for any beautifully decorated cake or cupcake.
Ingredients
- 1 cup (227g) butter softened (or shortening, for pure white frosting)
- 1 tsp. (5ml) vanilla extract (or clear vanilla, for pure white frosting)
- 5 Tbsp. (75ml) milk
- 4 cups (600g) icing sugar
Instructions
-
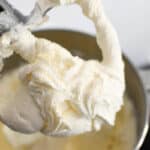
Beat the butter or shortening until creamy; add about 1 cup of the icing sugar and beat until smooth.
-
Add the milk and vanilla, and mix on low speed until incorporated. Gradually add the remaining icing sugar, and beat until the frosting is light and fluffy.
-
If your frosting seems too stiff, add a little milk (start with one tablespoon), and beat until well combined and smooth.
-
Use the frosting at room temperature. Store leftovers in the refrigerator, and soften before using again.
Recipe Notes
When measuring by cup, if your icing sugar is settled into a bag or container, loosen it up with your measuring cup before you measure it. If it's too compacted, your frosting will be too stiff.
Note: In this tutorial, the chocolate cake is being frosted with the pure white version of this recipe.
Can you use store bought/pre-made icing to frost a cake?
Sure! Provided that the spreading consistency seems good (which it usually does), picking it up pre-made should work just fine. Remember: frosting beautiful cakes is about 70% technique, and 30% recipe.
Is it better to decorate cakes fresh or frozen?
My preference is actually to work with frozen cakes. The reason for this is twofold:
- It allows me to work ahead and get the cakes baked and frozen well before I need to use them.
- Frozen cakes are much more sturdy (go figure) than fresh ones, making it much easier to keep the crumbs from getting mixed into your frosting.
If you are going to freeze cakes before you frost them, make sure you trim the tops until they are level first. Next, wrap the cakes securely in plastic wrap or store them in airtight containers.
Fresh cakes can also be frosted with this tutorial with great results. Don’t feel like you have to freeze your cakes first; it’s just a good option!
Can you frost a cake without special tools?
Yes! Just a regular serrated knife to cut off the top and a regular butter knife or bench scraper will go a long way. Just know that getting that “perfectly” smooth look is going to be tricky if you don’t have a palette knife or bench scraper at your disposal. A turntable is also very helpful, but not necessary.
How to prevent the cake from tearing
There are a few key things that go into preventing a cake from tearing. You need to know what causes that to happen and what you can do to prevent it. Here are a few important things to note about preparing a cake to be decorated:
Line your cake pans with parchment paper for baking
If you take the extra time to do this, the cake layers will bake with a much more sturdy outer “crust,” which will prevent the cakes from tearing.
Take care how you handle the cakes
Especially when you are working with larger cakes, it’s important to use care when you remove them from the pans or transfer them from one location to another. Try setting your cooking rack, plate, or pan on top of the cake, and then flip the whole thing over between two flat surfaces, rather than picking the cake up with just your hands.
Homemade cakes vs. boxed cake mixes
This one is really important. Boxed cake mixes tend to be really light and fluffy, and they can tear easily. You can use them for beautifully decorated cakes, but you would need to make sure that you line the cake pans properly and handle the cakes very carefully. You also want to make sure that your frosting consistency is not too thick so that it doesn’t rip and tear at the cake while you spread the frosting. Homemade cakes are much more hardy and tend not to tear as easily.
Crumb coat the cake first
“Crumb coating” the cake is the process of smearing a very thin layer of frosting all over the surface of the cake to “lock in” the crumbs. This is so that they can’t mix with the rest of the frosting as easily. The process of crumb coating is also a key element to making sure that your cakes won’t tear. If the cake is “glued” into place with frosting, it is less likely that you will tear away pieces of cake while you frost it.
Freeze the cake if necessary
This one is honestly one of the most helpful tips. If you freeze your cakes ahead of time, you are less likely to damage them.
How to frost a cake perfectly smoothly
This tutorial will help you to create a very smooth surface on your cakes, but not a perfectly smooth one. Lots of practice, great technique, and the right kind of icing will help tremendously with making sure that you get as close to perfect as possible!
That said, I will leave you with one little trick to getting the surface more “perfect” looking. Here’s what you do:
- Follow this tutorial as closely as possible
- Allow the buttercream frosting to develop a “crust.” (Ie, let the icing dry into place enough that if you touch it lightly with dry hands, it doesn’t feel wet or stick to your finger).
- Set a piece of parchment paper over top of the area you want to smooth, and lightly smooth your knife/palette knife/bench scraper across it as if you are frosting the cake in that spot again. Remove the parchment.
For this tutorial, you will need:
- Two 8″ round cake layers (I’m using basic chocolate cake layers)
- Double recipe Easy Buttercream Frosting (above)
- Fresh fruit or filling (optional)
- Cake leveler or a long serrated knife
- Turntable (optional)
- 10″ serving plate or cake board
- Knife, palette knife or bench scraper
- Spatula
Printable Tutorial:
How to Frost a Cake with Buttercream (Smooth Finish)
This simple tutorial will teach you how to frost a cake with smooth edges for a nice, professional finish on your home baked cakes!
Ingredients
- 2 8" round cake layers I'm using basic chocolate cake layers
- x2 recipe Easy Buttercream Frosting
- 1/4-1/2 cup Fresh fruit or filling optional
- 1 Cake leveler or a long serrated knife
- 1 Turntable optional
- 1 Serving plate or cake board
- 1 Knife, palette knife or bench scraper
- 1 Spatula
Instructions
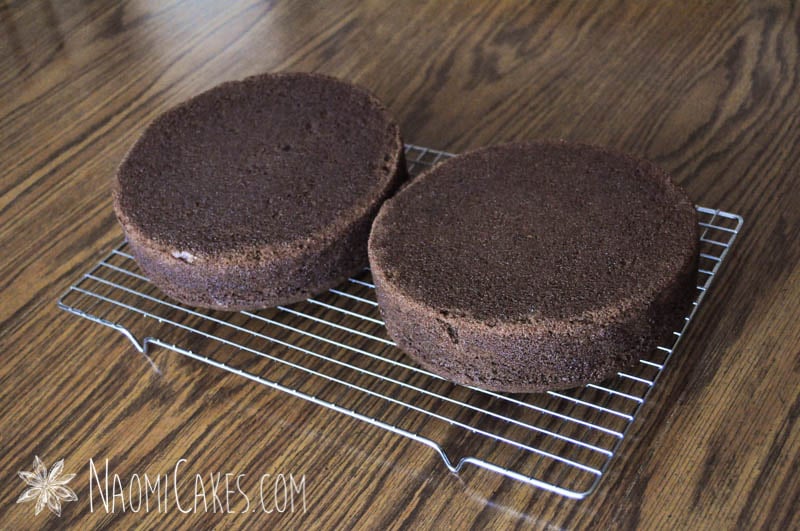
1 - Bake the cakes and level the tops
-
Bake your cakes and allow them to cool completely. Use a cake leveler or a long, serrated knife to cut off the rounded tops of the cakes. Make each layer the same height approximately with level tops. If you're using a knife, make sure to use a gentle sawing motion to cut through the cake.
-
TIP: The cakes I'm using for this tutorial are fresh, but if you cover and refrigerate the cakes overnight before working with them, that will make them much easier to work with. The moisture will soften the crusted edges of the cake for easy cutting, and the time sitting will help the cakes settle into a more solid form.
2 - Assemble the cakes
-
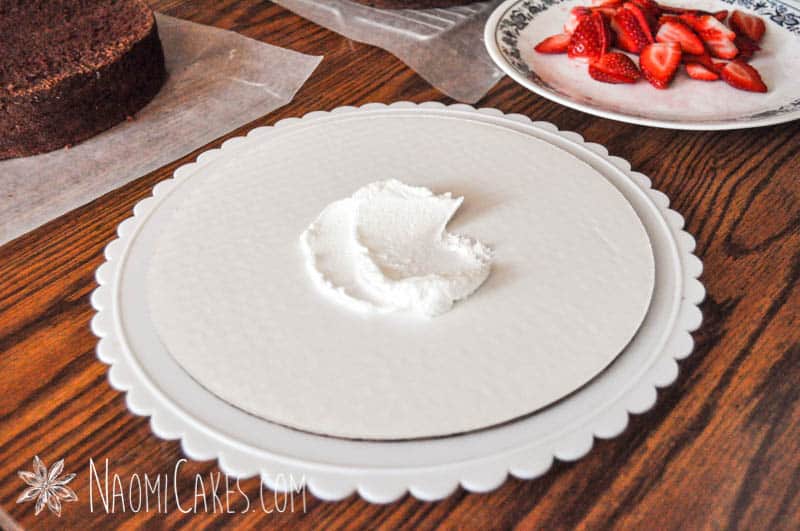
Place your cake plate or board onto the turntable if you have it, and smear a little dollop of frosting on the centre of the board. Next, cut side up, place one of your cake layers onto the board and press it into the frosting. This will keep it from shifting around on the plate.
-
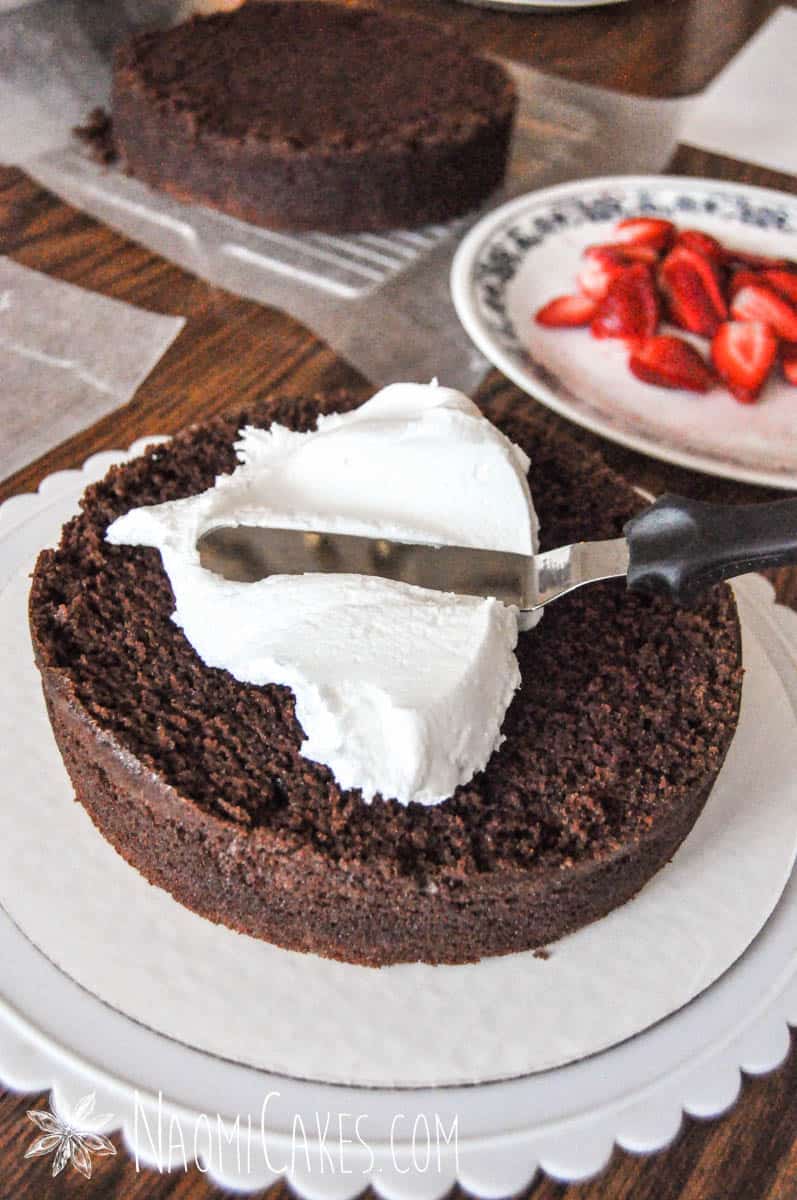
Spoon another dollop of frosting onto the cake and spread it evenly over the surface, applying enough pressure to "Lock the crumbs in." Spread the icing far enough to peak over the sides a little.
-
If frosting is the only thing you want to use in between the layers, you can put the next cake layer (cut side down) over top, and press it down firmly so that excess icing squeezes out the sides. If you want to fill your cake with some kind of fruit or filling, however, proceed to the next step.
-
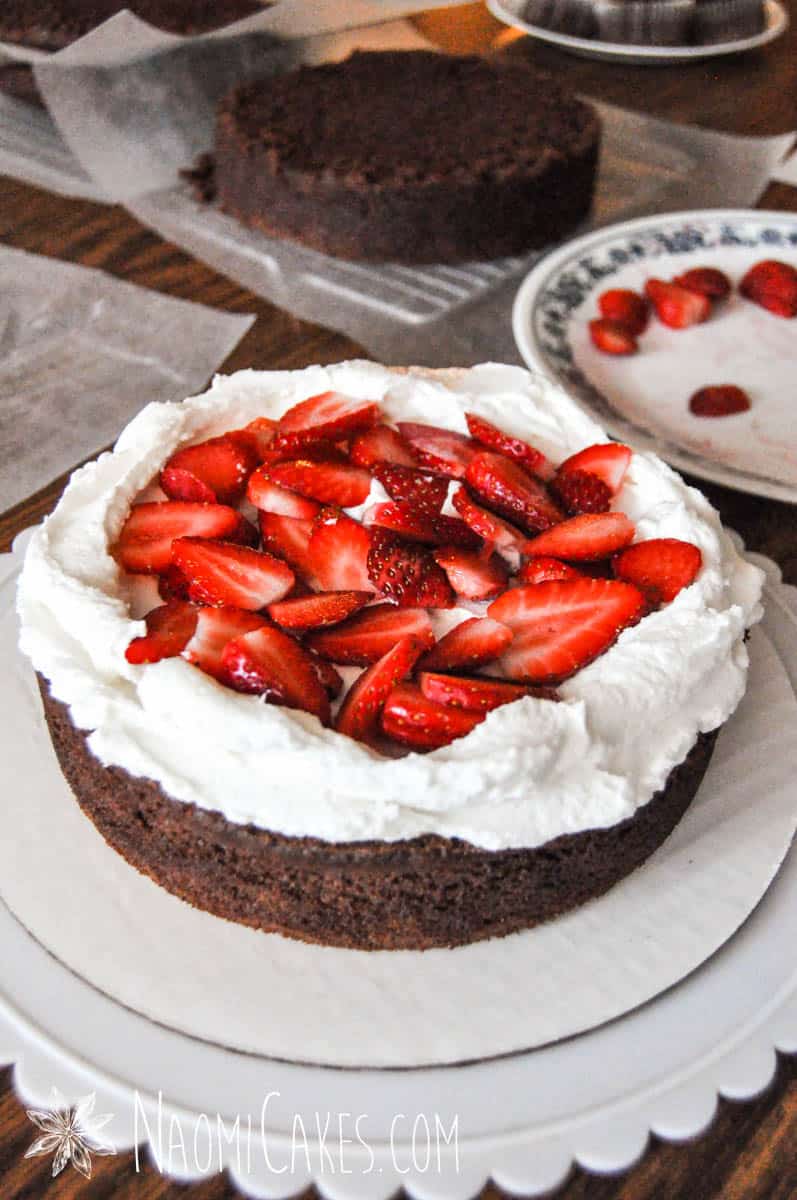
To fill a cake with fruit, jam, or some other kind of filling that isn't frosting, you will need to create a border of frosting around the edge of the whole cake that is quite thick and high. Think of it as a sort of "nest" for your fruit or filling. You can do this with or without a piping bag.
With a piping bag: Spread the icing on the cake to the edges thinly. Pipe a thick border around the outside, and fill the centre with a thin layer of fruit or filling.
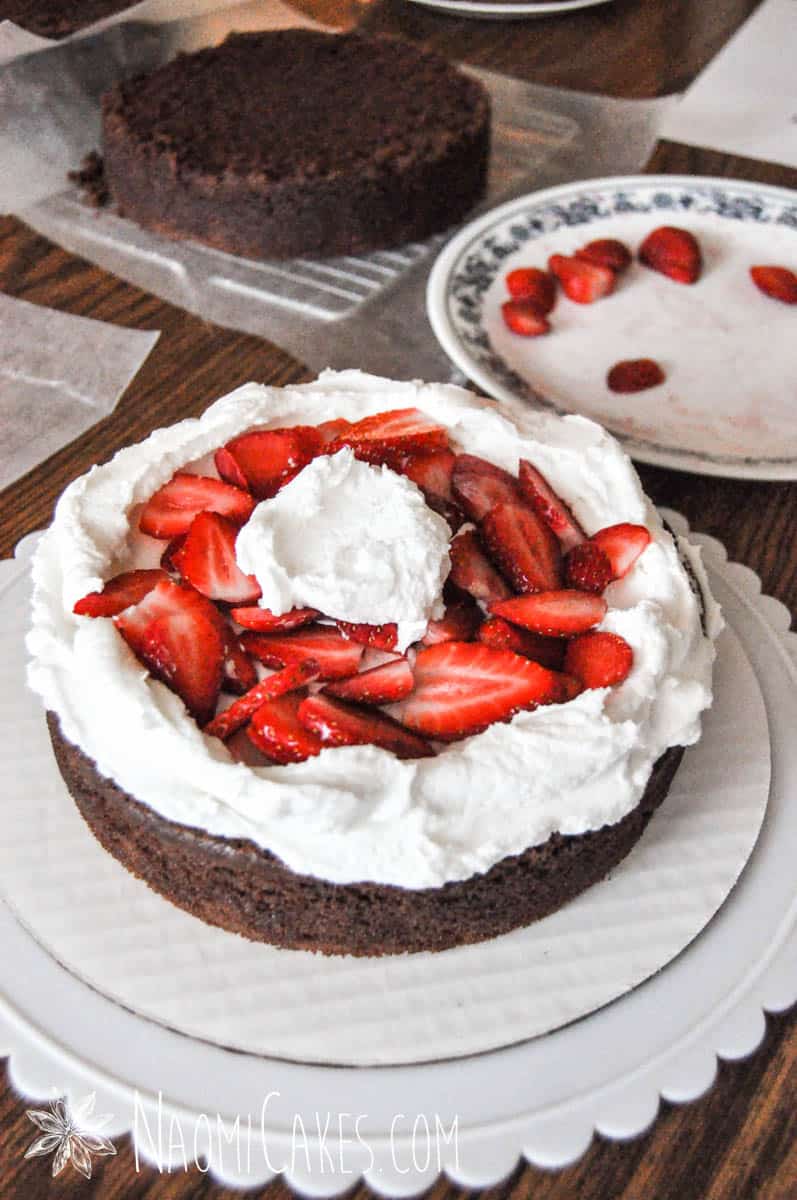
Without a piping bag (as in this tutorial): Spread a thin layer of frosting onto the surface of the cake to lock the crumbs in as mentioned previously. Spread a generous amount of frosting around the edges of the cake to create a border. Fill the centre with a thin layer of fruit or filling. If you used fresh fruit (as I have in this tutorial), add little dollop of frosting on top of the fruit.
-
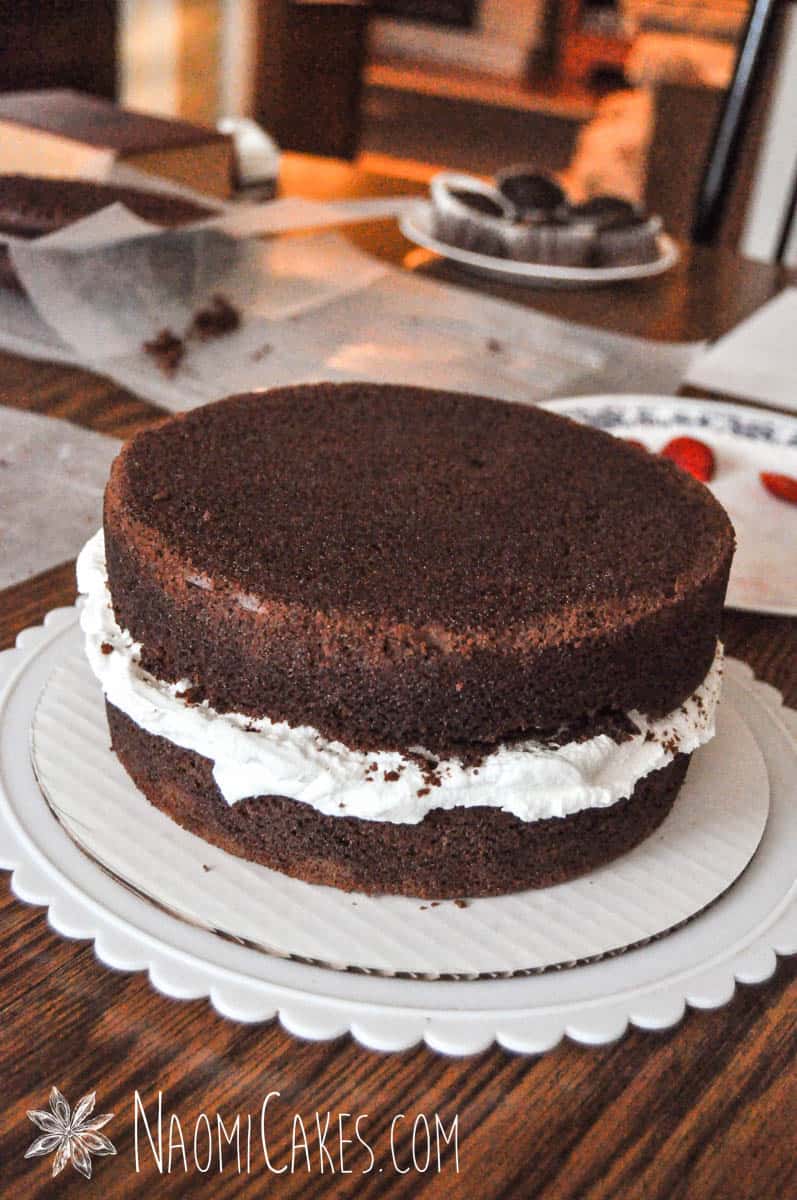
Press the second layer of cake (cut side down) on top. Press it down firmly so that excess icing squeezes out the sides.
-
Why "a thin layer" of filling?
Yes yes, I know - we all want a little extra of the delicious part in the middle, right? Well, the reason I don't recommend that is that adding too much in the middle increases the risk of it oozing out onto the cake. It also increases the risk of the whole thing sliding sideways at some point... Which is a stress like no other. So, resist! Your cake's appearance depends on it.
3 - Crumb coat the cake
-
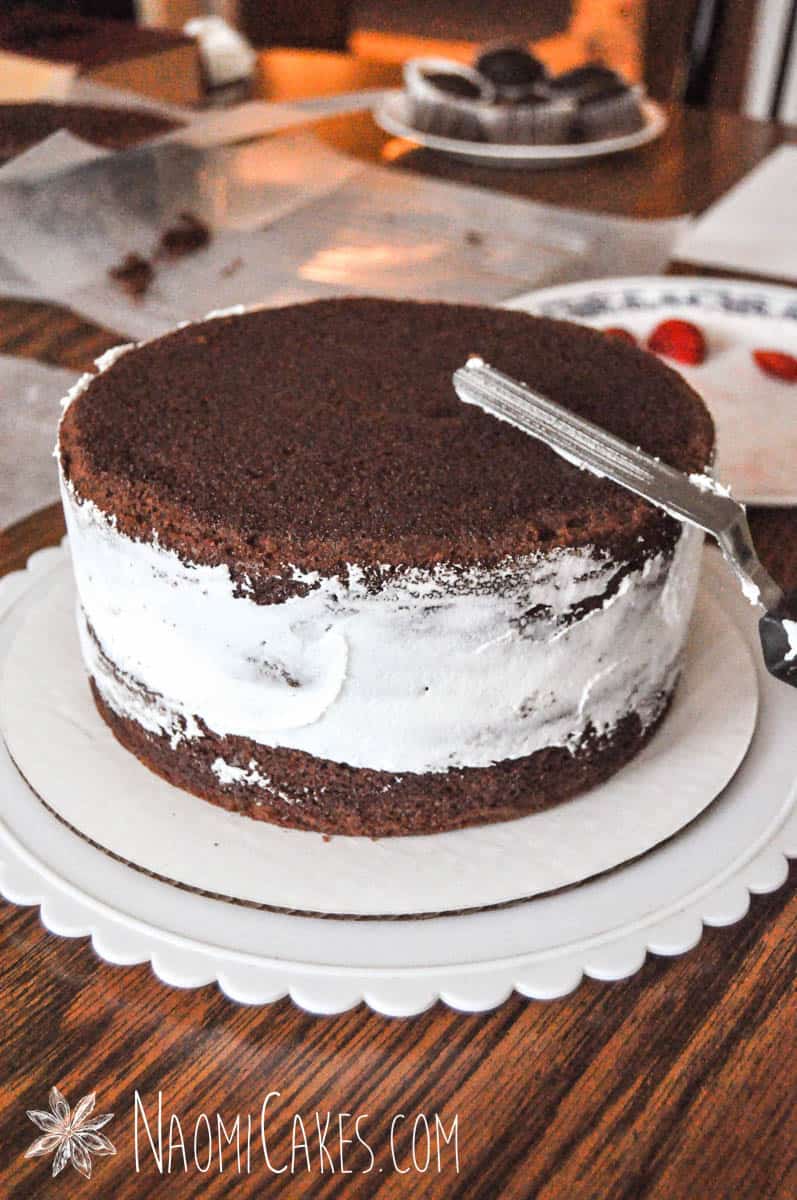
Using an angled spatula, spread the frosting that sticking out the sides flat against the side of the cake. Then put another dollop of frosting on the top of the cake, and again, firmly spread that over the entire surface of the cake to lock in the crumbs. If there are any loose crumbs hanging around on your work surface, clean them up before your proceed.
4 - Frost the cake
-
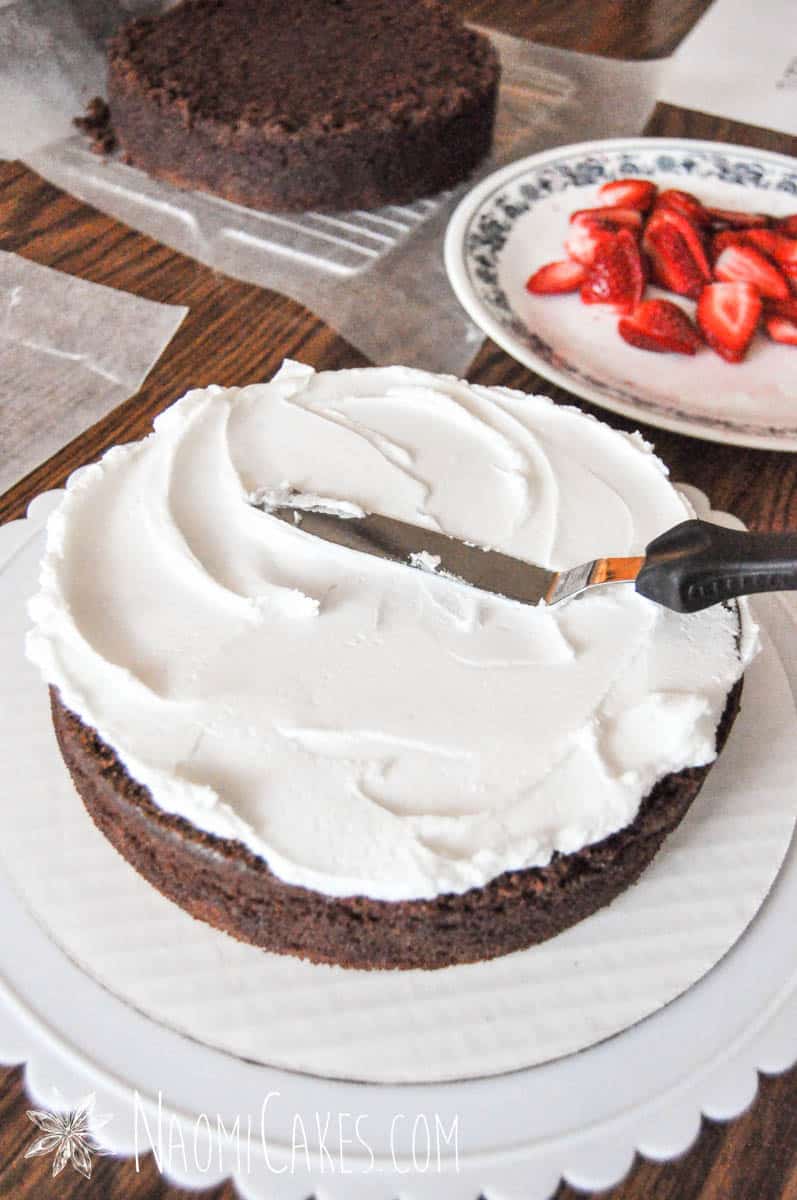
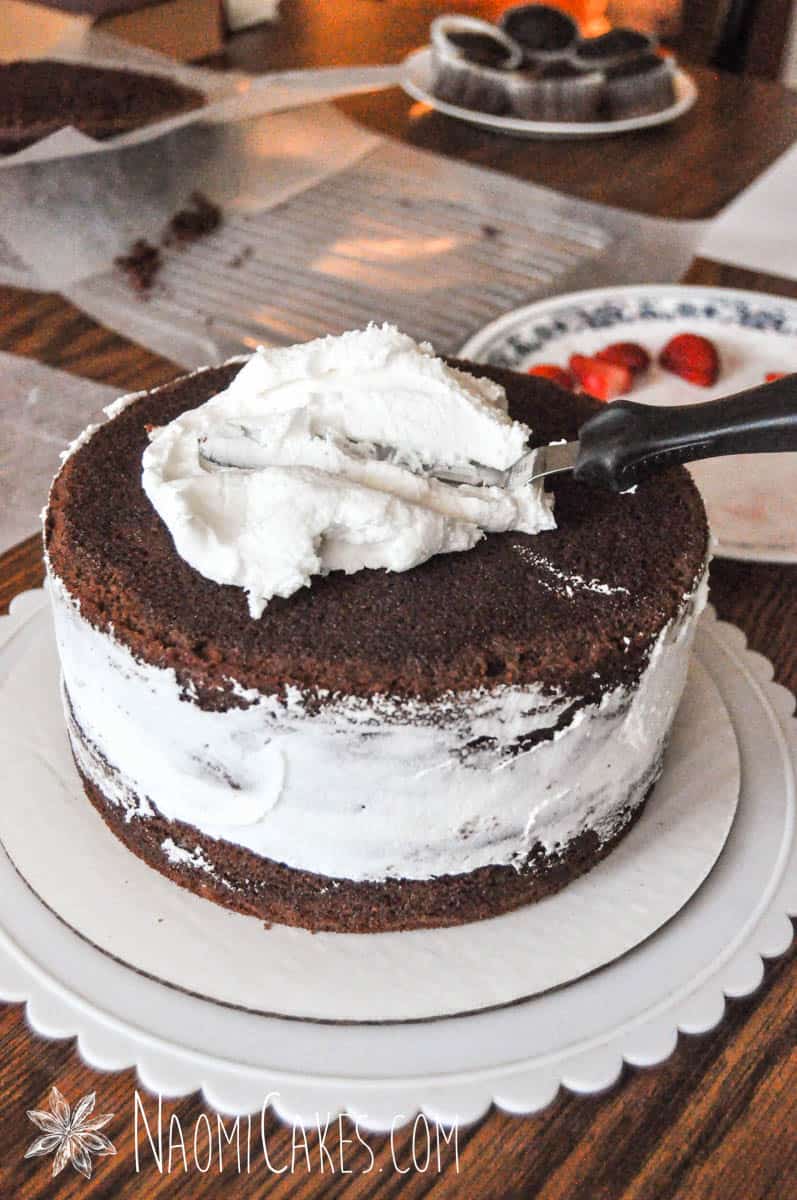
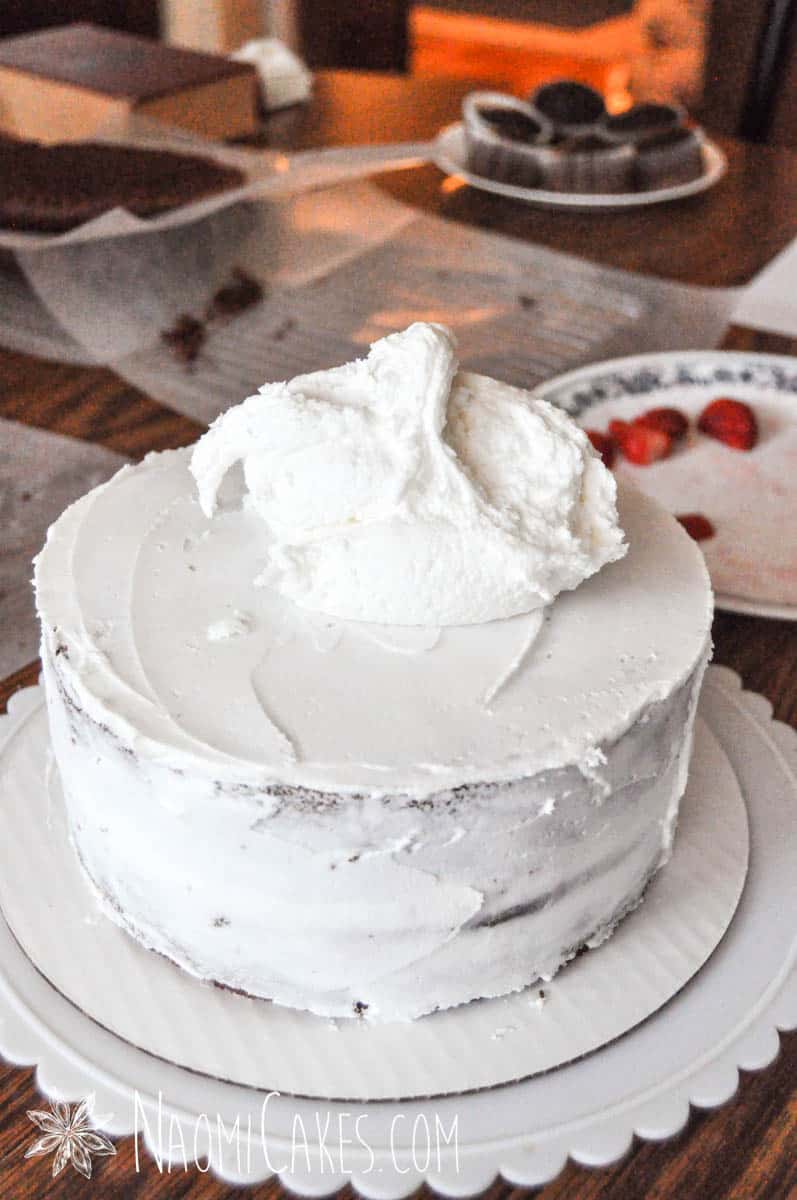
Add a generous amount of frosting to the top of the cake. And yes, I mean LOTS. It's always easier to take some off than to try to patch up mistakes later!
-
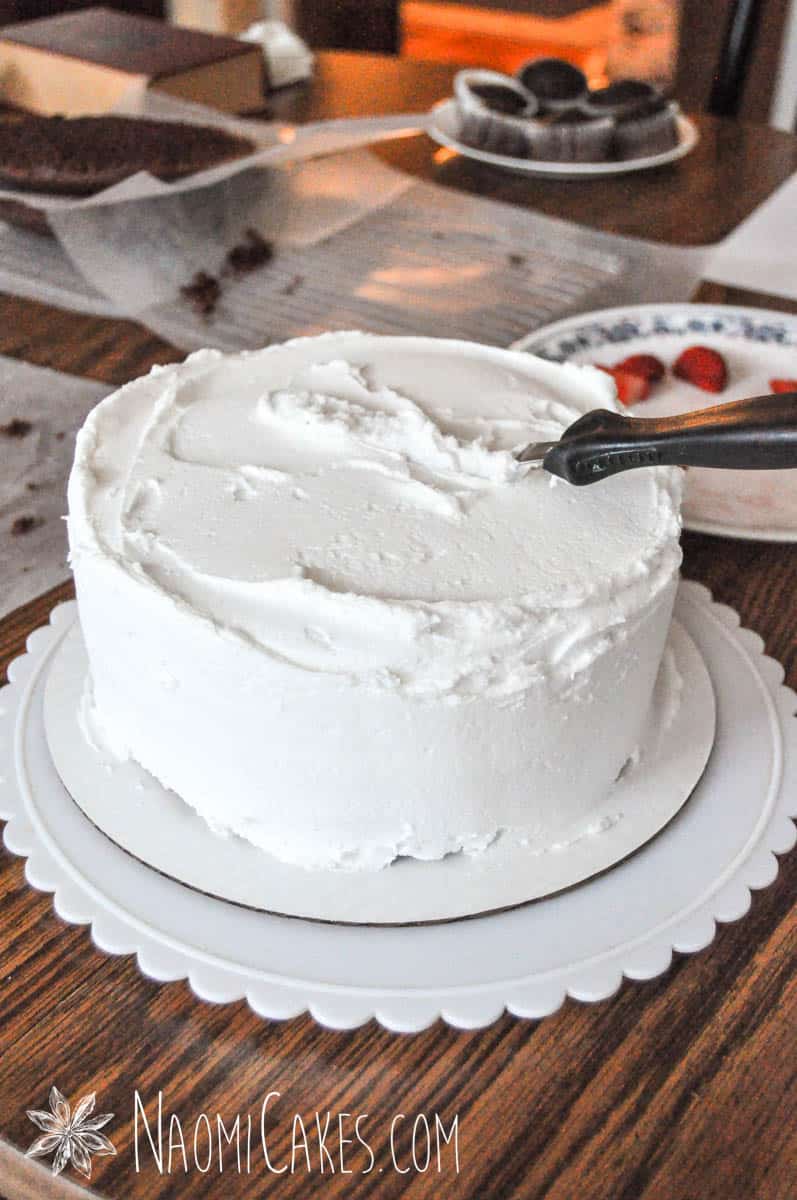
Spread the frosting from the centre of the cake out, until it starts to droop over the sides a little. Spread the frosting down over the sides until the whole cake is well coated with a thick layer of icing. Wipe the blade of your spatula to clean it, and run it along the sides of the cake as you turn it, smoothing the sides and scraping off excess frosting as you go.
-
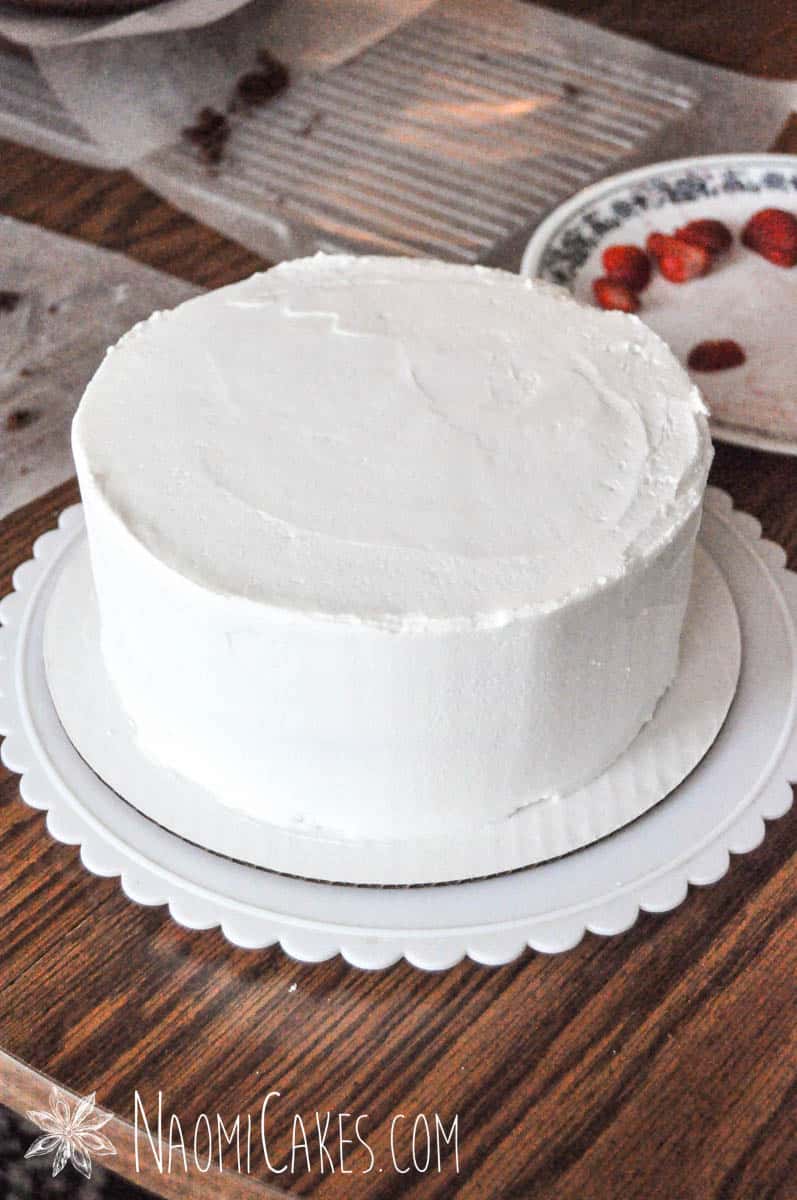
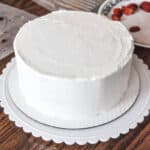
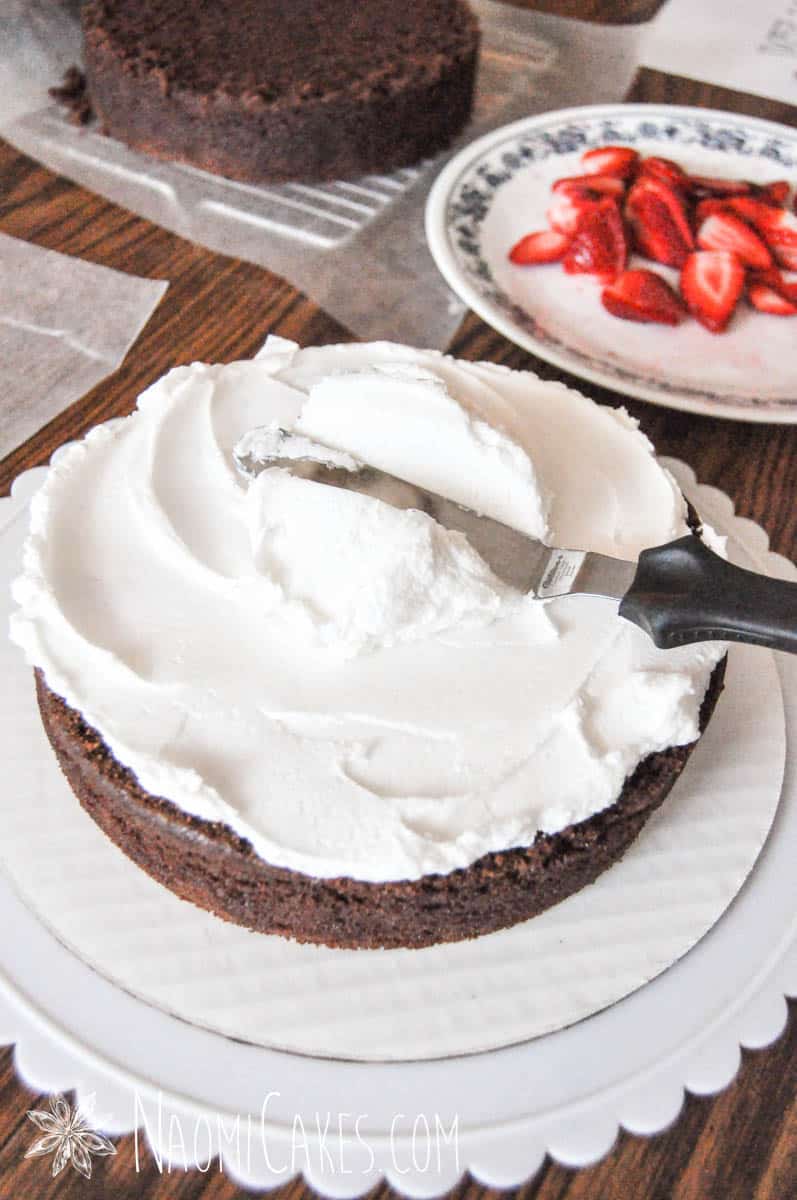
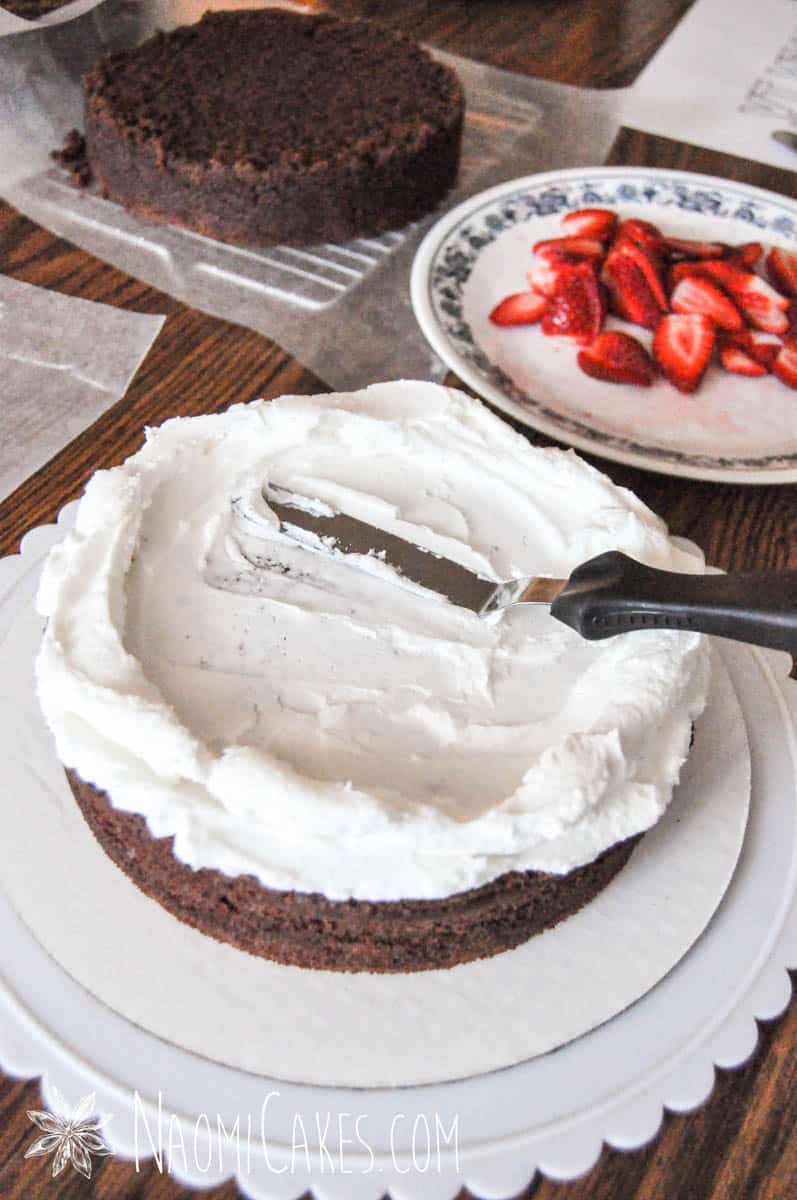
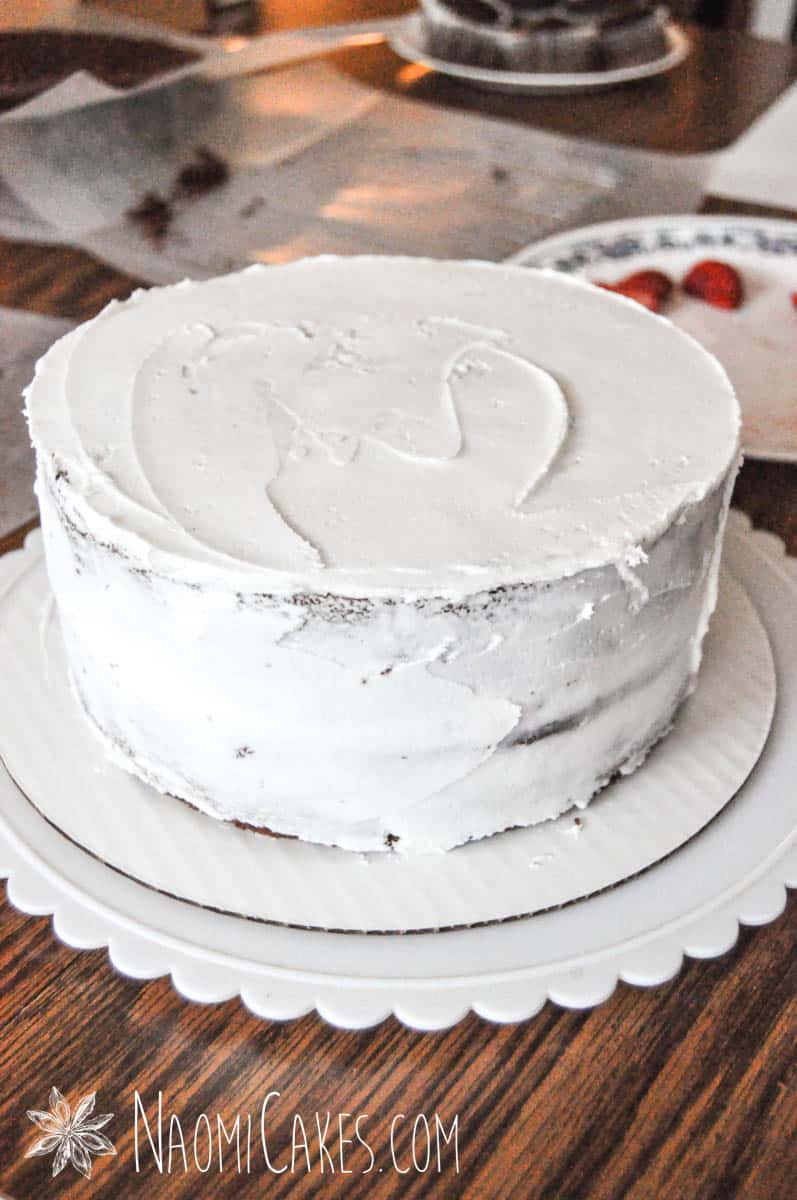
Once the sides are quite smooth, there will likely be a little ridge of frosting standing up from the top. Clean the spatula again, and spread from the edge of the top toward the centre, till the icing is evenly spread over the top of the cake. Clean the spatula one more time, and go back over to smooth any ridges on the top the best you can.
-
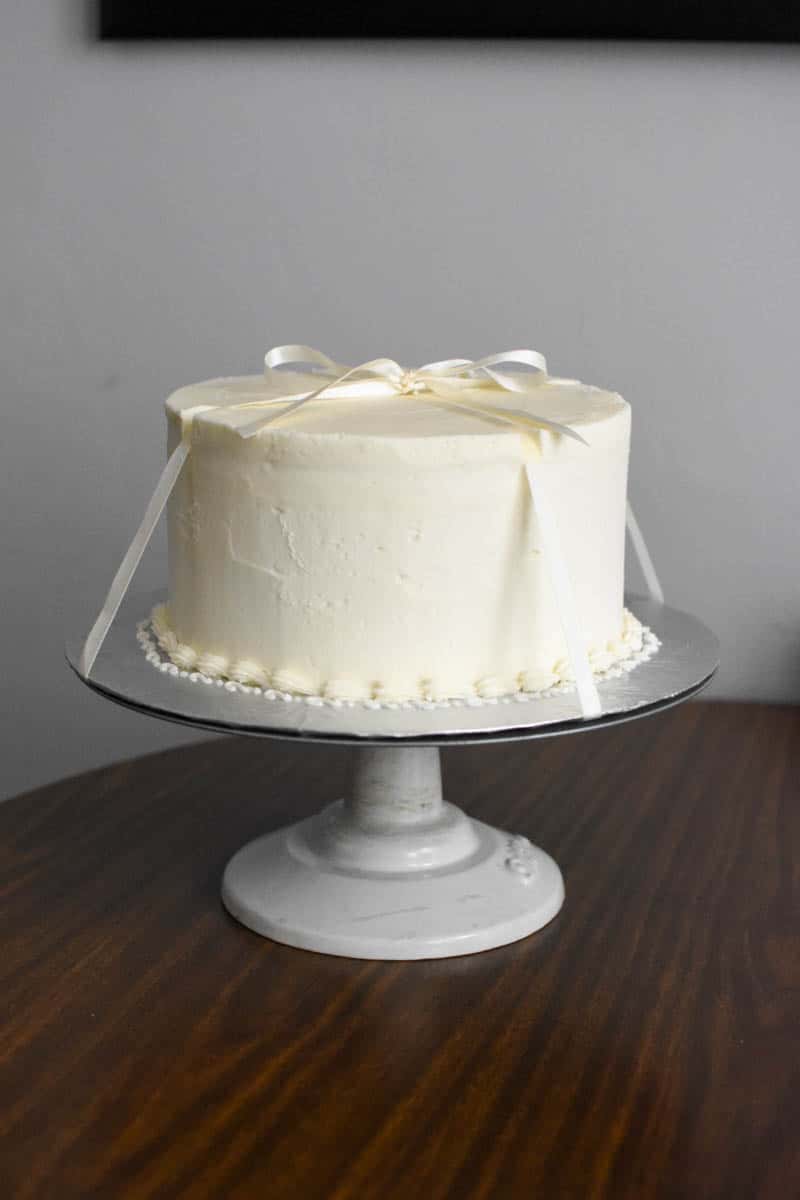
Remember: It doesn't have to be completely flawless. Once this cake gets decorated, you can cover up any little imperfections with piping.
How to Frost a Cake with Buttercream (Smooth Finish)
1 – Bake the cakes and level the tops
Bake your cakes and allow them to cool completely. Use a cake leveler or a long, serrated knife to cut off the rounded tops of the cakes. Make each layer the same height approximately with level tops. If you’re using a knife, make sure to use a gentle sawing motion to cut through the cake.
TIP: The cakes I’m using for this tutorial are fresh, but if you cover and refrigerate the cakes overnight before working with them, that will make them much easier to work with. The moisture will soften the crusted edges of the cake for easy cutting, and the time sitting will help the cakes settle into a more solid form.
2 – Assemble the cakes
- Place your cake plate or board onto the turntable if you have it, and smear a little dollop of frosting on the centre of the board. Next, cut side up, place one of your cake layers onto the board and press it into the frosting. This will keep it from shifting around on the plate.
- Spoon another dollop of frosting onto the cake and spread it evenly over the surface, applying enough pressure to “Lock the crumbs in.” Spread the icing far enough to peak over the sides a little.
- If frosting is the only thing you want to use in between the layers, you can put the next cake layer (cut side down) over top, and press it down firmly so that excess icing squeezes out the sides. If you want to fill your cake with some kind of fruit or filling, however, proceed to the next step.
- To fill a cake with fruit, jam, or some other kind of filling that isn’t frosting, you will need to create a border of frosting around the edge of the whole cake that is quite thick and high. Think of it as a sort of “nest” for your fruit or filling. You can do this with or without a piping bag.
With a piping bag: Spread the icing on the cake to the edges thinly. Pipe a thick border around the outside, and fill the centre with a thin layer of fruit or filling.
Without a piping bag (as in this tutorial): Spread a thin layer of frosting onto the surface of the cake to lock the crumbs in as mentioned previously. Spread a generous amount of frosting around the edges of the cake to create a border. Fill the centre with a thin layer of fruit or filling. If you used fresh fruit (as I have in this tutorial), add little dollop of frosting on top of the fruit. - Press the second layer of cake (cut side down) on top. Press it down firmly so that excess icing squeezes out the sides.
Why “a thin layer” of filling?
Yes yes, I know – we all want a little extra of the delicious part in the middle, right? Well, the reason I don’t recommend that is that adding too much in the middle increases the risk of it oozing out onto the cake. It also increases the risk of the whole thing sliding sideways at some point… Which is a stress like no other. So, resist! Your cake’s appearance depends on it.

3 – Crumb coat the cake
Using an angled spatula, spread the frosting that sticking out the sides flat against the side of the cake. Then put another dollop of frosting on the top of the cake, and again, firmly spread that over the entire surface of the cake to lock in the crumbs. If there are any loose crumbs hanging around on your work surface, clean them up before your proceed.
4 – Frost the cake
- Add a generous amount of frosting to the top of the cake. And yes, I mean LOTS. It’s always easier to take some off than to try to patch up mistakes later!
- Spread the frosting from the centre of the cake out, until it starts to droop over the sides a little. Spread the frosting down over the sides until the whole cake is well coated with a thick layer of icing. Wipe the blade of your spatula to clean it, and run it along the sides of the cake as you turn it, smoothing the sides and scraping off excess frosting as you go.
- Once the sides are quite smooth, there will likely be a little ridge of frosting standing up from the top. Clean the spatula again, and spread from the edge of the top toward the centre, till the icing is evenly spread over the top of the cake. Clean the spatula one more time, and go back over to smooth any ridges on the top the best you can.
Remember: It doesn’t have to be completely flawless. Once this cake gets decorated, you can cover up any little imperfections with piping.

Other great basic cake decorating tutorials
- How to Assemble Piping Bags for Cake Decorating
- How to Line Cake Pans with Parchment Paper
- Piping Techniques for Cake Decorating
And that’s it! I hope this has been helpful, and please feel free to leave questions in the comments below! You can also tag me in your photos on Instagram @naomicakesofficial; I always love to see your beautiful work!
–Naomi
This post contains affiliate links.
have yo ever used warm melted jam and covered the tops of the cakes? Then let them dry over night. This helps to seal the tops and prevents crumbs. I like your method of icing with using extra icing. Thanks so much for sharing. bren
Yes, actually I have! I used an apricot glaze, made with apricot jam, for the Sachertorte I made and posted on here in April. I haven't really used it on other cakes, but that's a great idea. Thanks for your comment!
Once again a wonderful job! I so enjoy reading these.