
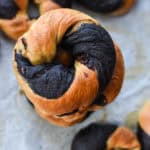
Chocolate Cherry Bagels [Recipe]
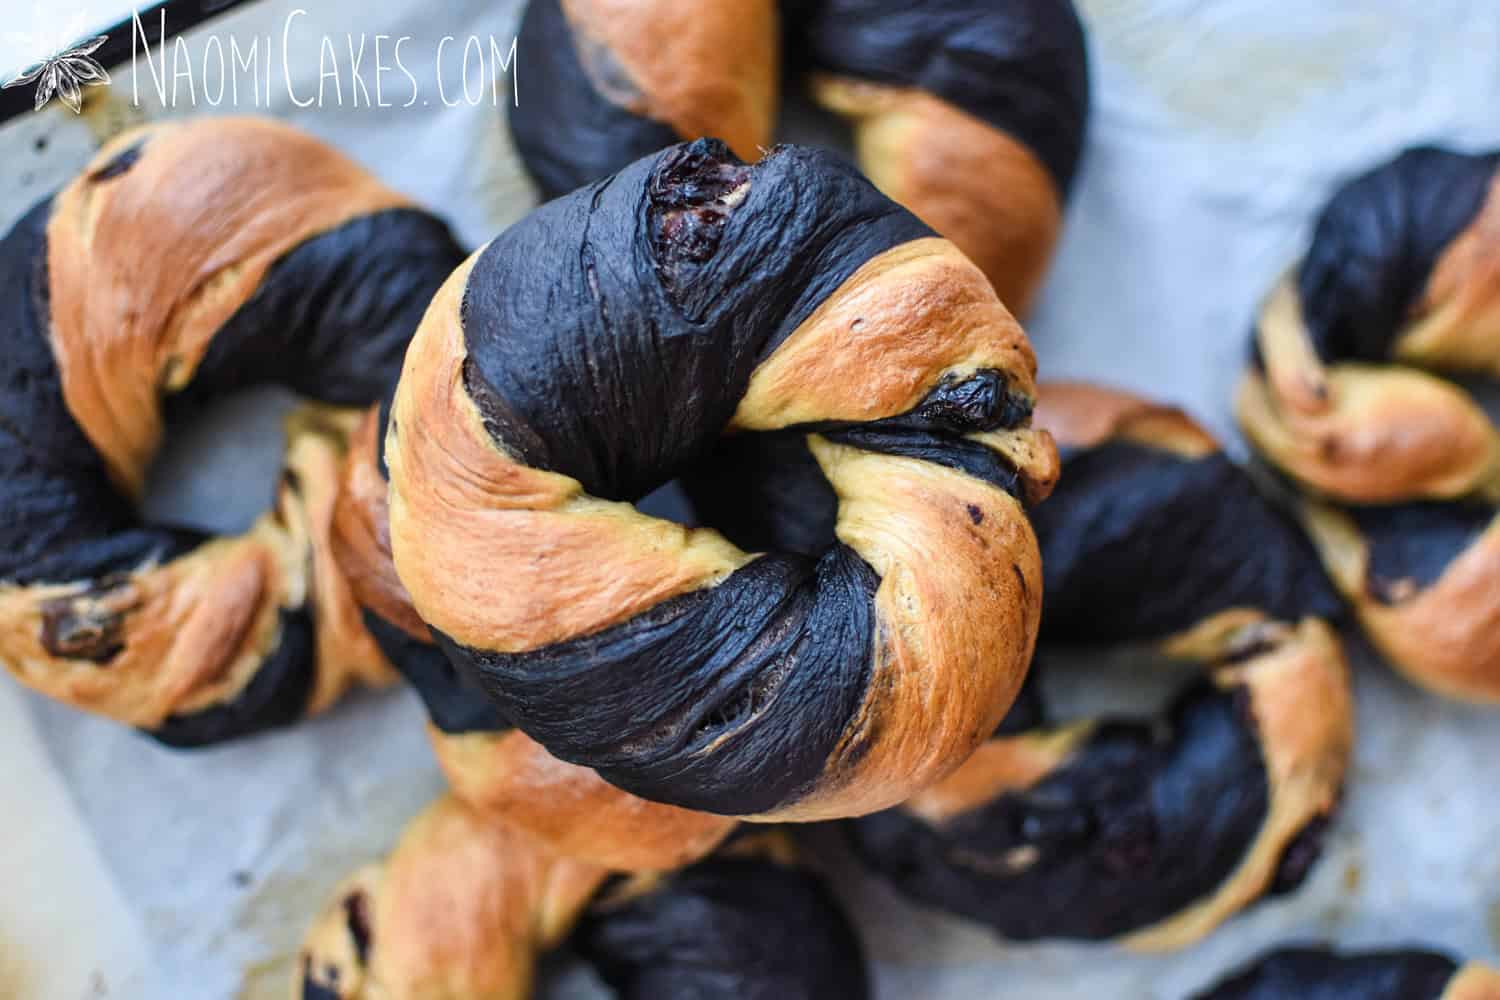
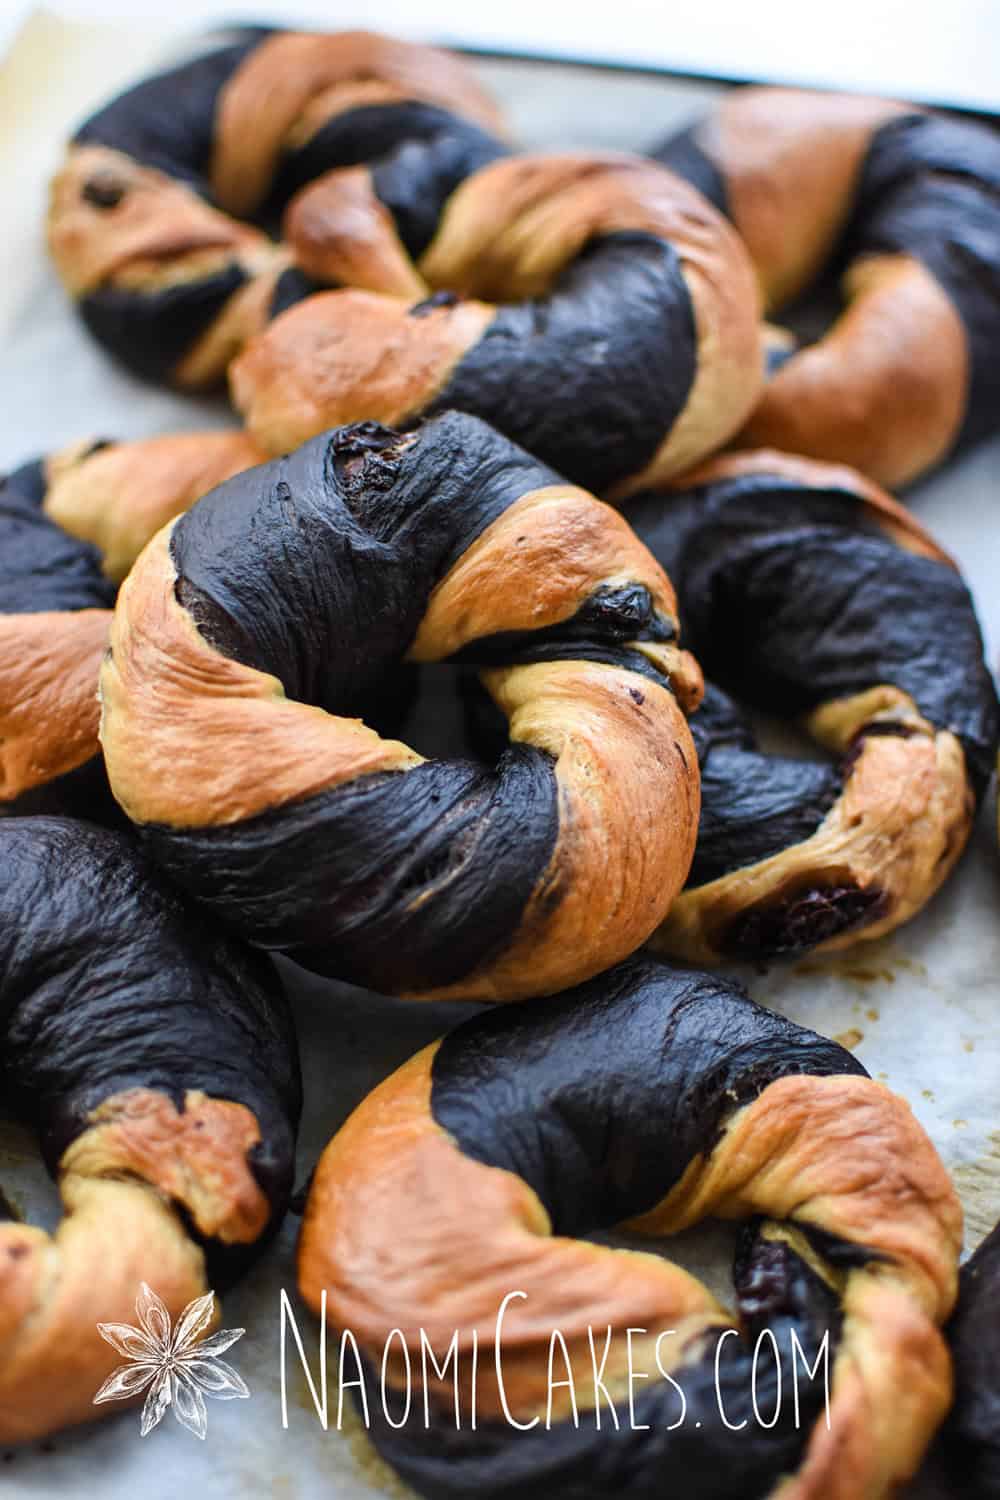
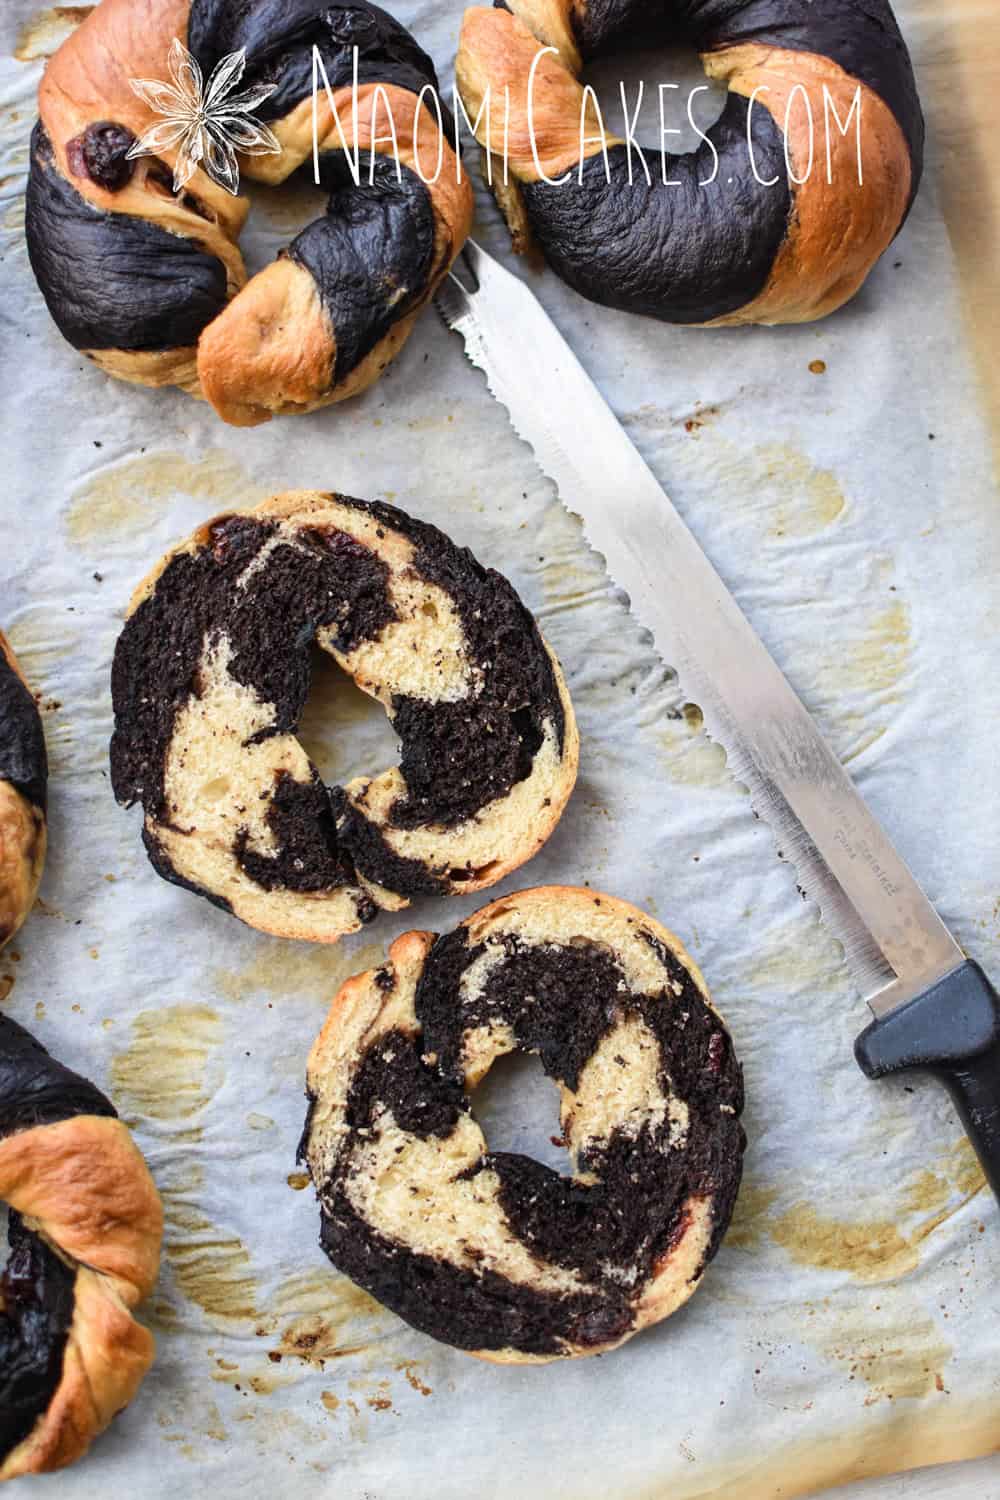
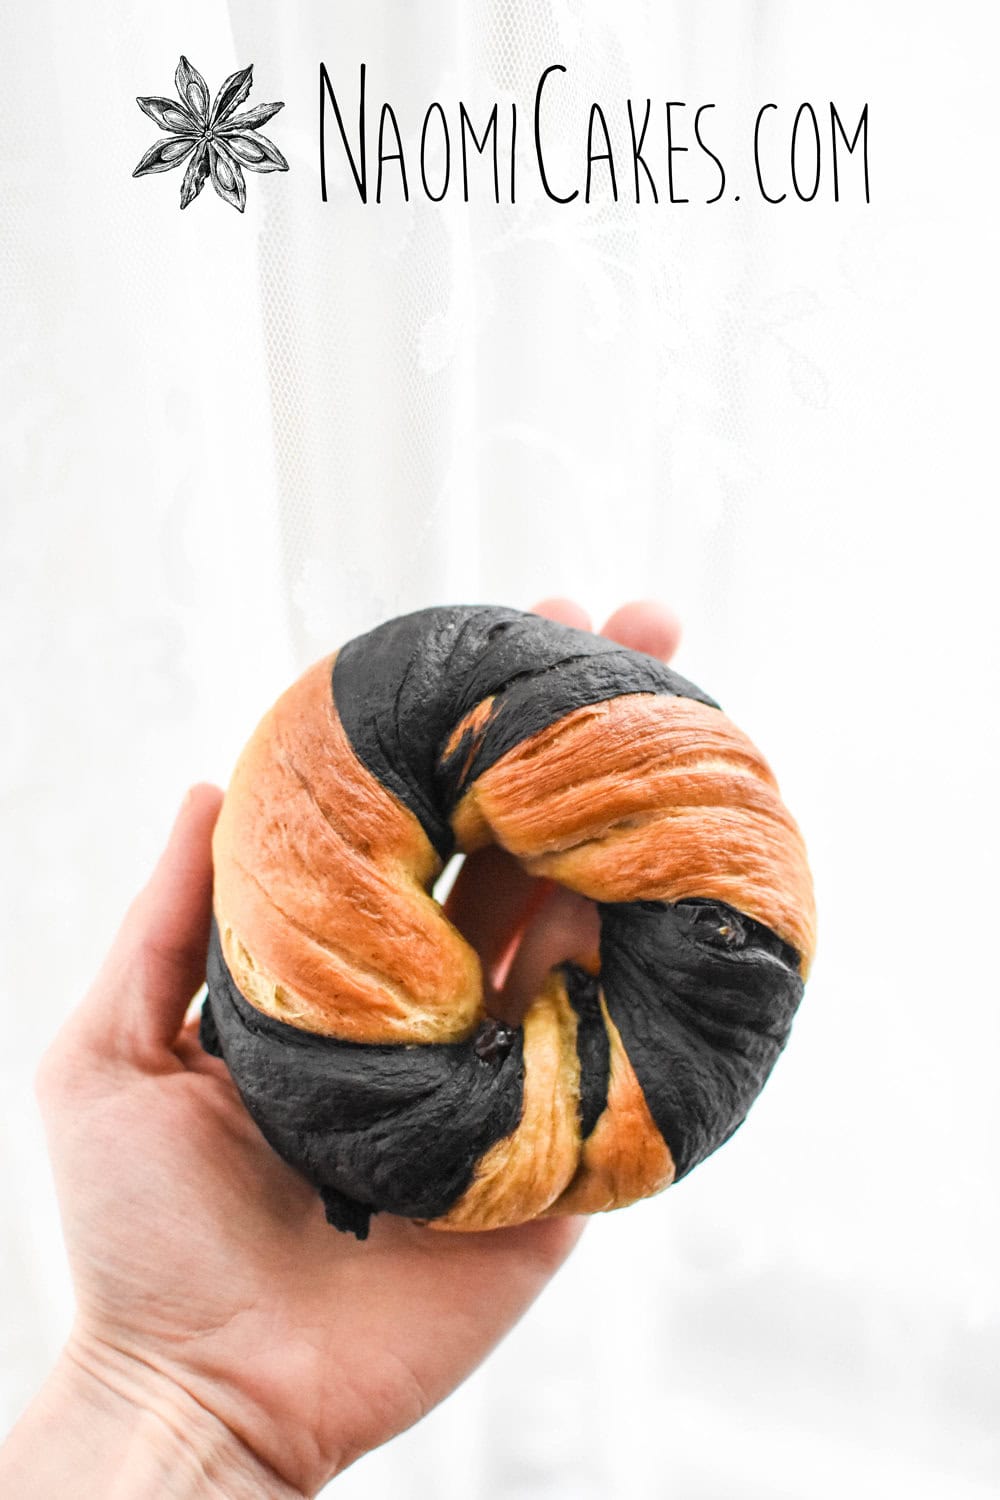
These striped, masquerade-esque chocolate cherry bagels might be some of the coolest looking bagels I’ve ever made. They are slightly sweet, with dark chocolate and cherry ribboned throughout – making them a perfect bread to serve toasted with butter, cream cheese, or whatever you might fancy.
I made this recipe for my family, and by the time I got to try one (which wasn’t that long after I made them, mind you), there was only one left. I’m glad that I did get a taste! Two dozen bagels, gone in an instant… I guess that means they were good, right?
How to make the dark/black portion of dough
The chocolate portion of this dough is made with dark/black cocoa powder. You could use any other type of cocoa as a substitute, if you like, but if you want that “black and white” look, black cocoa is the way to go.
Note: The link above might suggest a different type of cocoa depending on what country you’re from. If you want black and white bagels, the type of cocoa you are looking for should be very dark and look almost completely black.
How to serve chocolate cherry bagels
These bagels have very little sugar, giving them a rich chocolate flavour that goes well with a sweet or a savoury accompaniment. I kinda think they would be awesome toasted with cream cheese and fresh strawberries; but of course, dress it up however you like! Savoury toppings for these bagels will give you that sweet/savoury combo which is totally delicious.
Are chocolate cherry bagels easy to make?
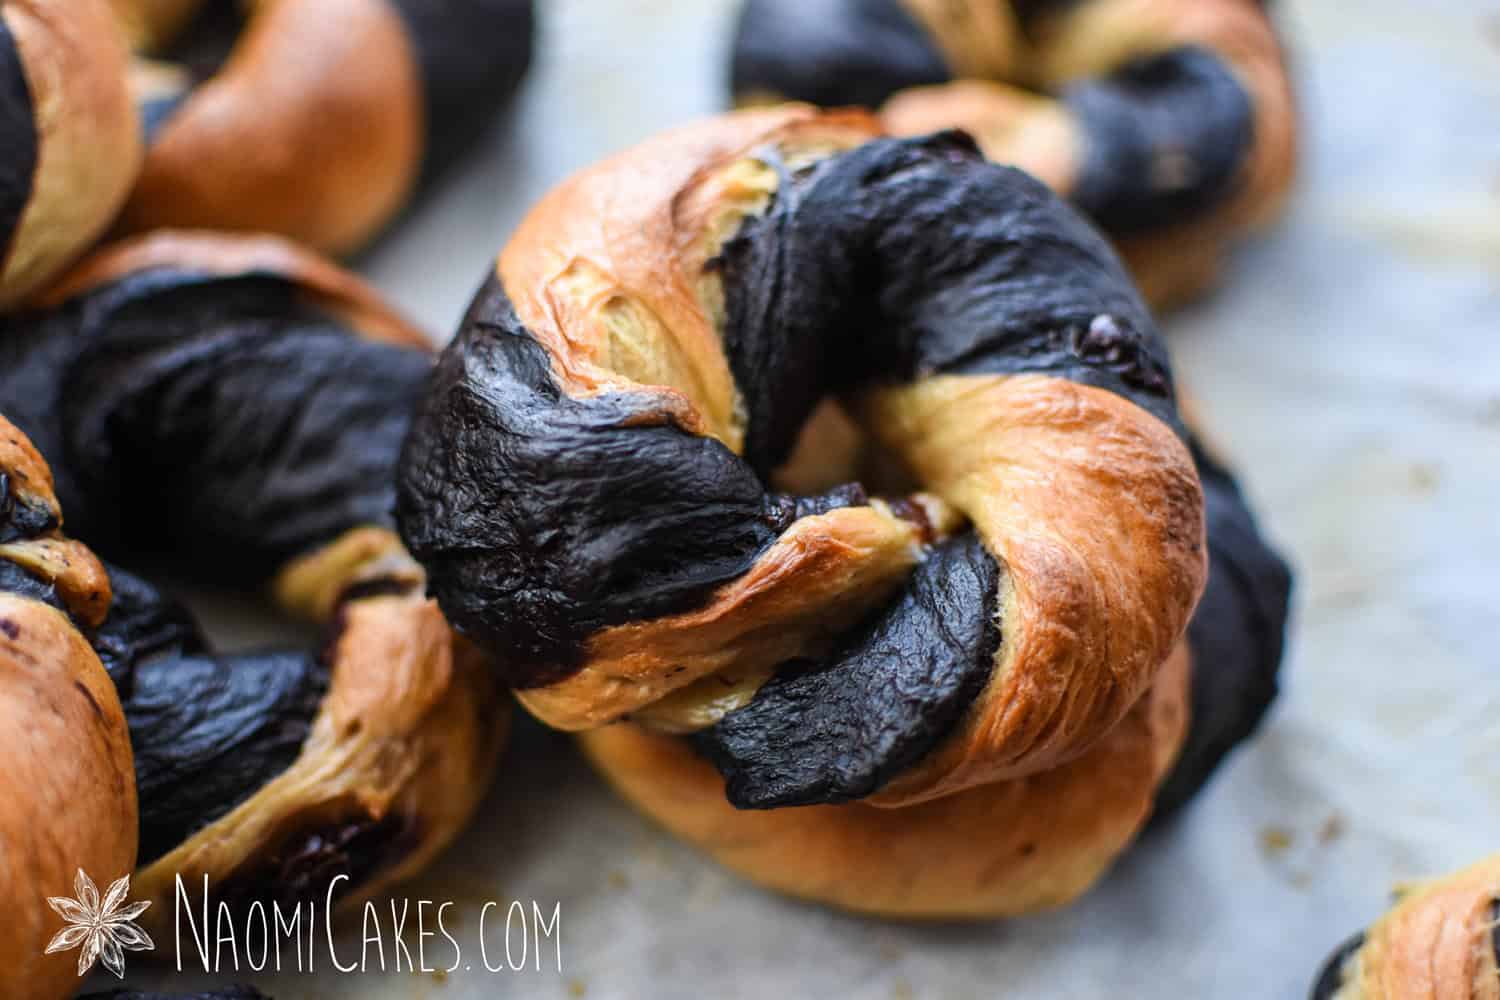
This recipe is quite simple to make, with the note that the “Twirling” process of the dough can make them come apart when you boil them. It’s a little tricky to put them back together smoothly if that does happen (because of how they are sealed), but still; I wouldn’t let that deter you from trying! The worst that can happen is that you have to re-seal the ends together, and they might look a little funny (check out the picture here):
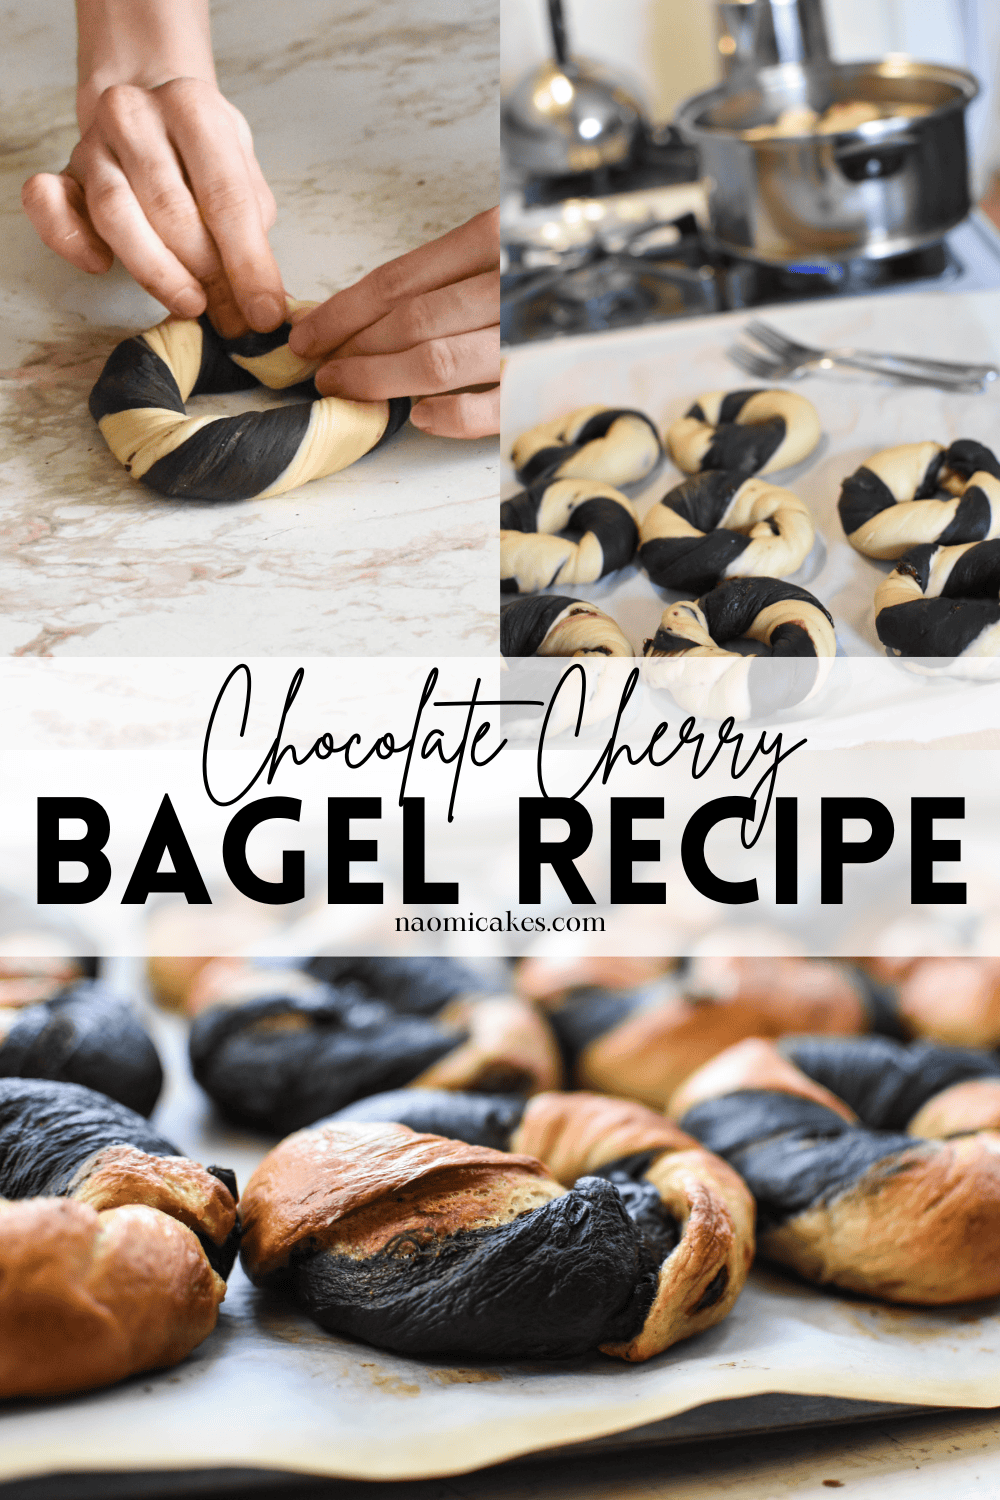
How to make bagels, step by step
This recipe includes step-by-step photos through the shaping and boiling process, since that’s the most tricky part. If you’d like to see more step-by-step pictures of the bagel making process, you can head on over to my Montreal Bagel Recipe, my Everything Bagel Recipe, or my Asiago Black Pepper Bagel Recipe… All of which have pictures of the the way the dough will look as you make it, shape it, and let it rise.
While those flavours are all very different than this one, the method is essentially the same. Since I’m a pretty visual learner, I’ve tried to visually document this process for you – with as many notes to go along as I can, just so that you can imagine it as accurately as possible before you attempt to make it.
Why are bagels boiled?
Bagels are boiled in water or “Poaching syrup” because that is what gives them their classic chewy texture, soft crust, and beautiful glossy sheen. You could make bagels without boiling them… but they sure wouldn’t taste like bagels!
Boiling bagels: What goes in the water?
I would say that it depends on what kind of bagels you are making. For most recipes, barley malt syrup is added to the water before boiling. You can also use any of the following in your water, however, and find that your bagels still turn out beautifully (although with a sightly different taste to the crust):
- Salt
- Baking soda
- Molasses
- Honey
- Nothing! Yup, that’s right. Bagels can be boiled with absolutely nothing in the water – they just won’t have that little bit of extra flavour.
Storing your bagels for freshness:
I like to keep my bagels in sealed plastic bags for storage in the freezer. I usually make about 2 dozen bagels at a time, and only keep enough out for my family to enjoy 1 or 2 times. The rest go in the freezer for later, and will last in well-sealed bags or containers for several months.

I had all kinds of thrills pulling these out of the oven. I felt like a champion. Want to see how it’s done? Scroll down for the recipe and some step by step images!
To make this recipe, you will need:
- Ingredients (see recipe card)
- Mixing bowls
- Stand mixer (optional)
- Measuring cups and spoons
- Glass measuring pitcher
- Stirring spoon
- Sharp knife
- Large pot
- Round slotted spoon/Cooking skimmer
- 2 Forks
- Kitchen timer
- Baking sheets
- Parchment paper
- Cooling rack
Chocolate Cherry Bagels
This beautiful, marbled, sweet but not-too-sweet bagel recipe is an easy way to impress your friends and family. Can be fresh from the oven in only 2-3 hours!
Ingredients
For the Plain Portion:
- 1-1/2 cups lukewarm water
- 1/2 Tbsp sugar
- 1 Tbsp dry active yeast
- 2 Tbsp oil olive oil or vegetable oil
- 1/4 cup liquid honey
- 1-1/2 tsp molasses fancy/table molasses or blackstrap – table molasses is my preference
- 3/4 tsp salt
- 1 egg beaten
- ½ cup dried cherries chopped
- 5-1/4 cups all-purpose or bread flour (+extra if the dough is too sticky)
For the Chocolate Portion:
- 1-1/2 cups lukewarm water
- 1/2 Tbsp sugar
- 1 Tbsp dry active yeast
- 2 Tbsp oil olive oil or vegetable oil
- 1/4 cup liquid honey
- 1-1/2 tsp molasses fancy/table molasses or blackstrap
- 3/4 tsp salt
- 1 tsp ground cinnamon
- 1 egg beaten
- ½ cup dried cherries chopped
- ½ cup dark cocoa powder
- 4-1/2 cups all-purpose or bread flour (+extra if the dough is too sticky)
Poaching Syrup:
- 1/2 cup liquid honey
- 16 cups water 16 cups = 1 gallon
Instructions
-
In a large mixing bowl, combine the lukewarm water with sugar and yeast from “The Plain Portion” ingredients, and stir to dissolve (there may be small clumps that don’t blend in very well – this is okay). Allow this mixture to rest about 10 minutes, or until slightly risen and bubbly.
-
Add the oil, honey, molasses, salt, beaten egg, and dried cherries; stir to combine. Stir in the flour, and knead on a lightly floured work surface until smooth and elastic, about 3-5 minutes, adding a little more flour if the dough is sticky. Place the dough back into the bowl, cover with plastic, and set aside.
-
In another large mixing bowl, follow the directions from steps 1&2, but this time using the ingredients from “The Chocolate Portion,” again adding a little extra flour if the dough is sticky. Allow both portions of dough to rise 1 hour or until doubled.
Note: To test if the dough is risen enough, stick your finger into the dough – if an indentation remains without shrinking back where your finger was, it is ready to use.
-
While the dough is rising, combine the water and honey for the poaching syrup in a large pot and bring to a boil. Reduce heat to a simmer, just to keep it hot, until ready to use.
-
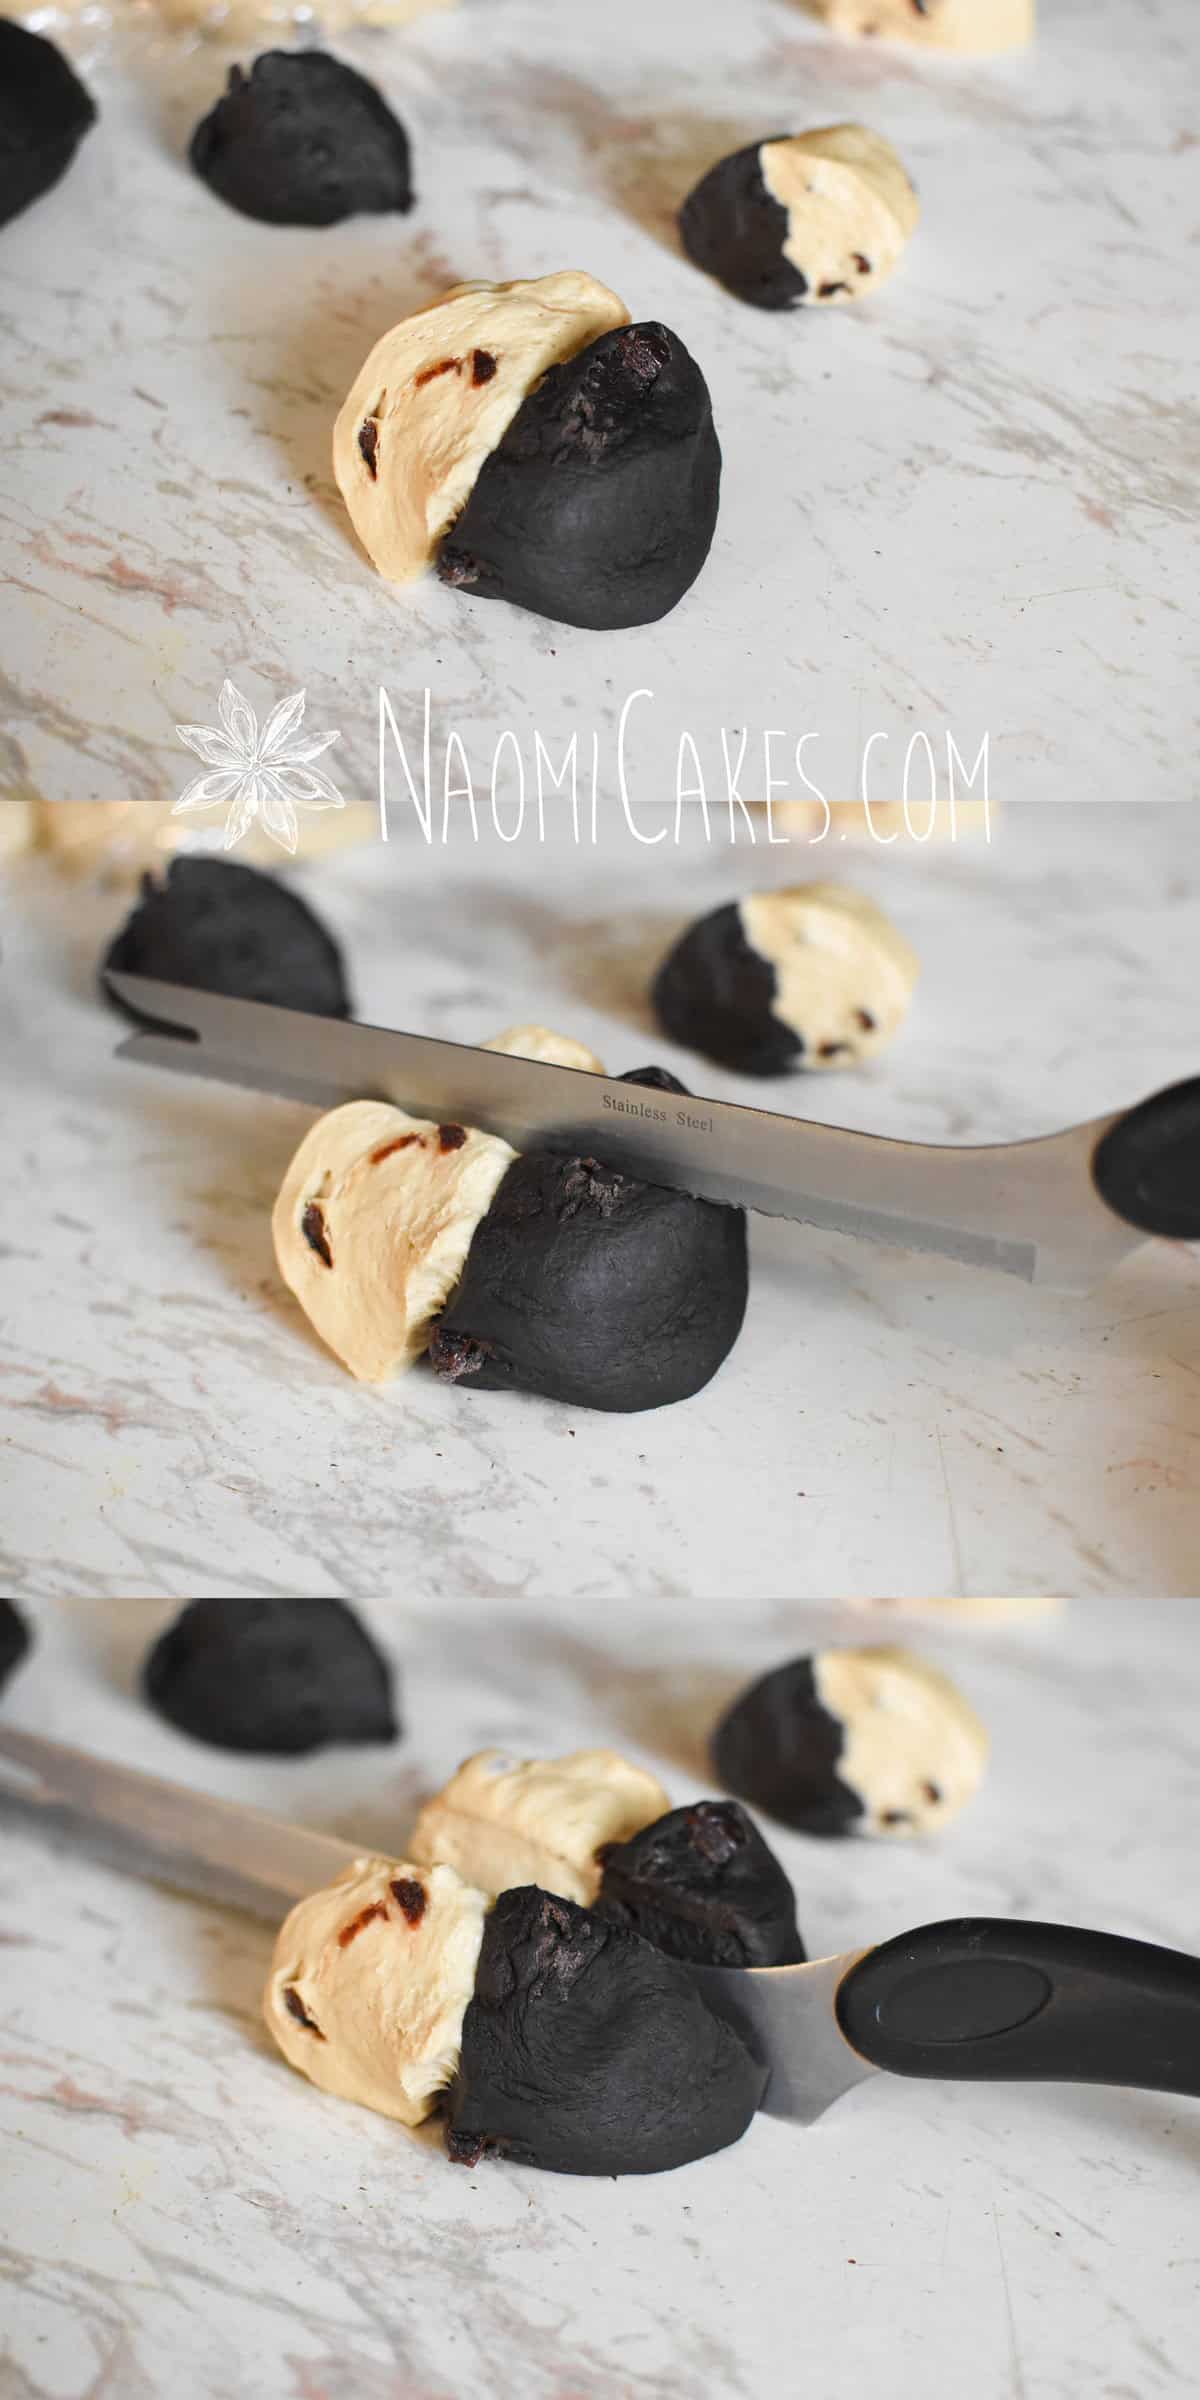
When the dough has risen enough, punch it down in both bowls to remove any air bubbles. Turn each portion out onto a clean work surface. Divide each portion of the dough into 12 evenly divided portions (each should weigh about 100 grams) – for a total of 12 plain pieces of dough and 12 chocolate ones (24 total).
-
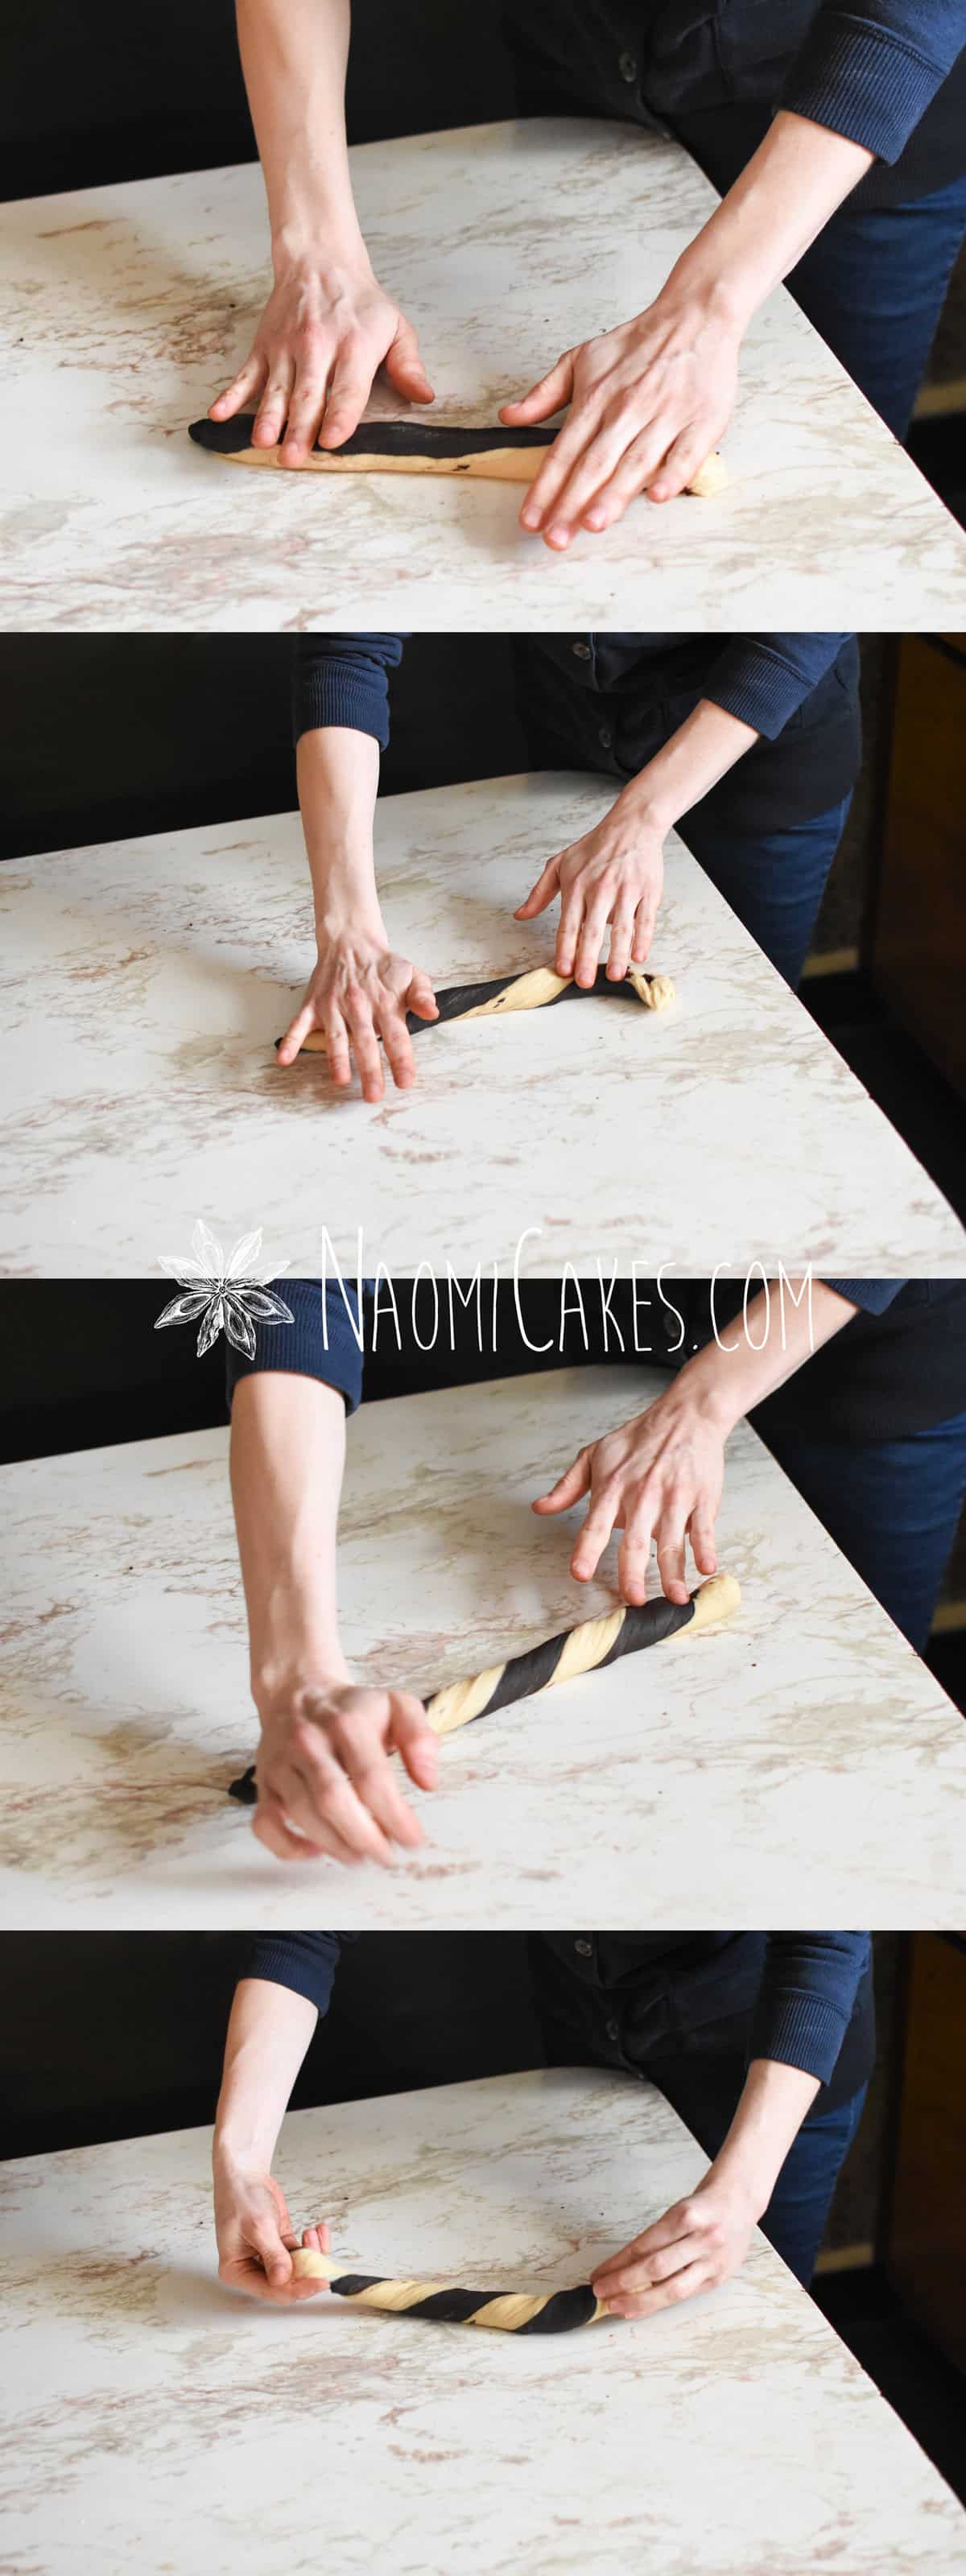
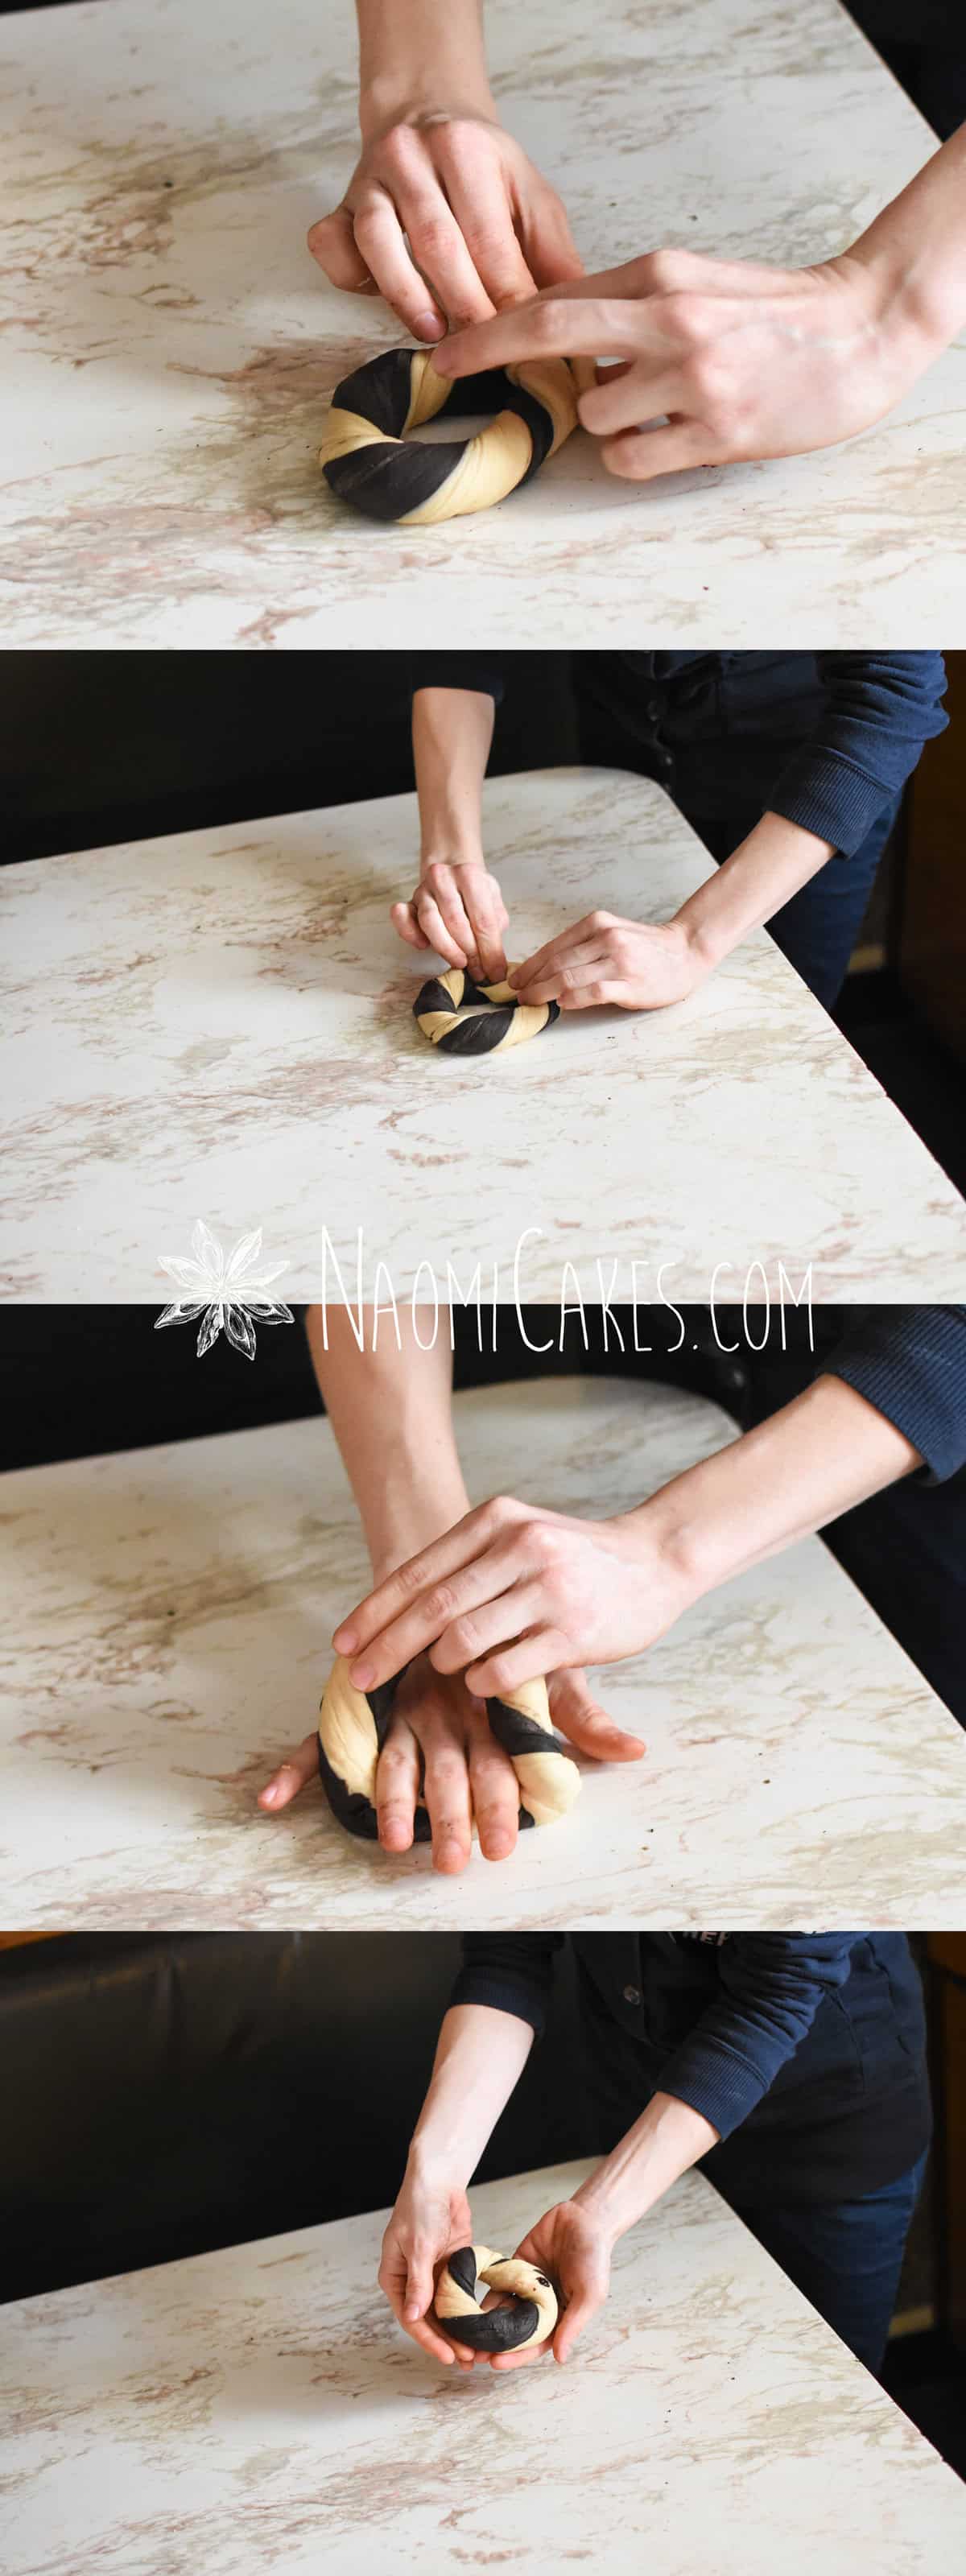
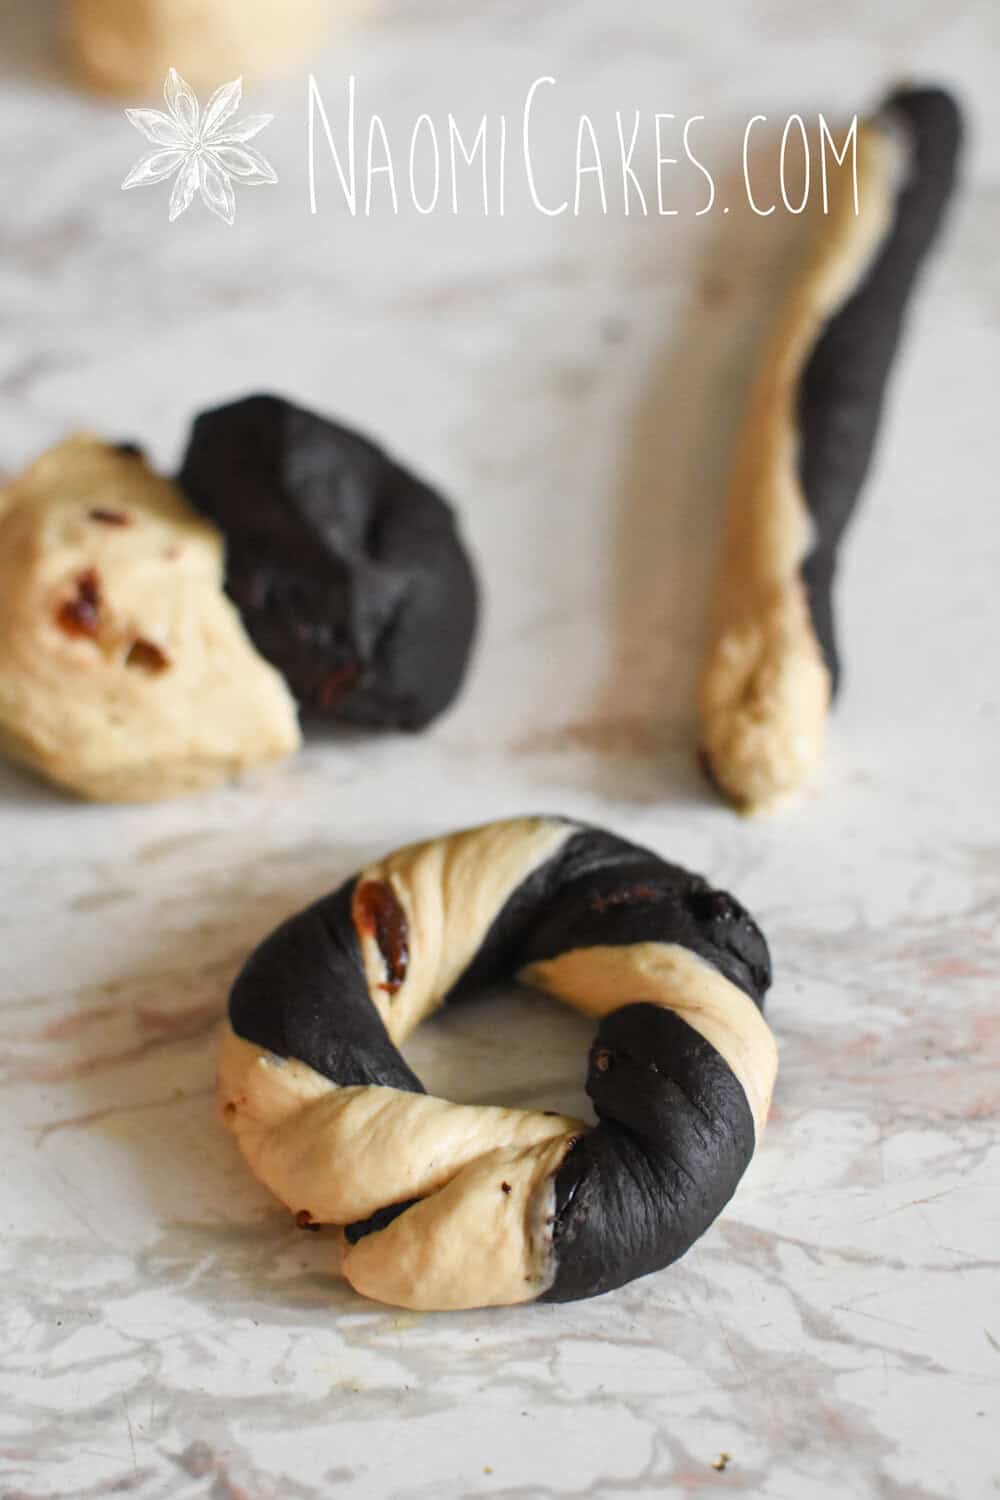
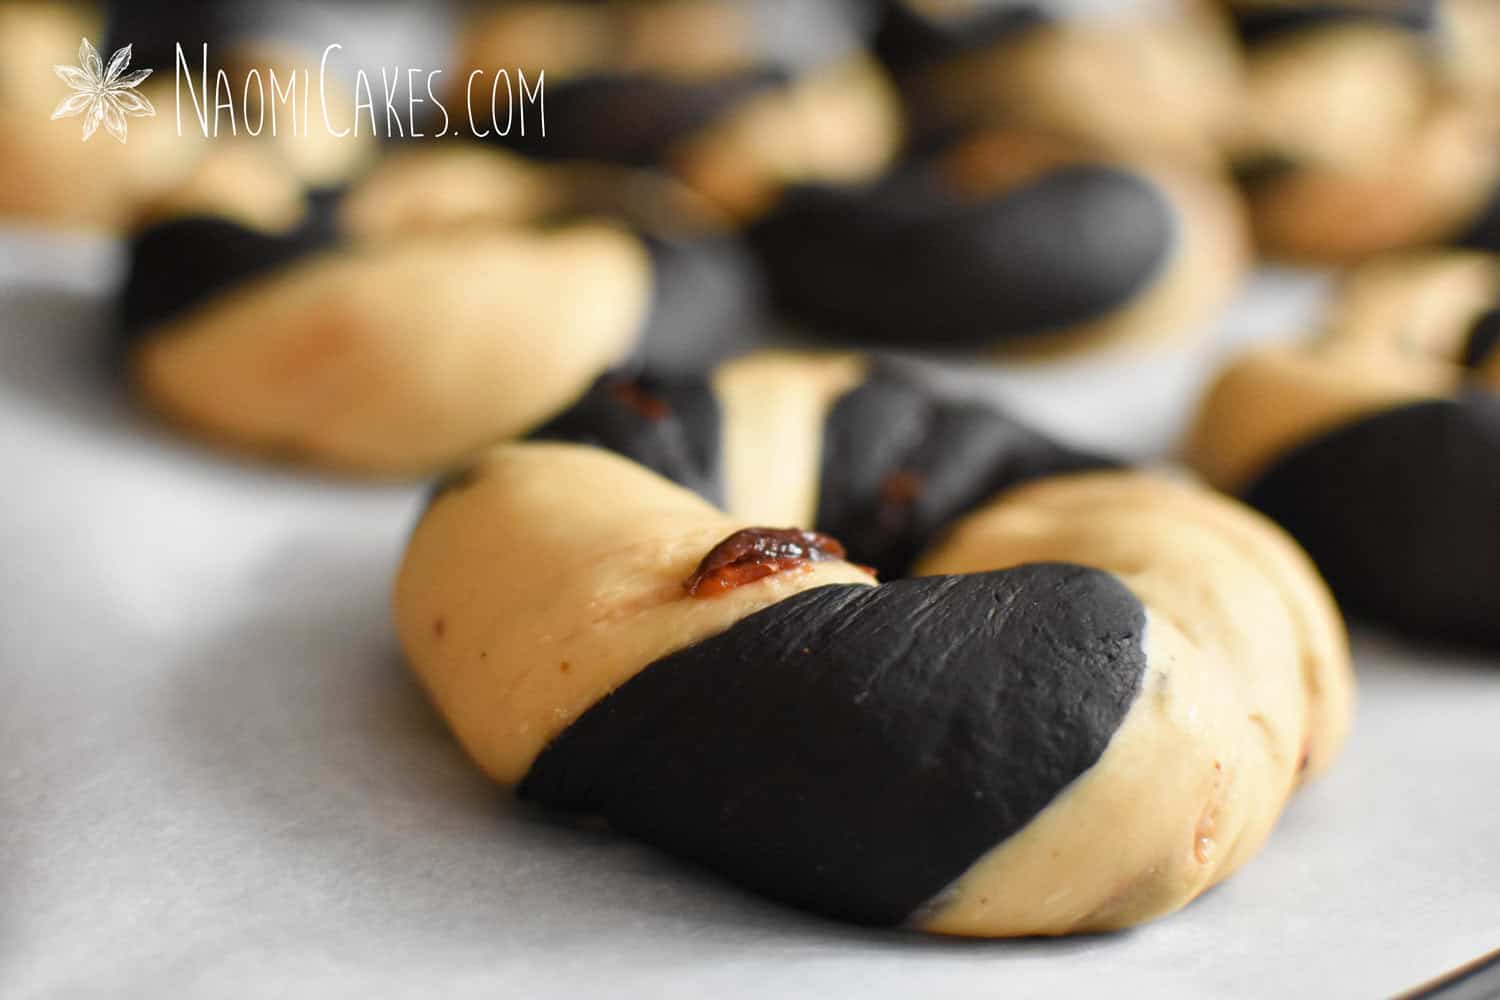
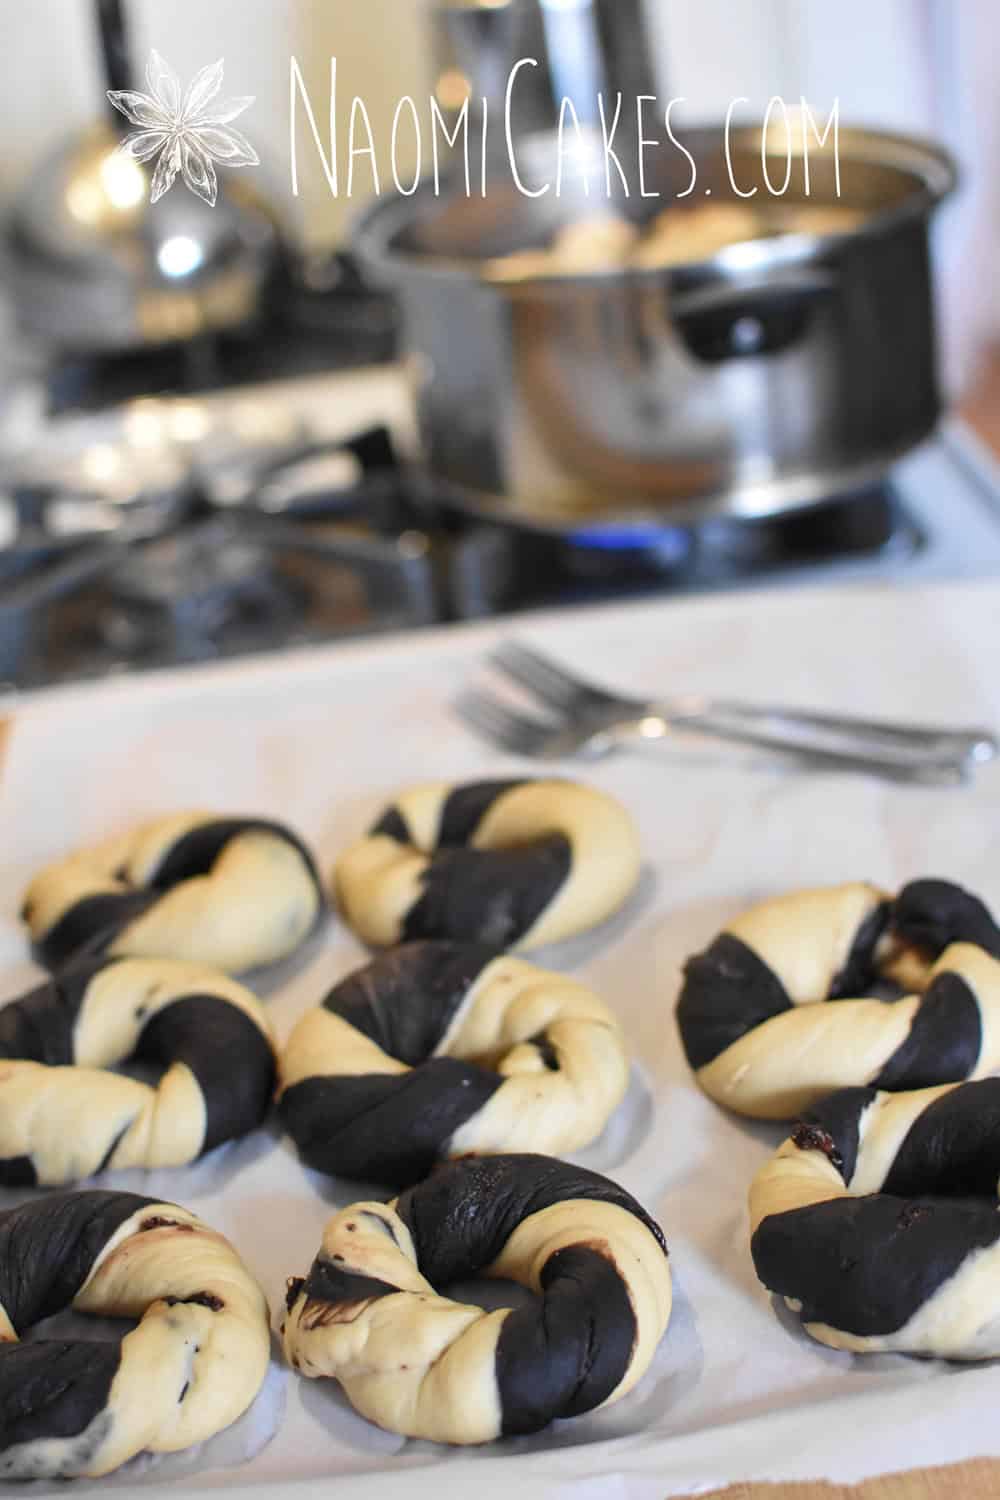
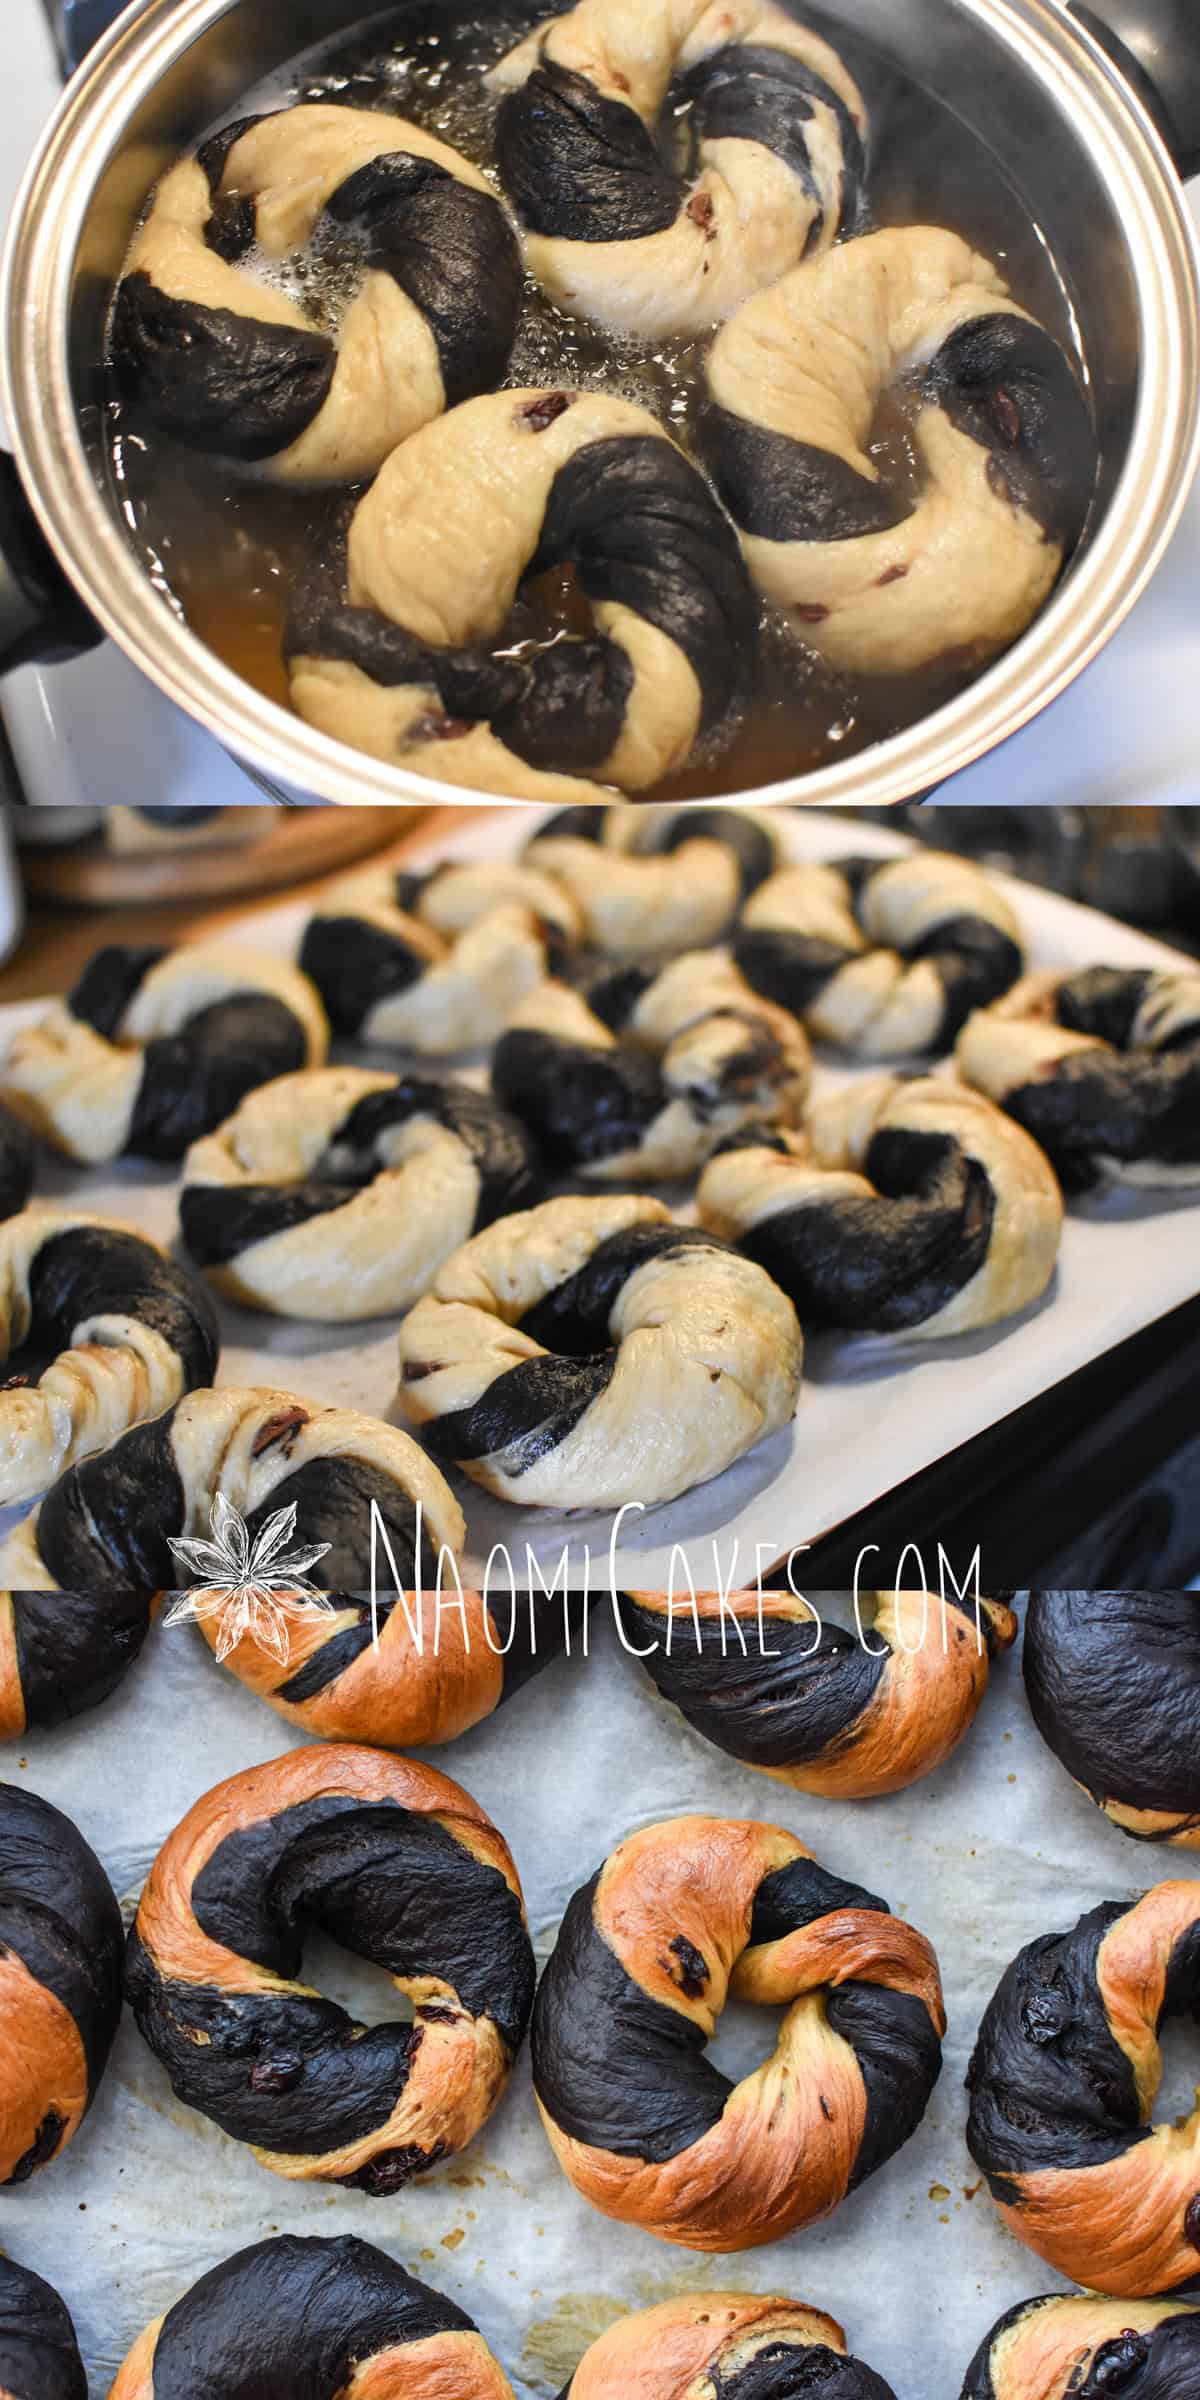
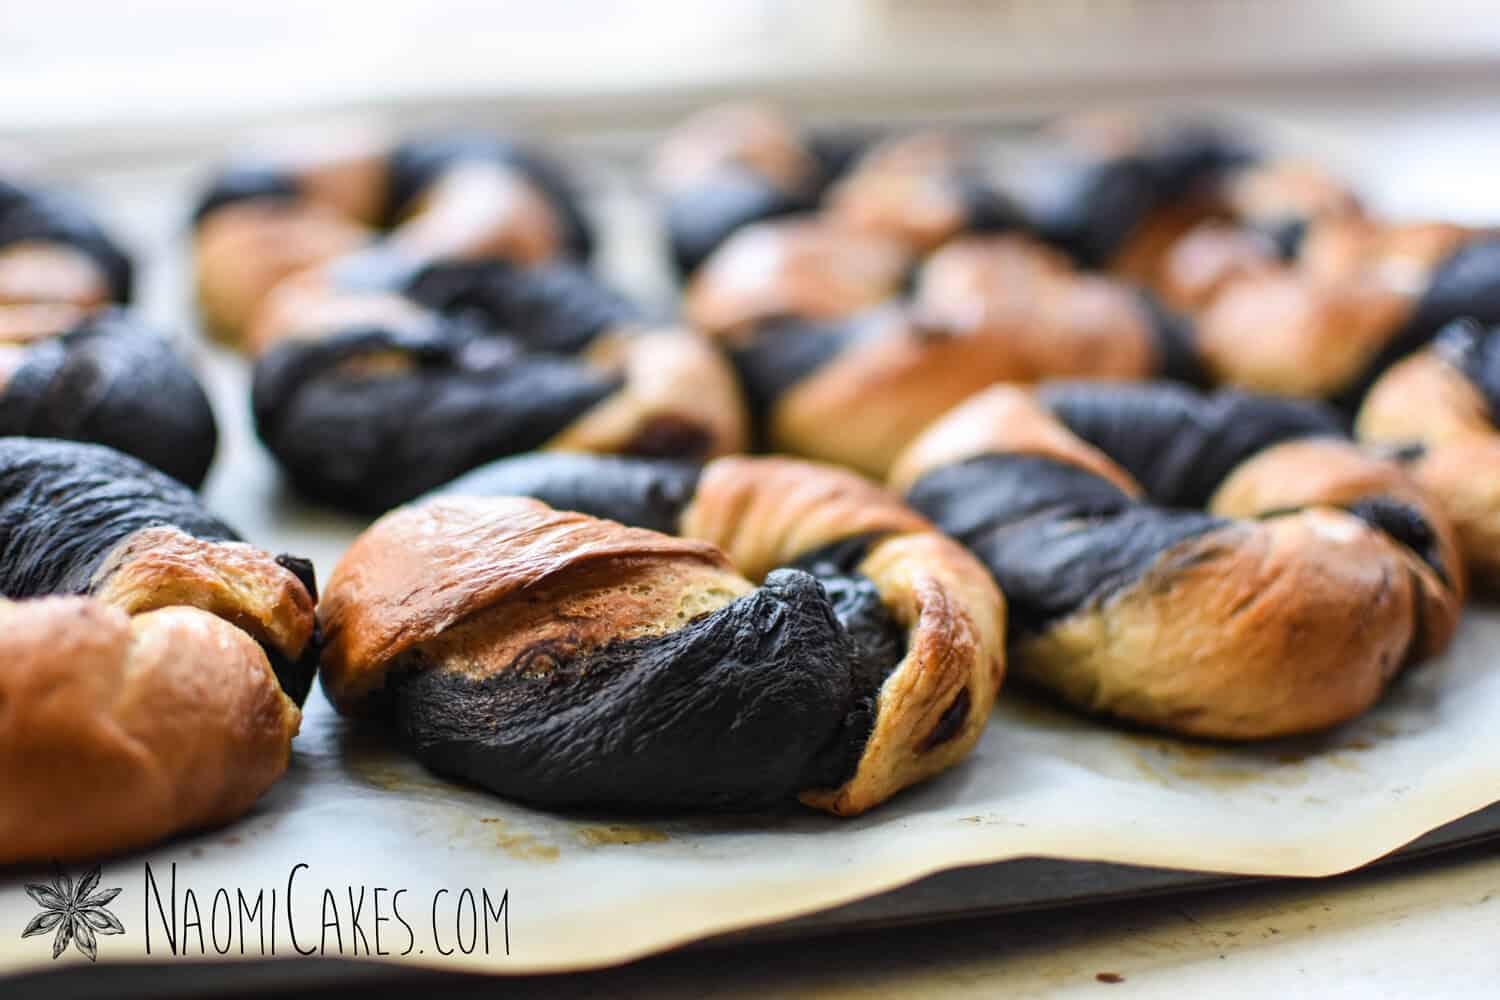
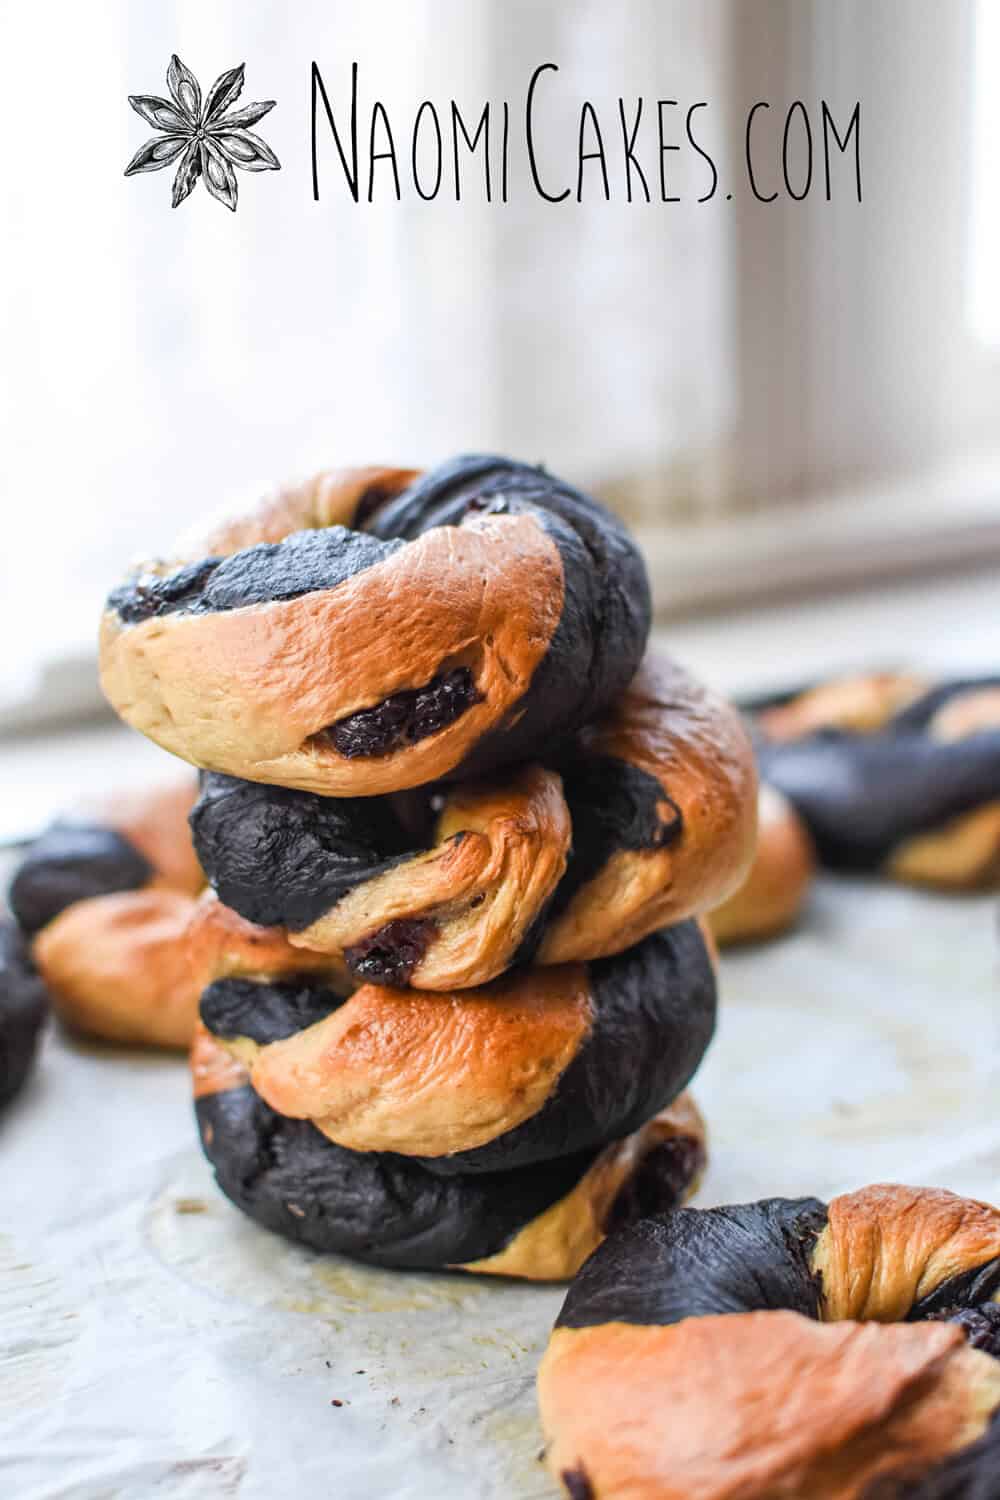
Press 1 plain and 1 chocolate piece together, cut that in half, and then roll each portion of blended dough into a long rope, about 12 inches long. Twist the rope a little to make a candy-cane stripe pattern, and bring the ends together with about a 1-inch overlap, pinching the ends together firmly to seal. Roll over the pinched portion of dough a couple of times, with your hand in the hole of the bagel, to make the seam a little smoother and more uniform. Set the finished bagel onto a parchment lined baking sheet, and repeat with the other bagels until all 24 have been shaped and placed on parchment lined baking sheets. The holes in the centre of the just-shaped bagels should be large enough to fit a golf ball inside snugly.
Note: If the dough is sticky, you can use a little flour on the work surface to prevent sticking. Also, I like to make my bagel holes a bit on the small side, so I usually roll them with 3 fingers in the hole instead of my whole hand.
-
Bring the poaching syrup back to a boil, preheat the oven to 425 degrees Fahrenheit, and allow the bagels to rest 10-20 minutes, or until about 1-1/2 times their original size. They won’t look very much larger – just slightly more puffy.
-
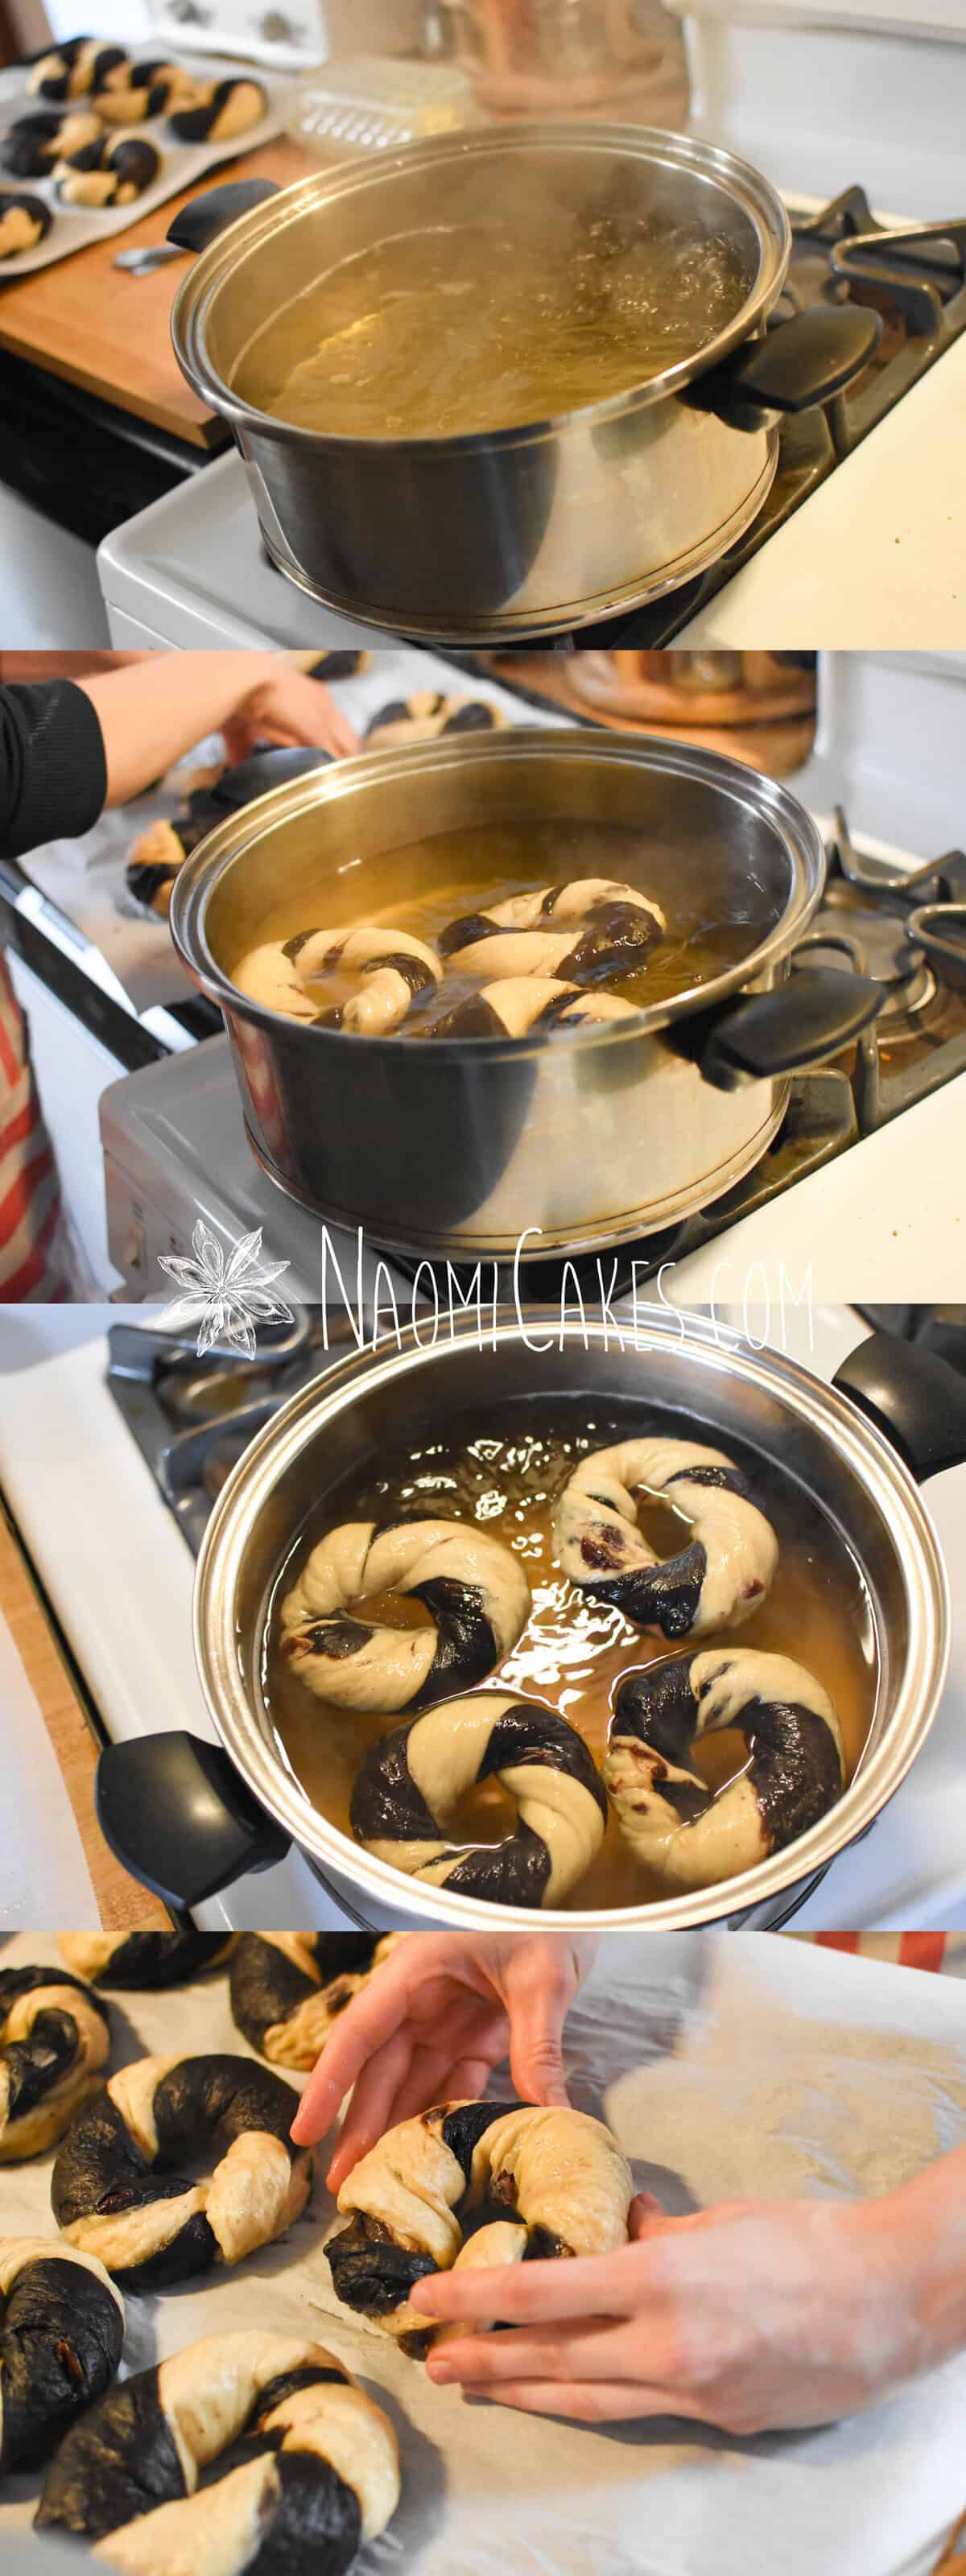
Drop 3-5 bagels into the boiling poaching syrup (depending on the size of your pot – you want them to have room to expand without overlapping each other), and allow them to poach 1 minute on each side, but not longer. If anything, take the bagels out slightly before they reach the 1 minute mark per side. Lift the bagels out of the water using a slotted spoon or fork, allowing them to drip slightly before setting them onto a parchment-lined baking sheet. The bagels should double in size during this step.
Note: If the bagels sink to the bottom of the pot instead of floating on the top of the water, they aren’t risen enough. The bagels should float right after you drop them in.
-
Allow the bagels to cool slightly, and then re-attach the ends of any bagels that broke open during the poaching process. (The dough should be a sticky, spongy texture at this step.)
Note: When the bagels have been twisted for that “Ribboned,” striped look, it will be a little more tricky to figure out how the ends should re-attach if they come apart in the water (which some of them are likely to do); however, don’t worry too much about that – just find a way to stick them back together in a ring, as smoothly as you can. To avoid the bother, if you prefer, you can roll the bagels without twisting the dough (as in step 5), making them striped bagels which will be much easier to re-attach if they come apart in the poaching process.
-
Bake at 425 degrees Fahrenheit for 15-20 minutes or until golden brown. Cool on wire racks.
Recipe Notes
In this recipe, 1 cup of flour = 140 grams.
Shaping the bagels, step by step
If you like this recipe, you may also like:
As always, let me know if you make these! I’d love to hear how they turn out. You can also feel free to tag me in your photos on Instagram @naomicakesofficial if you want to show of your work– I love to see it!
Back soon,
–Naomi
This post contains affiliate links.