Cheese. Bread. Cheesy bread. You get it: this is a good time. If you started salivating reading those words, you’re going to love my easy, no-knead recipe for Sun Dried Tomato and Cheese Sourdough Bread.
I tried this recipe out because I had been gifted with a whole bunch of jars of sun dried tomatoes in oil, and I was trying to think of good ways to use them. This idea popped into my head, and well… I am a changed woman. I can’t wait to make it again!
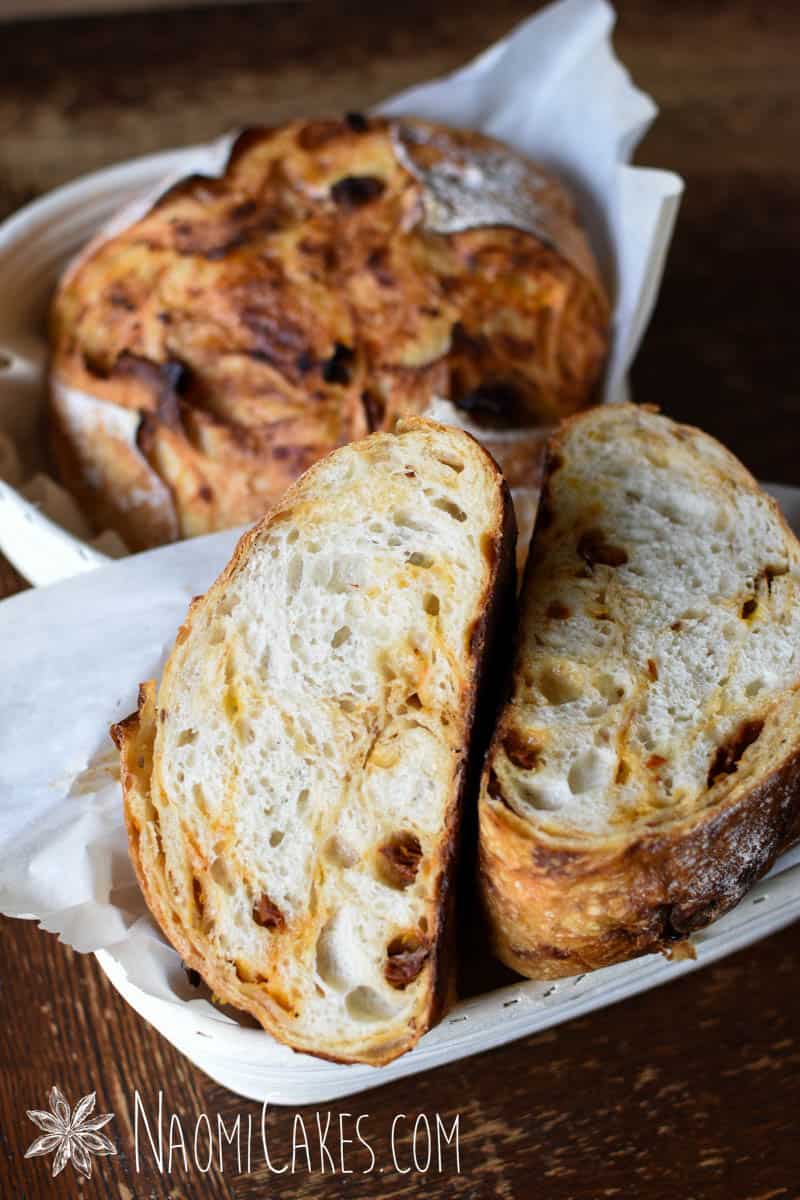
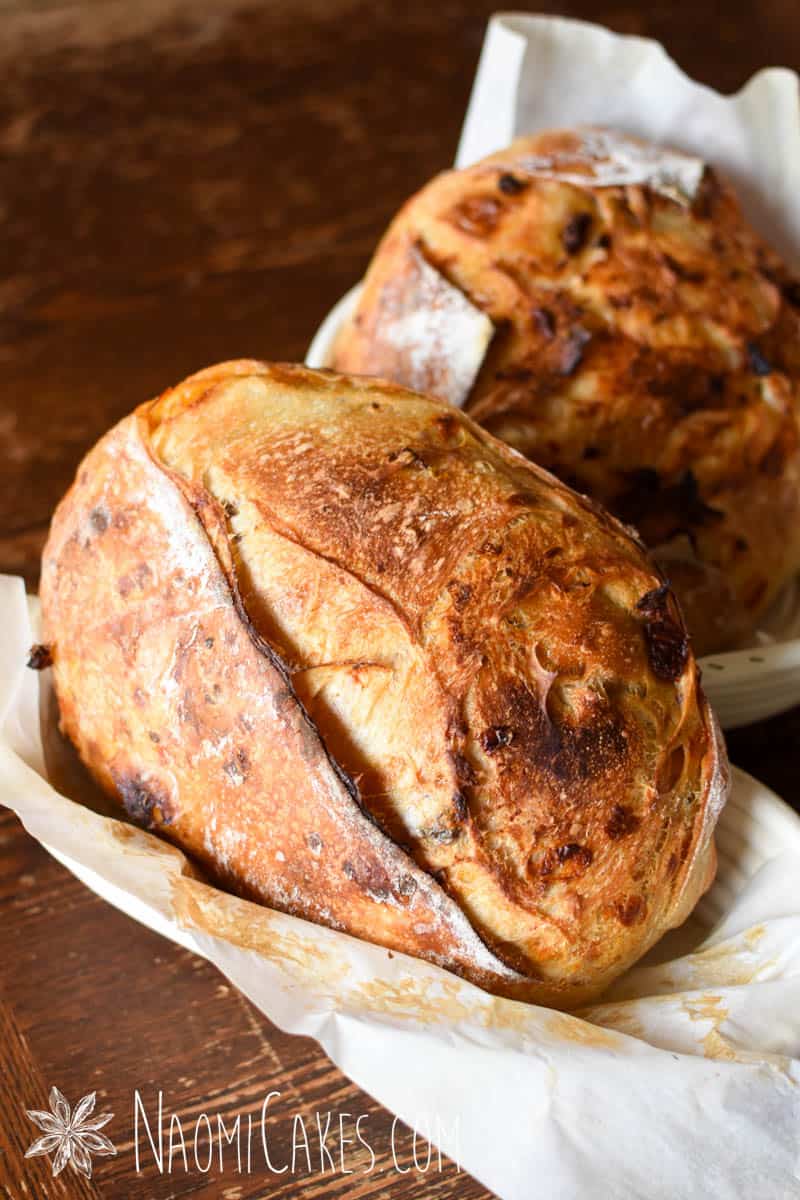
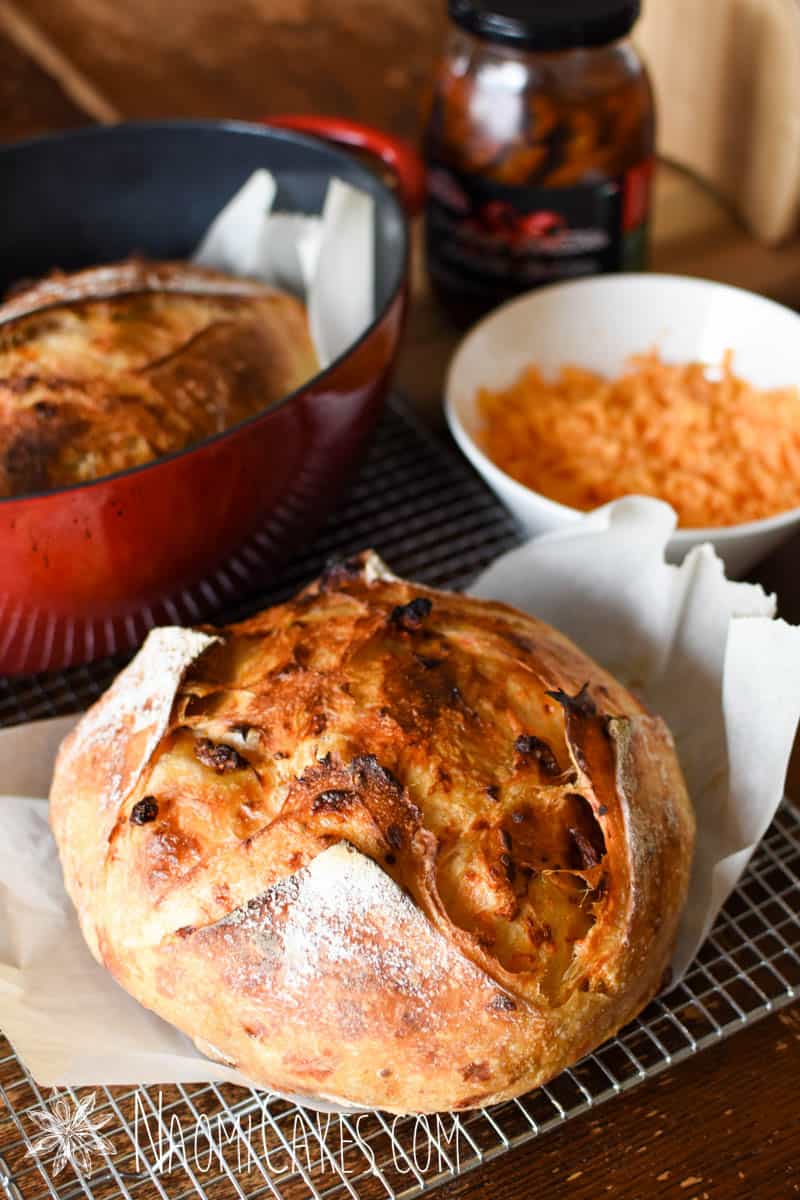
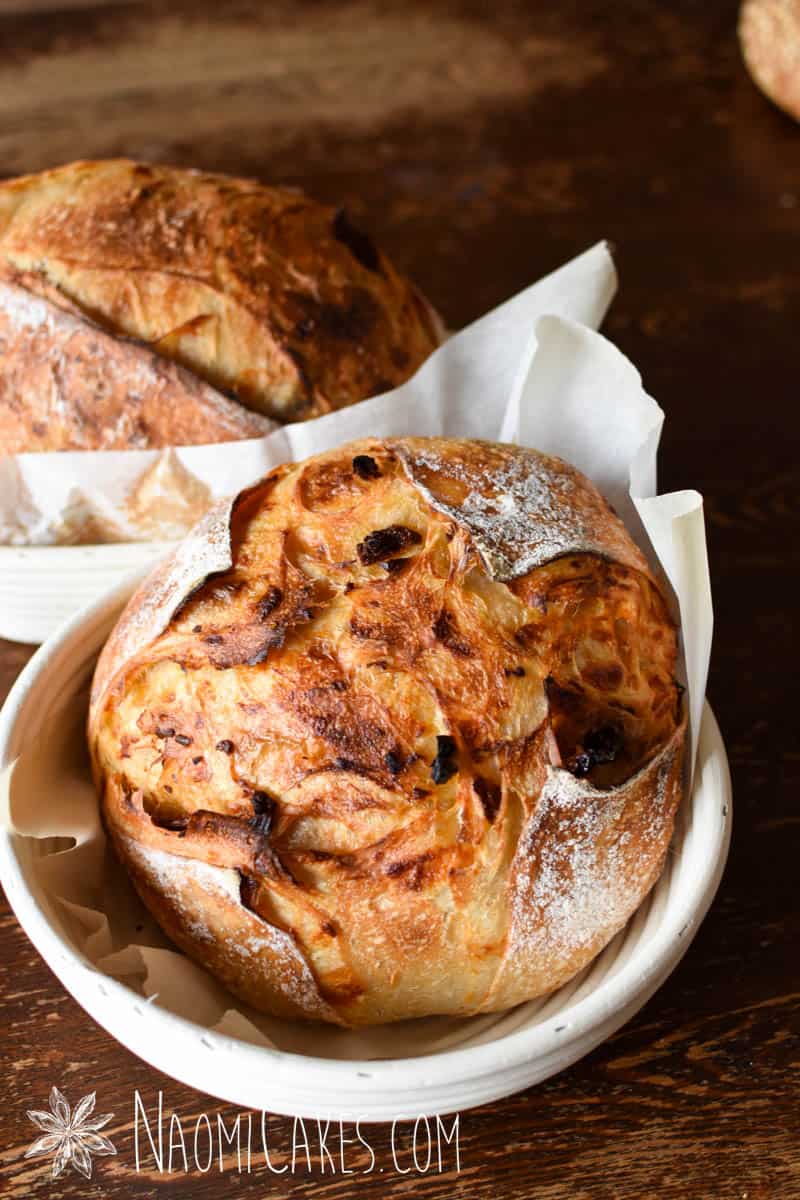
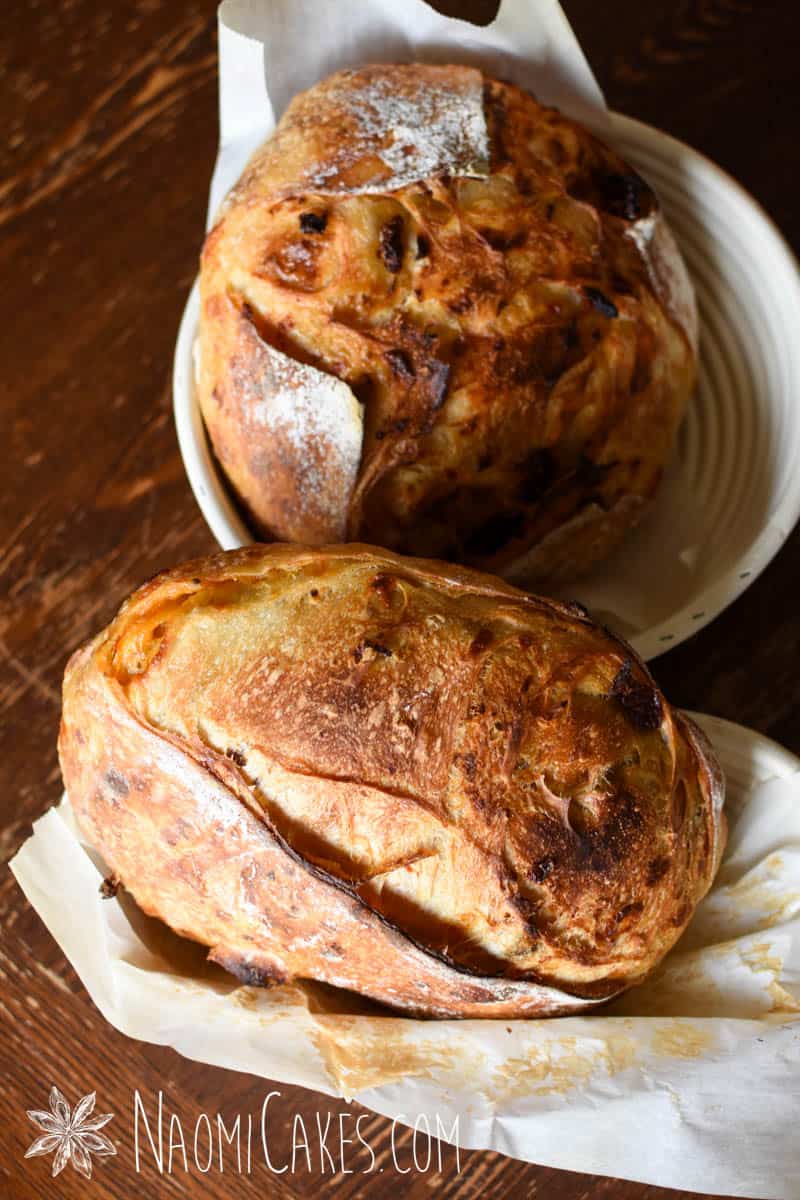
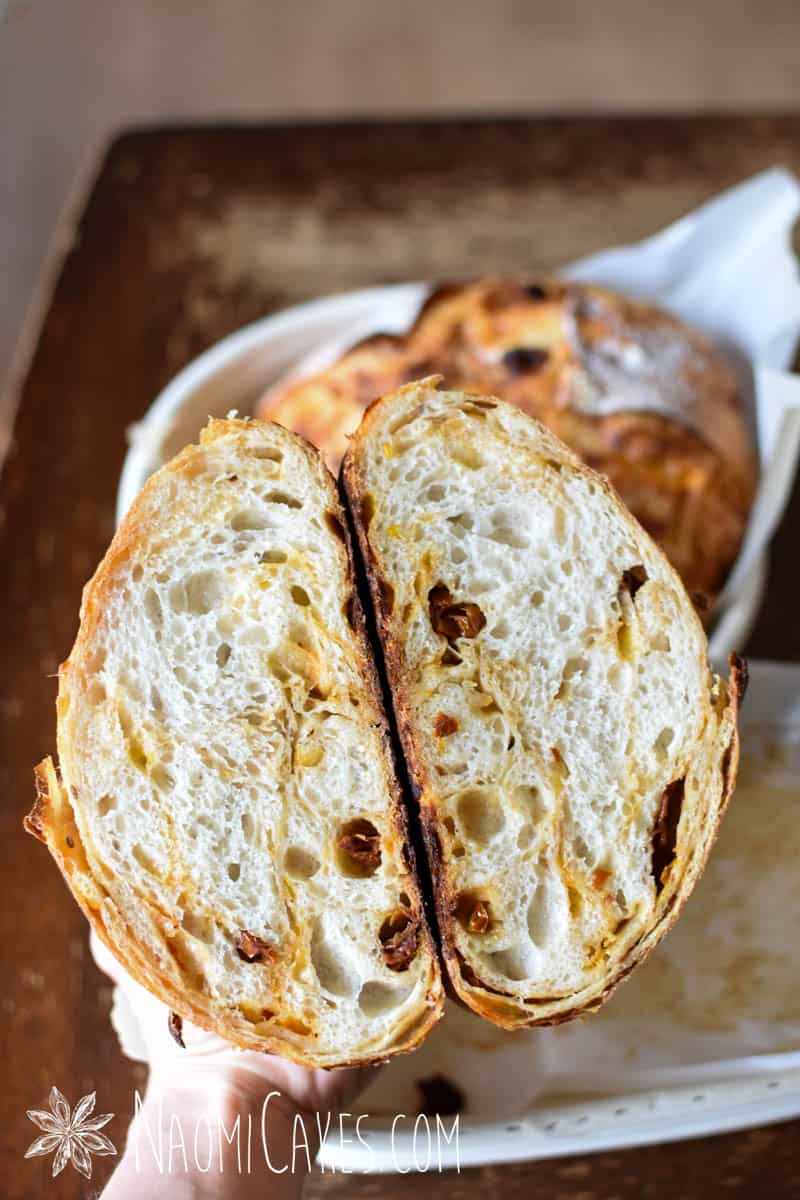
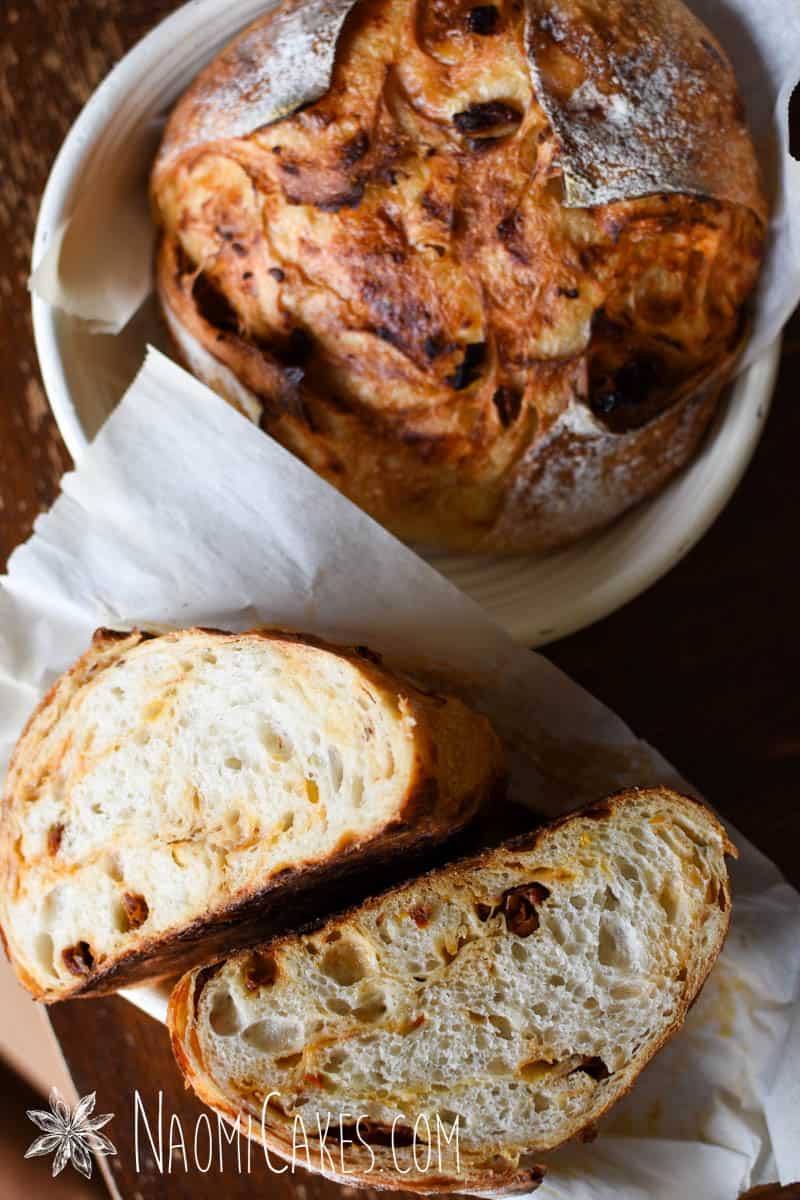
This recipe makes 2 white loaves of super soft and fluffy sourdough bread marbled with sharp cheddar cheese and salty, savoury pieces of sun dried tomatoes. It’s incredible served fresh or toasted, and can be served with butter, cream cheese, or all on its own. The outside of the loaf is wonderfully crusty, although a little softer than a traditional sourdough bread due to the oil in the tomatoes. The interior, for the exact same reason, is soft and spongy and light as a cloud.
What is the difference between sourdough and regular bread?
The difference between sourdough bread and regular bread is all in the yeast. Most breads in North America are made with dry active yeast, whereas sourdough bread (the old-world traditional method of making bread) is made with “wild yeast,” more commonly known as “sourdough starter.”
How sourdough bread is made
Unlike the traditional method of making bread with quick-rising yeast that can proof in an hour or less, sourdough bread is made by mixing the dough ingredients (usually just flour, salt, and water) with a fermented culture called the sourdough starter. This culture contains a type of healthy live bacteria which break down the grain and release gas bubbles, causing the bread to rise.
While traditional breads can be made from start to finish in 2-3 hours, sourdough breads have to go through the fermentation process which can take up to 24 hours.
What is sourdough starter?
Sourdough starter is made by mixing flour and water together, and then allowing it to rest at room temperature until it “Catches” the wild yeast from the air and creates an environment in which the healthy bacteria in the starter can thrive. Once you have created this environment, the bacteria feed on the sugars in the flour and release gas bubbles. This is the process which causes the starter (and thus, your bread) to rise.
For tips on making a healthy, active sourdough starter from scrach, you can check out my method for making sourdough starter here.
Is sourdough bread good for you?
Due to the fermentation process, the grain in sourdough bread becomes pre-digested, in a sense, by the live cultures in the dough. This creates a finished bread product that is much easier for people to digest, which is why some people with gluten sensitivities* can tolerate sourdough much better than other breads. (source)
*This is not universally true, and sourdough is definitely not gluten free, so keep that in mind if you have celiac disease. Sourdough may not be for you.
That said, yes, in a way sourdough bread is better for you. It’s much easier on your system to handle, and it’s a good, hardy, inexpensive food to make!
Can I make substitutions or additions in this sundried tomato and cheese sourdough?
Yes, of course! You don’t have to use sun-dried tomatoes in oil (just dry is fine), and most cheeses would make a great substitute for the normal cheddar cheese. I’m sure asiago cheese, parmesan cheese, or old white cheddar (vintage cheddar) would be completely delicious options for this recipe. Just, be warned: if you opt for asiago or parmesan cheese in this sun-dried tomato sourdough bread, you’ll definitely smell the cheese as the bread bakes.
You can also add different types of flour (such as whole wheat flour), if you want the bread to have more of a whole grain texture. Just make sure to keep at least 1/2 of the flour as white flour or bread flour if you want this to turn out well… And remember, gluten free flours are not a good substitute for the flours in this recipe.
Finally, I would say herbs: Fresh or dried herbs would be a great addition to this bread!
Tips for making great sourdough bread
Below are the tips I shared in my original white sourdough bread post, which is the base recipe of this sun dried tomato and cheese sourdough bread!
1. Make sure your starter is active– or more importantly, healthy.
When you feed your starter the night before, you should find that it has doubled or tripled in volume by the next morning. This means your starter is active, and more than that, it’s really healthy! I have found that I can even bake with dormant (non-active) starter right out of my fridge and get a great loaf of bread… if the starter has been fed somewhat recently and it was rising really well when I last fed it (indicating that the starter is very healthy).
2. Follow the recipe, and bake by weight if you can.
Baking by weight was always really intimidating to me when I was younger, simply because I wasn’t used to it. However, I have found that the results are far more accurate. For example, just from my own experimenting, 1 cup of flour can range anywhere from 100g-170g (almost double the amount!) That said, you might have a great recipe for bread, but if I tell you 1 cup and you make those cups way more dense (heavy) than I did, your bread will be much more dry and difficult to handle. If you don’t have one already, I highly recommend getting yourself a baking scale if you want to get into the world of sourdough bread. It will save you a lot of headaches!
3. Better to over-flour than under-flour your basket liner or tea towel.
Obviously you don’t want to go crazy on this, but one of the most discouraging things is finding that your bread is stuck to the basket or tea towel when you go to bake it. If you have too much flour on the top of the dough, you can always brush some of the dry bits of flour away… But if you don’t have enough, your loaves might just be ruined. I just use a miniature sieve to dust my towels, and I find that they come out beautifully.
I have also heard of using rice flour for this step in particular, which is something I would like to try.
4. Bake your bread in a covered baking dish or dutch oven (ie, bake the bread with steam).
This is essential for beautifully risen sourdough bread. The steam created inside of a closed dish allows the bread dough to rise longer before the crust sets, giving it maximum opportunity to expand. If you don’t have a dutch oven, you can set a pan with sides (such as a 9×13 inch baking dish) into the oven underneath your bread pan, and fill it with boiling water right before baking your bread. This will create steam in the oven, which will yield a similar effect. My favourite pan to fill with boiling water is a cast iron frying pan.
5. Cool the bread completely before cutting it.
Ok, so I have a little bit of a double standard here. I have definitely cut into hot loaves because I’m too eager to try them! So if you do, no judgment. Also, for one or two slices, that’s ok. The problem with cutting into hot, fresh bread is that the crumb will get sort of gummy and stick together. For best results, allow the bread to cool completely (or mostly completely) before you dig in.
Best ways to serve sun dried tomato and cheese sourdough bread
This bread is so delicious and easy to serve in a number of ways. Here are some of my favourite ideas:
Toasted and buttered for breakfast, alongside your favourite eggs
This recipe is the ultimate comfort food experience. It's savoury and cheesy, soft as a cloud on the inside, and crusty as can be on the outside!
Course
bread, Breakfast, Dinner, lunch
Cuisine
Canadian
Keyword
cheese bread, sourdough, sundried tomato
Prep Time45minutes
Cook Time45minutes
Resting Time12hours
Servings2loaves
AuthorNaomi
Ingredients
5-1/2cups(800g) all purpose flour +up to 1/4 cup of flour if the dough is very wet, but not more than that.
2-1/3cups(575g) water
1Tbsp(15g) salt
1-1/4cups(200g) active sourdough starter
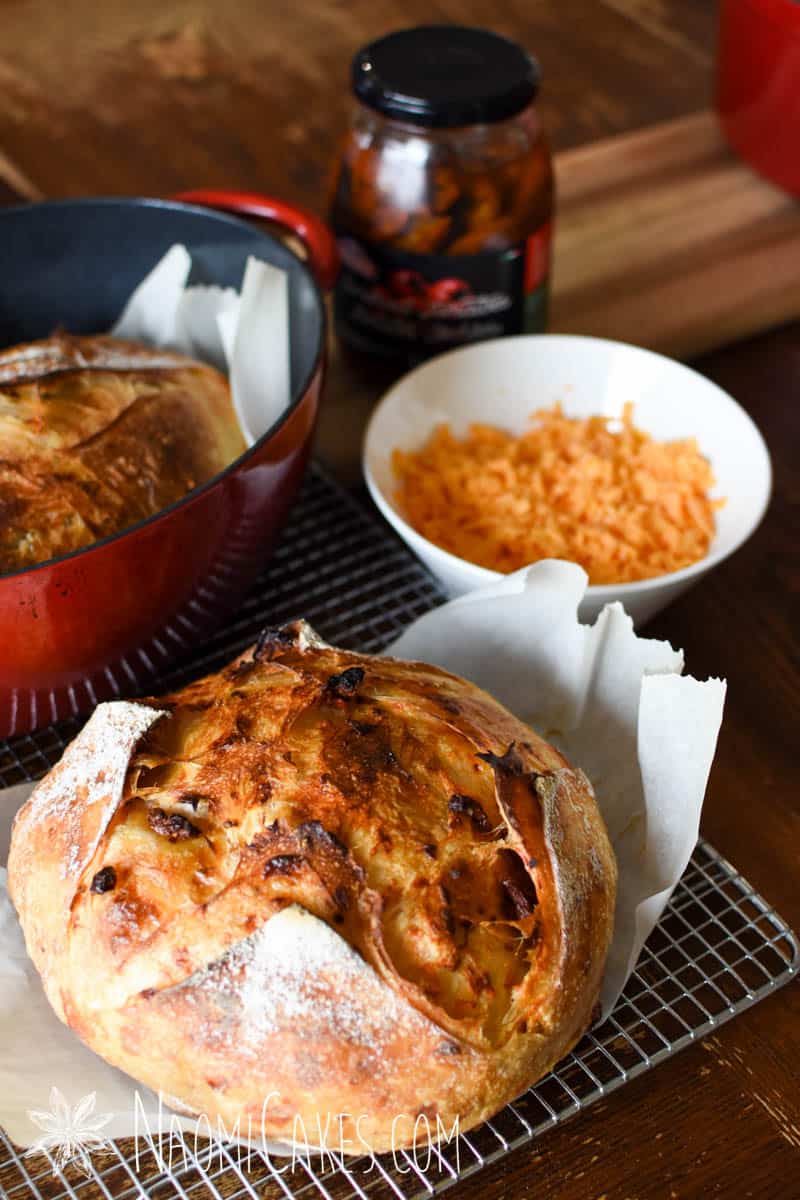
2cups(150g) old cheddar cheesegrated
1cup(150g) sun dried tomatoes in oildrained and chopped into small pieces
Instructions
In a large mixing bowl, combine all of the ingredients until a soft, shaggy dough forms (make sure all of the dry flour gets incorporated into the dough). Cover with a tea towel and allow this to rest 20-30 minutes.
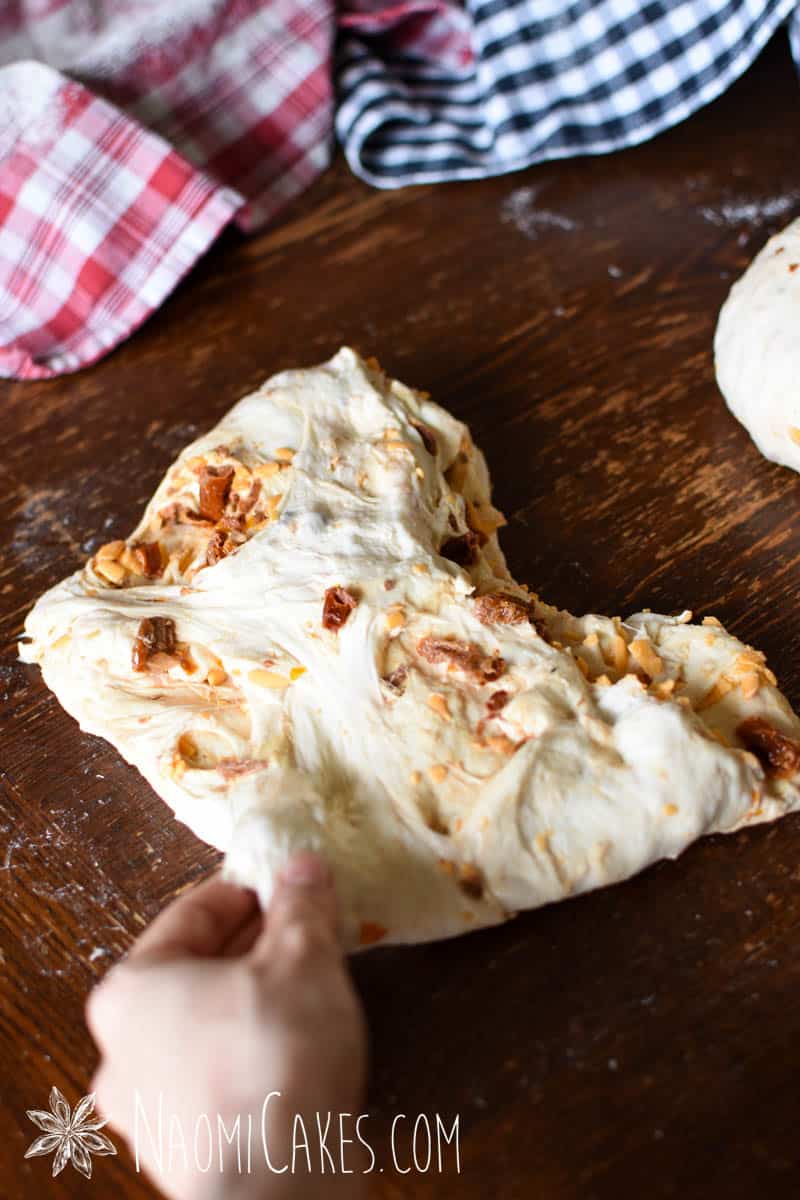
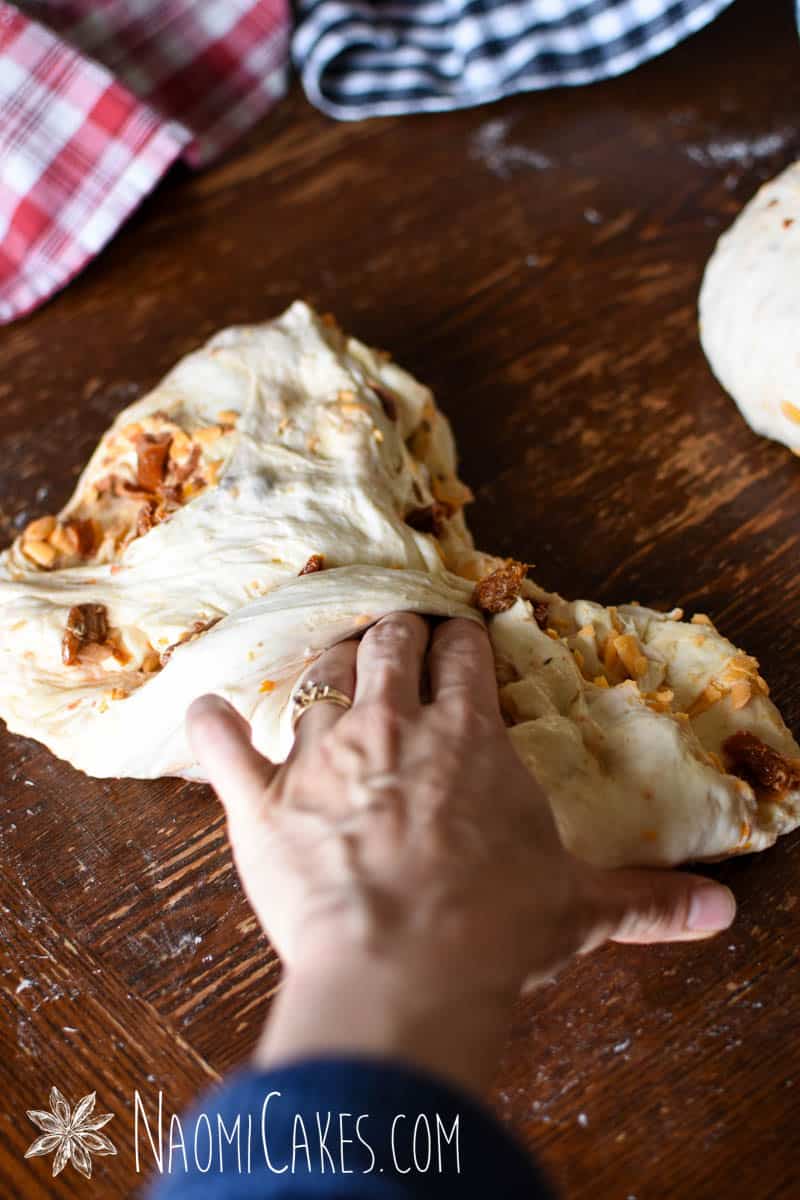
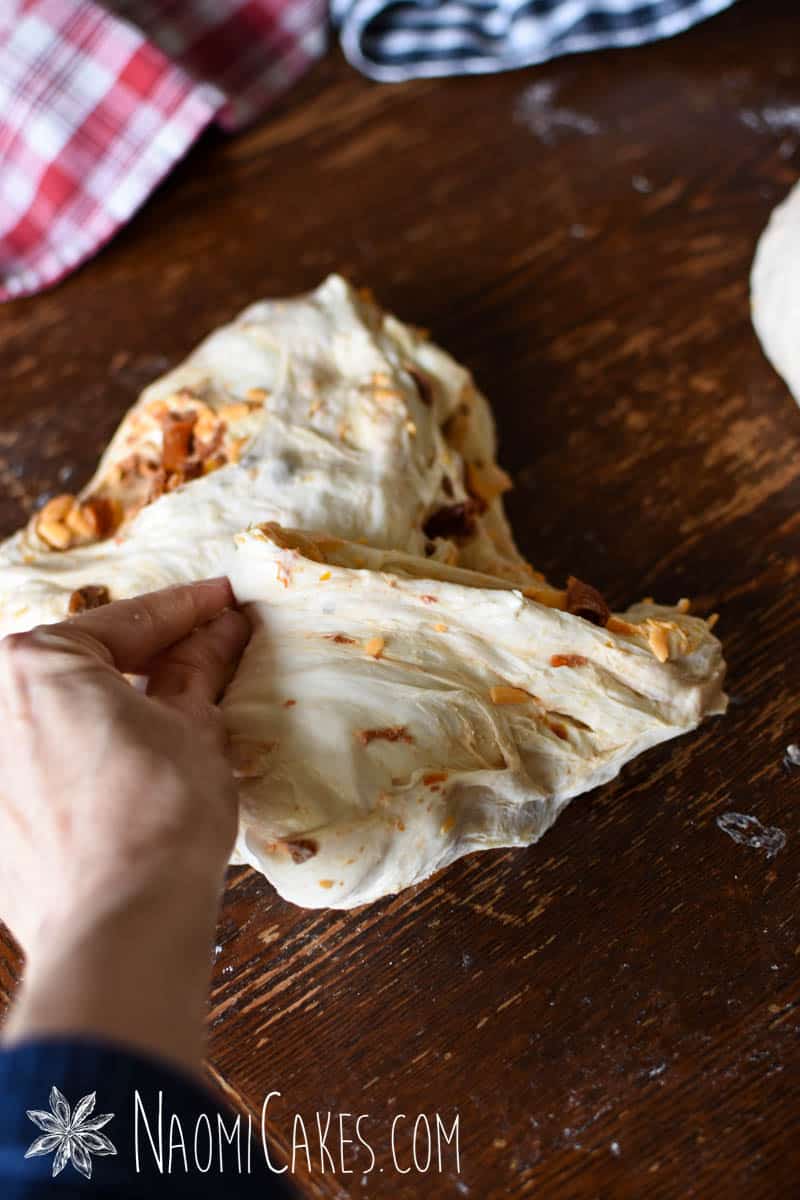
Sprinkle the grated cheese and chopped, drained tomatoes on top. Then put your hand under the dough, grab a handful, and pull it up as high as you can without breaking it. Fold the stretched dough down over the top of the whole amount, enclosing the cheese and tomatoes. Repeat this process from different sides of the dough 4-5 times, or until the dough isn't "loose" anymore and it begins to feel stronger, or "taut" (and the cheese and tomatoes are someone incorporated). Cover, and allow this to rest 30 minutes.
Repeat the stretch and fold process, folding 3-4 times, or until the dough begins to feel stronger (harder to stretch) again. Cover, and allow to rest another 30 minutes.
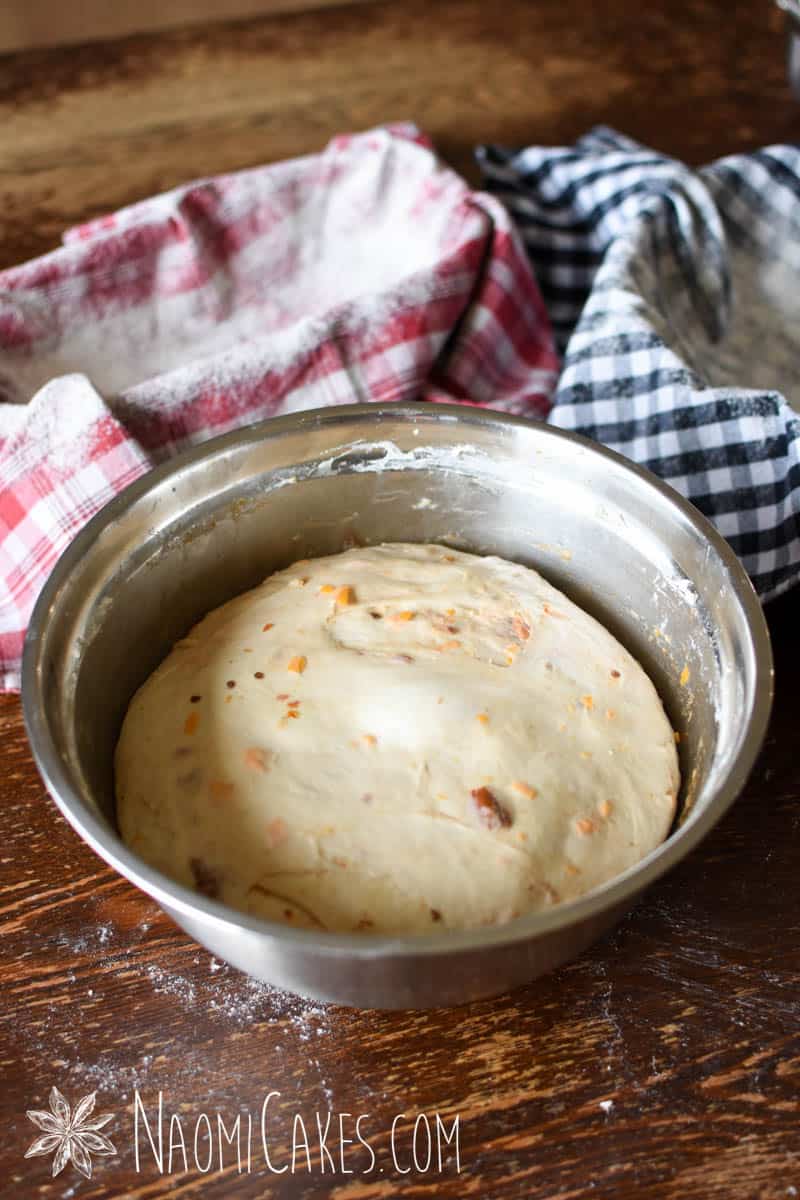
Repeat the stretch and fold process one final time, again folding 3-4 times, or until the dough feels taut and smooth. Cover, and allow to rest 3-6 hours or until the dough is doubled or nearly doubled in bulk.
For the pre-shape (optional):
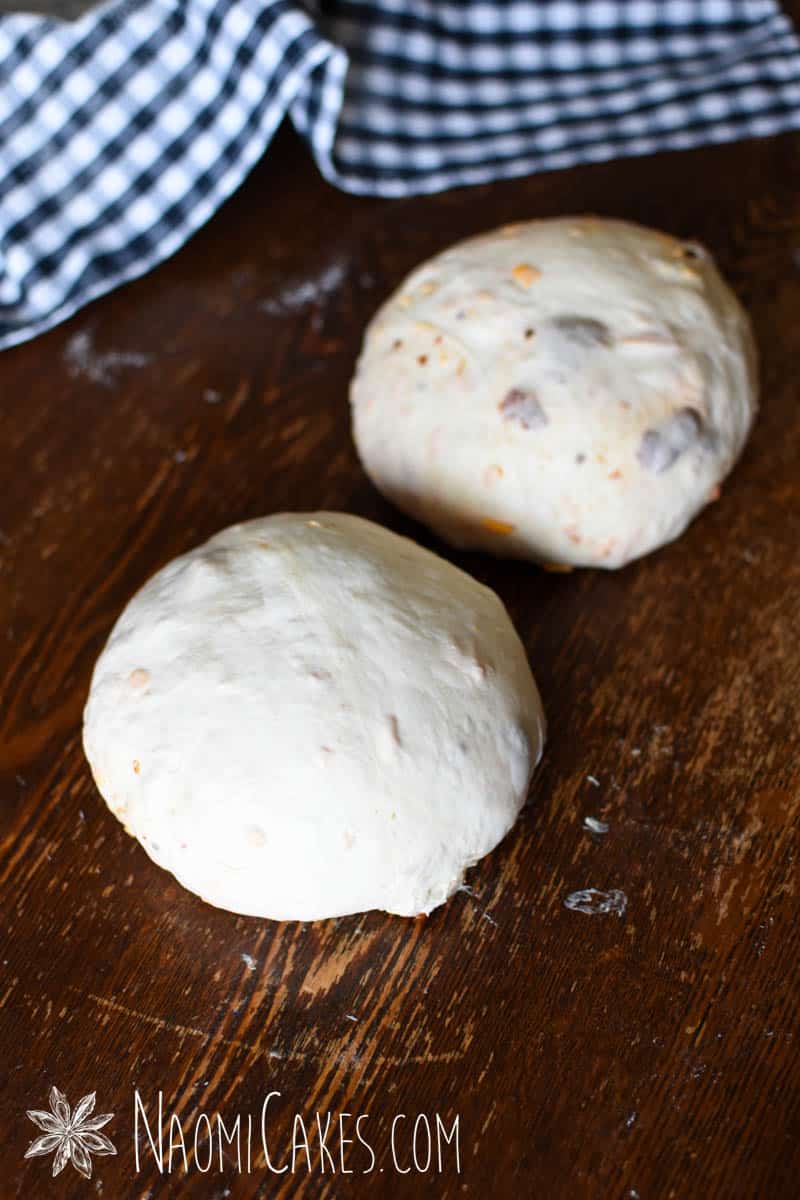
Turn the dough out onto a clean, unfloured work surface. Divide it into 2 equal portions, and stretch one piece of the dough out into a square. Pull the corners of the the square into the centre, and then repeat “stretching and folding” the edges into the centre (from each corner, about 3-4 more times) until the dough comes together into a smooth ball. Turn upside down, and repeat with the other section of dough. Cover, and allow these to rest 30 minutes.
If you choose to skip the pre-shape, you can place your shaped loaves smooth-side down into flour-dusted banneton baskets or bowls at this point.
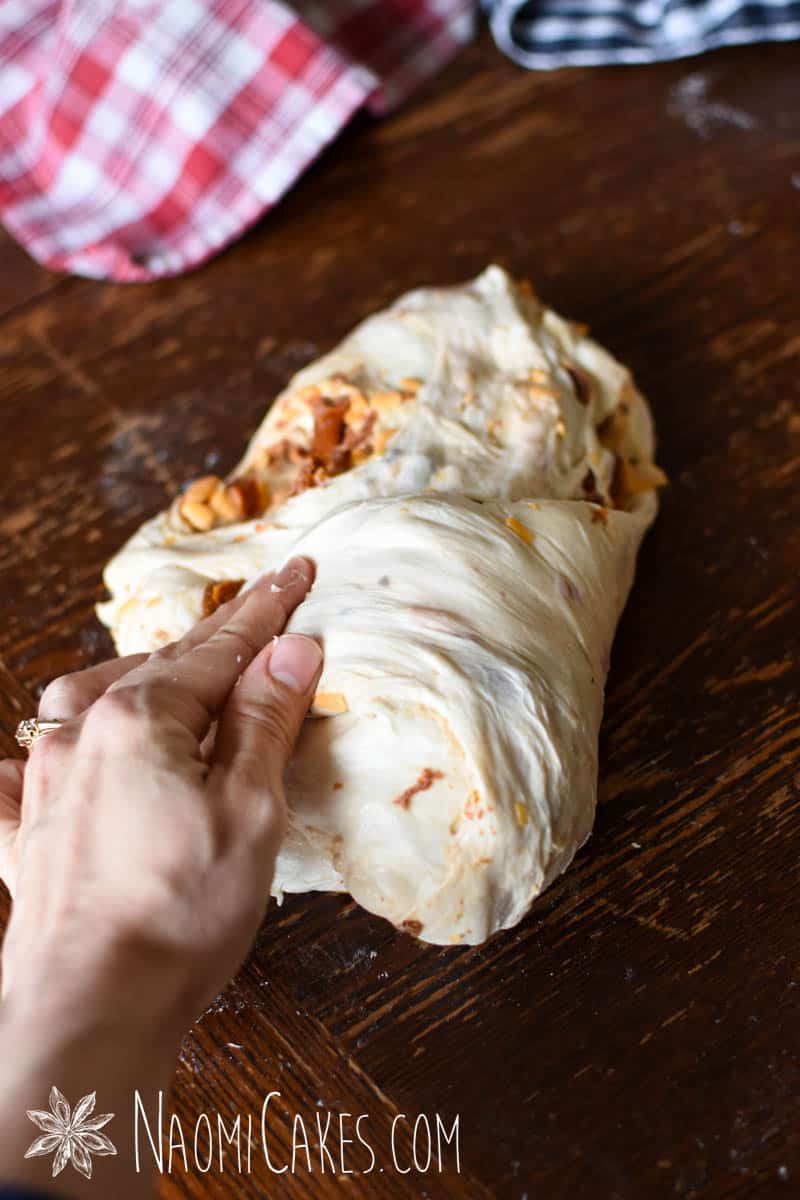
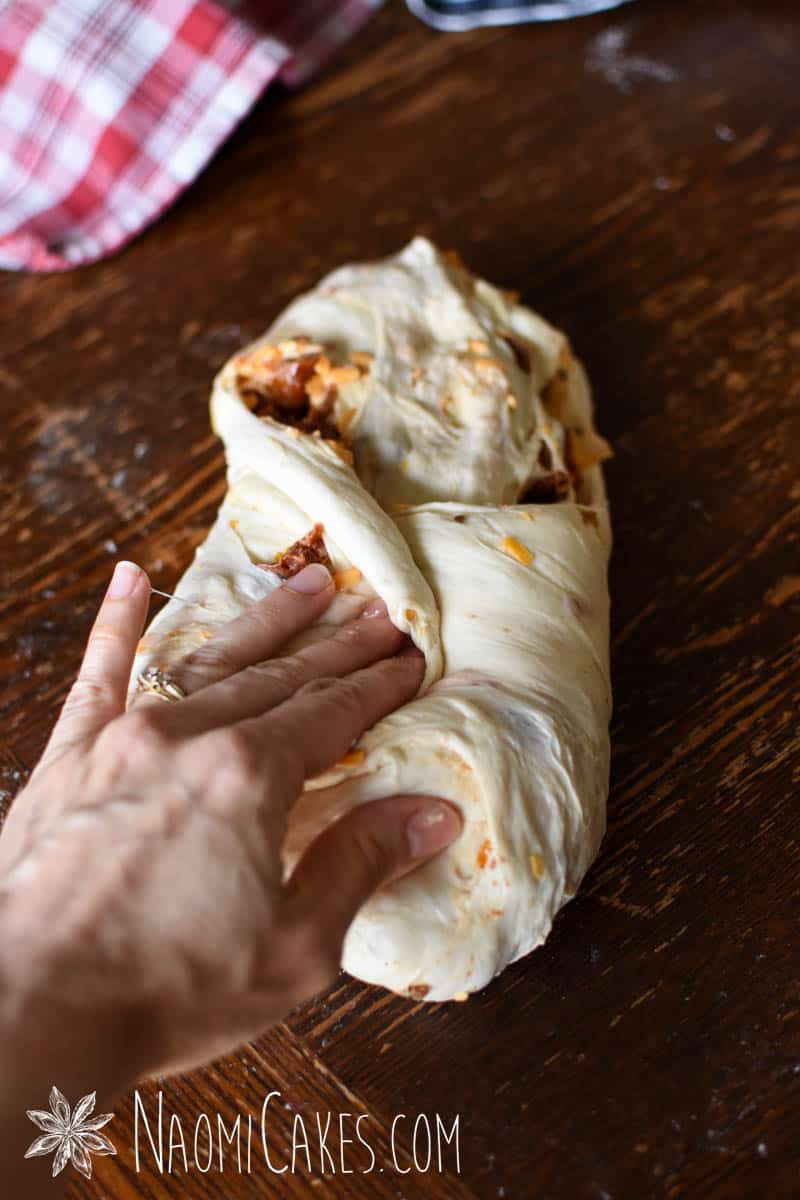
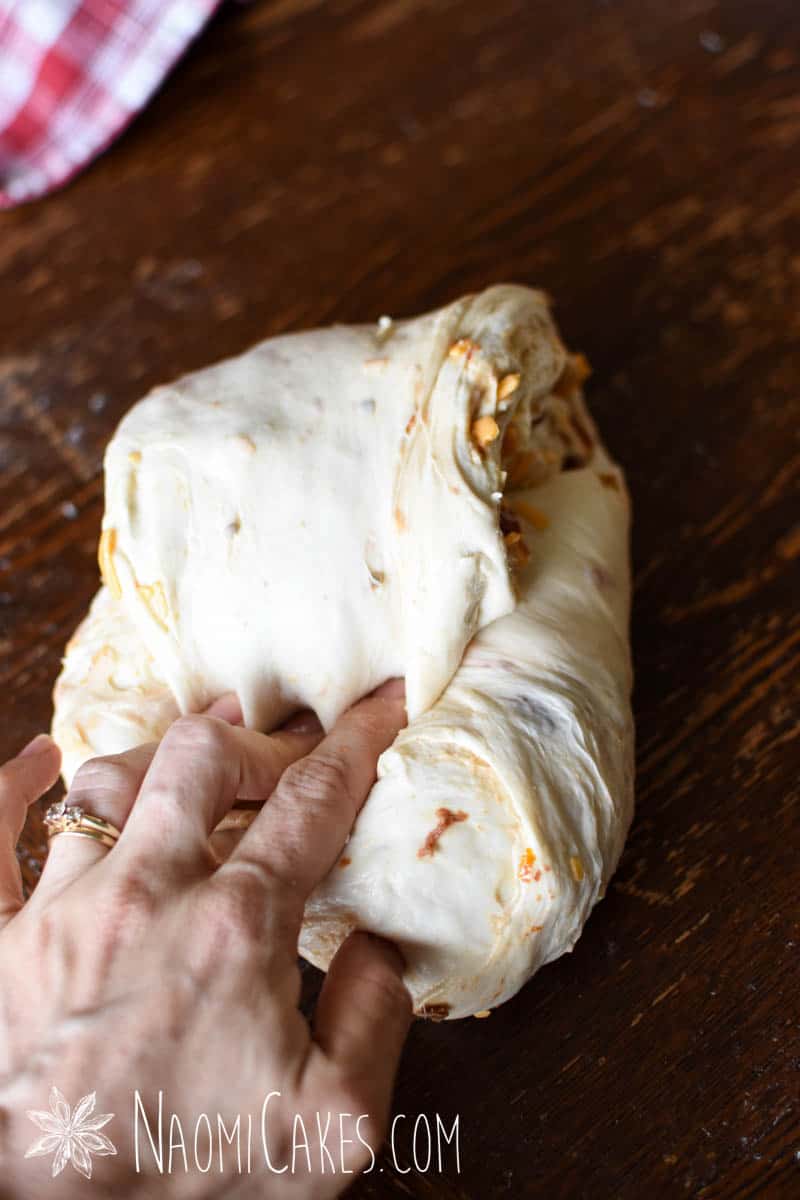
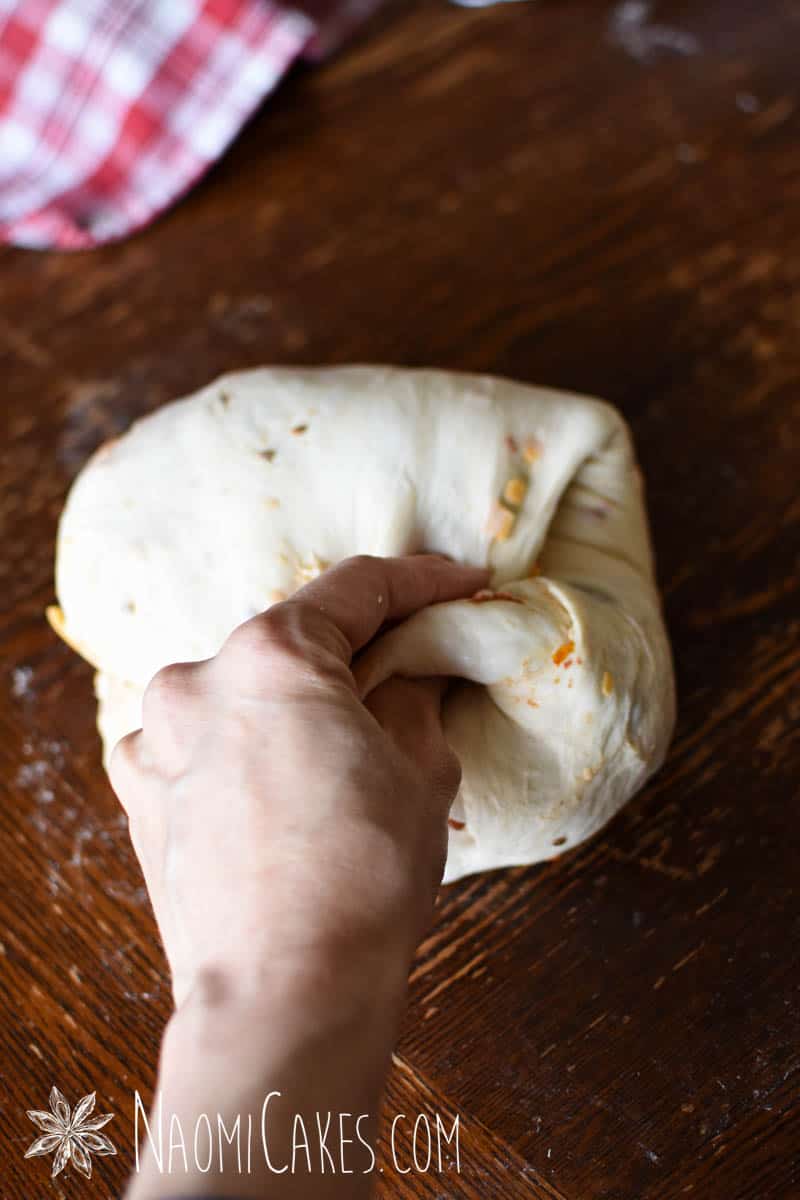
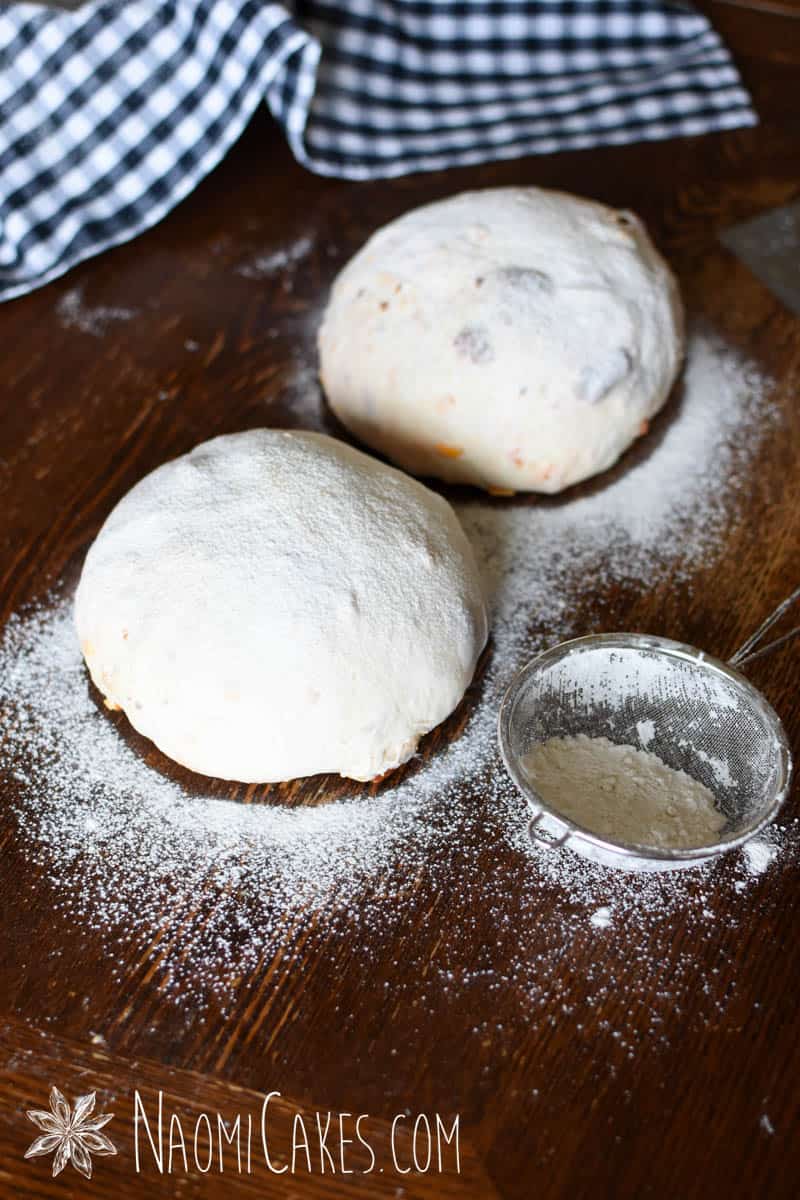
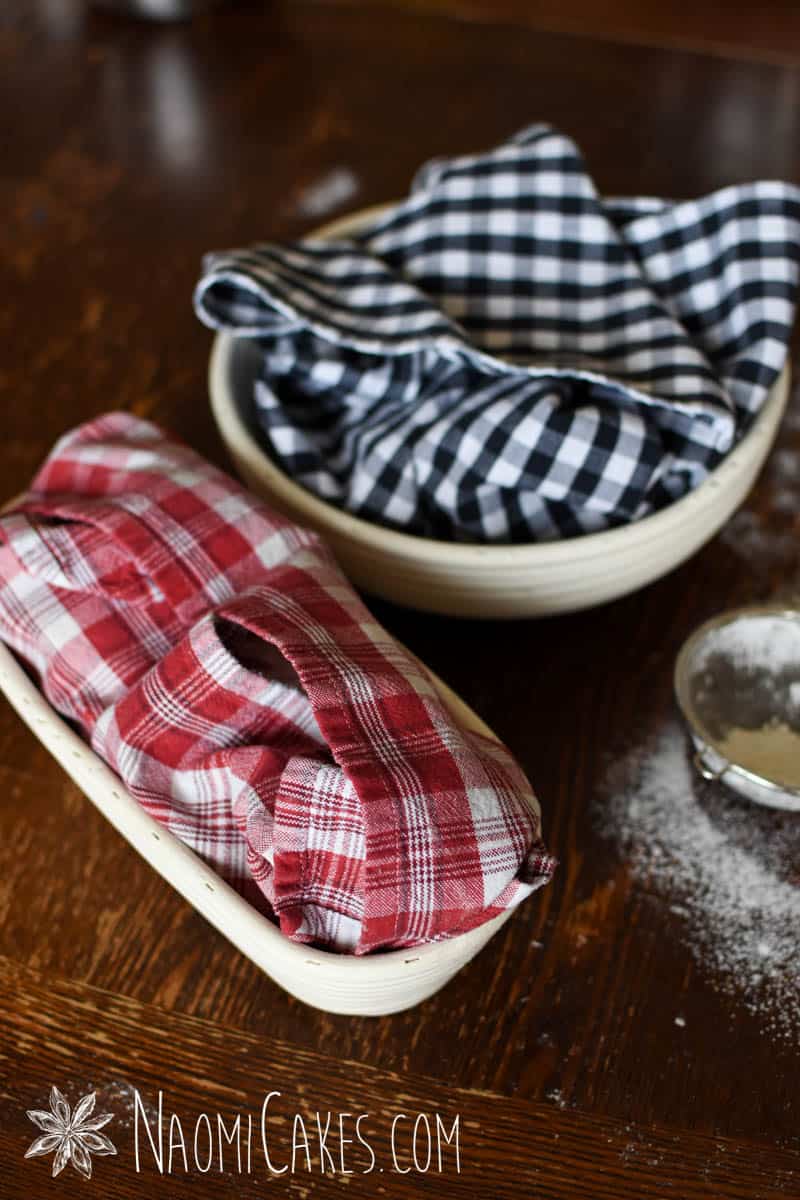
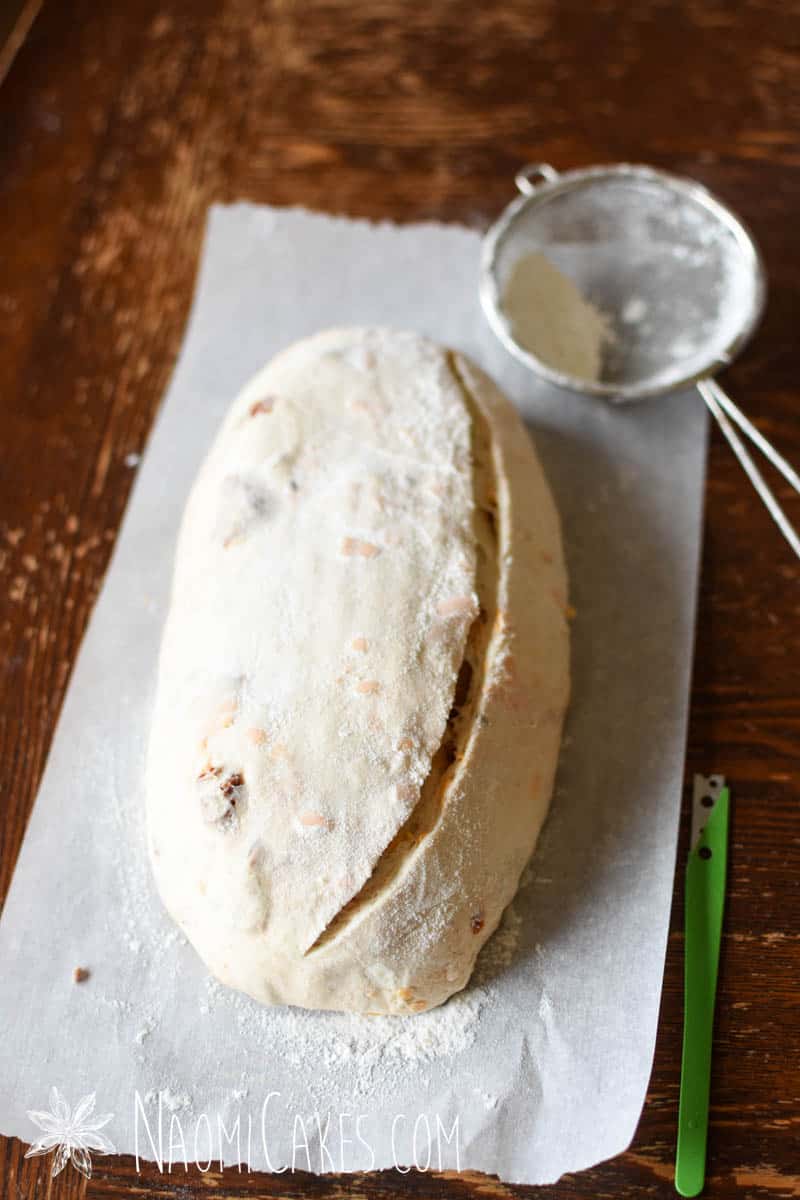
Shape the dough:
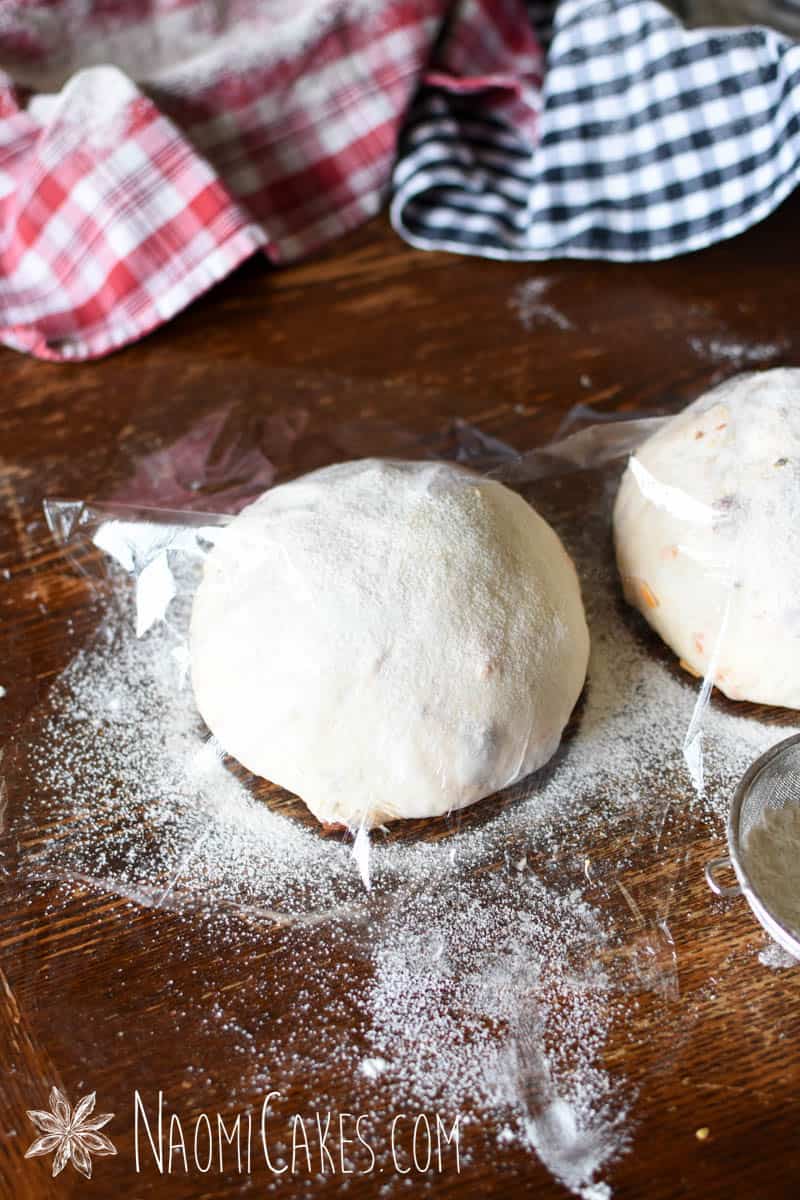
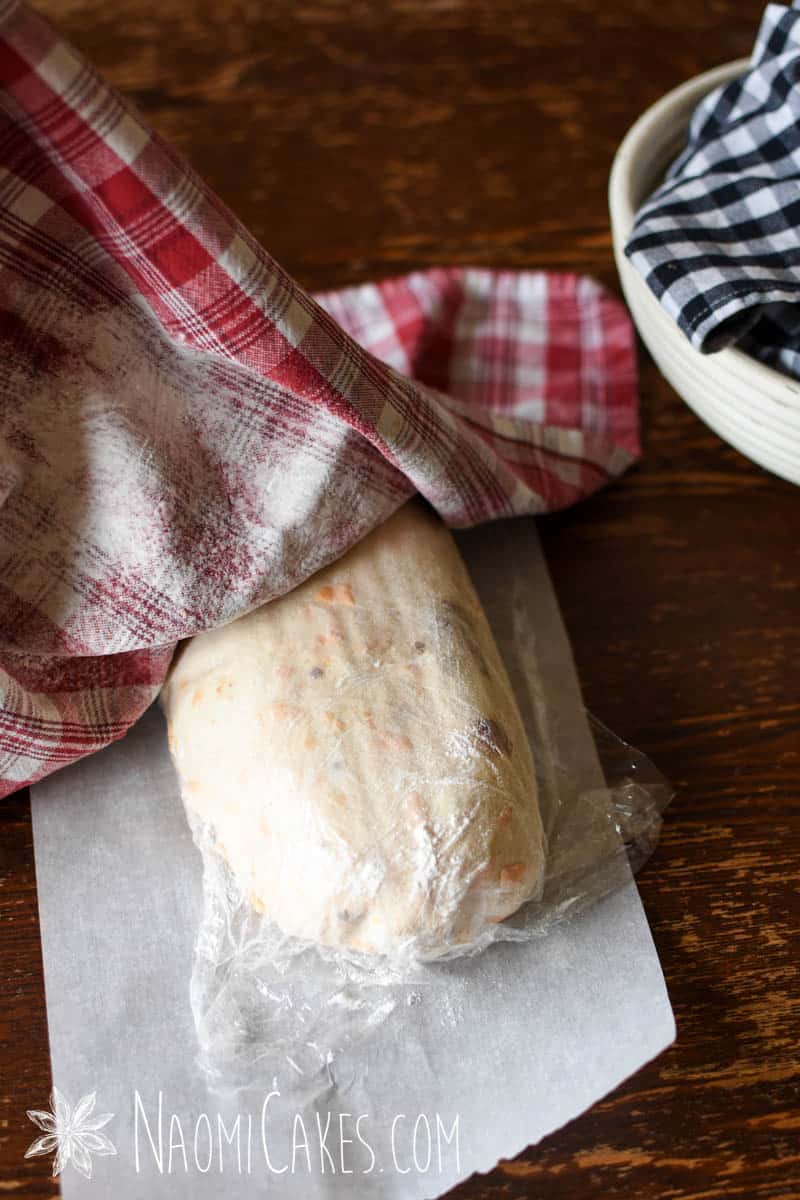
Pull each pre-shaped loaf into a square again, and stretch and fold the corners into the centre again. Roll the dough into a loaf shape, dust it lightly with flour, and put it smooth side down into a banneton basket or bowl* lined with a tea towel and plastic wrap or parchment (this disposable layer will prevent the tea towel from staining from the tomatoes). I like to cover the top of the loaf with the disposable layer, flip the whole thing over, and then set it into my basket.
Cover the tops with a bit of plastic wrap or parchment paper, and fold the towel over top. Place the loaves immediately into the refrigerator. Allow to rest in the fridge until the next morning.
Bake the bread:
The next morning, place a dutch oven into a cold oven, and preheat to 450 degrees F. Set the timer for 15 minutes.
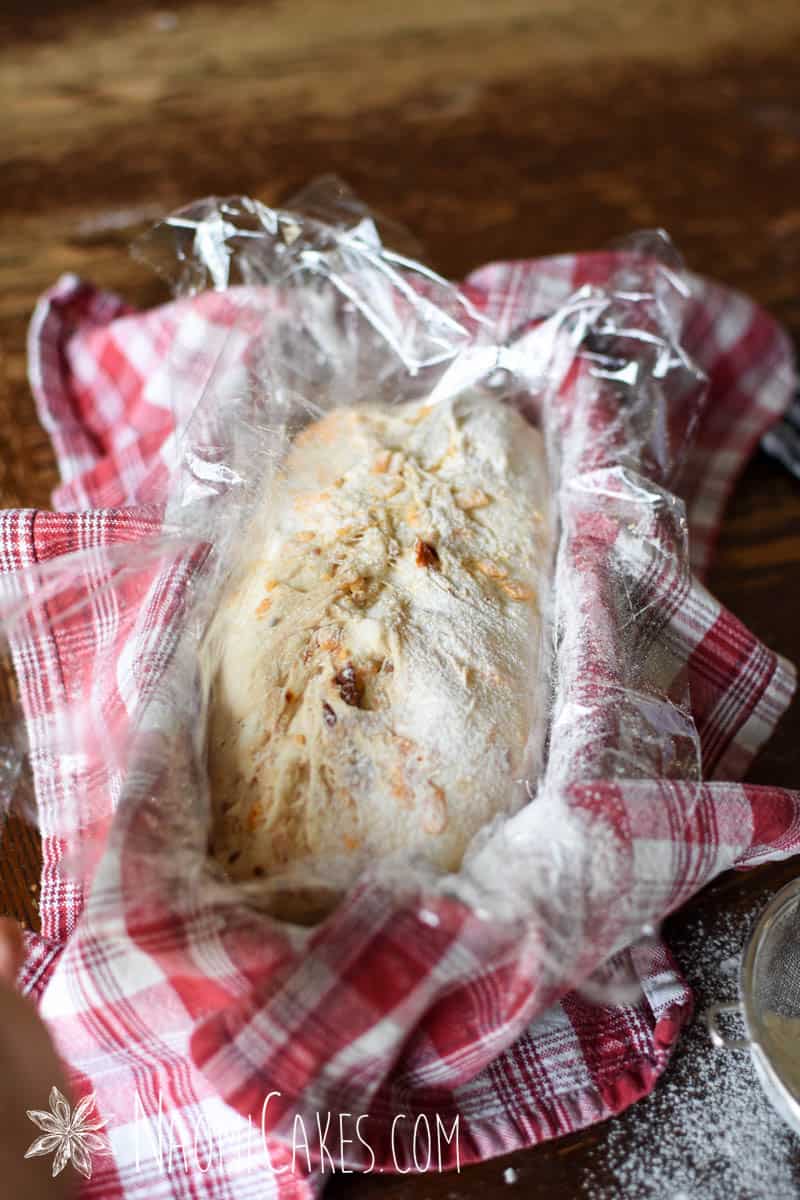
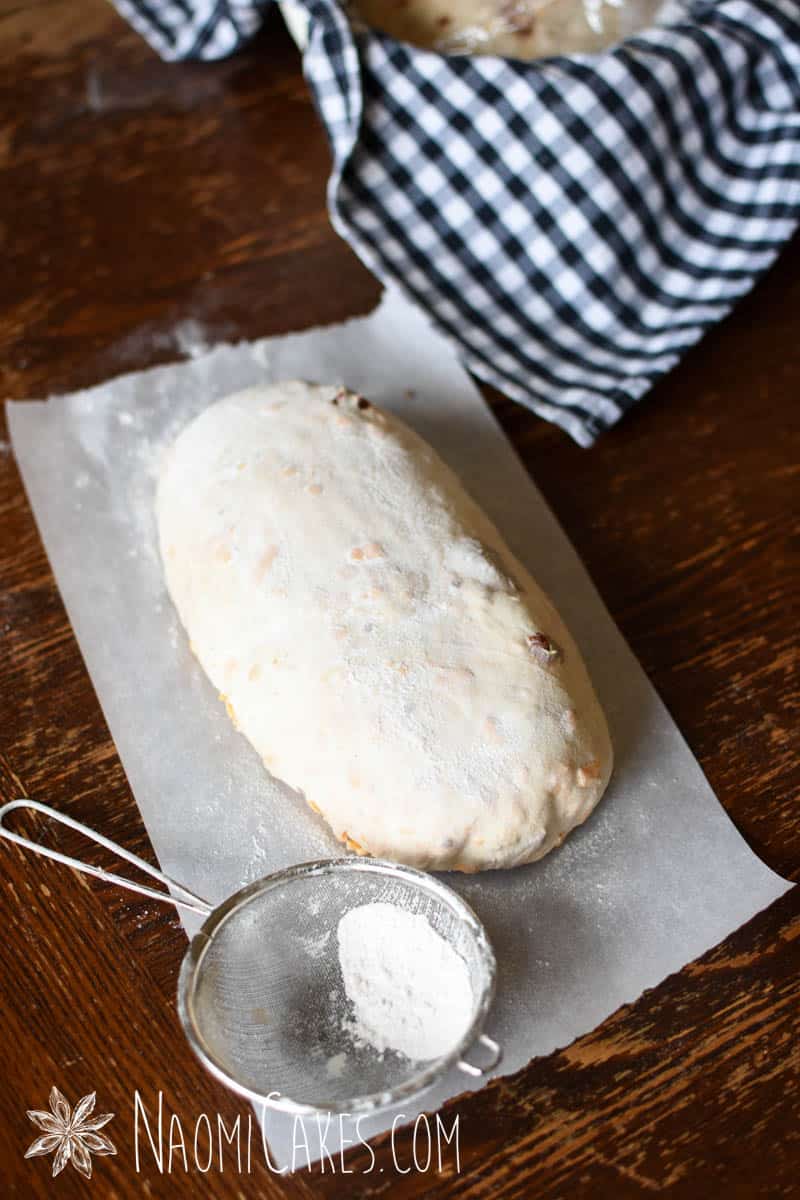
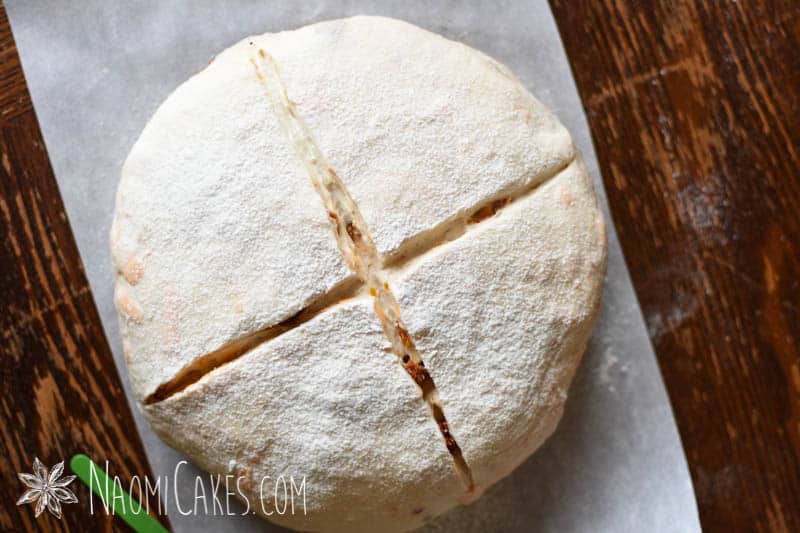
Uncover the bread and remove the plastic wrap or parchment cover. Turn out onto a sheet of parchment paper, remove the second plastic or paper layer, and score the bread with a sharp knife or razor blade as desired.
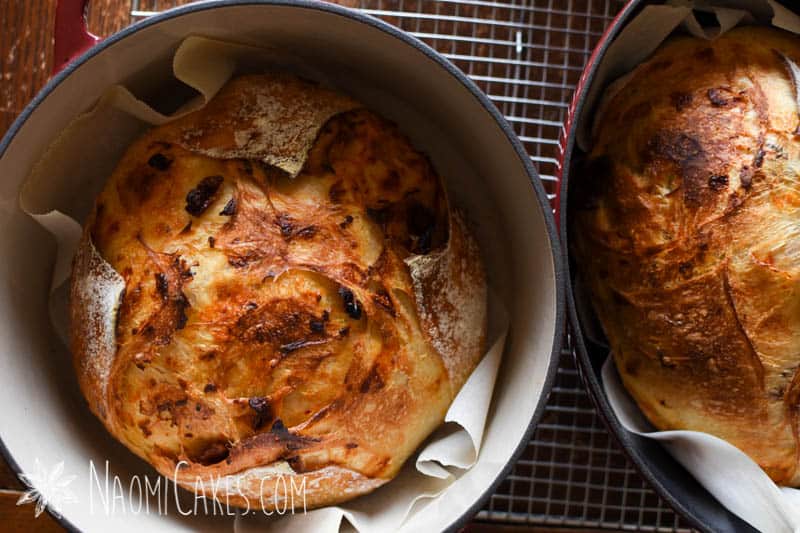
Once the dutch oven has been in the oven heating for 15 minutes, take it from the oven, remove the lid, and lift the bread into the hot dutch oven by the parchment paper sheet. Cover, and return to the oven for 35 minutes.
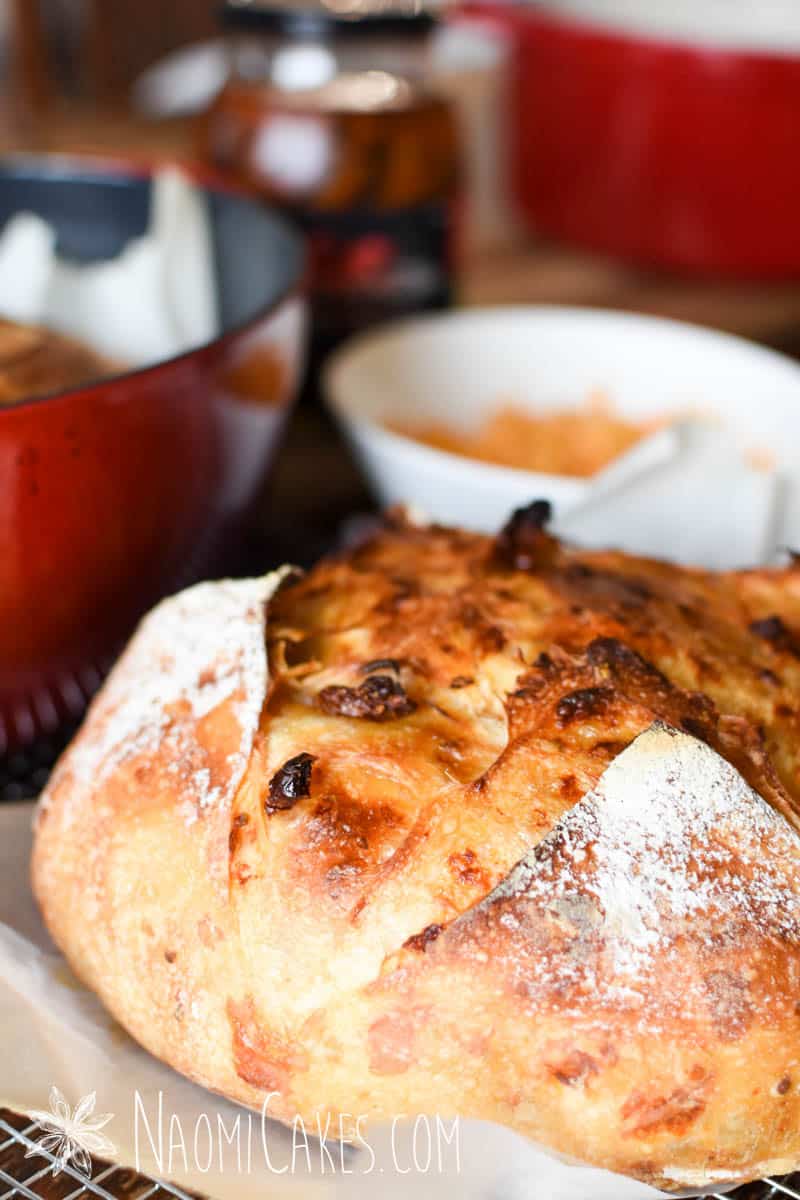
Remove the lid from the dutch oven, and allow the bread to bake 10 minutes more, just to brown it. Repeat with the second loaf, or save it for the next day to bake it fresh. Cool fresh bread on a wire rack. For best results, cool the bread completely before slicing into it.
Recipe Notes
*To use a bowl instead of a basket, the perfect size for these loaves is a bowl that measures about 7 inches across the top and about 4 inches deep.
How to Make Sun Dried Tomato and Cheese Sourdough Bread
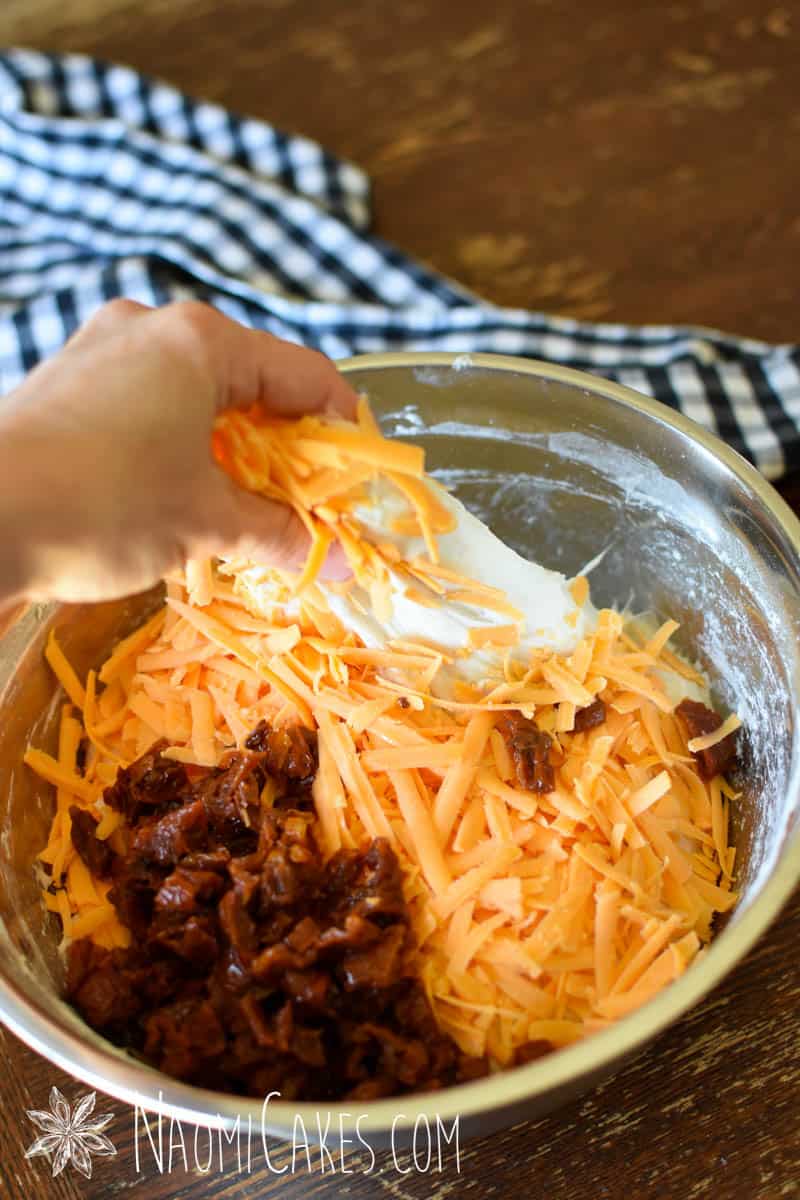
Make the dough
In a large bowl, combine all of the ingredients until a soft, shaggy dough forms (make sure all of the dry flour gets incorporated into the dough). Cover with a tea towel and allow this to rest 20-30 minutes.
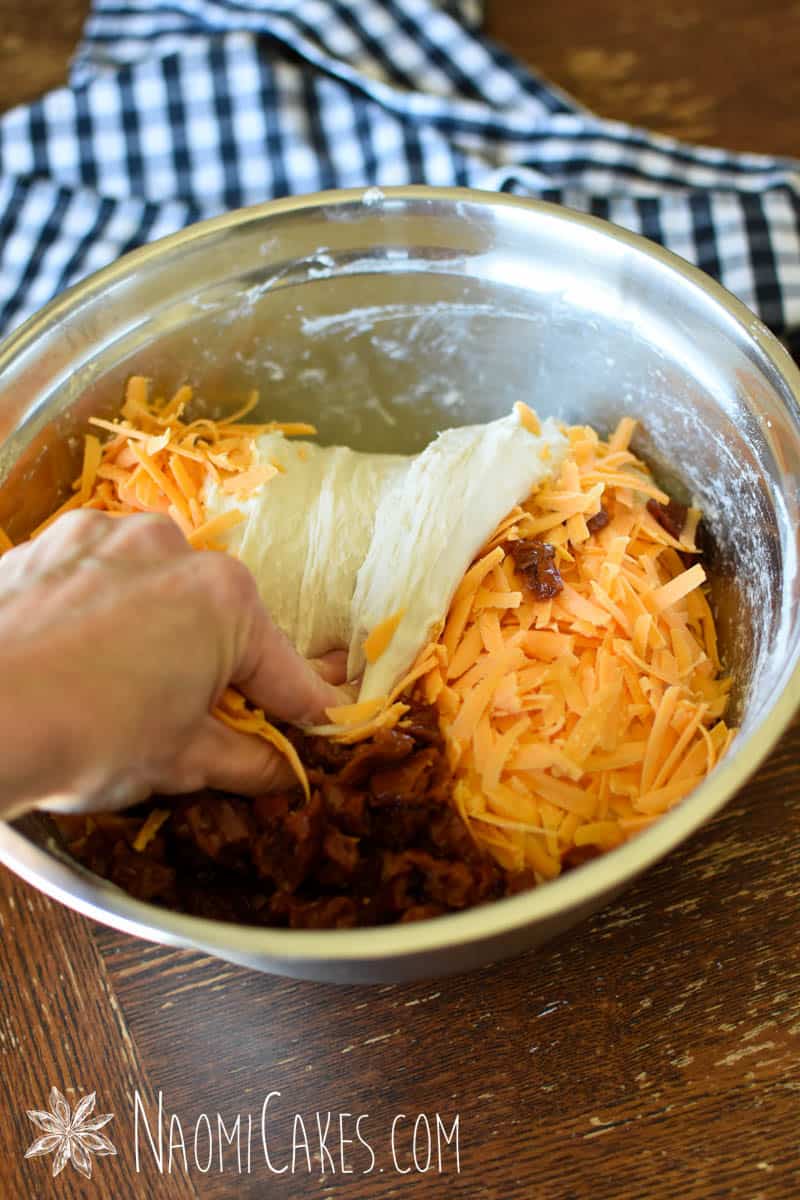
Sprinkle the grated cheese and chopped, drained tomatoes on top. Then put your hand under the dough, grab a handful, and pull it up as high as you can without breaking it. Fold the stretched dough down over the top of the whole amount, enclosing the cheese and tomatoes. Repeat this process from different sides of the dough 4-5 times, or until the dough isn’t “loose” anymore and it begins to feel stronger, or “taut” (and the cheese and tomatoes are someone incorporated). Cover, and allow this to rest 30 minutes.Repeat the stretch and fold process, folding 3-4 times, or until the dough begins to feel stronger (harder to stretch) again. Cover, and allow to rest another 30 minutes.
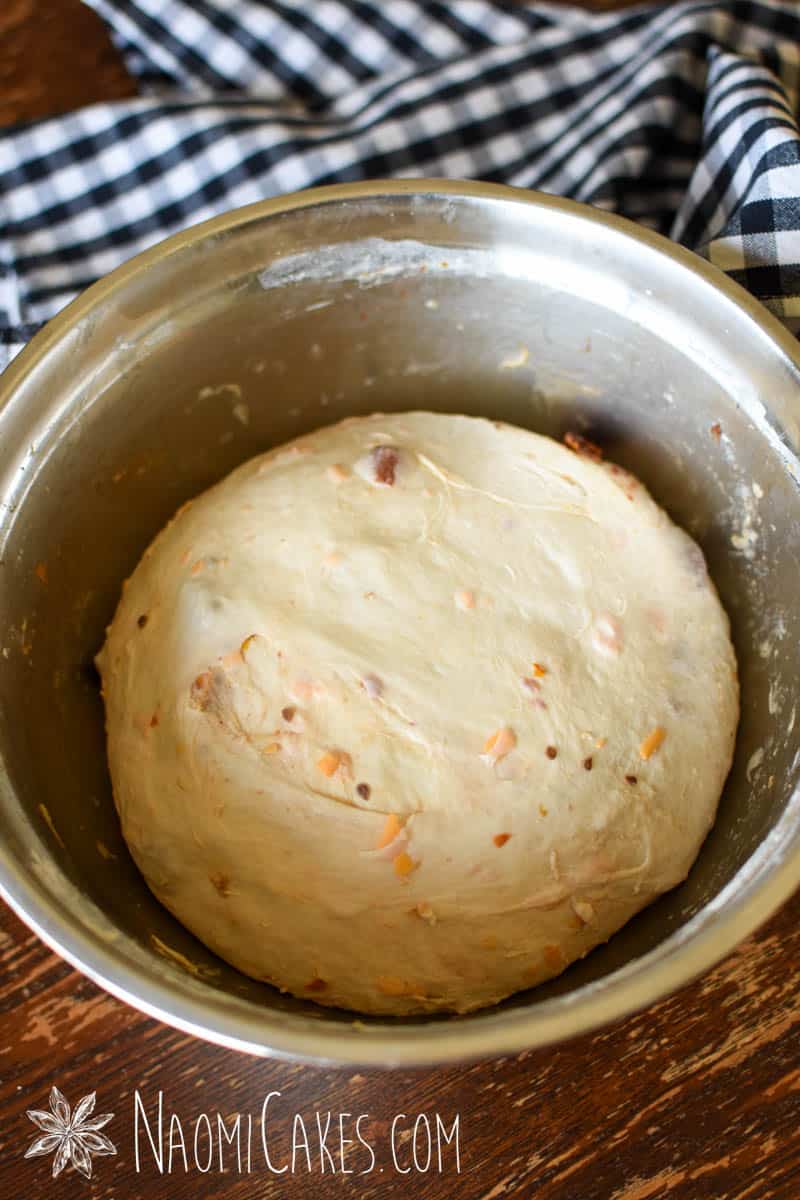
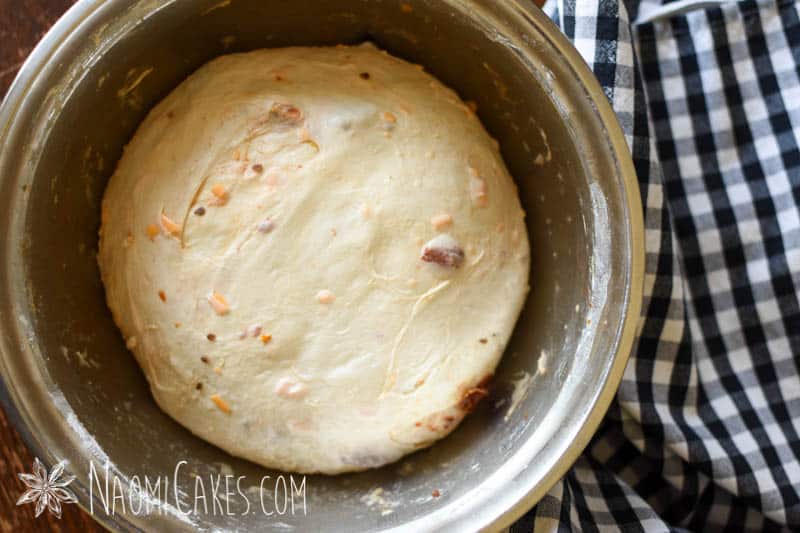
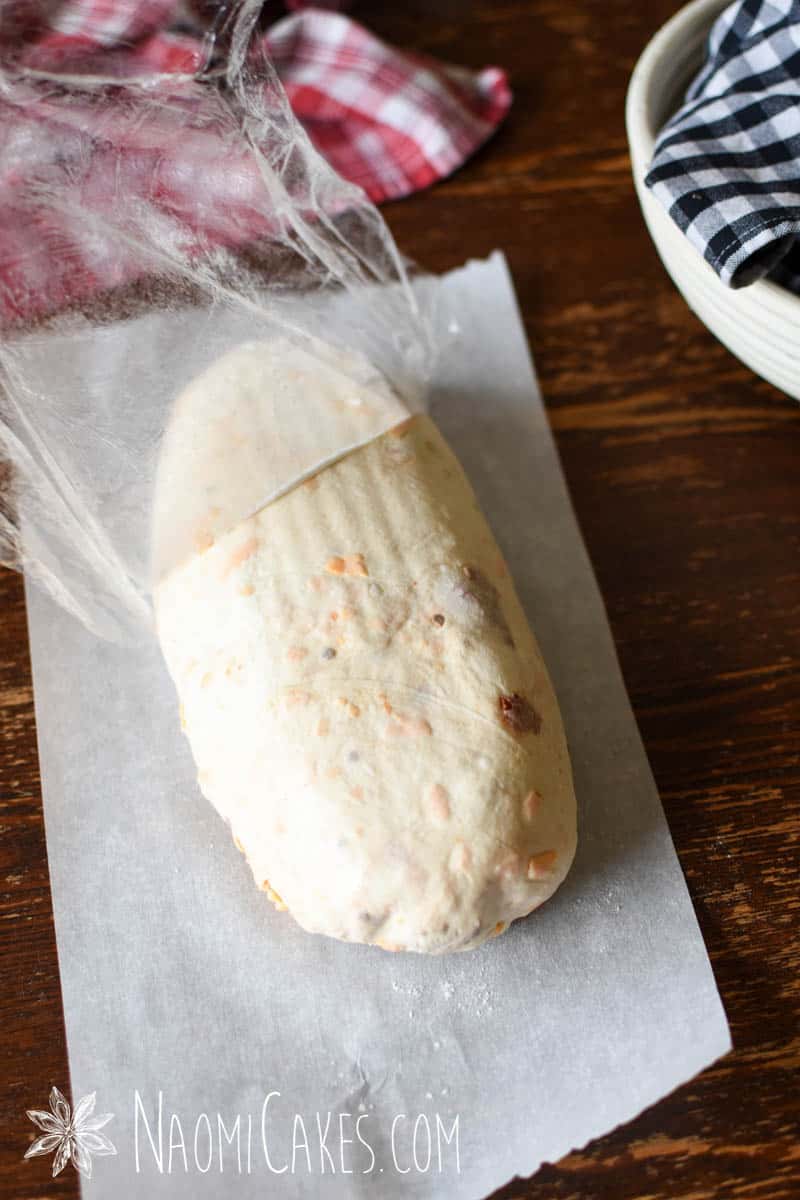
Repeat the stretch and fold process one final time, again folding 3-4 times, or until the dough feels taut and smooth. Cover, and allow to rest 3-6 hours or until the dough is doubled or nearly doubled in bulk.
The risen dough will have trapped air bubbles in it:
For the pre-shape (optional):
Turn the dough out onto a clean, unfloured work surface. Divide it into 2 equal portions, and stretch one piece of the dough out into a square. Pull the corners of the the square into the centre, and then repeat “stretching and folding” the edges into the centre (from each corner, about 3-4 more times) until it comes together into a smooth dough ball. Turn upside down, and repeat with the other section of dough. Cover, and allow these to rest 30 minutes.
If you choose to skip the pre-shape, you can place your shaped loaves smooth-side down into flour-dusted banneton baskets (a banneton is a proofing basket) or bowls at this point.
Shape the dough:
Pull each pre-shaped loaf into a square again, and stretch and fold the corners into the centre again. Roll the dough into a loaf shape, dust it lightly with flour, and put it smooth side down into a banneton basket or bowl* lined with a tea towel and plastic wrap or parchment (this disposable layer will prevent the tea towel from staining from the tomatoes). I like to cover the top of the loaf with the disposable layer, flip the whole thing over, and then set it into my basket.Cover the tops with a bit of plastic wrap or parchment paper, and fold the towel over top. Place the loaves immediately into the refrigerator. Let the dough rest in the fridge until the next morning.
Cover the top with plastic or parchment as well (optional):
Bake the bread:
The next morning, place a dutch oven into a cold oven, and preheat to 450 degrees F. Set the timer for 15 minutes.
Uncover the bread and remove the plastic wrap or parchment cover. Turn out onto a sheet of parchment paper, remove the second plastic or paper layer, and score the top of your dough with a sharp knife or razor blade as desired.
Once the dutch oven has been in the oven heating for 15 minutes, take it from the oven, remove the lid, and lift the bread into the hot dutch oven by the parchment paper sheet. Cover, and return to the oven for 35 minutes.
Remove the lid from the dutch oven, and allow the bread to bake 10 minutes more, until golden brown Repeat with the second loaf, or save it for the next day to bake it fresh. Cool fresh bread on a wire rack. For best results, cool the bread completely before slicing into it.
And that’s it! I hope you enjoy it. As always, if you make this recipe, please (pretty please) tag me in your photos on Instagram @naomicakesofficial, or just leave me a comment below to let me know what you thought! It always makes my day to hear from you guys.
Yeah, for sure! The only thing about mozzarella is that the flavour will be a lot more mild, and you won’t get the same marbled cheese affect on the inside (although the outside of the loaf will look great). Regardless, it will still be delicious!
To provide the best experiences, we use technologies like cookies to store and/or access device information. Consenting to these technologies will allow us to process data such as browsing behavior or unique IDs on this site. Not consenting or withdrawing consent, may adversely affect certain features and functions.
Functional
Always active
The technical storage or access is strictly necessary for the legitimate purpose of enabling the use of a specific service explicitly requested by the subscriber or user, or for the sole purpose of carrying out the transmission of a communication over an electronic communications network.
Preferences
The technical storage or access is necessary for the legitimate purpose of storing preferences that are not requested by the subscriber or user.
Statistics
The technical storage or access that is used exclusively for statistical purposes.The technical storage or access that is used exclusively for anonymous statistical purposes. Without a subpoena, voluntary compliance on the part of your Internet Service Provider, or additional records from a third party, information stored or retrieved for this purpose alone cannot usually be used to identify you.
Marketing
The technical storage or access is required to create user profiles to send advertising, or to track the user on a website or across several websites for similar marketing purposes.


Can I use mozzarella cheese
Yeah, for sure! The only thing about mozzarella is that the flavour will be a lot more mild, and you won’t get the same marbled cheese affect on the inside (although the outside of the loaf will look great). Regardless, it will still be delicious!