
Valentine’s Day Sugar Cookies [Recipe & Tutorial]
Hey guys, it’s me again! Today I thought it would be fitting, with Valentine’s Day just around the corner, to pull up the old cake/cookie decorator sleeves and make something pretty and pink. The chosen item of the day is these beautiful, lace-inspired Valentine’s Day sugar cookies!

Some notes on this tutorial:
This tutorial is created with the use of fondant icing. While I’m not a fan of the taste of fondant on cakes (although I use it all the time because it’s so beautiful), I LOVE it on cookies, and I think it’s one my favourite ways to decorate them!
Why I love using fondant for cookies:
Cookies decorated with fondant are chewy, smooth, and beautiful. The process also feels easier to me than using royal icing because you don’t have to wait as much time for icing to dry in between tasks.
When you use royal icing for cookies, you usually have to wait for the icing to dry before you begin to pipe on top of it. Fondant, however, is not like that. You can decorate them from start to finish all on the same day, with a beautiful, professional looking job as the end result.
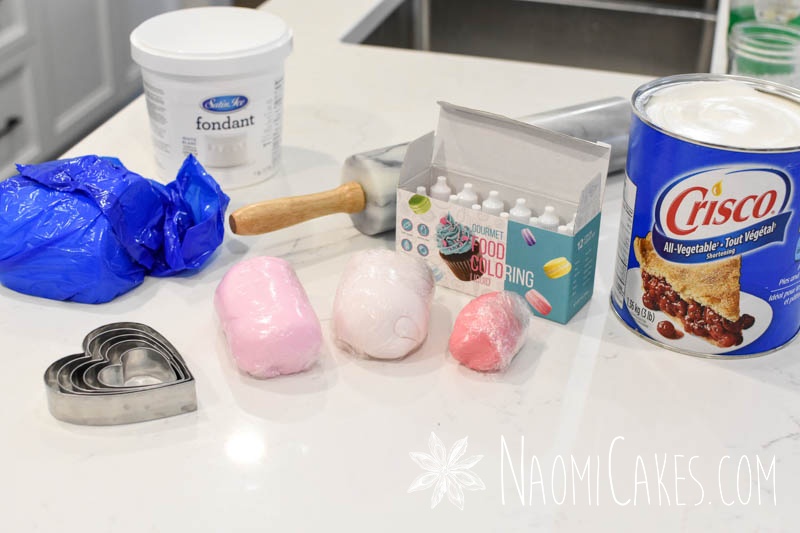
What you will need for this tutorial:
- Classic sugar cookies, baked and then cut with a multi-sized heart cookie cutter set
- White fondant icing (1kg or about 2.5 lbs)
- Plastic wrap
- Parchment paper
- Gel food colouring
- Shortening
- Rolling pin
- Straight pins
- Fondant smoother (optional)
- Sharp paring knife
- Piping gel (optional)
- Clean, new paint brushes
- Piping bags
- Couplers (optional)
- #2 piping tips (2)
- Royal icing, prepared
Are these cookies complicated to make?
No, and well – I guess it depends on what you mean! They will take time, and there’s no way around that. But as to the actual making of them, if you think you can hold your hand steady enough to pipe some lines and dots, you should be good to go no matter how much experience you do or don’t have.
I am a mom of 3 kids 3 years and under (with another one on the way!), and for me… let’s just say it took me longer than it would have without interruptions. Obviously, however: even in my shoes, it can be done!
How are these Valentine sugar cookies made?
Let’s dive into it, shall we! I’m going to post this tutorial in line with photographs that best show what I’m saying. I was unfortunately unable to get all of the images I would have liked during the process, but honestly I think you’ll be able to follow along without too much trouble.
If anything is unclear, of course, leave me a comment – I’ll be happy to get back to you as quickly as I can!
1: Assemble everything you need
One of the worst feelings is embarking on a project, all excited to make it, and then realizing part way through that you don’t have everything you need. That said, take a good look at the list above and make sure you have everything you need before you get started.
I got this adorable Valentine’s cookie cutter set on Amazon, and I totally love it! The shape of the hearts is perfect, and the little box is just cute. I’m a fan!

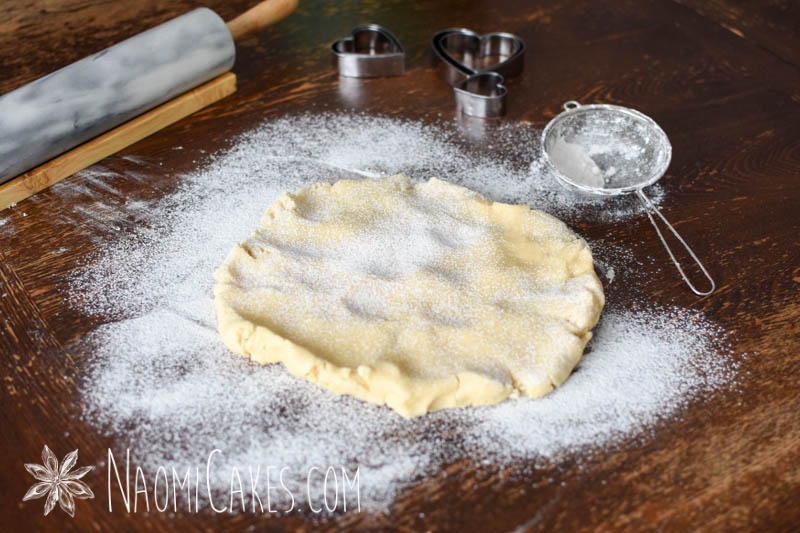
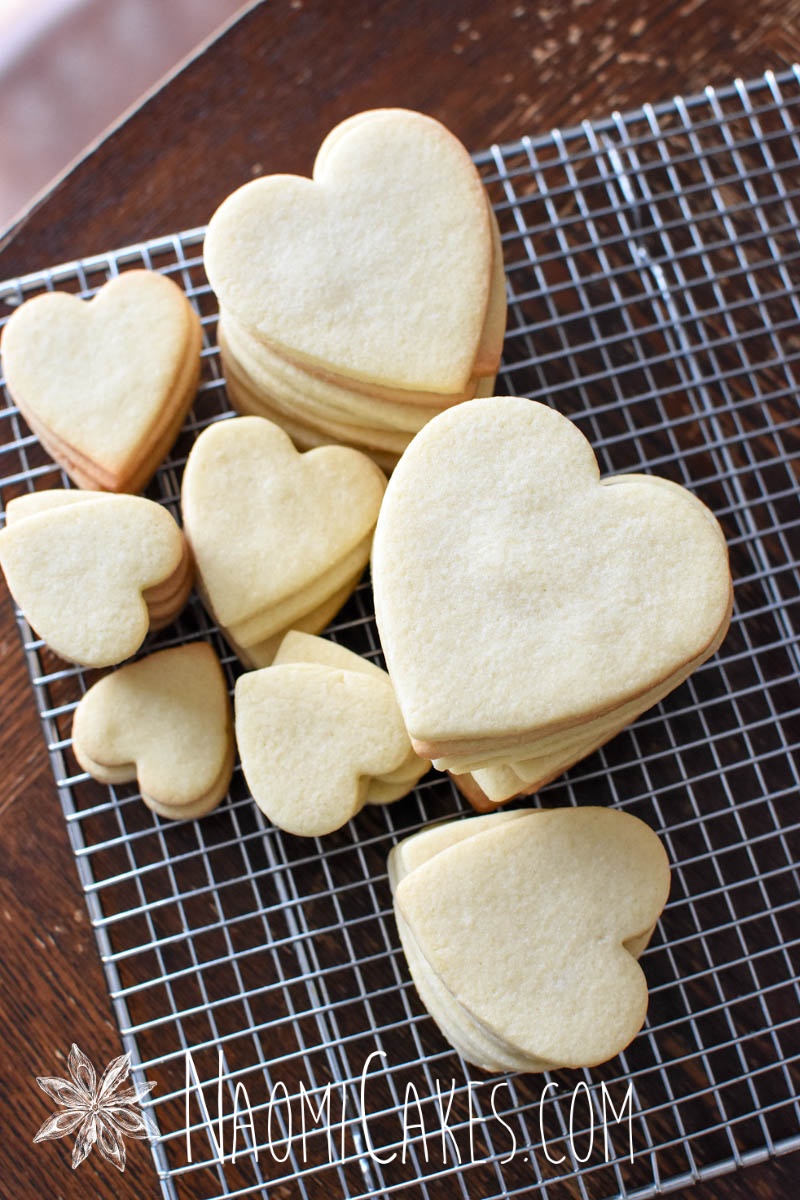
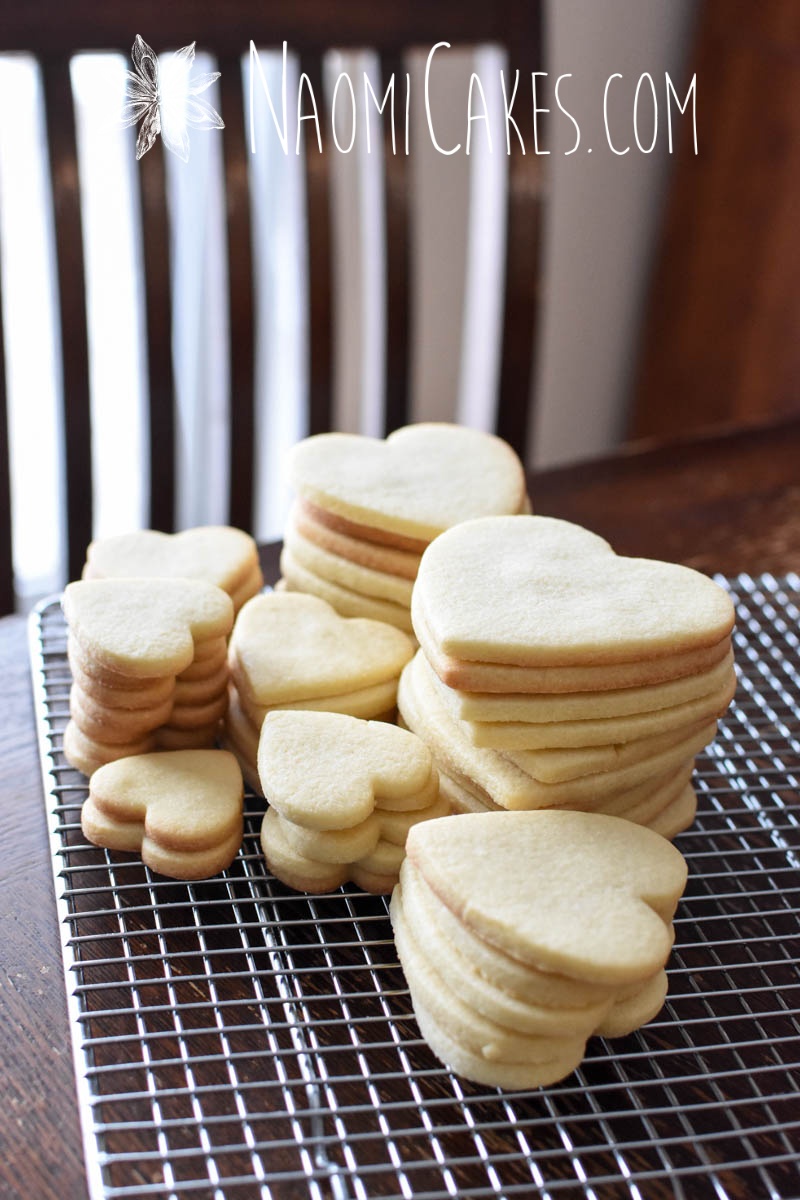
2: Bake the sugar cookies
I recommend baking your Valentine’s sugar cookies the day before you want to decorate them, or at least making the dough the day before. Since I have little people underfoot, here’s how I did it:
- I made the dough.
- I chilled the dough, rolled it out and cut it into shapes.
- I froze the cut, raw cookies on pans between sheets of parchment paper, and
- I baked them the morning of the day I wanted to decorate them
For your convenience, I’ll include my sugar cookie recipe below, which has it’s own post Here (in case you want to see more pictures of the process for baking cookies).


Classic Sugar Cookies
This classic sugar cookie recipe is easy to make and perfect for decorating.
Ingredients
- 1 c. butter softened
- 1 c. sugar
- 1 tsp. vanilla
- 2 large eggs
- 2-1/2 c. flour
Instructions
-
Cream the butter in the bowl of an electric mixer; add the sugar, and mix until well incorporated and fluffy. Add the vanilla and eggs; mix well. Add the flour, and again, mix until well combined.
-
Chill the dough for at least 1-4 hours (or overnight) before rolling.
-
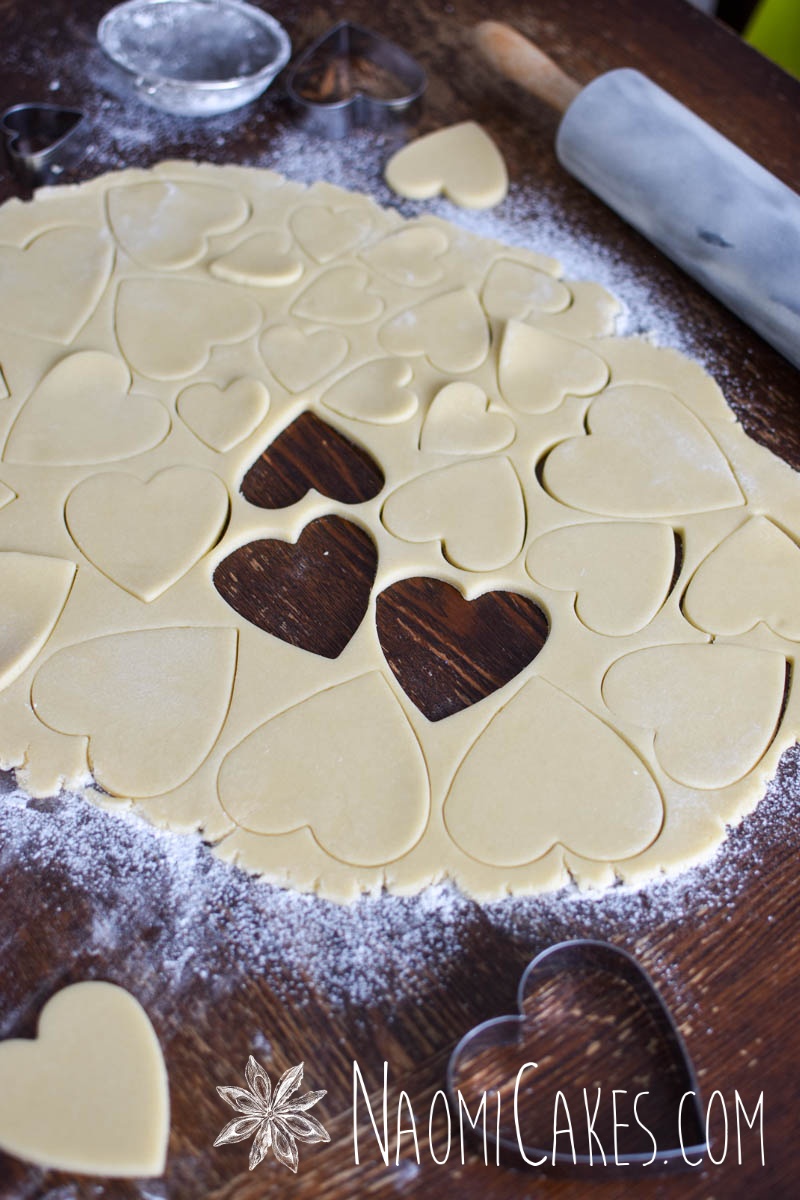
Roll out on a floured surface and cut out shapes with a lightly floured cookie cutter, in the shape(s) of your choice.
-
Bake at 350 degrees F for 8-10 minutes, or until just golden around the base of the cookies. Cool on wire racks.
Recipe Notes
You can freeze this cookie dough ahead of time, thawing it just before you want to use it. Or, to be even more prepared, go ahead and pre-roll and cut out your shapes, then layer the unbaked cookies between sheets of wax or parchment paper, and freeze them in a sealed container until ready to bake. I do this all the time when I make large quantities for something, and I want them all to be fresh (without the frustration of last-minute prep work). I can make hundreds of cookies in advance this way (great for weddings!) and bake them all fresh the morning of the event with little hassle. Also, frozen cookies retain their shape better when baked - Which is great for making perfectly decorated cookies!
3: Tint the fondant
Personally I like to use gel food colouring for my cakes and cookies, and the kinds that come in squeeze bottles are my favourite.
For these cookies, I divided the fondant in half and left half white. I made the rest into 3 shades of pink; one soft pink, one medium pink, and one deep pink with a drop or two of red to make it a little bit more robust of a colour.
To tint your fondant:
- Grease a clean, hard work surface with a little bit of shortening.
- Knead a drop or two of colour (gel colours are very strong) into your fondant until it is smooth and pliable, and the colour is evenly distributed. Add more colour if desired, kneading until it is well incorporated. Wrap the tinted fondant in plastic (to prevent it drying out). Set aside.
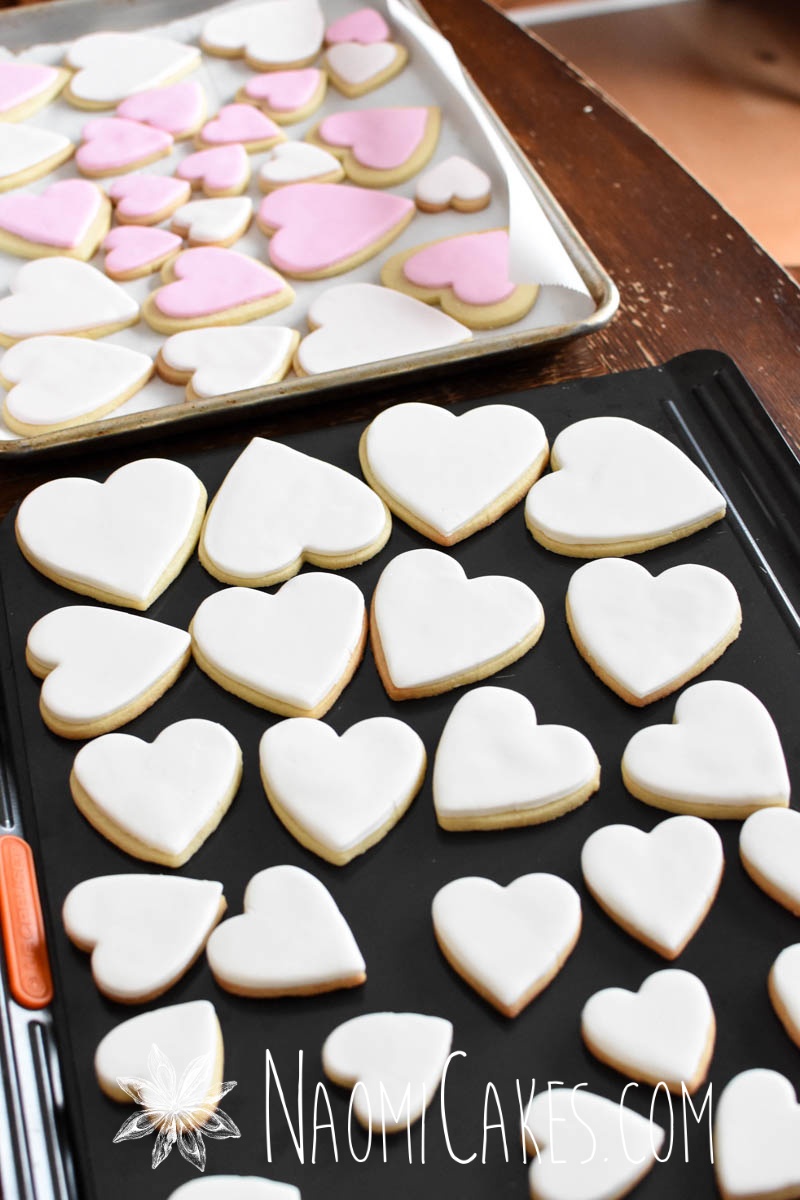
4: Roll and cut the fondant
- Grease a large, clean work surface with a little bit of shortening.
- Knead the white fondant until it is smooth and pliable, and roll out until the fondant is about 1/8″ thick. If there are any air bubbles, puncture them with the tip of a straight pin and then smooth the area flat with the palm of your hand.
- Cut into heart shapes with the same cookie cutters you used for the Valentine’s cookies. Cover with plastic until using.
- “Glue” the fondant hearts onto your cookies with a little bit of piping gel, keeping the others covered to prevent them drying out as you place each one. Smooth with the palm of your hand, or with a fondant smoother, and repeat until all of the hearts are covered. (I did some cookies with the same size heart on top as they are, and I did some others with a smaller size heart on the cookie, to make room for a piped border.)
- Repeat the above with the light and medium shades of pink, reserving the darkest pink for decorative details.
Tip: I like to use the fondant smoother for the large cookies and the palms of my hands for the smaller ones.
If you don’t have piping gel: You can mix a little bit of fondant into some water, stir until dissolved, and then brush that onto the backs of the fondant hearts to make a sort of homemade, edible glue.
5: Emboss some of the cookies with smaller heart shapes
Using the smaller heart shaped cookie cutters, impress a smaller heart into the centre of some of the larger ones. This is to make piping easier later.
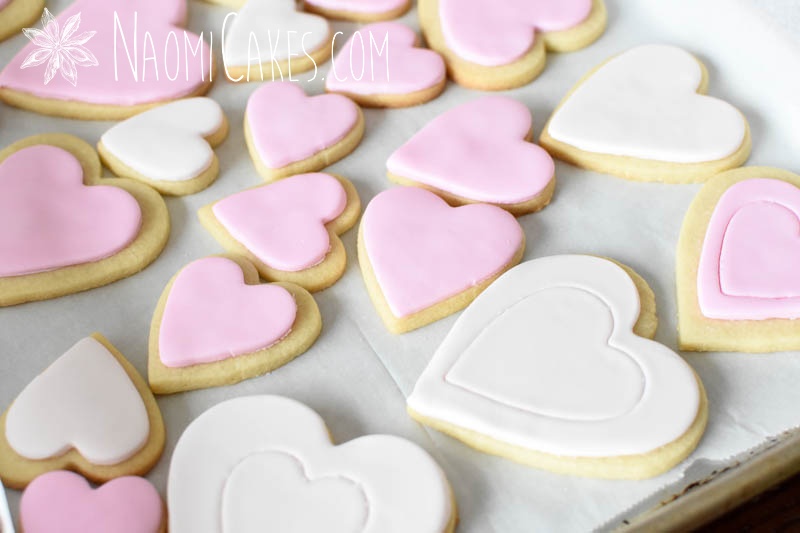

6: Make the flags, mini hearts, and bows
- Grease a clean, hard work surface with a little bit of shortening.
- Knead your light pink fondant icing until smooth and pliable, and then roll it out until quite thin. Repeat with the other two types of fondant, keeping the first one covered as you work.
- Cut into strips, and then cut the strips into small triangles with a sharp knife.
- Using the smallest cookie cutter, cut out little hearts for the centres of some of the cookies.
- You can also cut thin strips to shape into bows, if desired (I only did one cookie with this design).
- Keep the fondant pieces covered until you are ready to use them.

7: Secure the fondant decorations in place
- With a clean paint brush, brush a little water or edible glue (see step 4) onto the cookies where you want your decorative fondant shapes to sit. Be careful not to get too much liquid on the fondant, as it will create a little indent or glossy finish wherever the liquid can be seen.
- Arrange as desired, and set aside.


8: Pipe the royal icing details
- Prepare your royal icing, and tint 1/2 of it medium pink. Spoon into piping bags fitted with couplers and #2 piping tips. (The couplers are only necessary if you think you might want to use another size or shape piping tip at some point. For my cookies, I only used one size tip.)
- Trace the outline of your heart-shaped imprints on the cookies with the icing colour of your choice. Pipe a “rope” onto the tops of your little flag rows.
- Next, doodle! I did little scallops around the outside of the piped or small fondant hearts, to mimic lace. You can also do little dots, beaded borders, stripes, or swirly filigree, as I have in various forms on all of these cookies.
Tips:
- Keep a little bit of icing always hanging off the edge of the tip. Royal icing dries quickly, and you don’t want it to dry inside of the tip which would prevent you from piping anymore! If it dries hanging off the end, however, you can just break it off of the tip, and the icing underneath should flow out freely again.
- It’s helpful to have a clean washcloth nearby to keep your piping tip clean. If the tip has icing stuck to it at any point, it will draw the flow of icing as you squeeze toward itself, which can really mess up your piping. Keeping the tip clean will allow for clean, smooth lines.

Step 9: Study the pictures!
I probably (definitely) have too many pictures… but here we are. I couldn’t choose what to share, so today is Valentine’s Day sugar cookies as far as the eye can see day! You’re welcome.
If you need some ideas, feel free to study these images to help you decorate/doodle on the rest of your cookies!


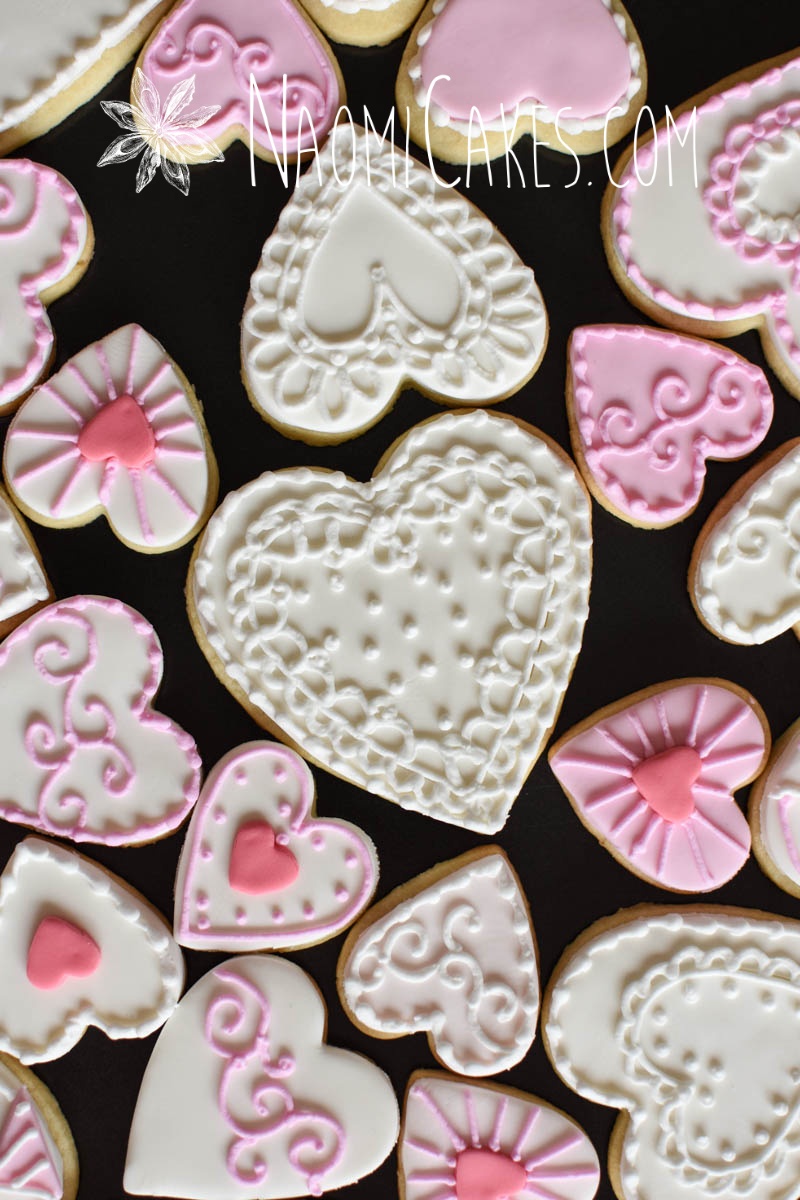


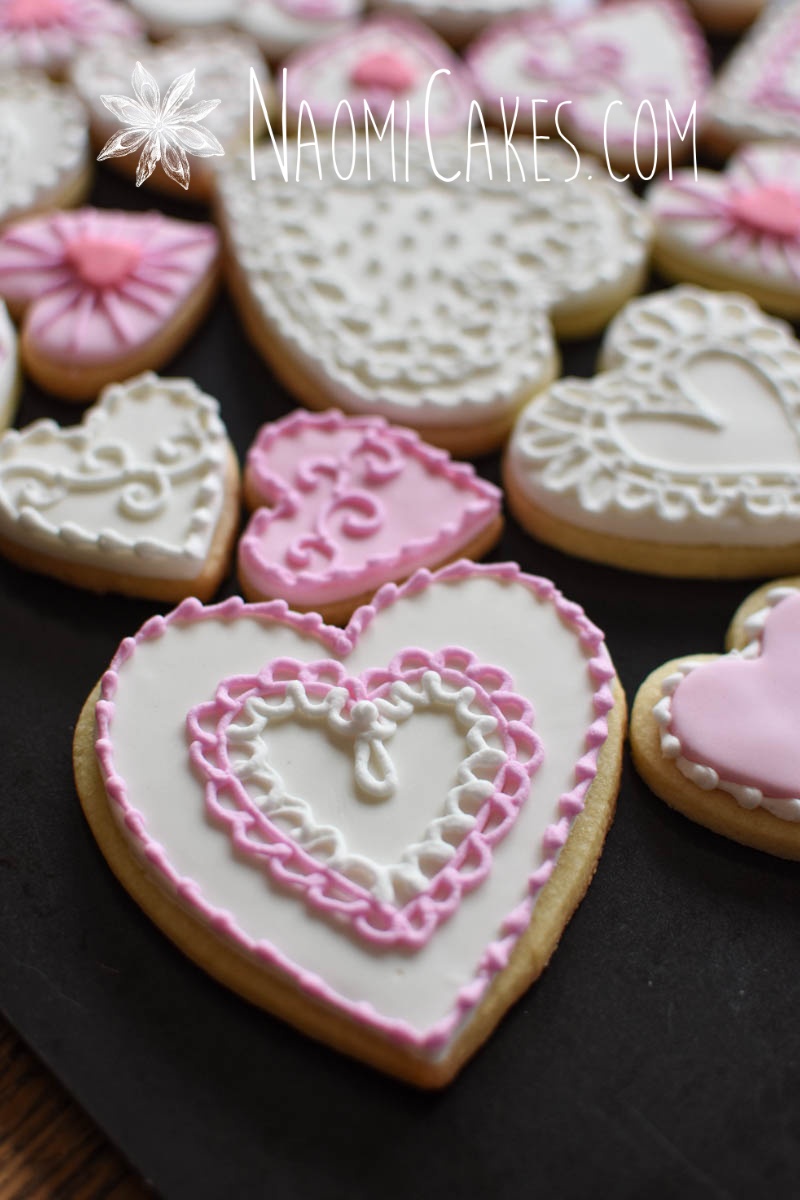


Lovely, aren’t they? I am so pleased with them.
If you make these cookies, or a variation of them, I would love to see your work! Please tag me on Instagram @naomicakesofficial, or leave me a comment below!
Bye for now,
Naomi
P.S. Do you have a favourite? Let me know in the comments!
This post contains affiliate links.