
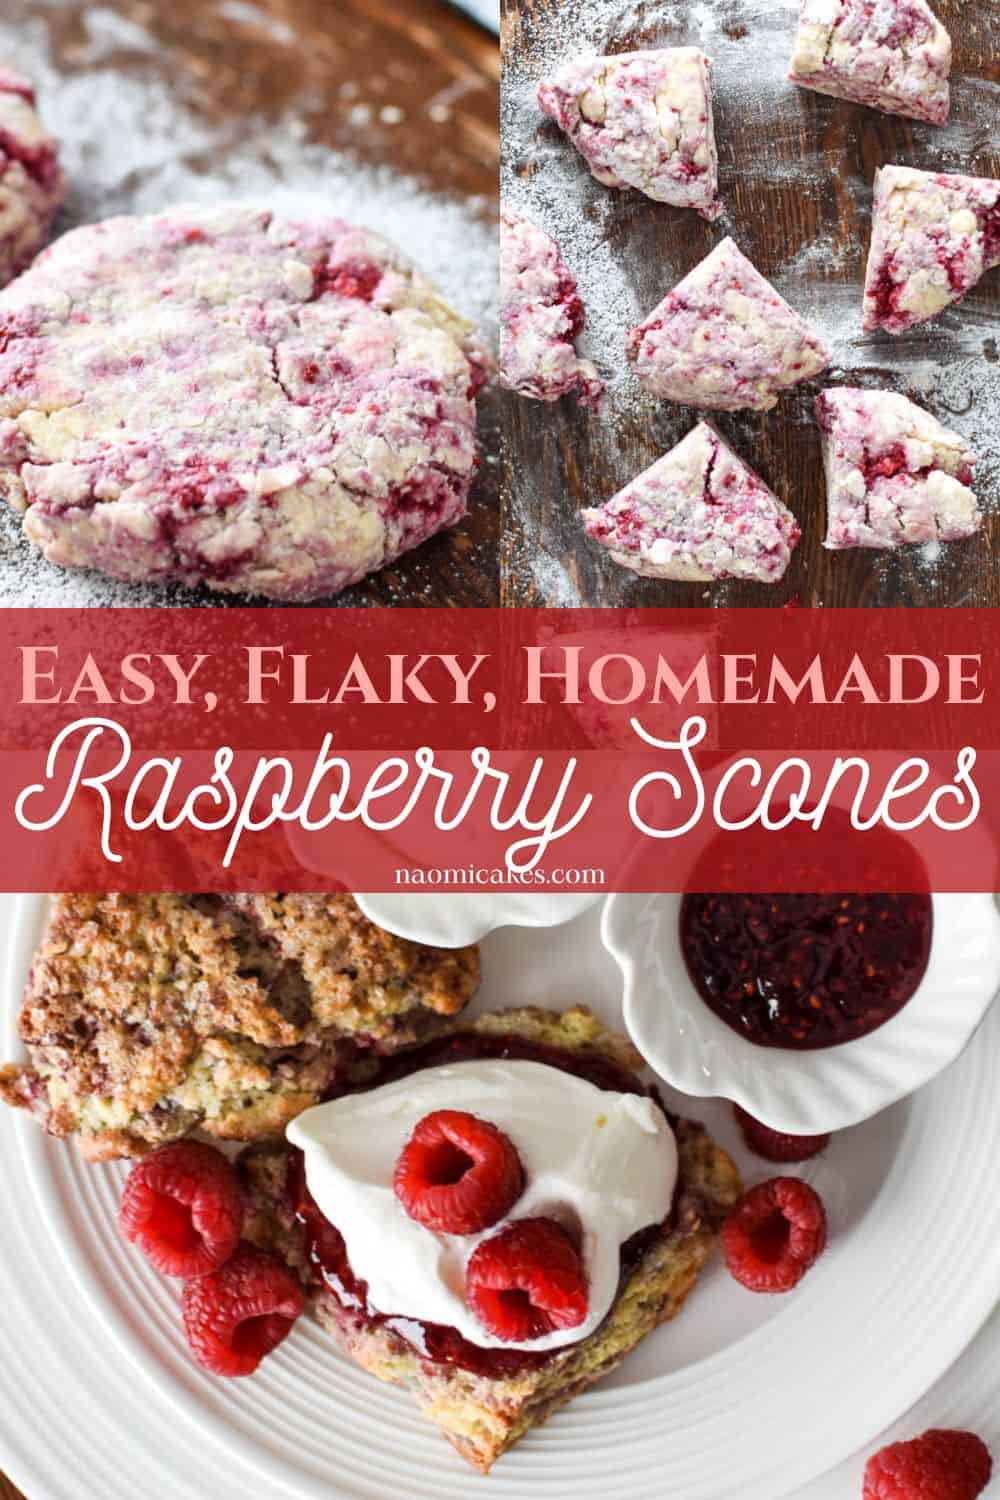
Easy Flaky Homemade Raspberry Scones [Recipe]
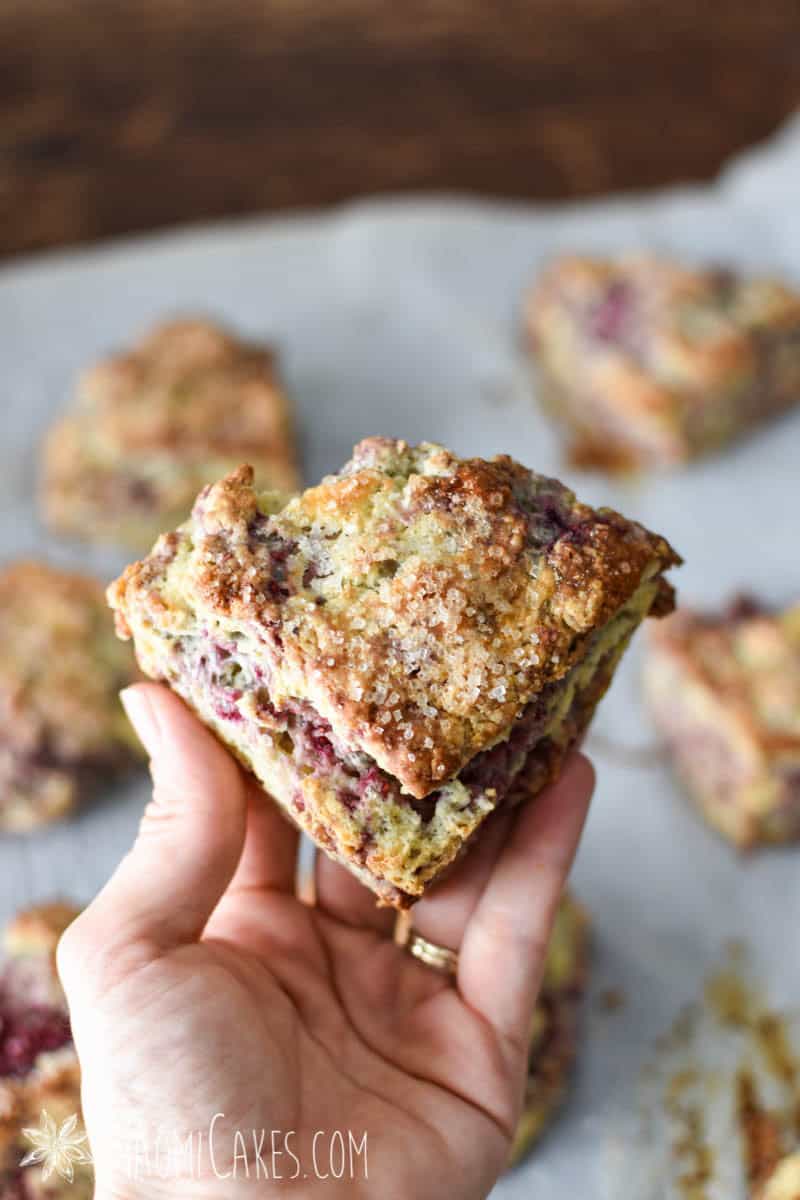
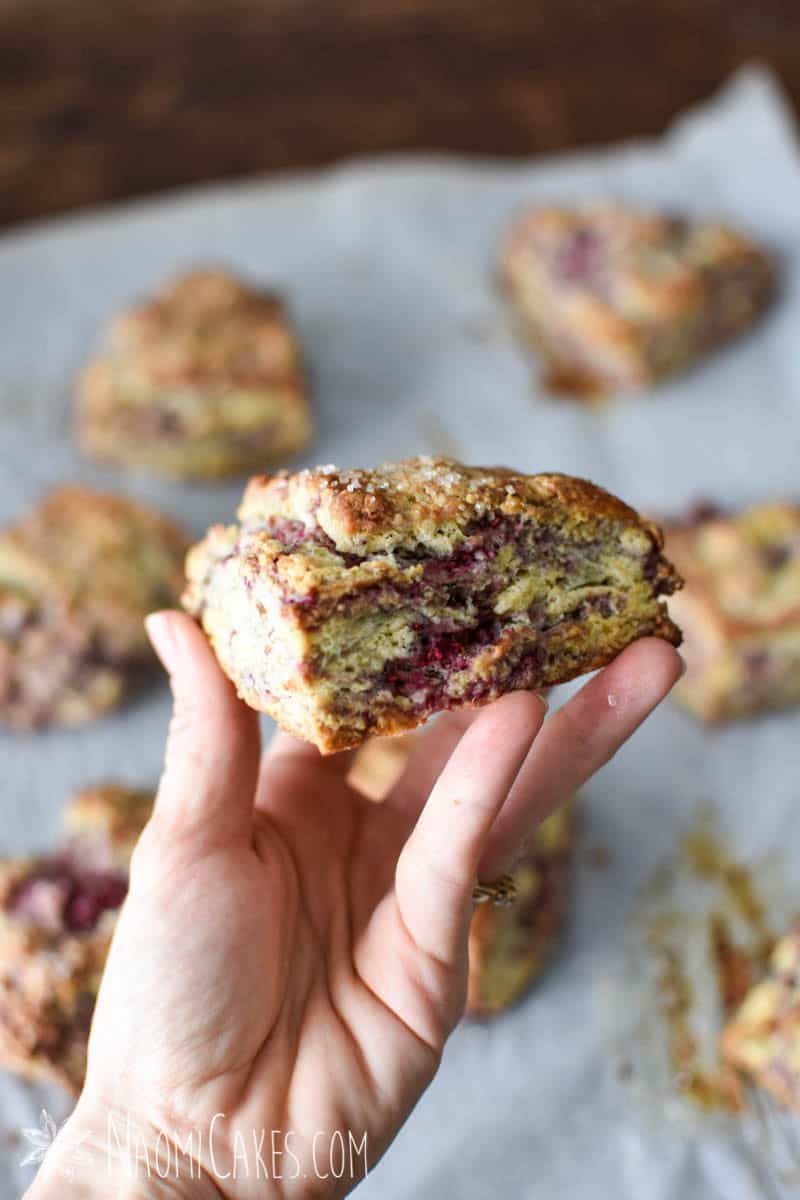
Light, flaky, not-too-sweet and bursting with fruity flavor, these raspberry scones are as pretty as they are delicious. If you’re looking for a recipe for tender scones with pretty marbled raspberries and buttery, flaky layers—this is the one for you!
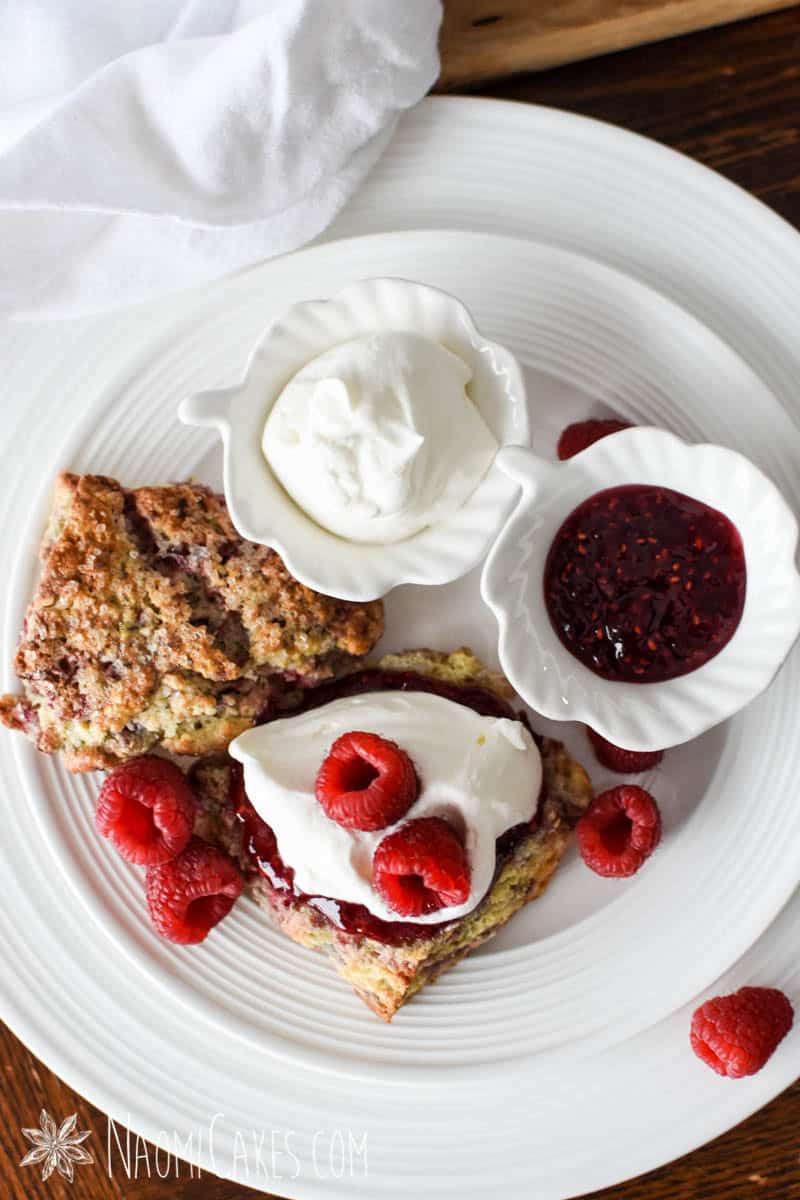
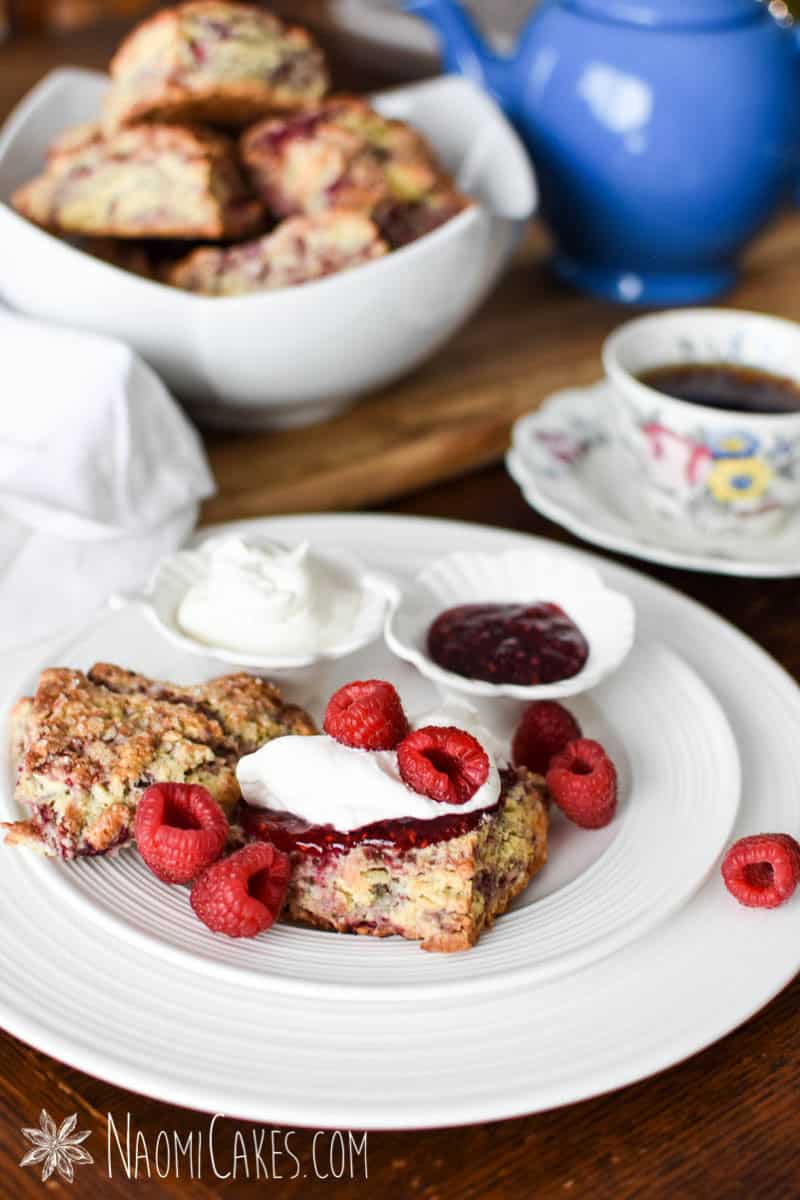
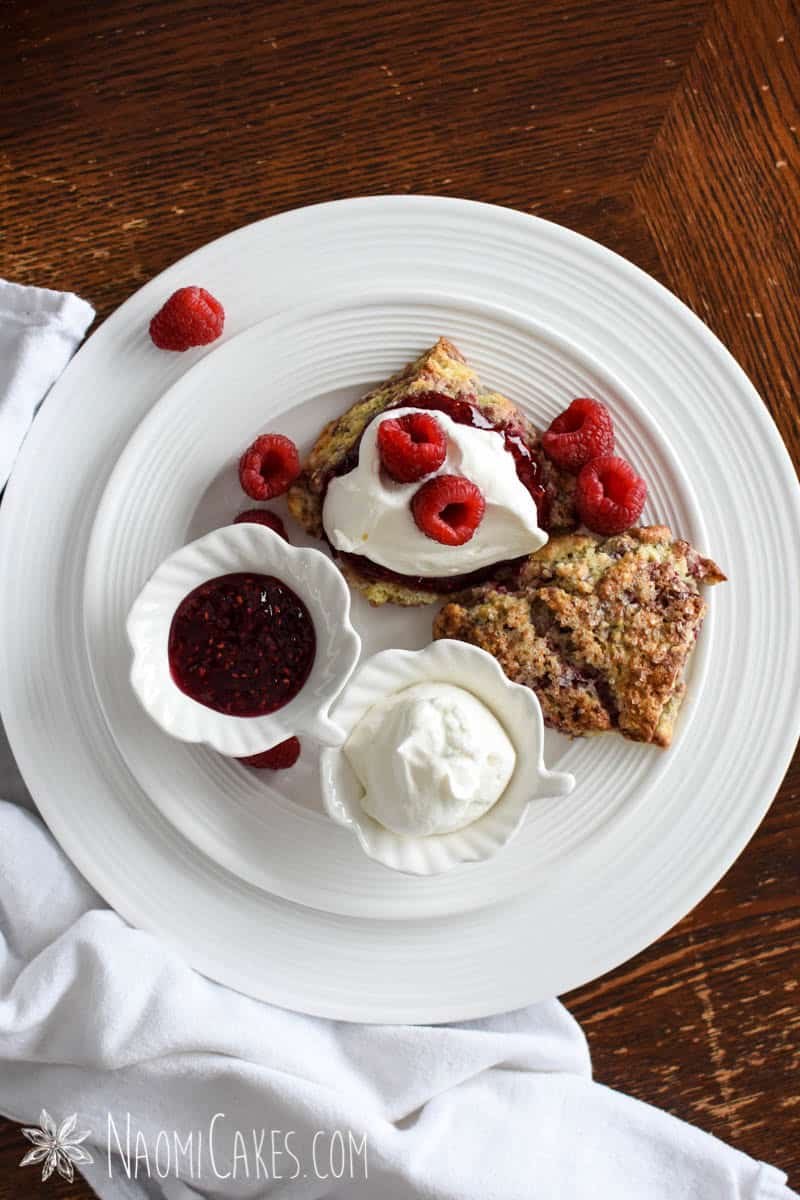
When it comes to scone recipes, I try to keep mine focused on the buttery, flaky layers more than sweetness. Scones, in my opinion, should be a biscuit-like, barely-sweet teatime treat, made sweet by a sprinkling of coarse sugar and the preserves that get smeared on top. I also love to serve my scones with Devonshire cream or whipped heavy cream, adding another decadent layer to the experience.
The perfect breakfast or teatime treat
This raspberry scone recipe is perfect for a light breakfast or afternoon tea. Fun fact, it is one of the featured recipes in my ebook, Make Time for Tea!
Scones are quick and easy to make, which makes them ideal to throw together and make any day more special. You can make these buttery scones, or any of my other scone recipes, to make your occasion more special. Here are a few favorites for you to check out:
How to serve scones
One of my favorite things is to make scones for birthdays or other special occasions, and to pair them with little finger foods and simple cookies, like my jam thumbprint shortbread cookies. I recommend serving scones with a cup of good tea (personally, I love a good quality black tea such as Barry’s or Yorkshire tea), and a small spread of your favourite “Little foods.” Here are some recommendations:
To serve alongside scones:
- Fresh fruit
- Fresh vegetables
- Mini sandwiches
- Simple cakes (such as my Raspberry Sponge Cake)
- Cookies (such as my Lemon Poppyseed Tea Cookies or my Jam Thumbprint Shortbread Cookies)
To serve on top of scones:
- Butter
- Whipped honey butter
- Your favorite preserves (such as my Strawberry Orange Marmalade, Peach Raspberry Jam, or Cranberry Apple Butter)
- Devonshire cream
- Heavy cream, whipped
- Cream cheese filling
Making raspberry scones with fresh vs. frozen berries
You can absolutely make these buttery raspberry scones with frozen raspberries as well as with fresh raspberries. The key with either type is to make sure to not overwork the dough. This is essential for multiple reasons:
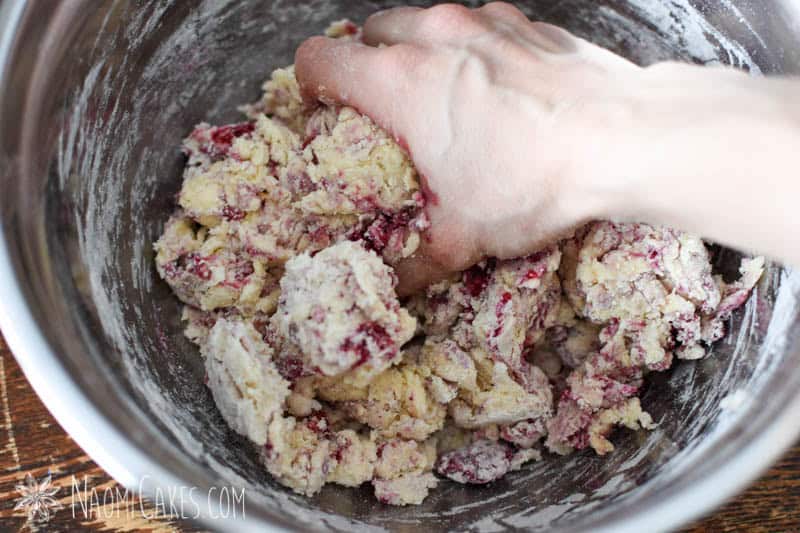
- To make flaky scones, it is essential to make them with cold butter, cut in with a pastry cutter or crumbled in with your fingertips. These bits of butter need to remain intact for the best scones. In order to make sure those cold butter flakes stay intact and the gluten does not develop too strongly, you must not overwork the dough, mixing it only enough to bring the dry and wet ingredients together into a soft dough.
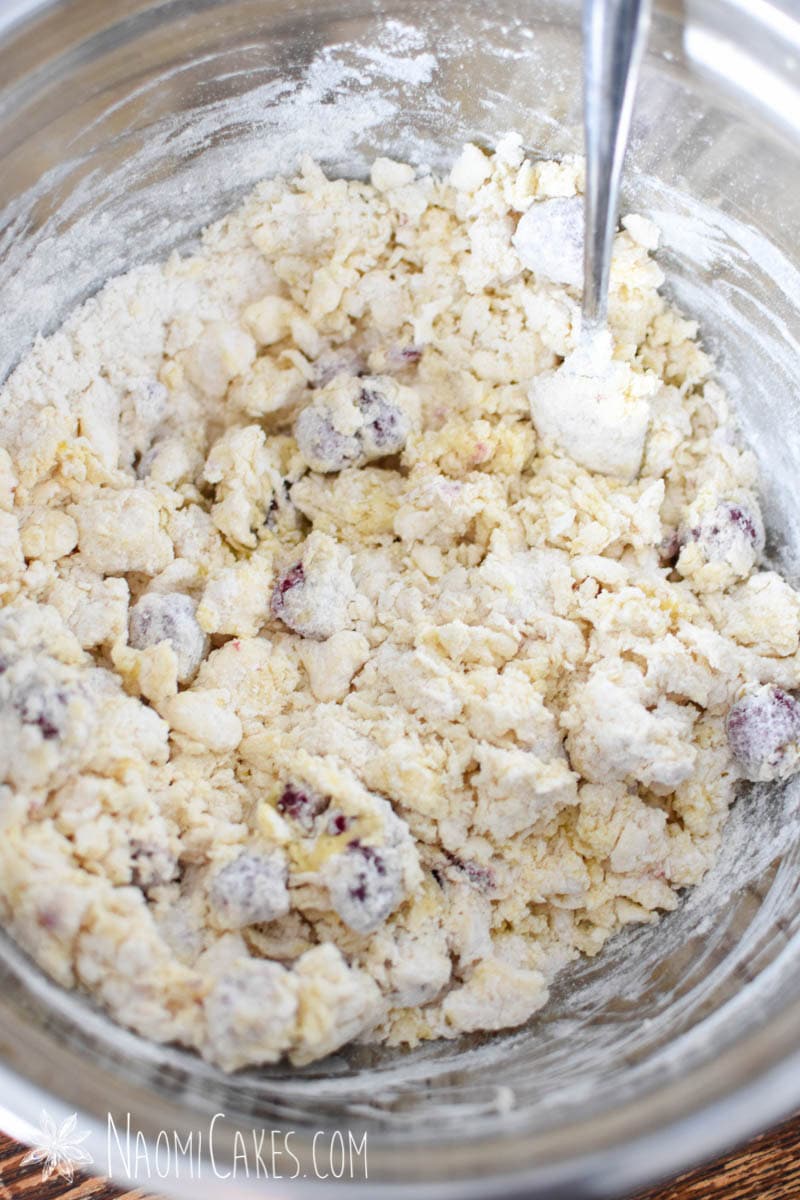
- Since juicy raspberries (fresh or frozen) can run into the dough and make it sticky (and messy), it’s essential to stop mixing the dough once you have begun to see the marbled look emerge. Once all of the dry ingredients are incorporated, you should stop mixing your dough, and immediately pat it out into a circle to be sliced into wedges.
How to make raspberry scones
Here are some tips for making perfect raspberry scones, every time! Scroll to the bottom of the post for step-by-step pictures, but here is a breakdown of the work:
Make the dough
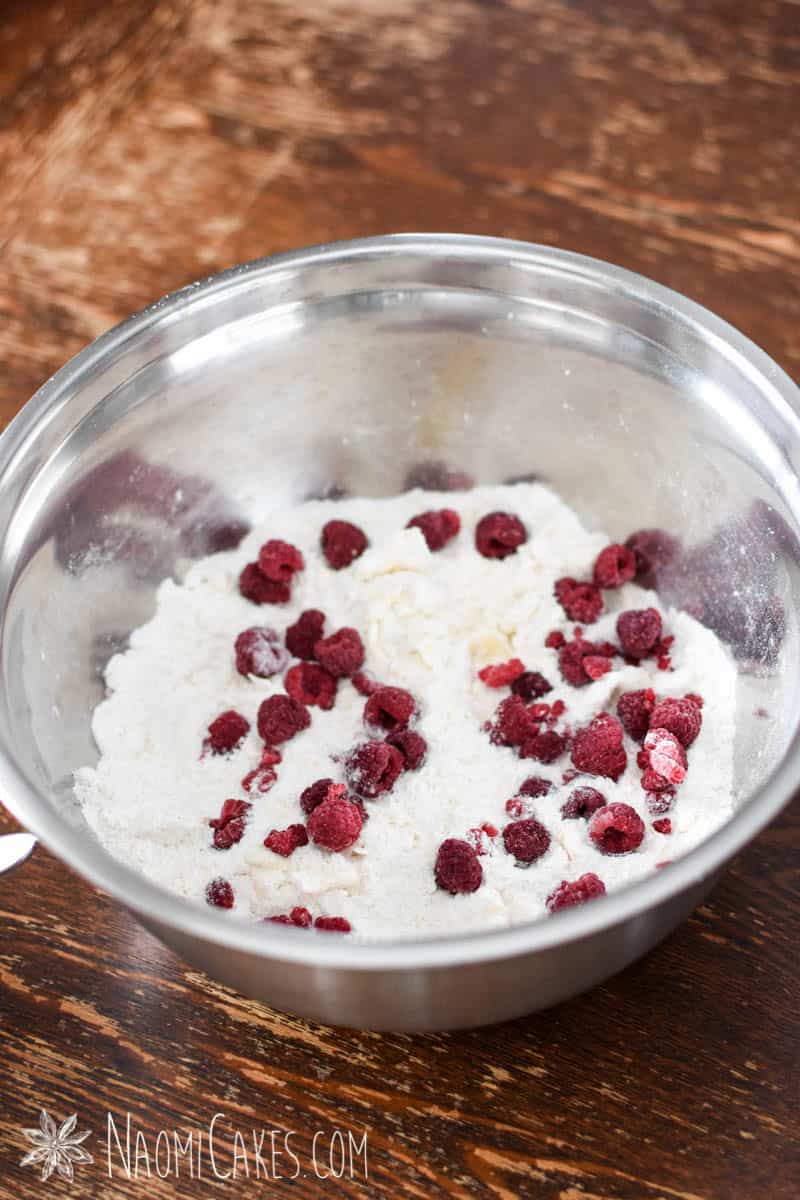
In a large mixing bowl, mix together the all purpose flour, sugar, salt and baking powder (see recipe card for amounts). Cut in the cold butter (by hand or with a pastry blender) until it resembles coarse crumbs or pea-sized chunks. Make a well in the center of the flour mixture, and add the raspberries.
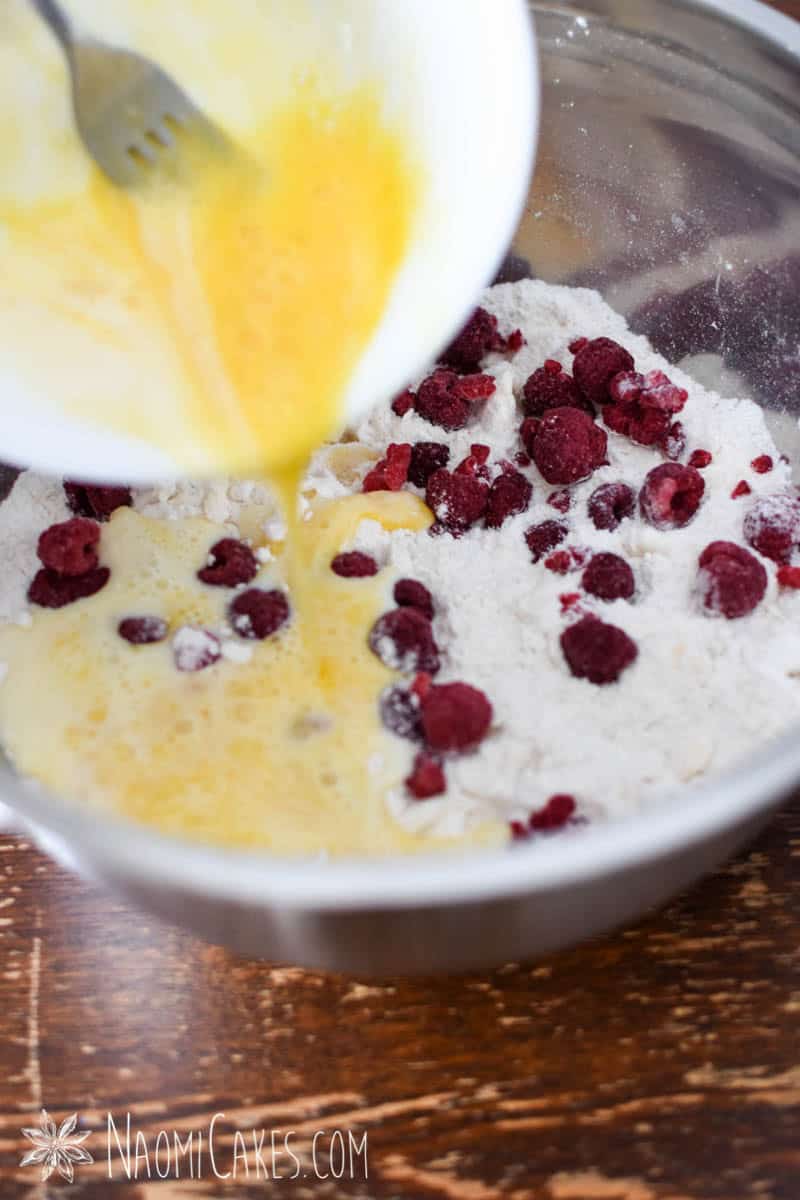
In a small bowl, combine the wet ingredients, and add them to the well. Mix the scone dough until it becomes difficult to stir, and then knead gently a few times just to bring all of the ingredients together. Do not over-mix.
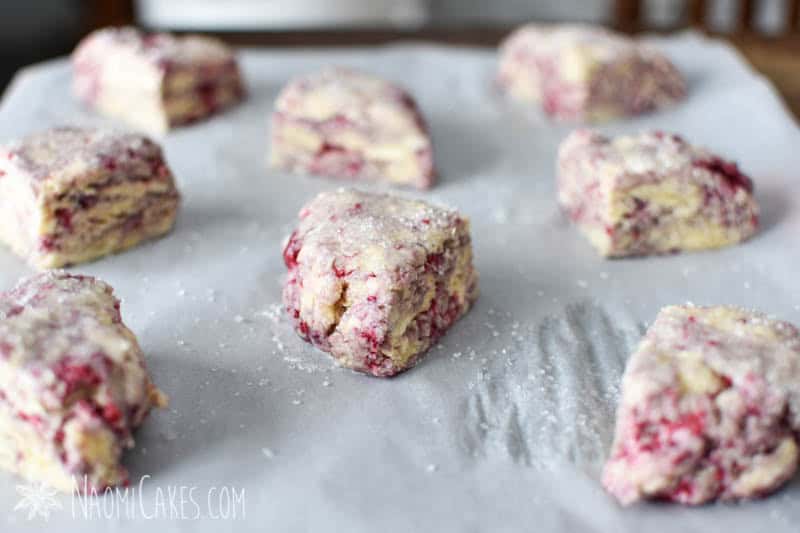
Cut the scones
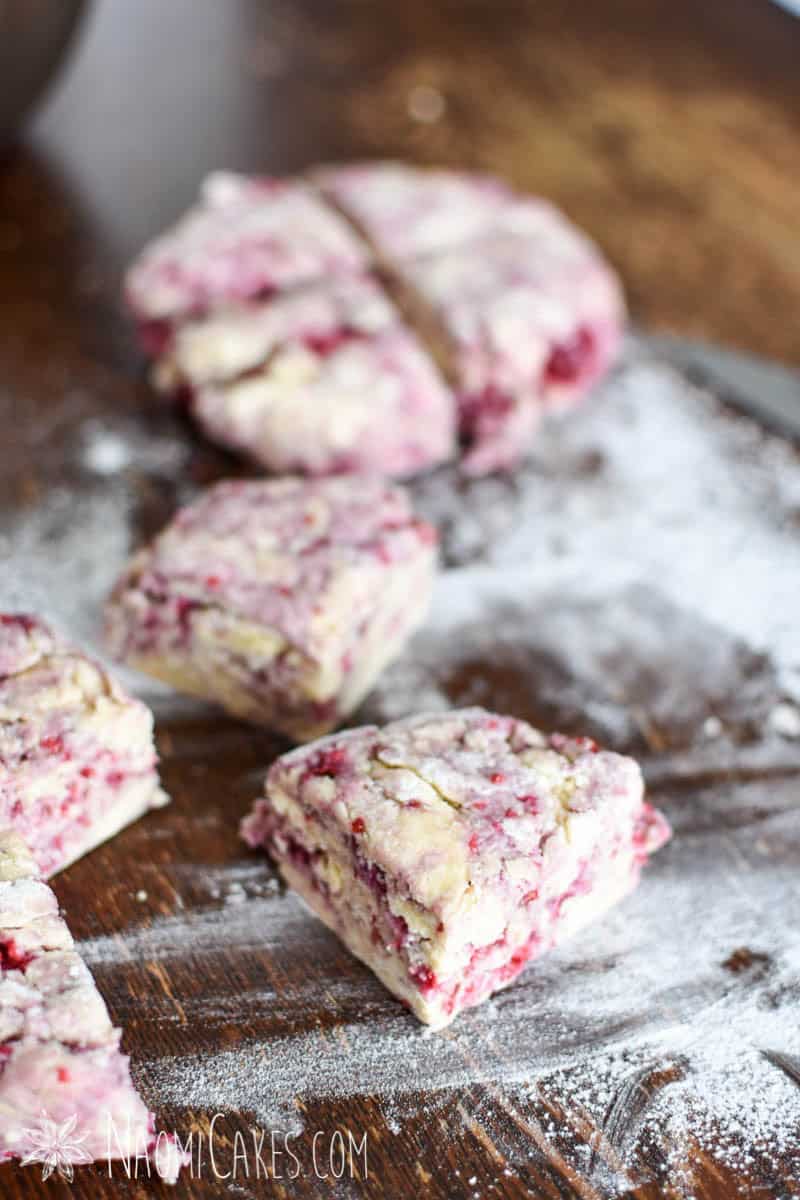
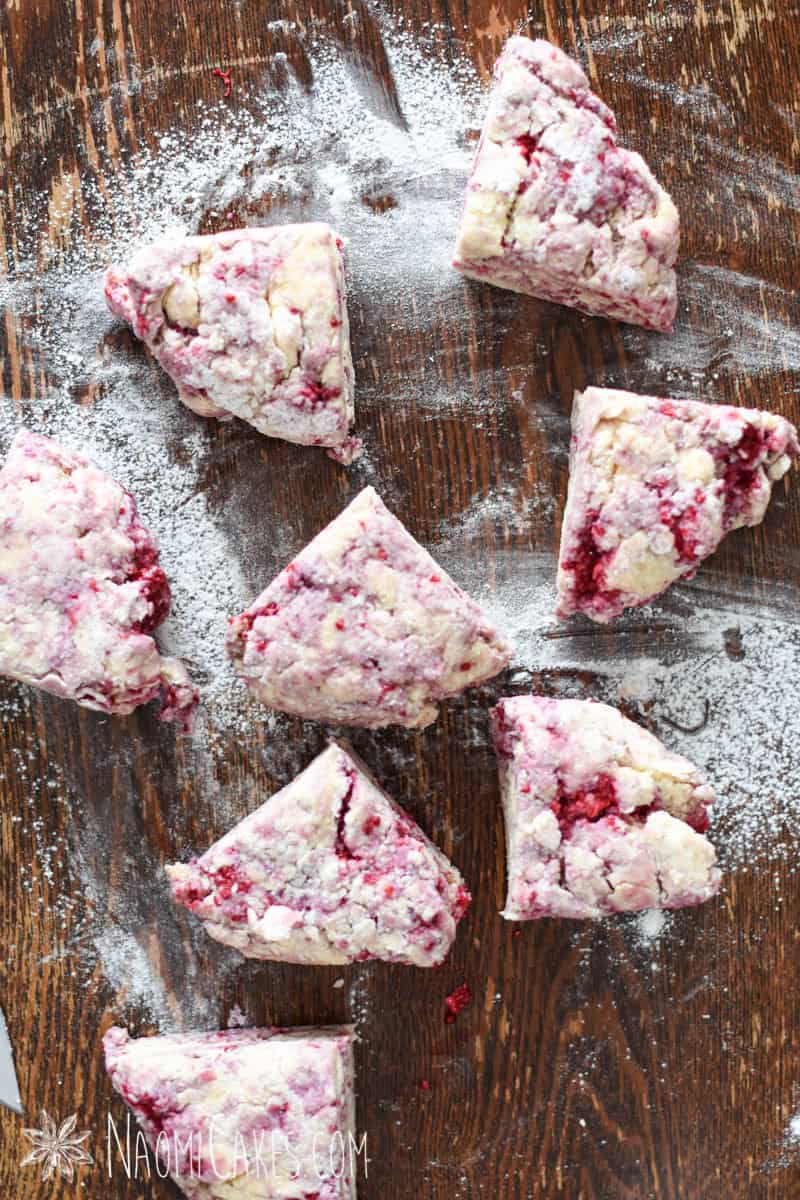
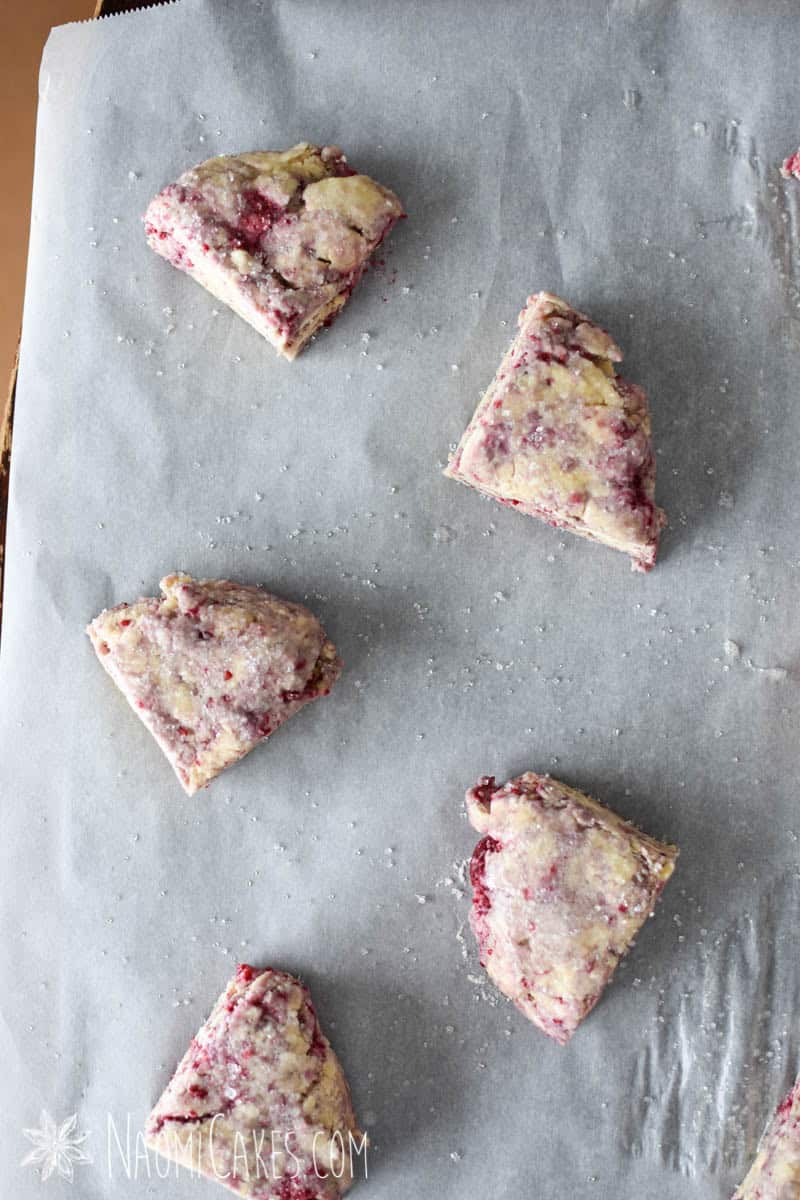
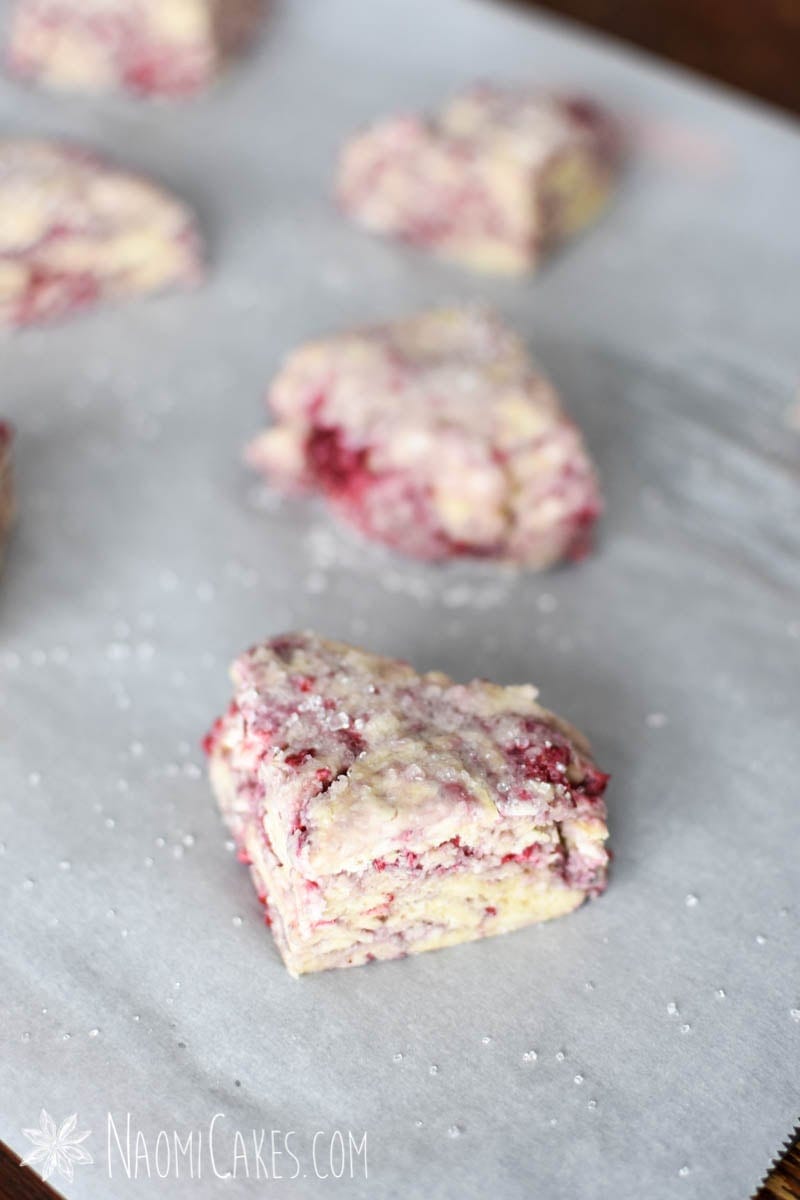
On a well-floured clean work surface, pat the dough into two 4-5″ circles, and cut each into 4 wedges with a bench scraper or a sharp knife. Place the wedges onto a parchment paper lined or non-stick cookie sheet, use a pastry brush to brush with beaten egg white, and sprinkle the tops of the scones with coarse sugar.
Bake
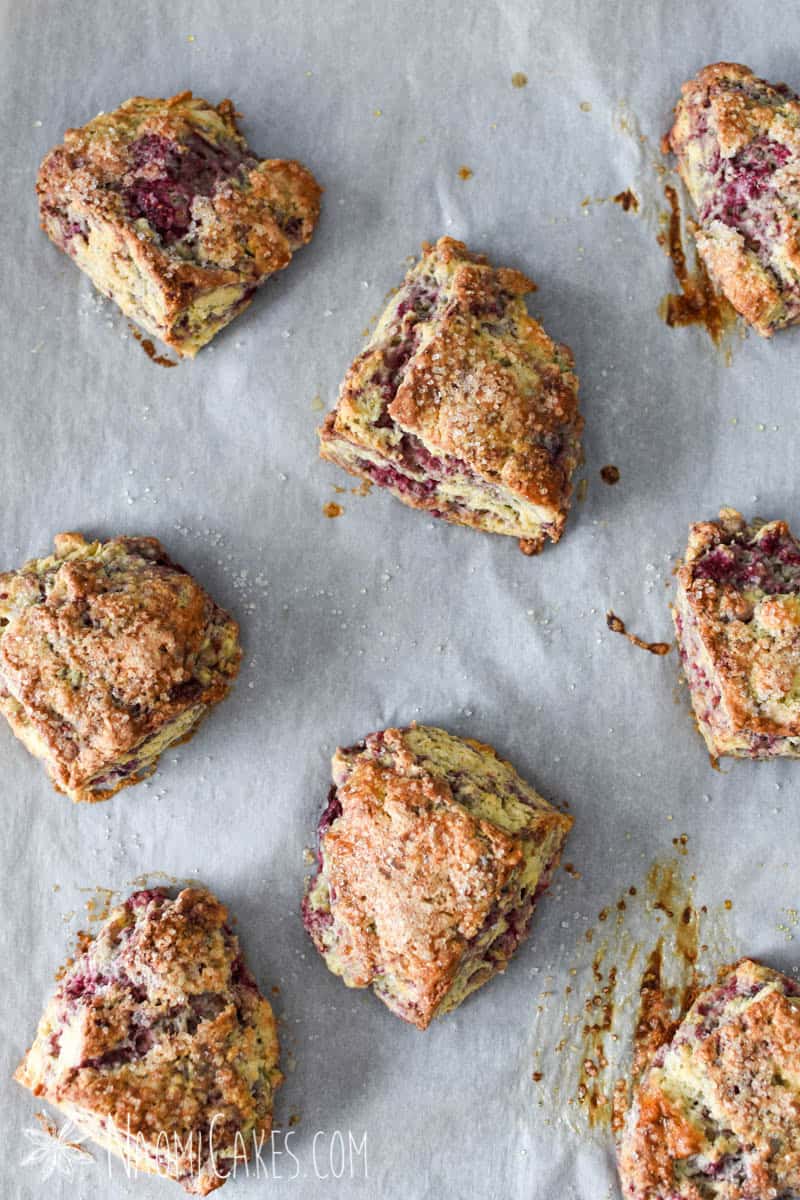
Bake at 400 degrees F for about 12-15 minutes or until golden brown around the edges. Cool on wire racks.
Serve
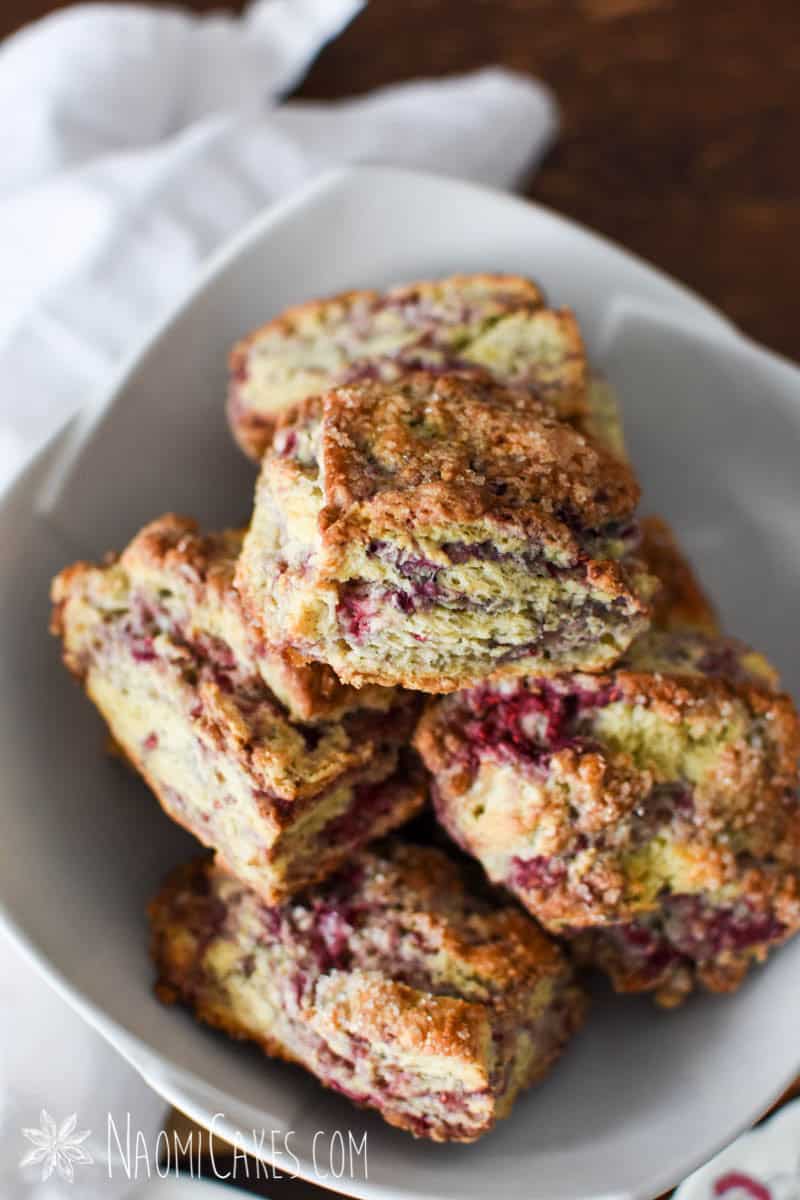
Scones, like biscuits, are best served on the day they are made.

Other ways to cut scones
Some scones are cut into longer wedges, or into rounds with a round biscuit cutter. This recipe is easy to make into those shapes as well, and you can check out these recipes for how to make your scones into other shapes:
For long, large wedges: Check out my Blueberry Lavender Scones recipe
For round, biscuit shaped scones: Check out my Currant Scones recipe
Toppings & additions
If you like your scones a little bit sweeter, you can consider adding a sweet glaze to the top (either brushed or drizzled on top). A simple glaze is made by thinning out icing sugar with milk or cream. You can check out my post for The Fastest Way to Frost Cookies for a great recipe.
This recipe can be easily altered to suit your taste. Try adding lemon zest for lemon raspberry scones, orange glaze (sub orange juice for the milk in my glaze recipe) for an orange scones variation, or sub out the fruit for another type to make a different fruit flavor. The sky is the limit for customizing this delicious treat to suit your taste!
Can you freeze unbaked scones?
Yes! This is one of my favorite hacks for making scones quickly, especially if you’re making them for a crowd. Scones can be fully prepared and frozen (unbaked) for up to 6 months before you bake them! This makes for quick, fresh, fluffy scones at a moment’s notice. If you’re making scones for a wedding, bridal shower, baby shower, or any other special event – I highly recommend doing it this way!
How to bake frozen scones
Scones can be baked directly from frozen. Simple arrange them on a large baking sheet lined with parchment paper, and bake them as directed in this recipe, adding about 5 minutes extra to the baking time (to cover the time necessary for the scones to thaw in the oven).
Do baked scones freeze well?
They do; although, there really is nothing like a fresh scone right out of the oven. If you baked too many and want to freeze the extras, you can absolutely do that. Just warm the scone slightly (5 minutes in the oven at 350 degrees F should do the trick) before you serve them. I would not freeze a baked scone more than one time.
You will need:
- Ingredients (see recipe card)
- Large mixing bowl
- Small mixing bowl
- Measuring cups and spoons
- Pastry blender
- Bench scraper or sharp knife
- Parchment paper
- Baking sheet
- Cooling rack

Raspberry Scones
This simple scone recipe is the perfect addition to tea time. Serve these with a spoonful of raspberry jam and a dollop of freshly whipped cream.
Ingredients
- 2 cups flour
- 1 Tbsp baking powder
- 1/4 cup sugar
- pinch salt
- 1/2 cup cold butter
- 1/2 cup fresh or frozen raspberries washed
- 2 large eggs with part of the whites reserved
- 5 Tbsp milk
- coarse sugar for sprinkling
Instructions
-
In a medium sized mixing bowl, combine the flour, baking powder, sugar, and salt, and whisk to combine.
-
Cut in the cold butter, and then using your fingers (or a pastry cutter), blend in with the flour until the butter resembles small flakes, about the size of a pea (or a little larger). Add the raspberries.
-
In a small mixing bowl, separate part of the egg white from one egg (just the thin part of the white), and set it aside.
-
Beat the remaining egg and white with your second whole egg. Add the milk.
-
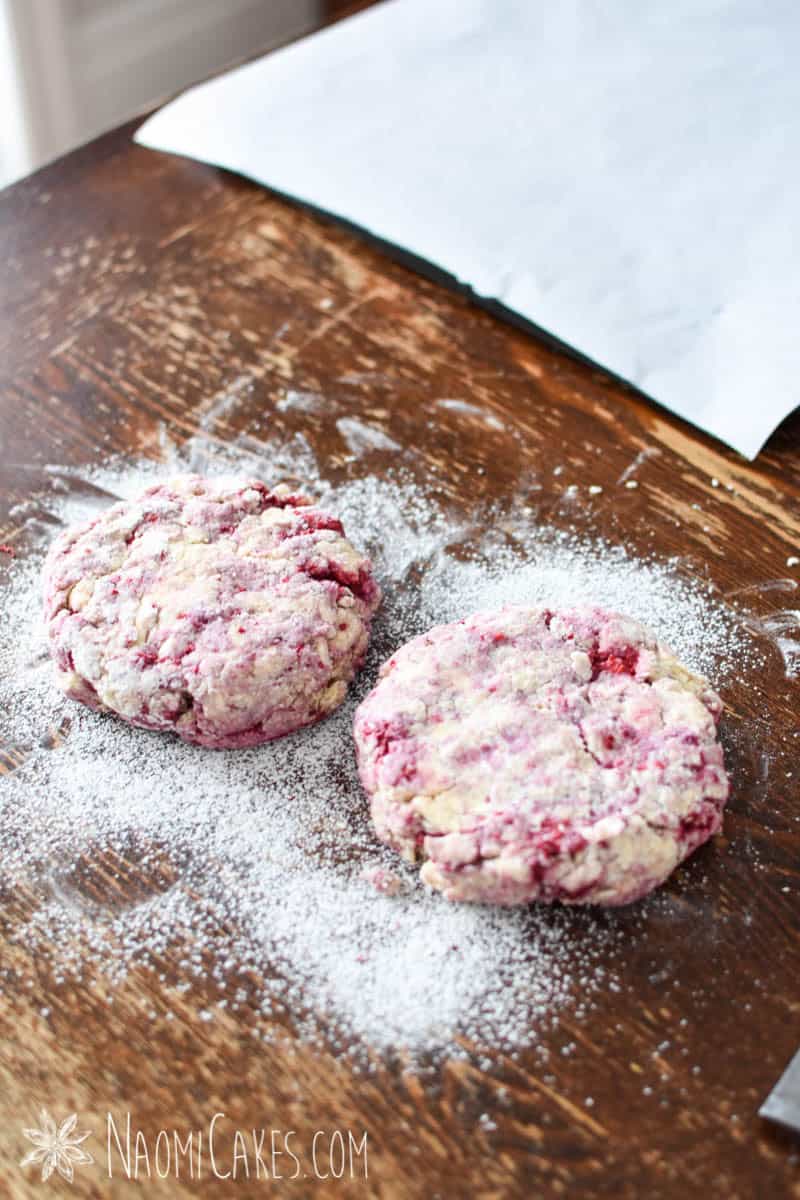
Pour the egg/milk mixture into the flour and currant mixture. Using a fork, stir to bring together into a shaggy dough, and then knead with your hands a couple of times just until all of the dry ingredients are incorporated and you have a rough dough marbled with pink (do not over-mix).
-
Divide the dough into 2 equal sections, and press out into 4" discs on a lightly floured work surface (about 1" thick). Cut each disc into 4 wedges.
-
Preheat the oven to 400 degrees F.
-
Arrange the scones on a parchment lined cookie sheet and brush with reserved egg white. Sprinkle generously with coarse sugar.
-
Bake for 15-20 minutes or until golden brown and puffy. Cool on a wire rack.
-
These scones are best served on the day they are made.


If you like this recipe, you may also like:
- Light and Flaky English Scones
- Currant Scones
- Strawberry Orange Marmalade
- Devonshire Cream
- Cream Cheese Filling
If you like this recipe, let me know in the comments! I’d love to know how they turned out, and how you served them. You can also tag me in your beautiful tea party pictures on Instagram @naomicakesofficial; I always love to see your work!
Bye for now,
Naomi
This post contains affiliate links.